About the Toolbar
Updated: 03/31/2025
This page describes the contents of the toolbar for each workspace.
Common to all workspaces


| Number | Item | Description |
|---|---|---|
| 1 | Select Target Version | Set the target version of the model. |
| 2 | Switch Workspaces | Switch between Modeling/Animation/Form Animation Workspaces. |
| 3 | Edit Level Switching | The editing method can be switched between three levels. • Level edit 1: Editing detailed part, shortcut key [1] • Level edit 2: Normal editing, shortcut key [2] • Level edit 3: Editing in large frames, shortcut key [3] The level switches to the respective level when editing a “Deform Paths” or “Warp Deformer.” The default Level edit is [2]. |
| 4 | Home | Opens Home. |
| 5 | nizima Link (Japanese version only) | Link to Live2D’s official Live2D model and illustration material market, “nizima.” |
Modeling Workspace

| Number | Item | Description |
|---|---|---|
| 6 | Edit Texture Atlas | Edit texture size, etc. when exporting MOC3 files for the SDK. |
| 7 | Edit Mesh manually | The shape of the mesh can be edited. However, the texture is not deformed. |
| 8 | Automatic Mesh generator | The mesh can be generated automatically without setting polygon vertices. By dragging the numerical values horizontally, the set values for each item are automatically reflected in the mesh shape. |
| 9 | Create Warp Deformer | Create a warp deformer. The “Sequential Creation” feature allows you to create warp deformers while building parent-child relationships in succession. |
| 10 | Create Rotation Deformer | Create a rotation deformer. The “Sequential Creation” feature allows you to create rotation deformers while building parent-child relationships in succession. |
| 11 | Rotation Deformer Creation Tool | Quickly create a rotation deformer by dragging on the View. |
| 12 | Arrow tools | Used to select and edit objects. • [Shift] + click for multiple selections • Drag for rectangular selection |
| 13 | Lasso Tool | You can drag around the lasso selection. |
| 14 | Brush Selection Tool | You can select different areas of influence as if you were shading with a brush. • Use [B] + drag to change brush size |
| 15 | Deform Path edit | By setting control points on the ArtMesh, you can move vertices collectively. |
| 16 | Deform Brush Tool | You can deform vertices as if you were painting with a brush, or you can shape the division points of a warp deformer. |
| 17 | Edit Glue | The glue allows the vertices of two ArtMeshes to adhere to each other. However, three cannot be used at the same time. |
| 18 | ArtPath Tools | You can create and edit a new ArtPath. |
Animation Workspace
| Number | Item | Description |
|---|---|---|
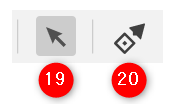
| 19 | Select/Edit tool | Used to select and edit objects. Only selections can be made for the parameter controllers. • [Shift] + click for multiple selections |
| 20 | Parameter controller tool | Click this item to use the parameter controller. This button is displayed in the Tool Details palette, allowing you to select, add, and delete controllers. |
Form Animation Workspace

Tools are displayed in the same way as in the modeling workspace.
Tools with grayed out buttons cannot be used for form animation.
Was this article helpful?
YesNo