Basic Dope Sheet Operation
Updated: 02/13/2024
This section describes basic operations on the dope sheet.
See “Graph Editor” for more information on the Graph Editor.
Basic Operation
Insert keyframes
An animation is created by inserting keys on the timeline, and there are several ways to insert keys.
This section describes how to insert keyframes on a dope sheet.
Method 1:
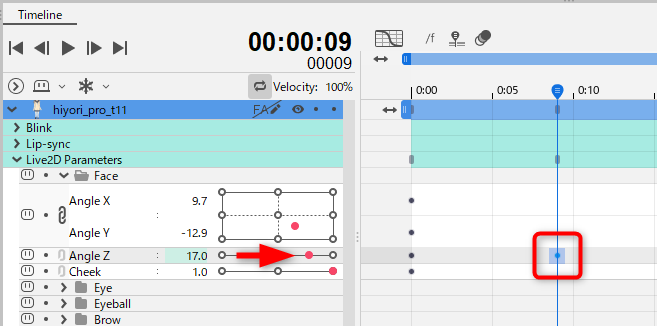
You can insert a key by holding down [Ctrl] and [Left-clicking] on the frame of the property you want to insert.
The cursor will then be a “+” as shown in the image below.

Method 2:
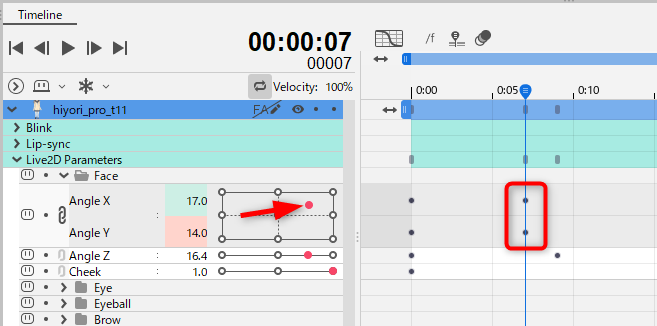
By selecting the frame at the position where you want to insert the key and moving the “Live2D Parameters” slider or entering a numeric value, you can insert a key for that parameter value.
Again, keys are inserted one at a time, but when parameters are linked, each key is inserted as soon as the slider is moved.
Point
Hold [Shift] while editing Live2D parameters to enter fine values.
This function is useful when fine adjustments are required.
Method 3:
You can insert a batch key into any element present in the frame.
Inserting a key into a frame of a track or a frame in the [Property] group using [Ctrl] + [Click] as in “Method 1” will simultaneously apply the key to all keys of the properties to which it belongs.
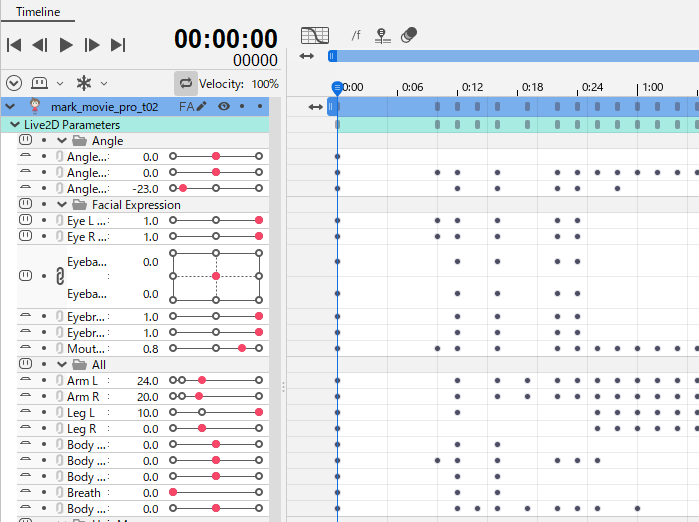
The image below shows a batch key inserted into a character’s track or [Property] group.
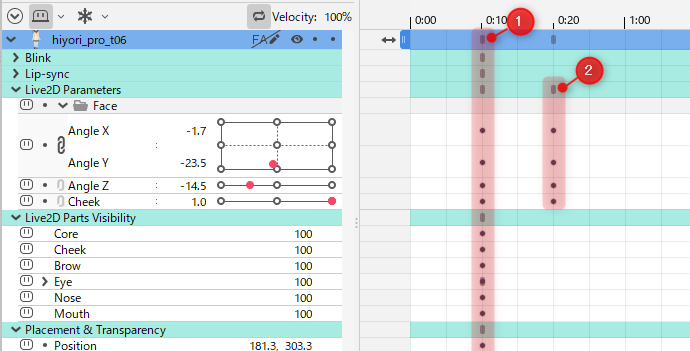
(1) shows a batch key is inserted into all elements (parameters, parts visibility, placement & opacity, lip-sync) in the character’s track.
(2) shows that a batch key is inserted only in the [Property] group of the parameter.
When inserting keyframes in a batch, insert keys at the positions that suit your purpose.
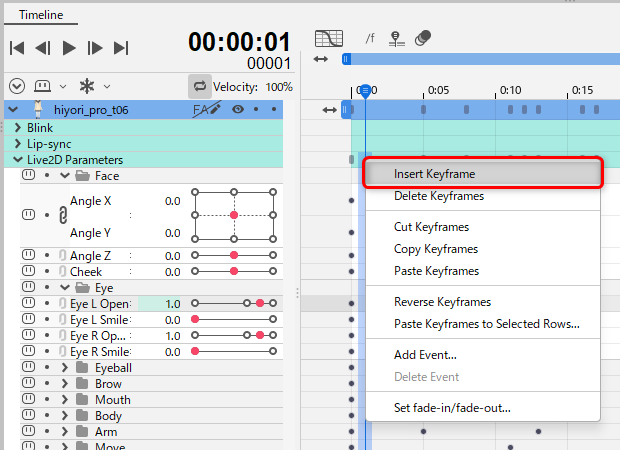
Point
Right-click the [Property] group in [Live2D parameters] and select [Insert keyframe] to insert keys for all properties in the group at once.
Keyframes can be inserted without affecting the keys already set.
Method 4:
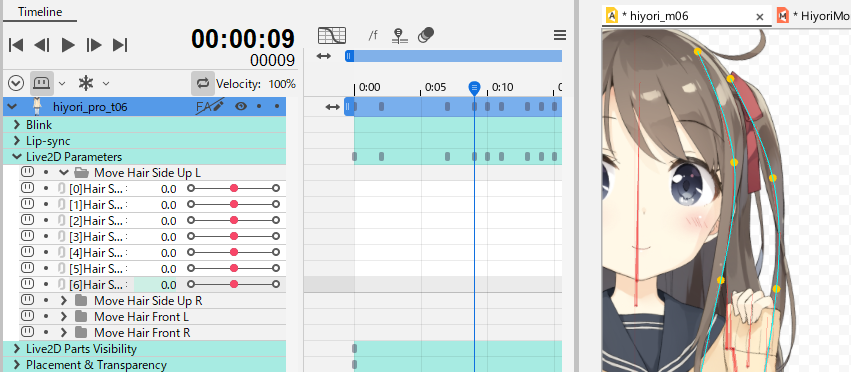
Keyframes can be inserted by dragging a rotation deformer in the Animation Workspace.
- Switching the Level edit to “1” displays the rotation deformer in the Animation View.
Note: If the part is locked on the model, the rotation deformer will not be displayed. - When you drag the tip of the rotation deformer at the position where you want to insert the keyframe, the associated parameters will move and the keyframe will be inserted.
(The rotation deformer can be adjusted with the rotation icon. The cursor will change to the icon when it is hovered over the tip.)
Note: The key is not displayed immediately after the rotation deformer is moved. By clicking anywhere on the [Timeline] palette or moving the indicator the key will be displayed.
Method 5:
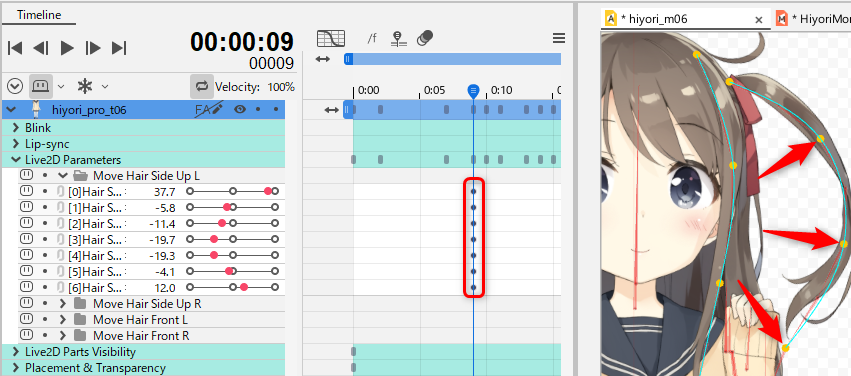
Keyframes can be inserted by dragging a deform path in the Animation Workspace.
- Switching the Level edit to “2” displays the deform path in the Animation View.
- Drag the control point of the deform path at the position where you want to insert the keyframe to deform the ArtMesh and insert the keyframe.
 |
 |
 |
Point
There is no problem with using this method when doing so for videos, but if the intention is to embed keyframes in a game, etc., to prevent unintended movement, it is recommended to insert a keyframe at frame 0.
Right-click the [Property] group in [Live2D Parameters] and select [Insert Keyframe] to insert keys for all properties in the group.
Depending on the embedding environment, there may only be compatibility with properties for which keyframes are set, so discuss this with the developer.

Point
In the case of Bezier curves, as in the Graph Editor, handles are automatically created while preserving the curve shape.
Delete keyframes
Left-click on a keyframe while holding down [Ctrl] to delete the key.
The cursor will then display “-.”

Keyframes can also be deleted by selecting them and then pressing [Back Space] or [Delete].
As with inserting, deleting a keyframe from a frame of a track or a frame in the [Property] group allows you to delete the keys of the frame of the properties to which they belong in a batch.
Copy, paste, and cut keyframes
Select a keyframe and use the following shortcut keys to execute it.
| [Ctrl] + [C] | Copy keyframes |
| [Ctrl] + [X] | Cut keyframes |
| [Ctrl] + [V] | Paste keyframes |
These operations can also be performed from the menu bar or from the right-click menu.
Note that the copy and paste performed in this operation will paste the copied keyframe into the same parameter.
If you want to paste a copied keyframe into a specific parameter, see the next section.
Copy and paste keyframes (paste into other parameters)
Normally, when you perform a copy and paste, the copied keyframes are pasted into the same parameter.
To paste a copied keyframe into another parameter, use the following procedure.
Here, as an example, the XYZ of the face are pasted into the XYZ of the body.
First, select the keyframe to be copied.
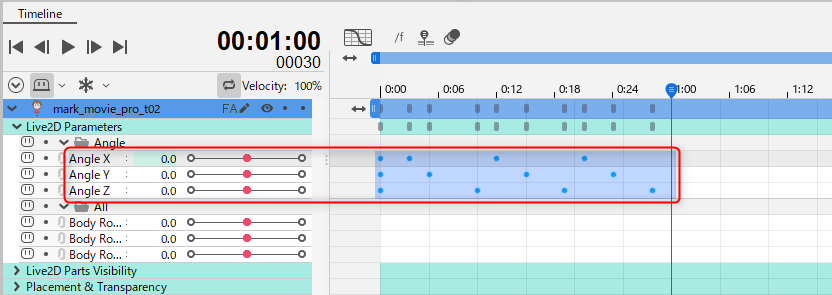
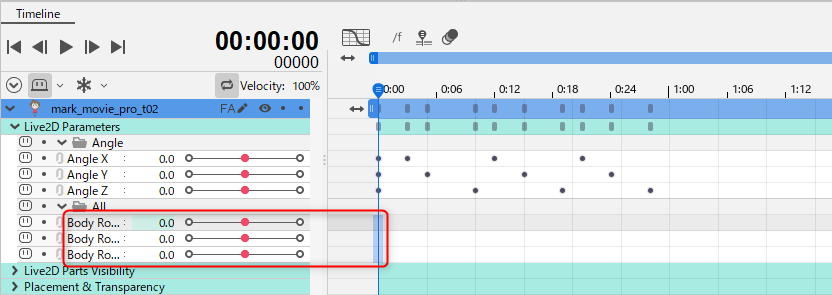
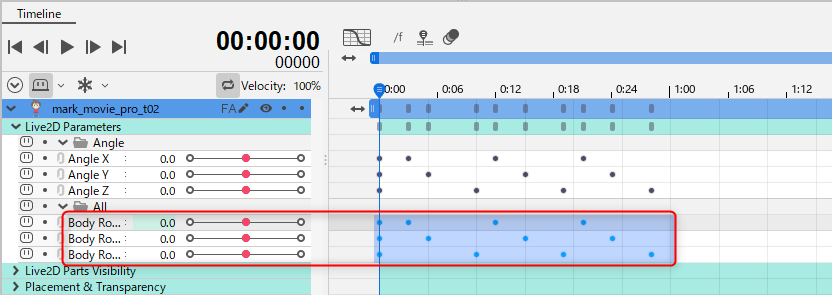
Next, select the same number of parameters that you copied at the position you want to paste.
Since keyframes of three parameters have been copied, select keyframes of three parameters as the destination as well.
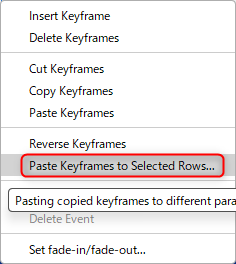
From the right-click menu, click [Paste Keyframes to Selected Rows].
The confirmation dialog box shown below will appear.

Select the processing to be performed when pasting and click [OK].
| Adjust values by ratio when the range of applicability is different | If the range of the destination is different from that of the source, adjust the value by ratio. |
| Match out-of-range values to maximum and minimum values | If the value of the source exceeds the range of the destination, match the out-of-range value to the maximum and minimum values. |
| Apply values as they are (Not recommended) | Apply the value as it is. If the source and destination ranges are different, it may result in unintended behavior. |
The keyframes for the face parameters were pasted into the keyframes for the body parameters.
Point
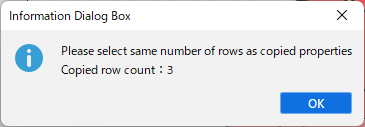
If the number of selected parameters is too large or too small, the dialog box shown below will appear and paste cannot be executed.
If this occurs, select the correct number of parameters for the paste destination again.
Copy and paste tracks
By selecting a track, you can copy and paste the model, audio, background image, etc.
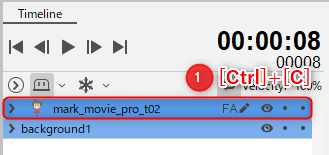
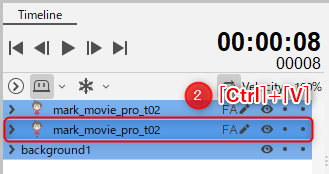
Copying and pasting a track can also be performed on another scene.
Point
Tracks cannot be pasted into other animation data files (can3).
Moving keyframes
You can change the position of the selected keyframe by dragging it.
Multiple selections allow you to move multiple keyframes at the same time.
Tips
You can also select a range by holding [Shift] + clicking on the dope sheet.
For Form Animation curve editing only, the values are adjusted to maintain a base point value (the same value as the frame value) that reflects 100% of the deformation when the key is moved.

Adjust keyframe interval
Select a range of frames and click the [Adjust Spacing] button.
When the [Adjust Spacing] dialog box opens, enter a spacing value directly or drag left or right on the input box, then click the [Apply] button.
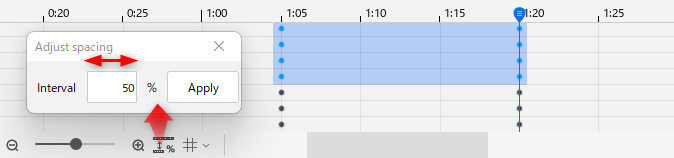
The spacing is adjusted starting from the beginning of the selected range.

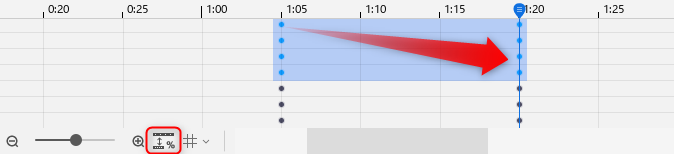
Reverse keyframes
Inverts the keyframe around the reference value.
For example, if this function is executed for an animation that tilts the head to the right (Angle Z: 0 -> 30 -> 0) as shown below, the keyframe will be flipped around [Default Value: 0], resulting in animation that tilts the head to the left (Angle Z: 0 -> -30 -> 0).

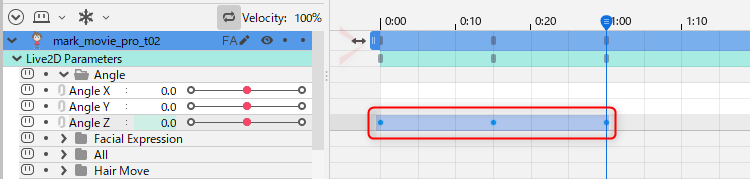
First, select the range of keyframes to be inverted.
Next, from the right-click menu, select [Reverse Keyframes].
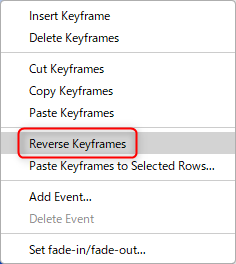
The keyframes are inverted, resulting in the animation shown below.

The appearance on the dope sheet does not change, but if you switch to the Graph Editor to check, you will see that the graph is inverted.
| Graph before reversal | Graph after reversal |
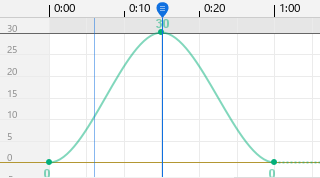 | 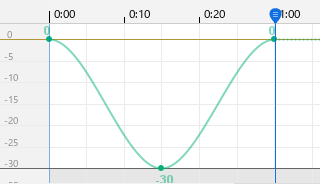 |
Point
Inversion is performed based on the reference value of the parameter.
Therefore, depending on the reference value setting, unintended results may occur.
Reference values can be viewed and changed from the [Modeling] menu -> [Parameter] -> [Parameter Settings] in the Model Workspace.
See “About Parameters” for information on parameter settings.
Expanding and reducing the timeline
Use [Alt] + [mouse wheel] to expand and reduce the timeline.
The center of scaling is the cursor position.
Tips
The Graph Editor can be scaled in the same way.
Scroll through the timeline
You can scroll horizontally through the timeline with the slider at the bottom of the timeline or with [Shift] + [mouse wheel].
You can scroll through the timeline horizontally and vertically at the same time with [click middle mouse button (click the mouse wheel)] + [drag] (or [Space] + [drag]).
This is useful in combination with the timeline expanding/reducing performed by [Alt] + [mouse wheel].
Separate parameters by folder
When creating models in the Model Workspace, you can separate the parameters of the model placed in the animation data by folder.
This makes it easier to manage models with numerous parameters.
Tips
Folders and folder open/close states set as parameters in the Model Workspace are reflected in the Animation Workspace parameters.
The open/close state of the parameter folder of the animation scene reflects the open/close state in the model data.
To close a folder, click the expand button to the left of each folder.
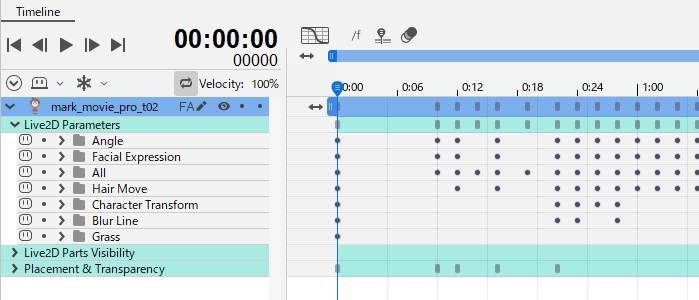
The image below shows all folders closed.
When the folder is closed, the keyframes contained in the folder will be displayed on the timeline, just as they are displayed on the model track, etc.
Keyframes can be inserted, moved, deleted, and edited even when the folder is closed.
If a folder is closed and a keyframe is moved, the edit will be applied to all keyframes contained in the folder.
Linking parameters
Click on the [Link Parameters] button next to the parameter name to link it to the parameter below.
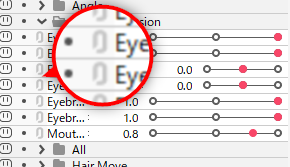
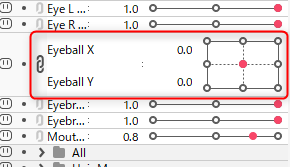
This function is useful when you want to link the left and right eyeball movements or the X and Y of the face.
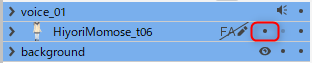
Show/hide models and images
To temporarily hide a model or image, click on the [Show/Hide icon] to the right of the track name.

The [Show/Hide icon] will change to a “.” and the track will be temporarily hidden.
You can switch continuously by dragging the [Show/Hide icon].
Point
Hidden elements are not exported.
Before exporting, check to make sure that necessary elements are not hidden and that unnecessary elements are not displayed.
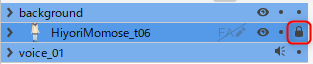
Lock models and images
To temporarily lock a model or image, click the [lock icon] to the right of the track name.

The [lock icon] will change to a “key icon” and the track will be temporarily locked.
You can switch continuously by dragging the [lock icon].
Solo display function
This function allows you to display the target track alone on the timeline palette.
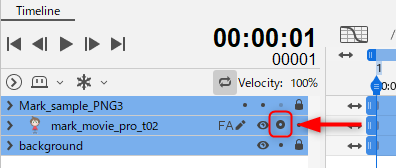
By pressing the [solo button] added to the right of the track’s display button (eyeball button), that track can be displayed by itself.
When a group track is displayed solo, only tracks within the group track are displayed. Solo display is also valid for videos and other output.
Setup events
An “event” can be used in applications and animations to perform an event process when you have reached a certain frame.
See “User Data and Events” for more details.