How to use the Material Separation Photoshop Plugin
Updated: 10/28/2025
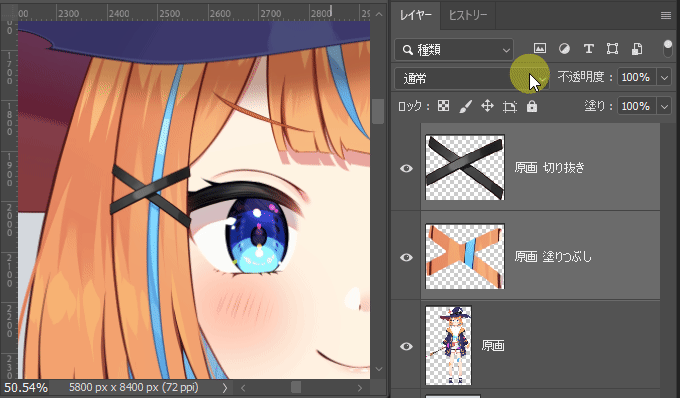
Display of material separation panel
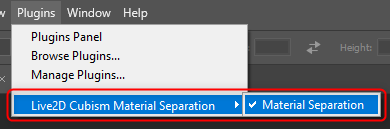
Open the Material Separation panel by selecting the [Plugin] menu -> [Live2D Cubism Material Separation] -> [Material Separation].
It can also be opened from the [Plugin] panel → [Live2D Cubism Material Separation].
Configuration of the material separation panel
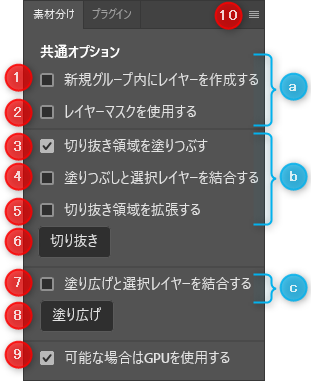
The [Material Separation] plugin is displayed in the following panel.
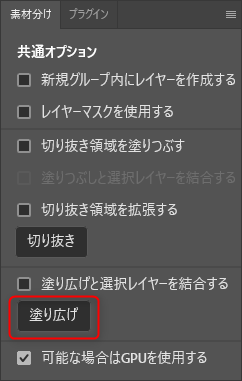
The panel consists mainly of the two functions [Cut Out] and [Transparency Fill] and [Common Options].
| Letter | Name | Description |
|---|---|---|
| a | Common Options | These options can be used for both [Cut Out] and [Transparency Fill]. |
| b | Options for Cut Out | These options are only for [Cut Out]. [Merge Color Fill and Selected Layers] is available when the [Fill Cut Out Area] checkbox is selected. |
| c | Option for Transparency Fill | This option is only for [Transparency Fill]. |
| Number | Name | Description |
|---|---|---|
| 1 | Create New Groups | When [Cut Out] or [Transparency Fill] is executed, a new group is created and a layer is created in the group. |
| 2 | Create New Masked Layer | When [Cut Out] or [Transparency Fill] is executed, a layer is created with a layer mask applied. |
| 3 | Fill Cut Out Area | When [Cut Out] is executed, a layer with a color filled background is created below the cut out layer. |
| 4 | Merge Color Fill and Selected Layers | When [Cut Out] is executed, a layer with a color filled background is created below the cut out layer, merged with the selected layer. |
| 5 | Expand Cut Out Area | When [Cut Out] is executed, the cut out region is expanded and the selected object is cut out slightly larger. |
| 6 | Cut Out | You can cut out a recognized object from an image by specifying a selection range. |
| 7 | Merge Transparency Fill and Selected Layers | When [Transparency Fill] is executed, a transparency fill layer is created under the original layer, merged with the selected layer. |
| 8 | Transparency Fill | You can transparency fill an image by specifying a selection range. |
| 9 | Use GPU if available | If a GPU is available, the GPU is used for processing. |
| 10 | Menu button | Clicking [About] from the menu displays the [About] dialog box, which allows you to check whether the current processing device is a GPU or CPU. |
How to create a [Cut Out]
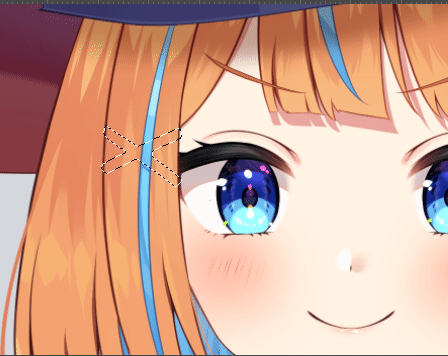
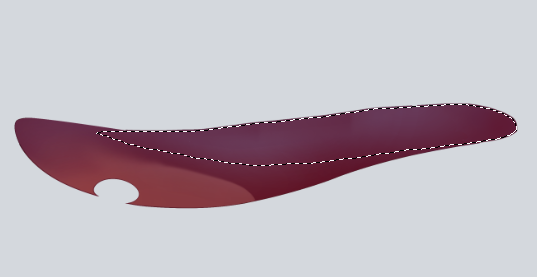
To create a cut out, you must specify a selection.
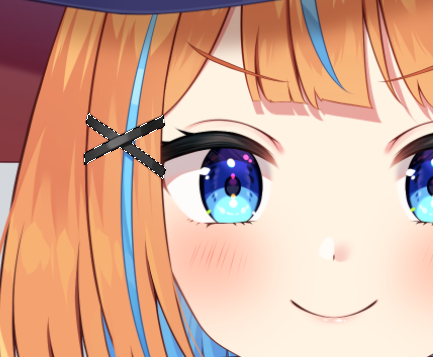
1. Select a layer and specify the selection
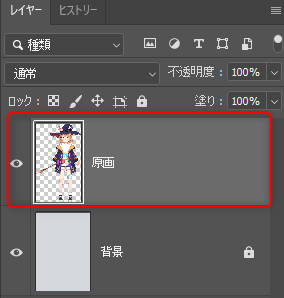
Select the layer from which you want to cut out, and use Photoshop’s selection tool or other tools to specify the selection.
Below is an example of the selection of black hairpins to be cut out of hair.
| Select a layer | Specify the selection |
|---|---|
 |  |
Precautions
The selection needs to fall within a rectangle no larger than 4 million pixels.
Tips
The selection does not necessarily have to be precise.
You can also use the Lasso tool or other selection methods to roughly surround the target.
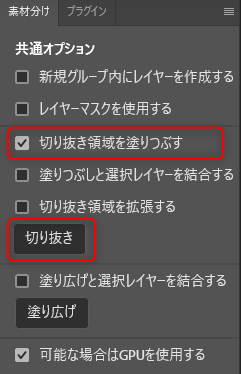
2. Click Cut Out
Select a layer, specify the selection, and click [Cut Out] on the panel.
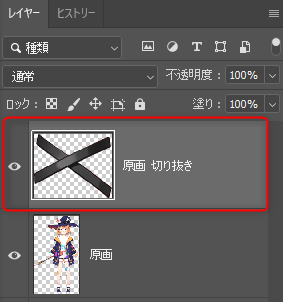
3. Cut out result
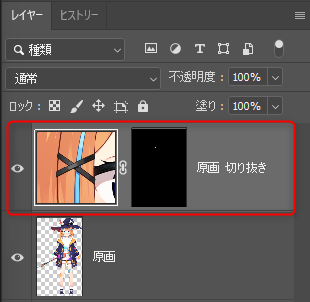
A pixel layer is created on top of the original layer, and the exact shape of the target is recognized and cut out.
| Layer status | Cut out result |
|---|---|
 |  |
Tips
Layer names:
When “Cut Out” or “Transparency Fill” is executed, a layer that is separate from the original layer is created.
At that time, the original layer name is inherited, and the name of the function is added after the layer name. (The same applies to the group name.)
Example:
Original layer name: “Source Image”
Created layer name: “Source Image Cut Out”
[Cut Out] options
Set the checkbox options on the panel to improve the ease of use.
Each of the [Cut Out] options is explained below.
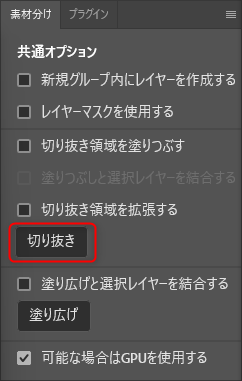
Fill Cut Out Area
With the [Fill Cut Out Area] checkbox selected, click [Cut Out].
A [Cut Out] layer and a [Color Fill] layer are created.
The [Color Fill] layer fills the cut out region to blend in with its surroundings and creates the result as a pixel layer.
Merge Color Fill and Selected Layers
When the [Fill Cut Out Area] checkbox is selected, the [Merge Color Fill and Selected Layers] checkbox can be selected.
After selecting the checkboxes, click [Cut Out].
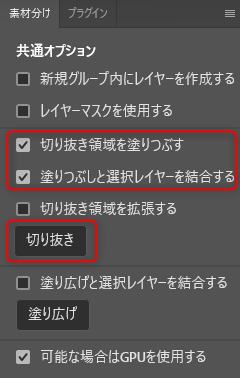
A [Cut Out] layer and a [Color Fill] layer that is merged with the selected layer will be created.

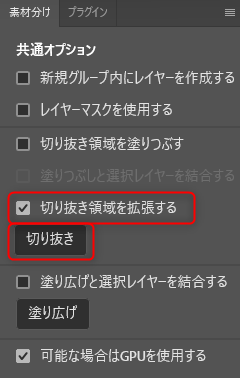
Expand Cut Out Area
With the [Expand Cut Out Area] checkbox selected, click [Cut Out].
The cut out area is expanded, and the selected object is cut out a little larger.
Note: This option is intended for the manual reduction process after cutting to a little larger size.
If you want automatic cutout with high accuracy, please do not set this option.
| Option settings | Normal result | Expanded result |
|---|---|---|
 | 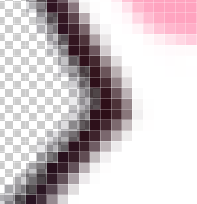 |  |
How to create a [Transparency Fill]
To create a transparency fill, you must specify a selection.
1. Select a layer and specify the selection
Select the target layer to be transparency filled and specify the selection.
Below is an example of specifying a selection to transparency fill the backside of a hat.
| Select a layer | Specify the selection |
|---|---|
 | 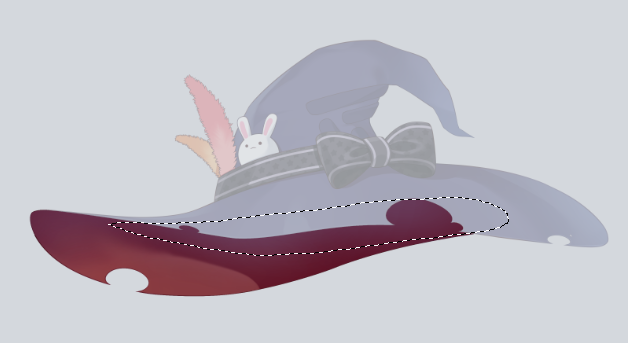 |
2. Click Transparency Fill
Select a layer, specify the selection, and click [Transparency Fill].
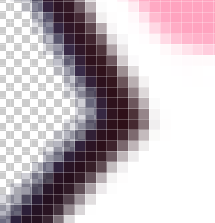
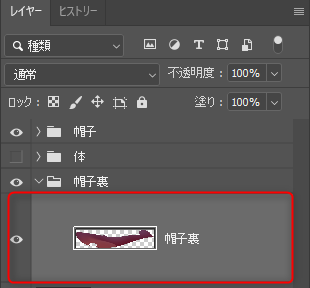
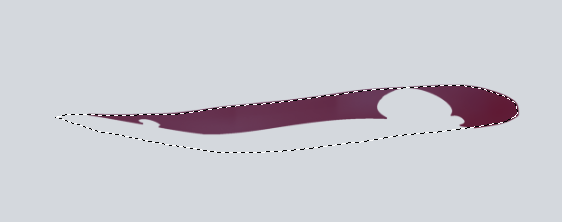
3. Transparency fill result
The transparency is filled according to the information in the source image (the back of the hat).
A pixel layer is created below the original layer, and a fill is applied to the “transparent area” within the selection.
| Layer status | Transparency fill result |
|---|---|
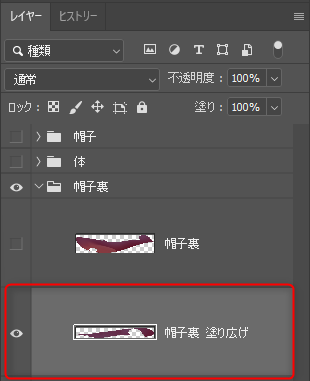 |  |
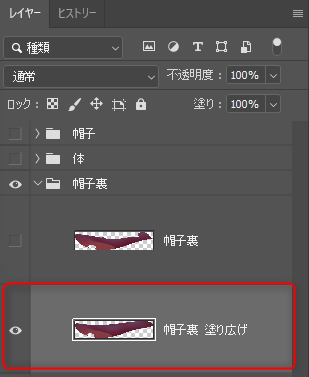
[Transparency Fill] option
With the [Merge Transparency Fill and Selected Layers] checkbox selected, click [Transparency Fill].
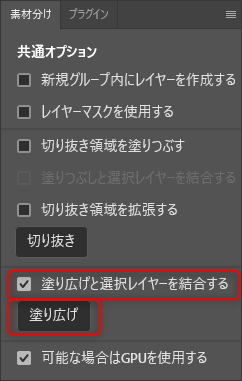
A [Transparency Fill] layer, which is combined with the selected layer, is created.
| Layer status | Transparency fill result |
|---|---|
 |  |
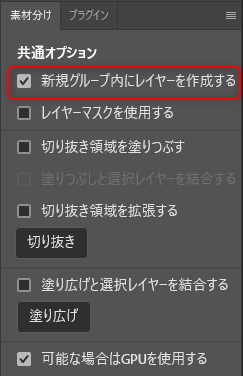
Common options
The following two common options can be set for both [Cut Out] and [Transparency Fill].
Create New Groups
With the [Create New Groups] checkbox selected, click [Cut Out] or [Transparency Fill].
A new group will be created, and the pixel layer will be stored in it.
Note: When using [Cut Out], the layer is placed on top of the original layer, and when using [Transparency Fill], the layer is placed below the original layer.
| Panel option settings | Status of the created group |
|---|---|
 | 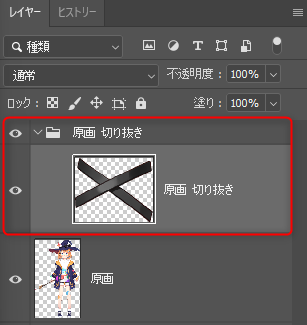 |
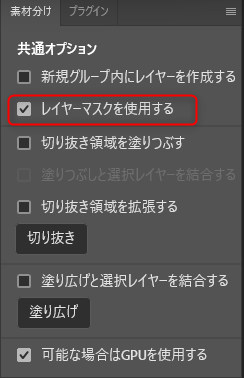
Create New Masked Layer
With the [Create New Masked Layer] checkbox selected, click [Cut Out] or [Transparency Fill].
A layer will be created with the layer mask applied.
| Panel option settings | Status of the created layer |
|---|---|
 |  |
Cut out/transparency fill multiple layers and groups
[Cut Out] and [Transparency Fill] can also be used for illustrations that have separate layers for “line,” “fill,” and shading.
The following example shows how to create a group for [Transparency Fill].
Example of creation with [Transparency Fill]
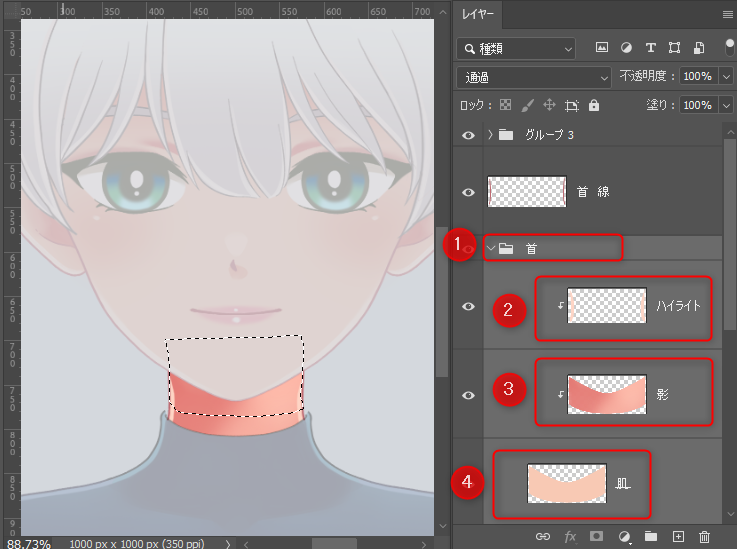
[Transparency Fill] will be applied to the neck.
The following image shows a selection of the area to be transparency filled.
As for the layer structure, from the layer (4) “Skin,” (2) “Highlights” and (3) “Shadows” are applied as clipping masks.
Creation procedure:
- Select a filled group (in the above example, group name (1) “Neck”).
- Use the selection range to specify the region to be transparency filled.
- In the Material Separation panel, click [Merge Transparency Fill and Selected Layers] and [Transparency Fill].
- A group for [Transparency Fill] (in the example below, group name “Neck Transparency Fill”) will be created.
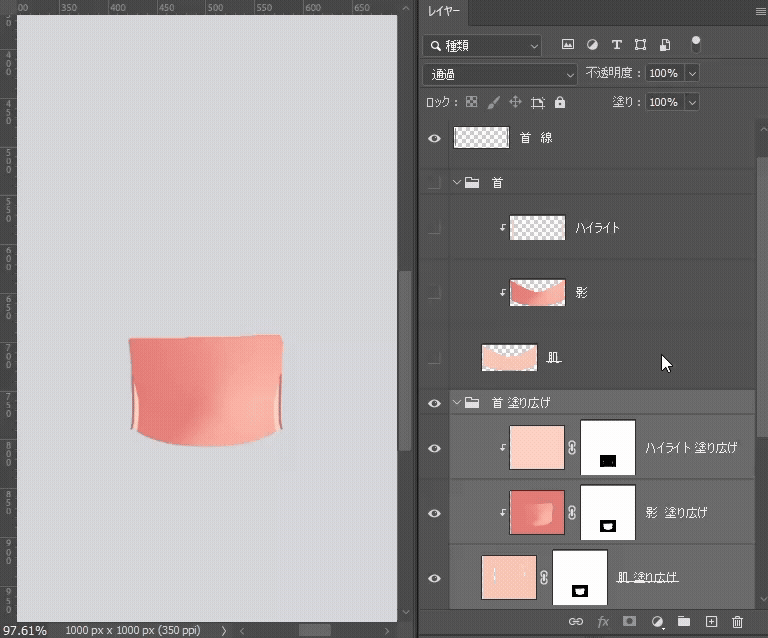
Layer structure:
The transparency filled layer retains the layer structure of the original group.
If clipping is done on multiple layers, only the layers contained within the specified selection range will be created.
Tips
It is possible to perform transparency filling for a clipping mask layer alone, but in that case [Create New Groups] will be disabled and the layer will be created in a clipped state.