Displaying and operating the timeline palette
Updated: 05/18/2026
Once you have placed the models, audio, and other materials in the scene, the next step is to create the animation.
This section describes the display and operation of the timeline palette for editing animations.
See “Timeline Palette” for details on the screen layout of the timeline palette.
See “Basic Dope Sheet Operation” and “Graph Editor” for basic operations.
Display of the Timeline
Click the [Open/Close Button], (1) or (2), in the image below to expand the track or property group.
(You can expand/collapse all by clicking and holding down [Shift].)
Within each property group, keyframes can be edited.
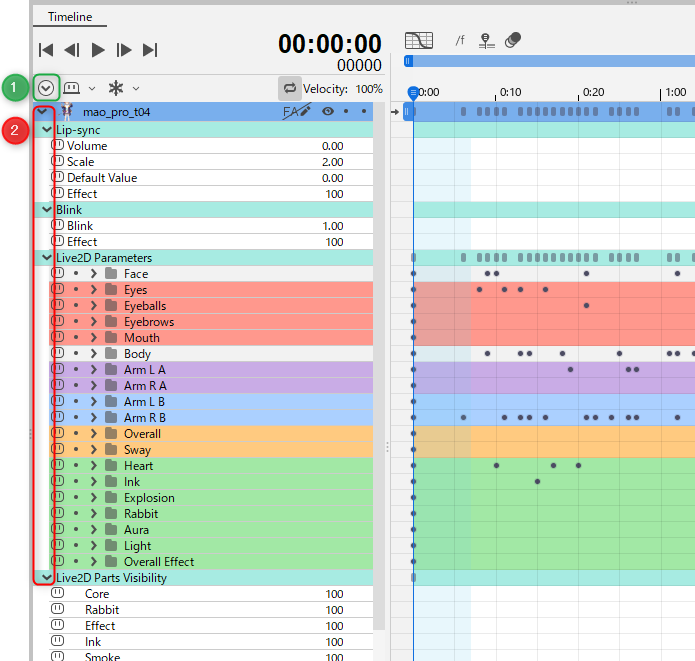
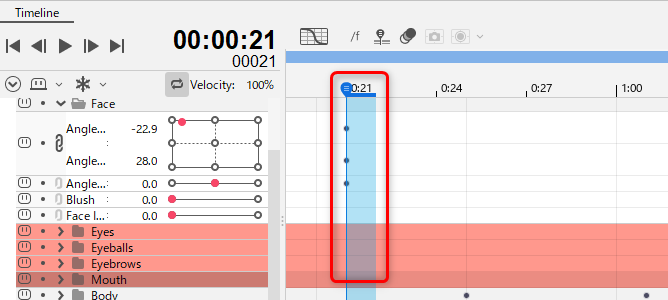
When the display scale of the timeline is increased, the indicator shows the range of a frame (the blue area).
Basic Operation of the Timeline
Change overall length
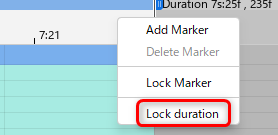
The overall length of the animation scene is changed by dragging the gray area marked with [Duration].
It can also be changed by entering a numerical value in the [Duration] section of the [Inspector] palette.
Right-click on the [Duration] section to open the [Lock length] menu.
You can lock the length of a scene by selecting [Lock length].
Change Work Area range
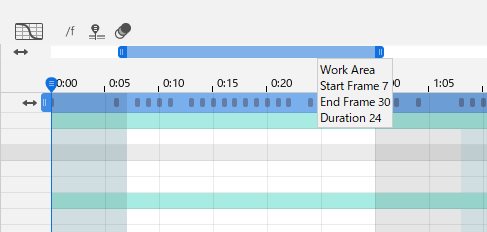
The blue bar is the [Work area].
This indicates the playback range of the animation scene being edited.
The length can be changed by dragging the left and right ends.
Furthermore, you can mouse over the Work Area to see the information.
Move Work Area
You can drag the blue Work area to move the area to be played.
Change track length
You can move the position of a track on the timeline by dragging the arrows on the right and left ends of the track left and right.
Drag the left and right ends to change the length of the track.

Tips
The Work Area and track positions can also be changed using the indicators.
See “Animation Menu” for details.
Movement Operation of the Timeline
Expanding and reducing the timeline
Use [Alt] + [mouse wheel] to expand and reduce the timeline.
The center of scaling is the cursor position.
Tips
The Graph Editor can be scaled in the same way.
Scroll through the timeline
You can scroll horizontally through the timeline with the slider at the bottom of the timeline or with [Shift] + [mouse wheel].
You can scroll through the timeline horizontally and vertically at the same time with [click middle mouse button (click the mouse wheel)] + [drag] (or [Space] + [drag]).
This is useful in combination with the timeline expanding/reducing performed by [Alt] + [mouse wheel].
Move to the beginning/end of the timeline
Use [Home] to move to the beginning of the entire timeline.
Use [End] to move to the end of the entire timeline.
If the indicator is already at the beginning/end of the entire timeline, it moves to the beginning/end of the entire Work Area.
Move to the beginning/end of Work Area
Use [Shift] + [Home] to move to the beginning of the entire Work Area.
Use [Shift] + [End] to move to the end of the Work Area.
Move by one keyframe
From the current location of the [Indicator] on the selected parameter, move to the previous and next keyframes in sequence.
Press [J] to go to the previous keyframe and [K] to go to the next keyframe.
Press [Shift] + [J] to go to the previous key in the entire track and [Shift] + [K] to go to the next key in the entire track.
Timeline Settings
Click the menu button in the upper-right corner to display settings related to operations on the timeline.
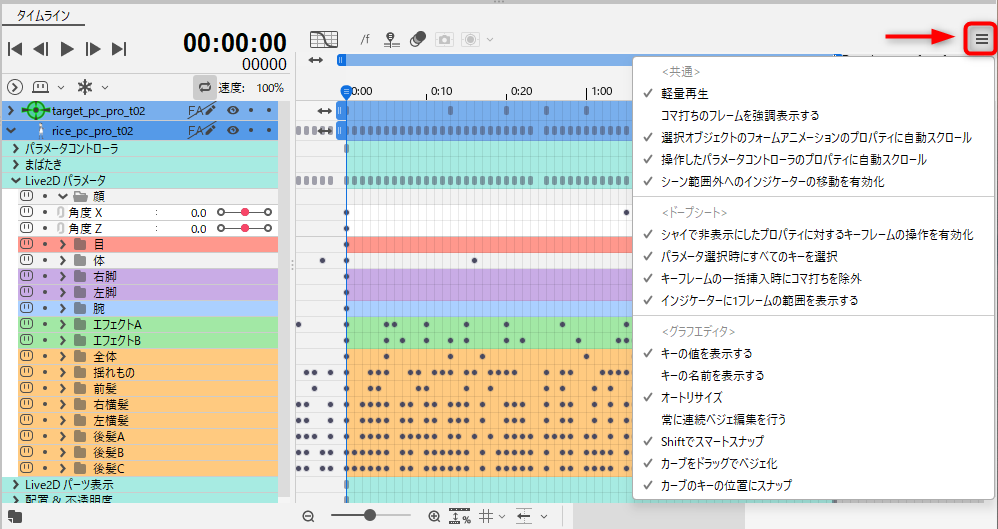
Common
Lightweight playback:
If this is selected, the parameters and values on the timeline palette will not change while the scene is playing.
See “Lightweight Playback Function” for details.
Highlight frames for frame step:
If this is selected, you can highlight the frame step.
ON

OFF

Parameters to which parameter controller target tracking is applied are not highlighted.
See “Controller target settings” for more information.
Autoscroll to form animation properties of selected objects:
If this is selected, clicking on an object in the view opens its properties.
(If the same object is selected consecutively, the properties will not be opened the second time or later.)
Autoscroll to the properties of the operated parameter controller:
If this is selected, selecting a parameter controller on the View will automatically scroll to the associated properties.
Enable indicator movement outside the scene range:
If this is selected, the indicator can be moved outside the range of the scene.
When it is used in conjunction with [Edit frames before frame 0] at the bottom of the timeline, the indicator can be moved to frames before frame 0.
Dope Sheet
Enable keyframe operations for properties hidden with Shy:
See “Shy Function” for details.
Select all keys when selecting parameters:
If this is selected, all keys for the selected parameter will be in the selected state.

Exclude frame steps when batch inserting keyframes:
If this is selected, when keyframes are inserted in a batch using [Ctrl] + [Click] or [Insert keyframes] in the right-click menu, frame step properties are excluded.
Display the range of one frame on the indicator:
When this is selected, the range of one frame is colored on the indicator.
Graph Editor
Display key values:
If this is selected, the key values are displayed in the Graph Editor.
Display key name:
If this is selected, the key names will be displayed in the Graph Editor.
Auto resize:
ON
If this is selected, the entire graph will follow along with the values as you drag keyframes around in the Graph Editor.
OFF
If this is cleared, the dope sheet will be displayed so that the entire top and bottom of the dope sheet fits within the timeline.
Always edit continuous Bezier:
ON
In the timeline palette, the handles before and after the key are always aligned when manipulated.
While pressing [Ctrl], this item is disabled if enabled or enabled if disabled.
See “Graph Editor: Continuous Bezier editing” for details.
Smart snap using Shift:
See “Graph Editor: Value formatting” for details.
Make Beziers by dragging curves:
When [Make Beziers by dragging curves] is selected, curve dragging is also enabled for non-Bezier curves.
See “Graph Editor: Curve dragging” for more information on curve dragging.
Snap to keyframes’ values on Graph Editor:
When [Snap to keyframes’ values on Graph Editor] is checked, the selected key is snapped to the numeric value of the previous or next key.
As you move the keyframe up or down, an orange line will appear with the value to be snapped.