ArtPath Brush Editing
Updated: 09/01/2020
Brush Selection and Settings
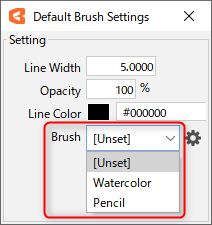
Default brush settings
When creating a new ArtPath in the Editor, the default settings will be the following [Default Brush Settings].
If line width and brush settings are predetermined, it is convenient to create an ArtPath after selecting a brush in [Default Brush Settings].
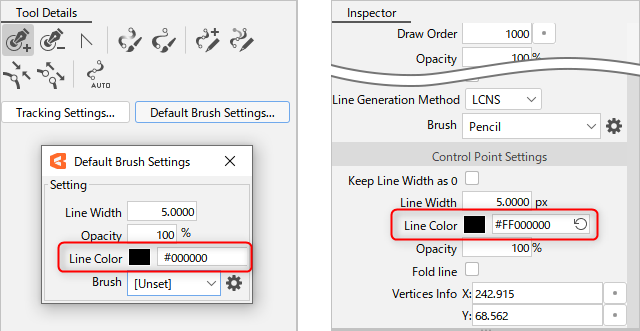
[Line Width], [Opacity], [Line Color], and [Brush] can be set. [Line Color] and [Brush] are explained in detail in the next section.
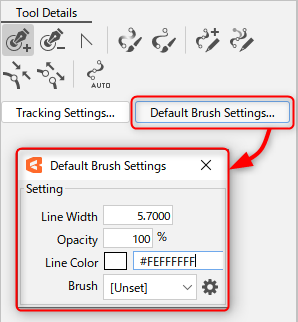
Note: Please note that you cannot set up your own brushes from the [Default Brush Settings] in the [Tool Details] palette. The settings for your own brushes are set in the [Inspector] palette.
Brush line color
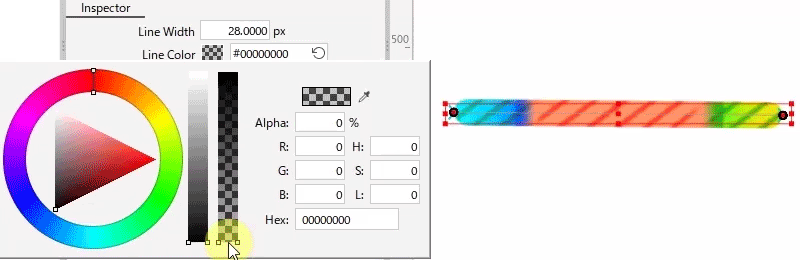
You can adjust both the Line Color and the Opacity of the line color.
If the Brush material itself has a color, the color of the material can be displayed by reducing the Opacity.
Note: Line color is like painting over the brush material with the line color you have set.
Click on the color box of the [Line Color] item in the [Tool Details] palette and [Inspector] palette.
The following dialog box will open.
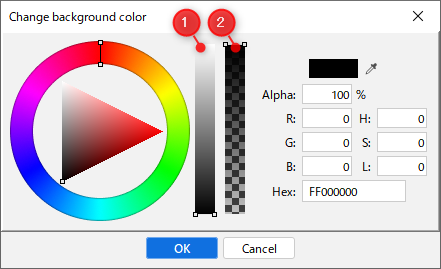
Line Color can be specified directly from the color circle, entered as a color code, or selected with an eyedropper.
You can adjust the brightness by dragging the bar (1) up or down.
The opacity of the line color can also be adjusted by dragging the bar (2) up or down.
Brush selection
You can select a brush from the [Tool Details] palette. The brushes that can be selected here are those registered for the model.
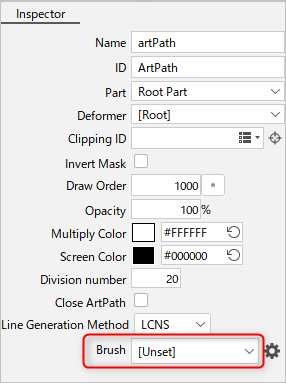
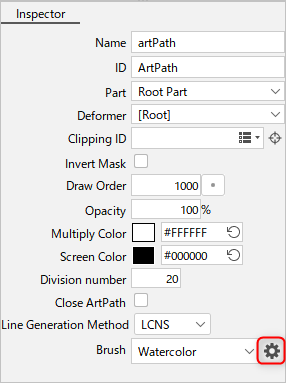
To change the ArtPath Brush Settings after it has been created, select the ArtPath you want to change and select a brush from the [Inspector] palette.
Brush settings
New brushes can be created and textures can be adjusted.
While adjusting the settings, the adjustment result is reflected in real-time on all ArtPaths for which the brush is set.
Note: The brush content set here will be saved in the cmo3 file being edited. It is not saved in the Editor.
You can export brush settings by using “Export/Import Brushes.”.
Clicking on the red framed gear icon in the [Inspector] palette shown in the following image opens the [ArtPath Brush Settings] dialog box.
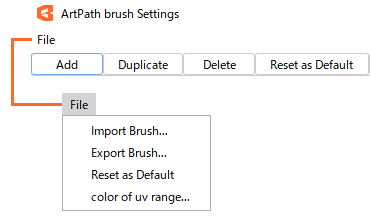
ArtPath Brush Settings Dialog Box
Common area
| Name | Details |
| Add |
Adds a new brush with the name “New Brush.” |
| Duplicate |
Duplicates the currently selected brush. |
| Delete |
Deletes the currently selected brush. |
| Reset to default |
Resets the setting of the currently selected brush to the default value. |
File menu
| Import Brush |
Loads brushes exported in .cabr format. |
| Export Brush |
Exports brushes in .cabr format. |
| Reset to default |
Resets the setting of the currently selected brush to the default value. |
| UV range display color |
The line display, such as the border settings displayed in the mesh method, can be changed to any color. |
Sprite method
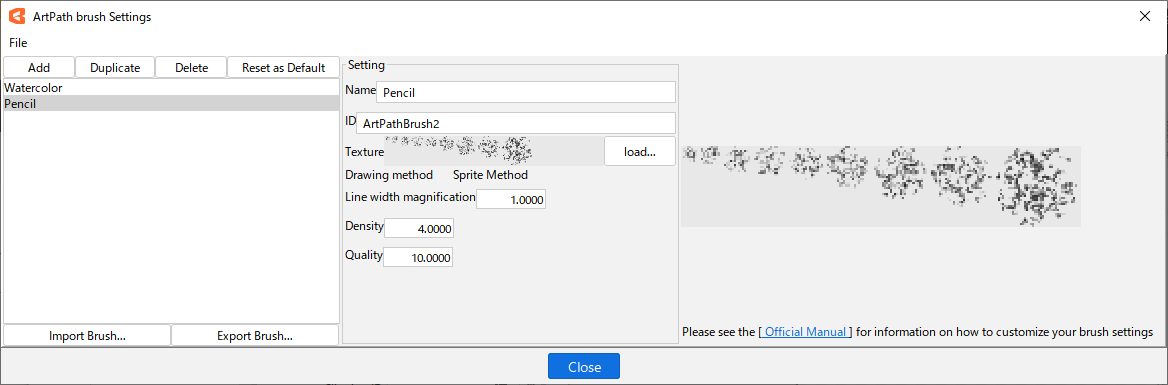
| Setting/Name | Details | Behavior when changing values |
|---|---|---|
| Name | Any name can be set. | ― |
| ID | Any ID can be set. | ― |
| Texture / Import | Load your own prepared brush image. | ― |
| Drawing method | When multiple pieces of material are loaded, they will be in sprite format. See “Creating and Adding Your Own Brushes” for more information. | ― |
| Line Width Magnification | The magnification factor for the line width of the brush texture can be set numerically in the range of 0-100. |  |
| Density | Brush texture density can be set numerically in the range of 0-10. The higher the density, the more it affects the Editor’s overall performance. |  |
| Quality | Texture quality can be set numerically in the range of 0-100. The higher the quality, the higher the resolution of the texture selected for smaller line widths. The lower the quality, the lower the resolution of the texture selected for larger line widths. |  |
For details on the mechanism of the sprite method of brush drawing set up here, see “Sprite Method Drawing Mechanism.”
Mesh method
Note: The default setting of “Watercolor” does not have a border setting, so a border setting has been added for the purpose of this explanation.
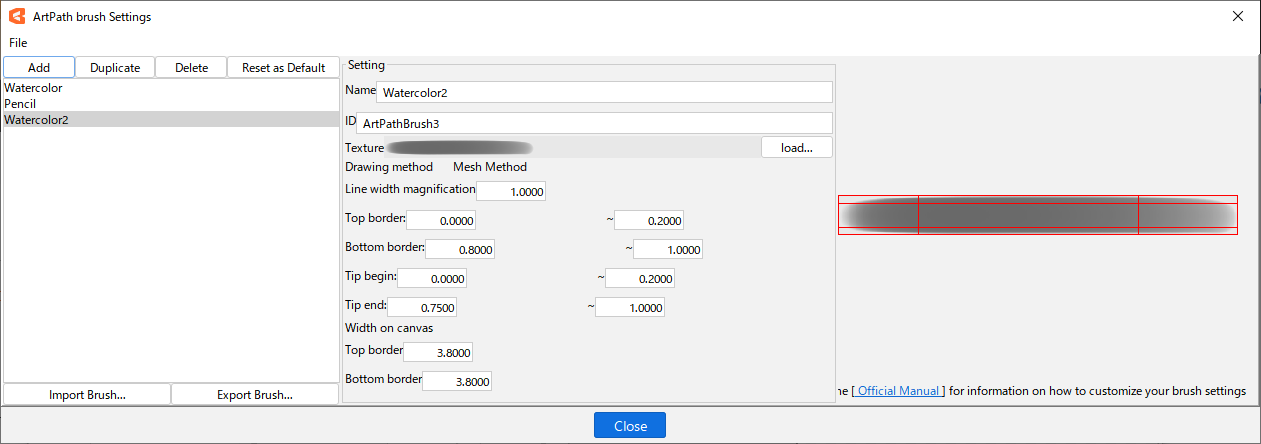
| Setting/Name | Details | Behavior when changing values |
| Name | Any name can be set. | – |
| ID | Any ID can be set. | – |
| Texture / Import | Load your own prepared brush image. | – |
| Drawing method |
When a single material is loaded, it will be in mesh format. |
– |
| Line Width Magnification |
The magnification factor for the line width of the brush texture can be set numerically in the range of 0-100. |
 |
| Top border |
The area above the top border of the brush texture can be set numerically in the range of 0-1. Note: 0 is the top edge of the screen, 1 is the bottom edge of the screen. |
 |
| Bottom border |
The area under the bottom border of the brush texture can be set numerically in the range of 0-1. Note: 0 is the top edge of the screen, 1 is the bottom edge of the screen. |
 |
| Tip begin |
The range of the ArtPath line’s entry point can be set numerically in the range of 0-1. Note: 0 is the left end of the screen, 1 is the right end of the screen. |
 |
| Tip end |
The range of the ArtPath line’s exit point can be set numerically in the range of 0-1. Note: 0 is the left end of the screen, 1 is the right end of the screen. |
 |
| (Width on Canvas) Top border |
The display ratio of the set “Top border” area to the actual above-top-border area on the canvas can be set numerically in the range of 0-100. Note: The appropriate value depends on the resolution of the canvas. Note: The border width set here is always maintained even if the line width of the ArtPath is changed. |
|
| (Width on Canvas) Bottom border |
The display ratio of the set “Bottom border” area to the actual under-bottom-border area on the canvas can be set numerically in the range of 0-100. Note: The appropriate value depends on the resolution of the canvas. Note: The border width set here is always maintained even if the line width of the ArtPath is changed. |
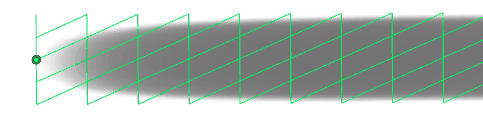 |

For details on the mechanism of the mesh method of brush drawing set up here, see “Mesh Method Drawing Mechanism.”
Create and Add Your Own Brushes
You can also prepare PNG images of your own brushes and load them into Editor for use.
The original image for the brush can be created using image creation software such as Photoshop or CLIP STUDIO PAINT.
There are two types of brush images that can be loaded into Editor.
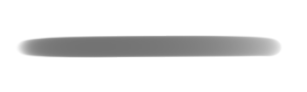
| Sprite method | Mesh method |
 |  |
Create images using the sprite method
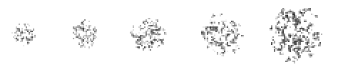
Please prepare at least two images for each brush size. Increasing the size provides resilience against image resolution degradation.
When creating an image, make sure that the brush size becomes reduced in proportion to the image size.
(E.g. 400 x 400, 300 x 300, 200 x 200)
The created image should be exported as a transparent PNG.
Note: There is no clear rule for brush size, but we recommend that you prepare a larger (thicker) size than you want to use in the source image.
Note: There is no color specification at the time of creation. The color will be drawn in the color specified at the time of creation if the opacity of the ArtPath line color setting in the Editor is set to 0.
It is also possible to change the line color setting to any desired color.
Create images using the mesh method
There is one image to be prepared.
The created image should be exported as a transparent PNG.
Note: There is no clear rule for size, but we recommend that you prepare a larger (thicker) size than you want to use in the source image.
Note: There is no color specification at the time of creation. The color will be drawn in the color specified at the time of creation if the opacity of the ArtPath line color setting in the Editor is set to 0.
It is also possible to change the line color setting to any desired color.
Add your own brushes to the Editor
| Number | Images | Details |
| (1) | 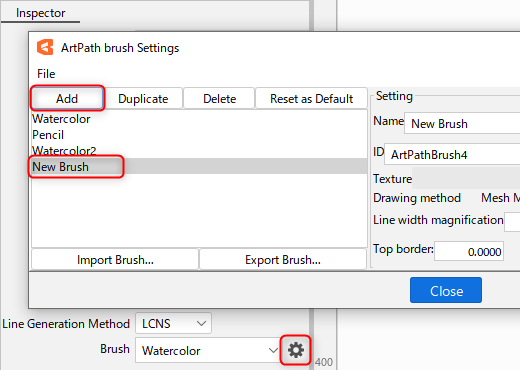 |
Open the [ArtPath Brush Settings] dialog box and select [Add].
|
| (2) | 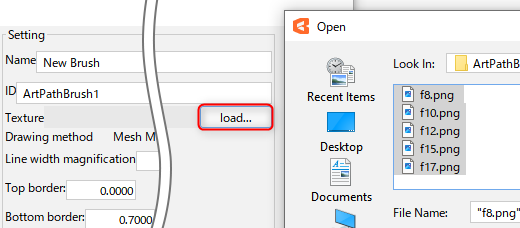 |
Select a PNG image of the brush you created from the Texture [Load]. The sprite method and mesh method are automatically identified by the number of images. |
| (3) | 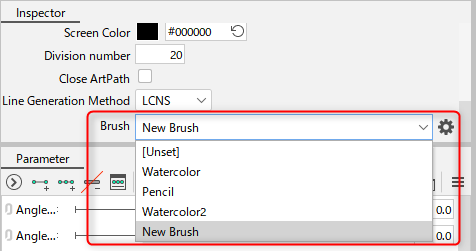 |
Once the images are loaded, apply the brush settings to the ArtPath you want to change the texture of. Adjust the brush setting details, checking the ArtPath on the view. |
Export/Import Brushes
Export brush
Select the brushes you want to export and click [File] -> [Export Brush] in the [ArtPath Brush Settings] dialog box to export in .cabr format with the desired name.
Import brush
Select the brush file (.cabr) you want to import and click [File] -> [Import Brush] in the [ArtPath Brush Settings] dialog box to load the brush.