Add/Delete Keys to/from parameters
Updated: 12/17/2024
By adding a key to the parameter, the shape of the deformation can be registered in the keyform and motion can be applied.
Keys can be edited from the following three locations.
- Icons in the [Parameter] palette
- [Edit Parameter] dialog box
- Pop-up for parameter adjustment
Please also check out our “Basic Tutorial,” which shows the steps from adding keys to creating shapes in videos.
Simple Editing of Keys from Palette Icons
Adding keys
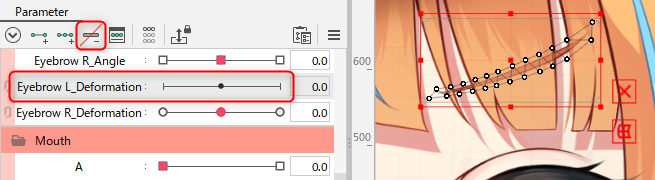
1. Select the object (ArtMesh or deformer) for which you want to set parameters.
Note: Here, using the 3-point addition of the key as an example, click on the ArtMesh of the left brow to select it.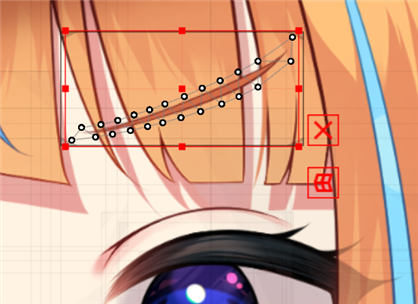
2. Click on the parameter to which you wish to add a key to select it.
Here, select the “BrowL deformation” parameter.
3. Click the [Add 3 Keyforms] button at the top of the palette.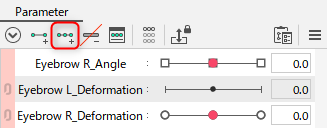
4. Three green dots are added to the “BrowL deformation” parameter.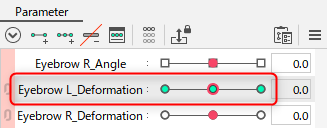
TIPS
The example here is [Add 3 Keyforms], but if you want to add 2 points, follow the same steps and click [Add 2 Keyforms].
Deleting keys
- Select the object whose key you want to delete.
- Select the parameter to be deleted by clicking on it.
- Click the [Delete all keys] button at the top of the palette.
- All keys (green dots) of the parameter are deleted.
If you want to delete only some of the keys, you can do so from the [Edit] dialog box described below or from the parameter adjustment pop-up.
Edit Key from Edit Dialog Box
Adding keys
1. Select the object for which you want to set parameters.
As an example here, click to select the ArtMesh for the left brow.
2. Click on the parameter to which you wish to add a key to select it.
Here, select the “BrowL deformation” parameter.
3. Click on the [Edit Key Manually] icon.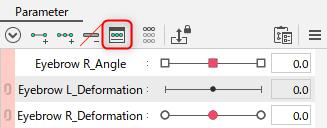
4. The [Keyform editing] dialog box appears.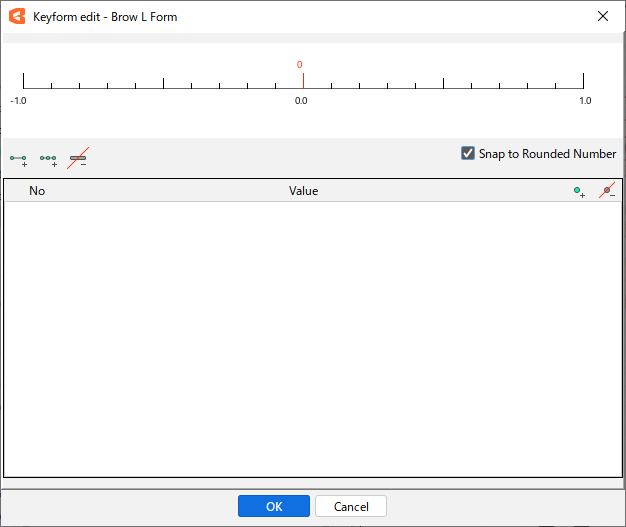
5. Click on the scale and a red dot will be inserted. This is the key.
Here we want to set “-1.0,” “0,” and “1.0,” so click the location of each value on the scale (red arrow), or click the [Add 3 keys] button below the scale.
6. When three points have been inserted, click the [OK] button.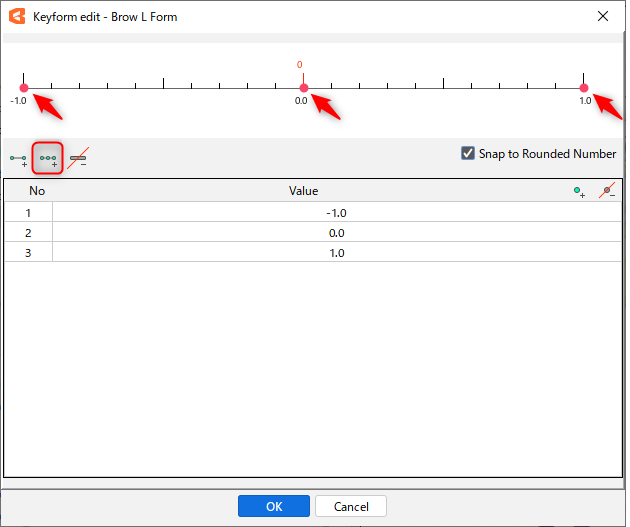
Three green dots have been added to the “BrowL deformation” parameter.
Deleting keys
- Select the object whose key you want to delete.
- Select the parameter to be deleted by clicking on it.
- Click on the [Edit Key Manually] icon.
- The [Keyform editing] dialog box appears. (Up to this point, the operation is the same as adding a key.)
- Click on the keyform you wish to delete (red dot) to remove the keyform.
Edit key value
The value of the inserted key can be edited.
- Select the object whose value you wish to edit.
- Select the parameter to be edited by clicking on it.
- Click on the [Edit Key Manually] icon.
- The [Keyform editing] dialog box appears. (Up to this point, the operation is the same as adding a key.)
- Click on a number in the [Value] column to edit it.
Enter the desired number.
Edit Key from Parameter Adjustment Pop-up
Adding keys
1. Select the object for which you want to set parameters.
As an example here, click to select the ArtMesh for the left brow.
2. Click on the parameter to which you wish to add a key to select it.
Here, select the “BrowL deformation” parameter.
3. Drag or click the black dot on the parameter slider to move it to the position where you want to add the key.
Tips
The position of the black dot can be moved by entering a value in the numeric field to the right of the slider.
If you want to add keys with exact values, please use this.
4. After confirming that the black dot is where you want to add the key, click the [+] mark in the pop-up that appears to the right of the parameter.
5. The black dot turns green and a key is added.
TIPS
If there is only one keyform on a parameter, the object will only be displayed with that key value.If you want the object to always be displayed when the parameter is moved, insert keys on both ends of the parameter as well, even if it is not deformed.
TIPS
Note that if you add a key with the slider, the keyform may be set to a value that is not divisible by the decimal point.
If an unintended value is set, it can be corrected in the [Keyform editing] dialog box.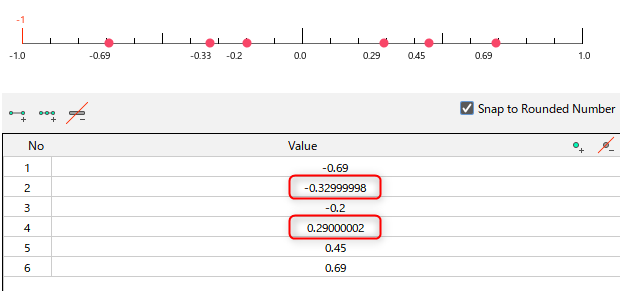
Deleting keys
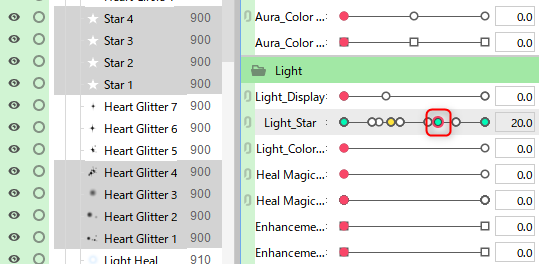
1. Select the object whose key you want to delete.
2. Click on the keyform to be deleted so that it has a red border around the green dot.
Tips
The slider can be adhered by right-clicking near the keyform you wish to select.
3. Click the [-] mark in the pop-up to the right of the parameter to delete the keyform and the green dot will disappear.
Select object associated with key
You can select the object associated with one key of the parameter.
With the key selected, click the [Modeling] menu > [Parameter] > [Select object associated with key] to select the object associated with the key.
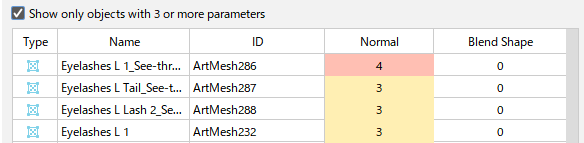
Verify the Number of Parameters Mapped to an Object
You can verify the number of parameters mapped to an object from the [Modeling] menu -> [Parameters] -> [Verify Mapped Parameters].

| Number | Item | Details |
|---|---|---|
| (1) | Display only those with 3 or more parameters | If checked, only those with three or more parameters can be displayed. |
| (2) | Normal | The number of normal parameters mapped is displayed. |
| (3) | Blend Shape | The number of parameters mapped for the blend shape is displayed. |
For three parameters, the cell is displayed in yellow; for four or more, the cell is displayed in red.