3. Adding Facial Expressions
You can download the latest Cubism Editor here.

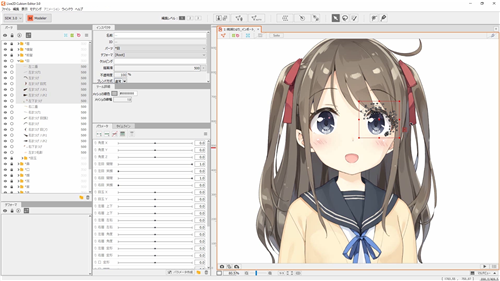
Using Live2D, let’s actually move the illustrations.
This time, add movements for [Eye open/close], [deformation of eyebrows], and [Mouth Open/Close].
Basic Tutorial List
- Illustration Processing
- Preparing to move the illustration
- Adding facial expressions
- Adding body movement
- Adding XY facial movement
- Creating animations
Tutorial Video
Below are links to the pages in a manual that explains in more detail the items described in the video.
- Parts Palette [0:10]
- About Parameters [0:45]
Parameter Palette
Edit Parameter - Deform Paths [2:15]
- Clipping Mask [3:25]
You can download the data for the movements created in the video here. Use the data as a reference.
Note: Please be sure to read the Free Material License Agreement before downloading.
The completed sample model of “Hiyori Momose” appearing in the video => Click here to download
Note: Some browsers may not allow you to download the file even if you click the link.
In that case, please right-click and save the link.
Video Review
This section describes specific ways to add facial expressions to a model.
In particular, the quality of the eyes and mouth movements can vary greatly depending on the method of deformation, so try to learn how to add facial expressions here!
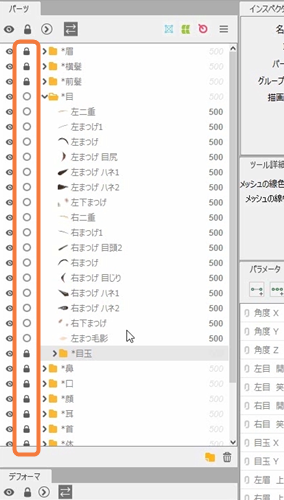
Lock Parts
First, lock all parts except the eyes to prevent them from being edited.
You can lock a part by clicking the lock icon on the Parts palette.
Eye Opening and Closing
Lock all parts except the eyes, making it impossible to edit anything except the eyes.
Once locked, select the object to add movements. Now, start the movement with the left eye, so select all the left eyelashes.
Multiple selections can be made by holding down Shift and clicking.
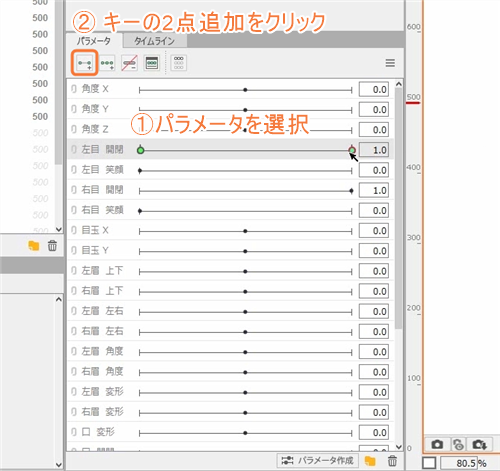
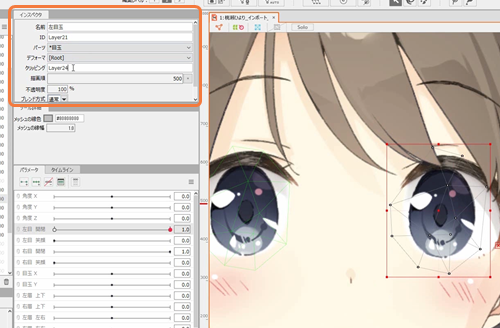
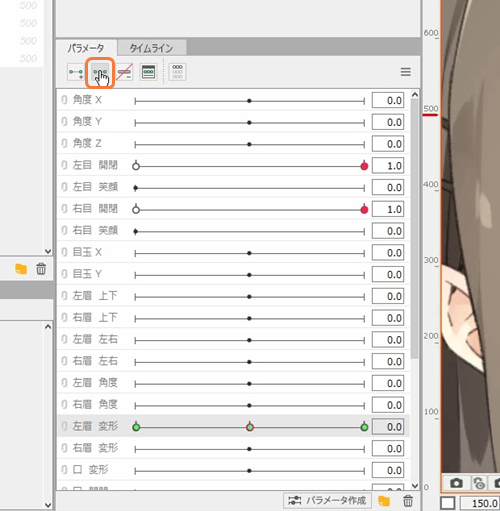
With at least one object selected, select the parameters to add movements. A parameter that is grayed out is in the selected state.
First, select “EyeL open/close” and click on [Add 2 Keyforms] at the top of the Parameter palette.
The selected ArtMesh now has parameters, and the parameters that were gray now have green dots.
A parameter with red and white dots while an object is unselected has an object key inserted.
When an object is selected, a green dot indicates that the object has a parameter attached to it.
Move the eyelashes to try out the parameter.
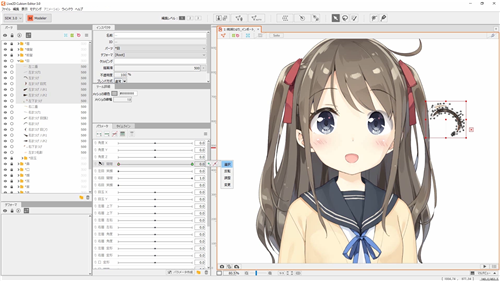
If you move a parameter in this state, it will move from the position where you moved it to the position where it was at the beginning.
This is the state with parameters.
If you move one point and then the other, the initial position setting will be lost.
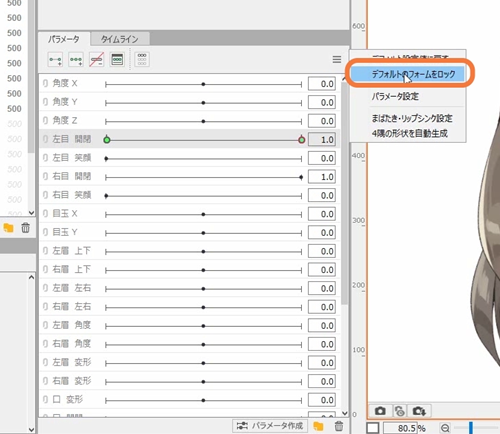
To prevent this, check the “Lock Default Forms” checkbox in the Parameter palette menu.
Doing so makes it impossible to edit the object when its default values are used.
Eyelashes deformation
Let’s actually add movement to the eyelashes. Hide the eyeballs to make it easier to create the closed eye shape.
Move the parameter to the left and confirm that the number next to the parameter is 0.
In the 0 state, transform the eyelashes into a closed eye.
Click on the eyelashes and a red box will appear; grab the center of the box and lower it to the position of the lower eyelashes.
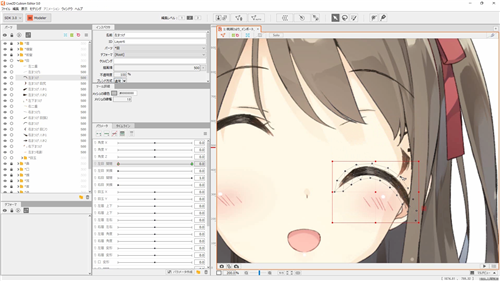
From here, deform the meshes of the inner corner and outer corner of the eyes to create the closed eyes, although it is difficult to move the vertices one by one.
In such a case, click on the [Deform Path edit] on the [Tools Menu] above.
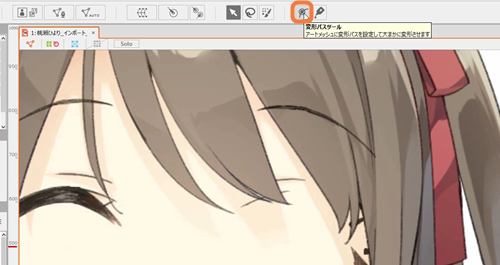
Clicking on the ArtMesh with the deform path selected will draw a line.
Note that deform paths cannot be drawn unless an ArtMesh is selected.
Return to the Select Tool and click on the struck green point to change it to red. When you move this point, the area around the point is deformed all at once.
This will create the shape of the closed eye.
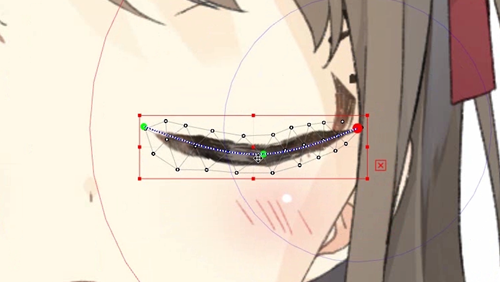
Once the rough shape is created, directly move the vertices of the ArtMesh to shape it.
Once you have deformed the main eyelashes, move the parameters around to check them.
Deformation of the white parts of the eyes using clipping
If eyeballs are displayed in this state, they will be visible even when the eyes are closed.
Therefore, use the clipping function to create movement so that the eyeballs are not visible when closed.
First, select the white part of the eye.
Copy the ID as it appears in the inspector palette and paste the white eye ID into the eyeball clipping text box.
Now the eyeball is clipped to the white part of the eye.
When the white part of the eye is actually moved, the eyeball is not displayed outside the range of the white eye.
Let’s put a parameter on this white eye. If this parameter is set so that the white part of the eye is deleted—that is, hidden by the eyelashes—when the eye is closed, the eyeball will not be visible.
This completes the left eye’s motion setup.
Let’s add movements for the right eye in the same way.
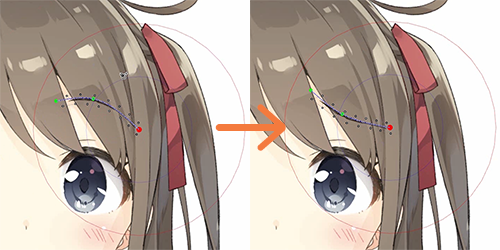
Deform Eyebrows
Similar to the eyelashes, eyebrows can be moved using a deform path. The procedure is almost the same.
With the left eyebrow ArtMesh selected, select the parameters for the left eyebrow deformation.
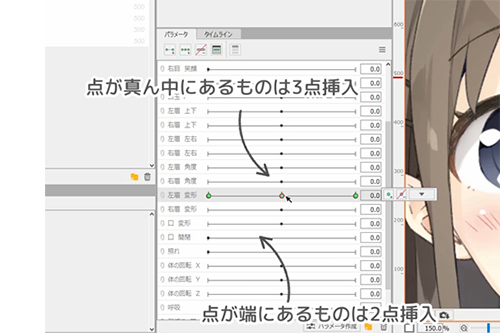
This time, instead of inserting two points, insert three points.
The deformity is such that the eyebrows are bent down to the side when the parameter goes to the left side and the eyebrows are raised when the parameter goes to the right side.
TIPS
You can tell how many points to insert by where the black dot in the parameter is located.
Also, please refer to the sample models while adding parameters.
Let’s start with the down-slanting eyebrows first.
Select the ArtMesh with the parameter set to [-1.0], and draw a deform path to move the points. Edit the vertices for fine adjustment.
Down-slanting eyebrows take the shape shown in the following image.
Let’s continue to create the right side of the parameters.
This transformation is mainly used to express surprise.
Contrary to a down-slanting eyebrow, the eyebrow is transformed so that the center of the eyebrow is raised.

Let’s add movements for the right eyebrow in the same way.
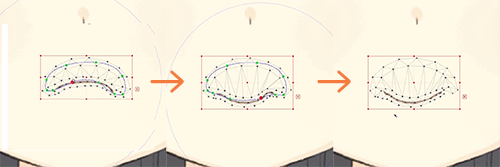
Deform Mouth
Select the top and bottom parts of the mouth and inside the mouth, and insert two keys in [Mouth Open/Close].
In this illustration, the mouth is open by default, so create a closed mouth when the parameter is 0.
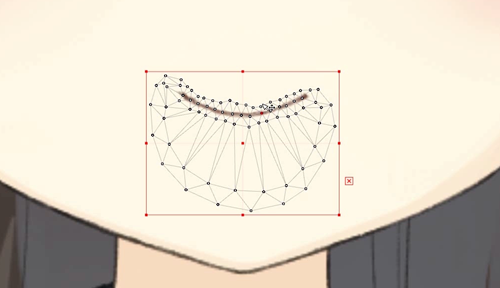
Deformation of the top part of the mouth
First, create the shape of the top part of the mouth. Since it is difficult to see with the other parts displayed, hide them.
Draw a deform path on the top part of the mouth. As with the eyes and eyebrows, draw a deform path that traces the line. The skin tone area will also move significantly if only the top of the line is drawn.
This will cause the vertices to intersect and make it difficult to make adjustments later, so a deform path is also drawn for the skin tone area.
In this way, moving the deform path on the line does not affect the upper portion, and the vertices of the skin tone area will not move.
Move the deform path to create the shape. Once the rough shape is created, directly adjust the vertices and shape.
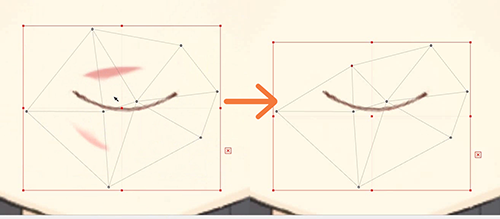
Deformation of the bottom part of the mouth
When shaping the bottom part of the mouth, be careful to keep the lines as close as possible to the shape of the top part.
The bottom part is hidden by the top part when the mouth is closed, and the line may be smudged or positioned too high.
In this condition, the shape of the closed mouth at the time of interpolation may look bad. So, try to match the shape to the top part as much as possible.
Deformation of area inside the mouth
If the area inside the mouth protrudes from the skin tone area, move the vertices so that the skin tone area of each mesh widens, or add parameters to the area inside the mouth so that the inside area shrinks when the mouth is closed.
This completes adding movement.
Other parts can be moved in the same way, so please refer to the sample models and other materials to try adding movement.
In the next video, adding movement to the hair and body will be explained.
Previous section “2. Preparing to Move the Illustration” | Next section “4. Adding body movement”