Using the Tracking function
This page explains in detail how to track particles in Adobe® After Effects® software using the tracking function of the Cubism AE plug-in.
The Cubism AE plug-in allows you to display Cubism models and handle motion directly in After Effects.
For more information, see “About AE plug-in” in the Editor manual.
What is the tracking function?
This function allows a layer to follow a specific ArtMesh.
Images, effects, etc. can be tracked more efficiently as the model moves.
For more information, see “Tracking function” in the Editor manual.
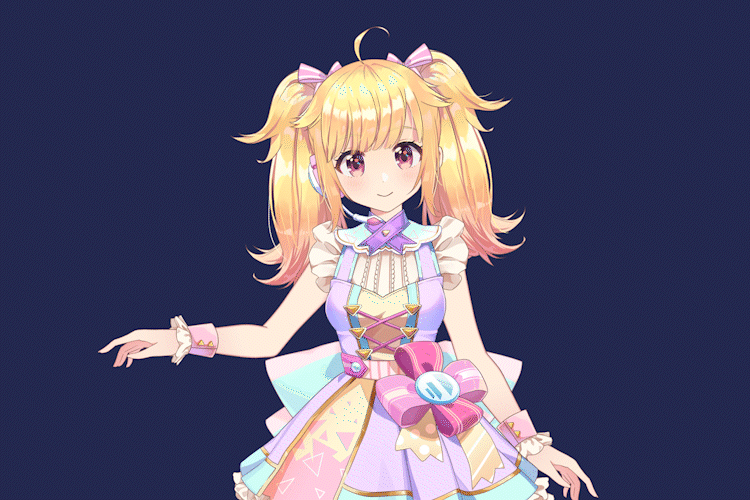
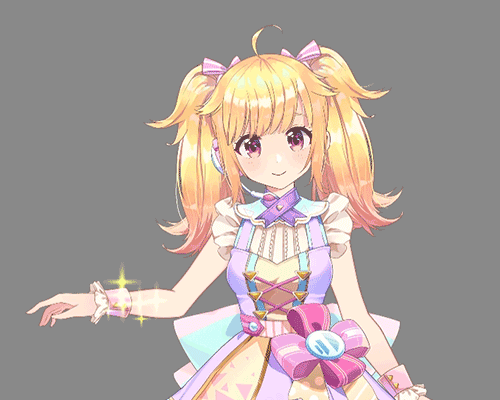
The following is a step-by-step guide to loading a model and motion file created in Cubism Editor and making the light particles track to the right hand.
Preparation
Exporting data for embedded use
Export the necessary data for embedding from Cubism Editor.
For information on how to export, see “Data for embedded use” in the Editor manual.
TIPS
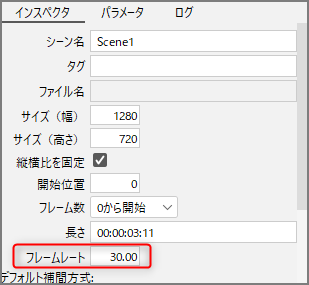
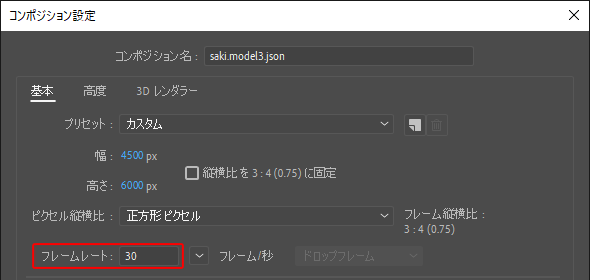
Align the frame rates of motion files and compositions.
Download the Plug-in
Download and install the Cubism AE plug-in from the following site.
AE (After Effects) plug-in download
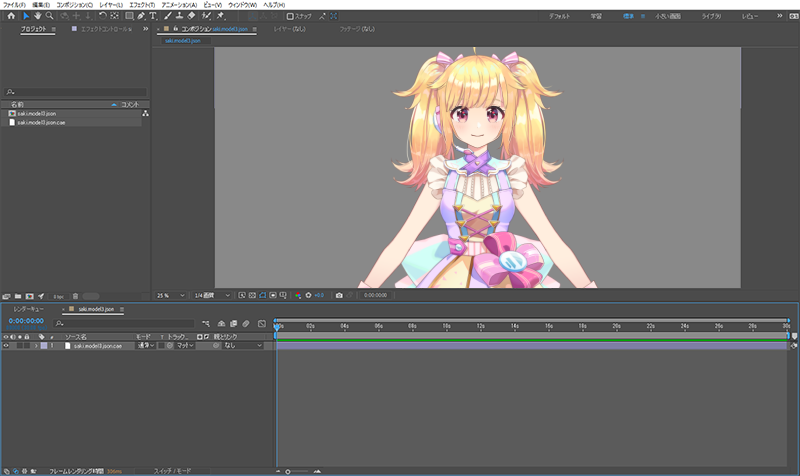
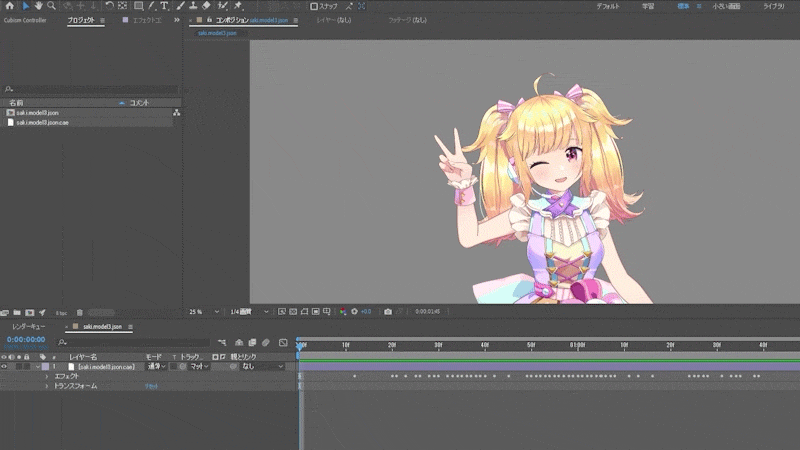
Display the model in Adobe After Effects
For detailed instructions, see “Model Display” in the Editor manual.
Load motion files
For detailed instructions, see “Import and export motion” in the Editor manual.
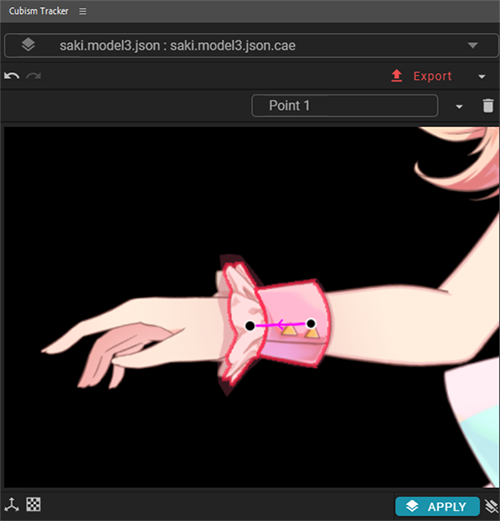
Set Attach Points
Specify the ArtMesh to be followed.
In this case, let’s set the attach point at the wrist.
Open Cubism Tracker
Open the [Live2D Cubism Renderer] effect on the model layer where the animation was set, and click [Tracking] -> [Open].
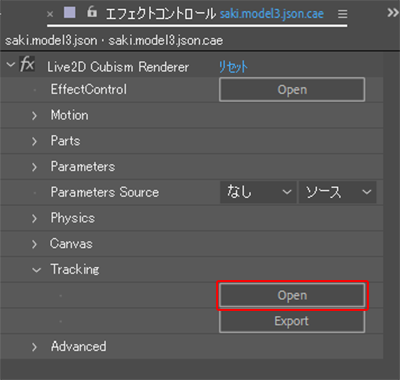
TIPS
If the panel does not appear, go to the [Window] menu -> [Extensions] and select the [Cubism Tracker] check box.
Set attach points on the ArtMesh to be tracked
Hover the mouse over the Modeling view to change the color of the ArtMesh, and then drag the mouse to set the attach point.
Output tracking information
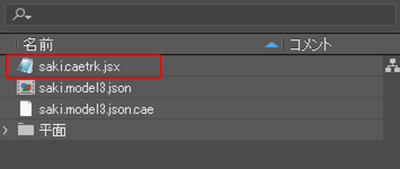
When you have completed setting the attach points, click the [Export] button to save the tracking information.
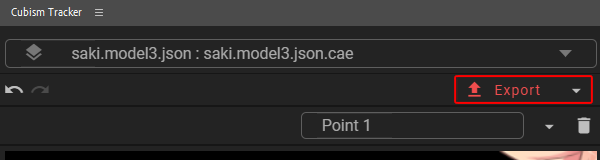
Once the export is complete, the tracking information is output to a [.jsx] file and automatically registered in the Project panel.
Precautions
Be careful not to delete the [.jsx] file.
Create a null layer and apply tracking
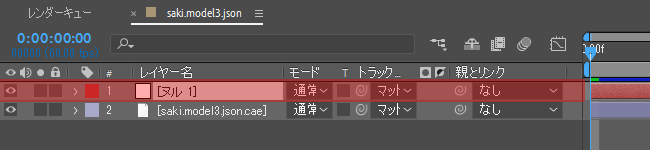
Create a null layer
Select the [Layer] menu -> [New] -> [Null object] to create a null layer to which tracking will be applied.
The null layer is added to the timeline.
TIPS
Tracking can be applied to a null layer for efficient editing.
For example, it can handle only some parameters or be flexible to changes in structure.
Apply tracking to a null layer
Select the null layer you just created (1) and the “attach point” (2) in the Cubism tracker panel.
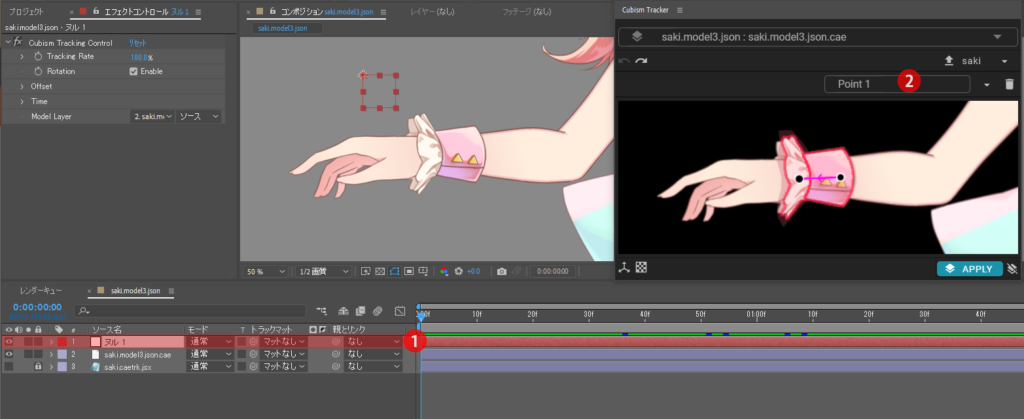
Click [APPLY] (3) in the Cubism tracker panel.
Effects and expressions are added to the selected layer to control tracking.
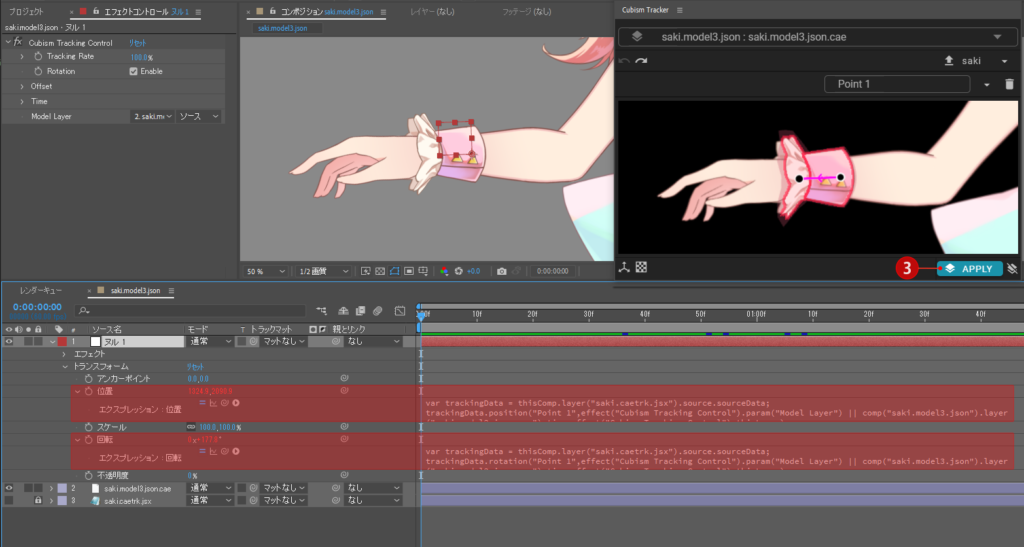
This completes the tracking of a null layer on an ArtMesh with attach points set.

Create particles
Select the [Layer] menu -> [New] -> [Plane] to create a plane layer for particles.
Change the name to “Particles.”
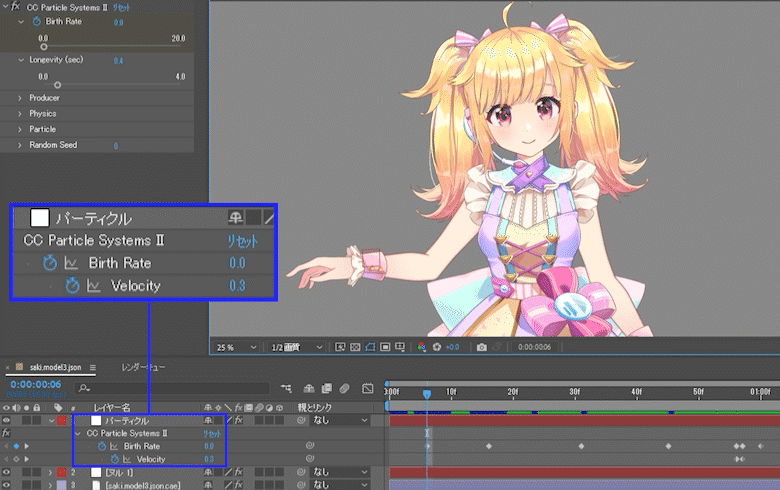
Select the particle layer you created, and then select the [Effects] menu -> [Simulation] -> [CC Particle Systems II].
The effect of [CC Particle Systems II] is added to the layer.
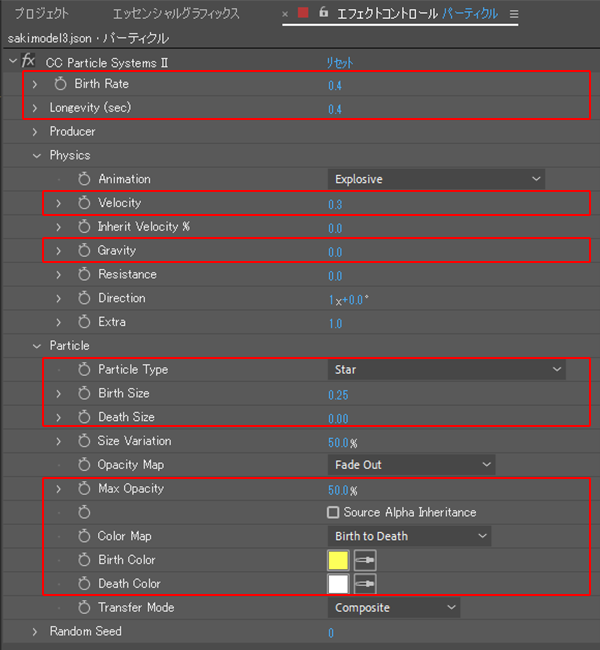
Open the Effects control and create particles of your choice.
In this example, the values have been set as follows.
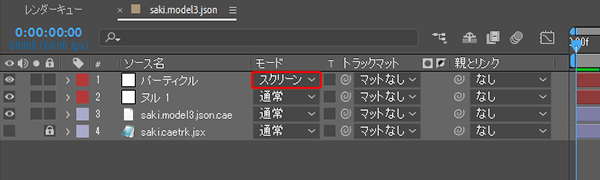
Set the rendering mode for particles to [Screen].
Make particles track
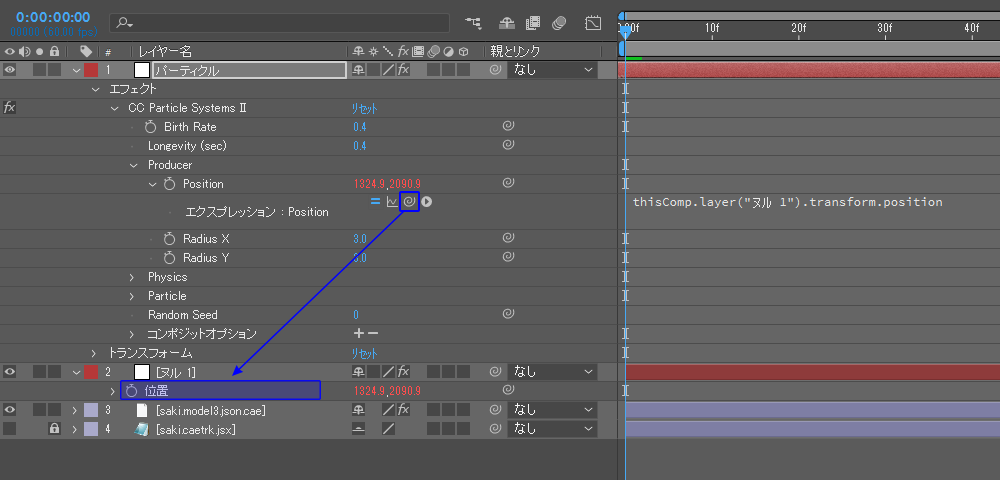
Link to the coordinates of the null layer to which tracking is applied.
Drag the “Link to parent” mark next to [Position] under [Transform] on the particle layer to a parent on [Position] under [Transform] of the null layer.
TIPS
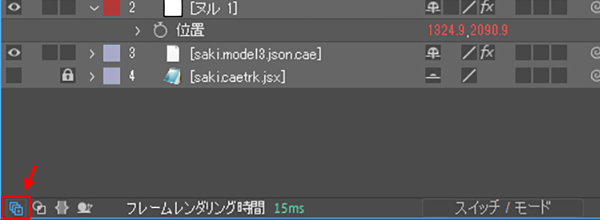
If you do not see the “Link to parent” mark, click the “Show switch” button in the lower-left corner.
This completes the coordinate linking and the enabling of particle tracking.
Adjust particles
Adjust the appearance and diffusion of particles for richer animation.
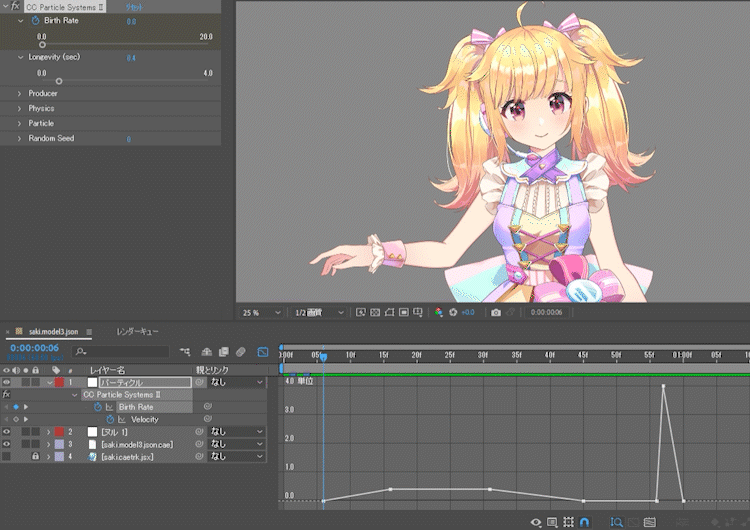
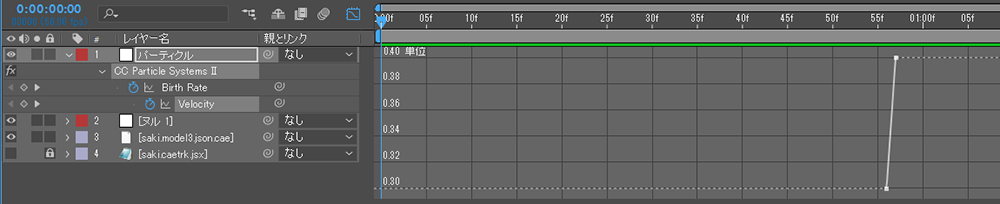
In this example, adjust the “Birth Rate” and “Velocity” values for the “CC Particle Systems II” effect.
| Item | Description |
|---|---|
| Birth Rate | Set the value before the signature pose to “0.0,” the value when the model performs the signature pose to “4.0,” and the value after the signature pose to “0.0” to vary the amount of the effect. |
| Velocity | Increase the value by “0.4” when the model performs the signature pose and set the effect to diffuse as it disappears. |
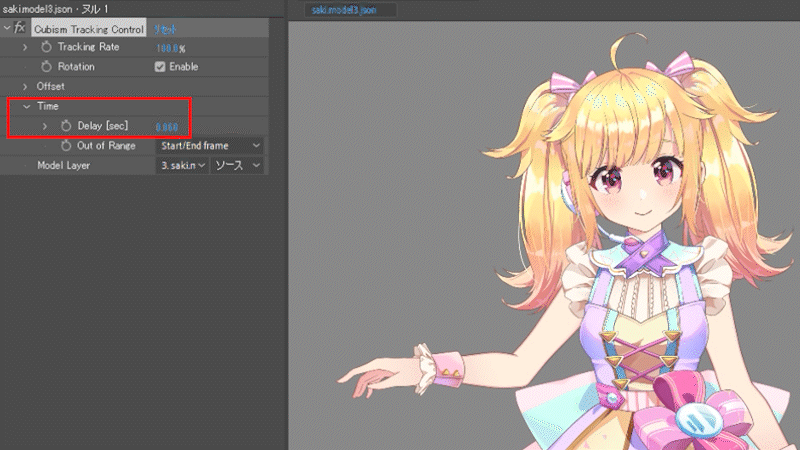
Application: Shift the timing
It is also possible to slow down the tracking of particles to make it look like the particles are chasing the hand.
Open the null layer’s Effect Control.
Select [Cubism Tracking Control] -> [Time] and change [Delay] to 0.06.
This completes the shifting of the timing of particle tracking.
In addition, detailed adjustments can be made in the settings of the tracking function.
For more information, see “Additional Adjustments” under “Tracking function” in the Editor manual.