Data for Embedded Use
Updated: 08/26/2025
This section describes how to output models and motion files for games and other embedded applications.
Types of Embedded Data
The data for embedded use is output from the .cmo3 and .can3 files, respectively, as follows.
| Extension | Description | |
|---|---|---|
| 1 | .png | The image set in the texture atlas is exported. |
| 2 | .moc3 | Actual data of Live2D models for use in applications. |
| 3 | .model3.json | The .model3.json file is in JSON format and contains information for linking MOC3 files, texture files, etc. By using model3.json when specifying models in the SDK’s sample1 or After Effects plug-ins, you do not need to specify texture files yourself. |
| 4 | .physics3.json | This data contains the set values for physical operations. |
| 5 | .motionsync3.json | This data contains the setting values for motion-sync. |
| 6 | .userdata3.json | This data contains the setting values of user data. |
| 7 | .cdi3.json | This data contains information for parameters and part names and linkage information for parameters. |
| 8 | .paramctrl3.json | This data contains information on the parameter controller. |
| 9 | .motion3.json | This data contains motion data for each scene set in Animation. |
Export Files for Embedded Use
Exporting MOC3 files and .model3.json
Before exporting, please display the parts you need and hide the parts you do not need.
When exporting a MOC3 file, the first step is to edit the texture atlas.
See “Edit Texture Atlas” for more information.
When you have finished editing the texture atlas, with the models to be exported displayed, click the [File] menu -> [Export embedded file] -> [Export as MOC3 file].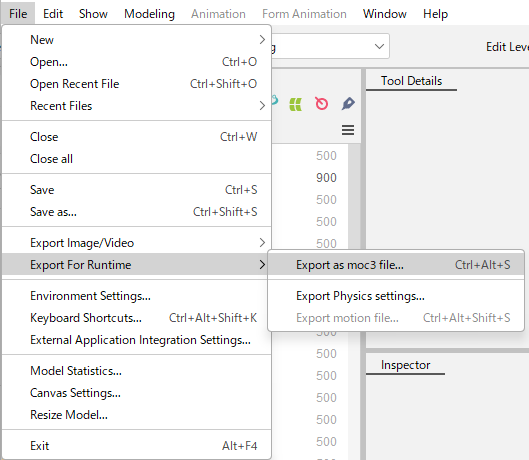
The [Export settings] dialog box will appear as shown below.
The [.moc3] file, the [.model3.json] file, and the [Texture] are exported by default from [Export as MOC3 file].
If you wish to export other files such as the physics settings file at the same time, select them from the [Export settings] dialog box.
After confirming each setting, click [OK].
Note: For the export target, select [1/1] to export the texture in its original size.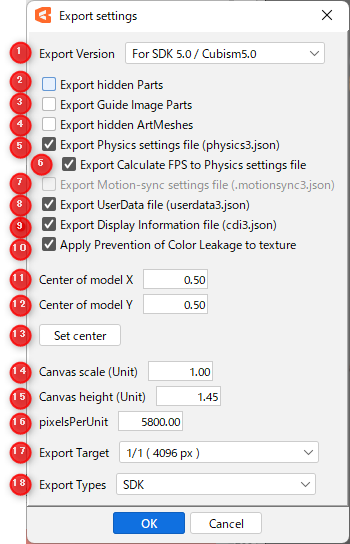
| [Export Settings] | ||
| (1) | Export version | Select the version of the SDK you want to export. |
| (2) | Export hidden parts | Export hidden parts. |
| (3) | Export guide image parts | Export guide image parts. Note: If the guide image parts are hidden, they will not be exported. |
| (4) | Export hidden ArtMesh | Export hidden ArtMeshes. |
| (5) | Export physics settings file (physics3.json) | Export the physics settings file (.physics3.json). |
| (6) | Export calculate FPS to physics settings file | When the physics settings file (.physics3.json) is written out, the FPS information is also written out with it. |
| (7) | Export motion-sync settings file (.motionsync3.json) | Export the motion-sync settings file (.motionsync3.json). |
| (8) | Export user data file (userdata3.json) | Export a user data file (.userdata3.json). |
| (9) | Export display information file (cdi3.json). | Export parameters, part names, and parameter linkage information (.cdi3.json). Note: Export is recommended when using AE plug-ins. |
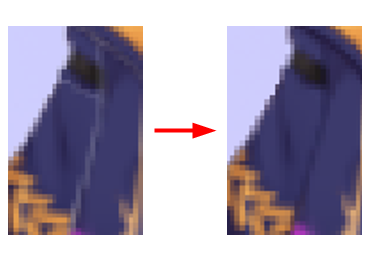
| (10) | Apply color leakage prevention processing to the texture |
Apply color leakage prevention processing to the texture. |
| (11) | Model center X | Set the center position of the model against the X axis (horizontal axis). |
| (12) | Model center Y | Set the center position of the model against the Y axis (vertical axis). |
| (13) | Set at the center | Return to default position. |
| (14) | Canvas width (Unit) | Set the size to fit the unit. |
| (15) | Canvas height (Unit) | Set the size to fit the unit. |
| (16) | pixelsPerUnit | It is automatically set to match the width and height of the canvas. |
| (17) | Export target | Select the target to specify the texture size, file name, etc. |
| (18) | Export type | Select whether to export for SDK or nizima. If nizima is selected, you can set the model name and preview size. |
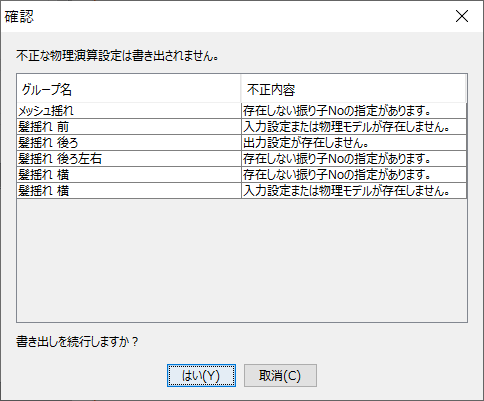
Precautions
If the physics settings are incorrect, a confirmation dialog box will appear and the incorrect physics settings will not be written out.Note: A similar dialog box appears when you export physics settings.
Export Physics settings
The physics settings file is often exported together with the MOC3 file when it is exported, but it can also be exported separately.
Select [File] menu -> [Export Embedded File] -> [Export Physics settings].
Export the physics settings file (.physics3.json), specifying the save location.
For FPS information:
If the FPS information is not set in the model file, the information dialog box is displayed and the FPS information is not written out.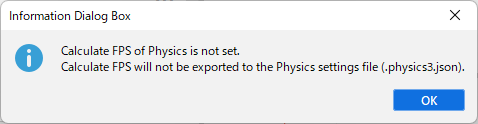
If the FPS information is set in the model file, a confirmation dialog box will appear and FPS information will be exported only if [Yes] is selected.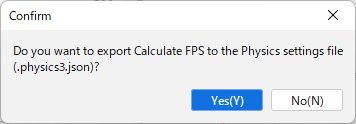
How to set FPS information:
FPS information is set by opening “Physics Settings” in the model file.
Model files created with Cubism Editor 4.1.01 or earlier may not have FPS information set.
Exporting motion-sync settings
The motion-sync settings file can be exported together with the MOC3 file when it is exported, but it can also be exported separately.
To export the file individually, you can follow either of the following procedures.
(1) Export in modeling view
Click the [Modeling] menu -> [Parameter] -> [Motion-sync Settings].
Click the [Motion-sync] menu -> [Exporting motion-sync settings] in the [Motion-sync Settings] dialog box to export.
(2) Export in animation view
Click the [Animation] menu -> [Track] -> [Motion-sync Animation Bake].
Click the [Motion-sync] menu -> [Exporting Motion-sync Settings] in the [Motion-sync Animation Bake] dialog box to export.
Export parameter controllers
Right-click on a track with a parameter controller set and select [Export of parameter controllers] from the context menu.
Export a parameter controller file (.paramctrl3.json) to the specified save location.
Exporting motion files
Select an animation file and click the [File] menu -> [Export Embedded File] -> [Export motion file].
When the [Motion Data Settings] dialog box appears, confirm each setting and click [OK].
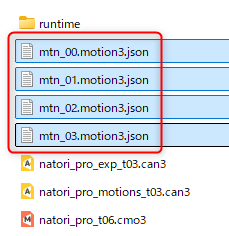
Export a motion file (.motion3.json) to the specified save location.
POINT
Motion cannot be exported with model data selected.
Export is performed with the animation data or animation scene selected for export.

| [Motion Data Settings] | ||
| (1) | Export scene setting*2 | Select the scene to be exported using the radio buttons and checkbox below. |
| (2) | Export target | Use the following pull-down menus to set the elements to be exported (model, parameter, and part display switching). |
| (3) | Model | Select the model track to be exported. |
| (4) | Parameter*4 | Select the parameters to be exported. |
| (5) | Parts display switching*5 | Select the display toggle for the exported parameters. |
| (6) | Opacity*6 | Select the opacity setting to be exported. |
| (7) | Lip-sync | Select the lip-sync settings to be exported. |
| (8) | Eye blinking | Select the eye blinking settings to be exported. |
| (9) | Bake lip-sync and eye blinking into motion | Lip-sync and eye blinking effect settings are baked into the motion keyframes. |
| (10) | Apply frame steps | Export including the frame steps set in the form animation. |
| (11) | Export events | Export including events set in animation. |
| *2 Export scene setting | ||
| (12) | Output all scenes | Export all scenes. |
| (13) | Output the currently selected scene | Export the currently selected scene. |
| (14) | Output scenes with motion export enabled |
Select and export any scene with motion export enabled. |
| (15) | Output Work Area | Only the Work Area is exported. |
| *4 Export target (17) | ||
| A | All parameters | Export all parameters. |
| B | Parameters that change | Export the parameters that change. |
| C | Keyed parameters | Export the keyed parameters. |
| D | Parameters that are not shied | Export the non-shied parameters. |
| E | Parameters that are not frozen | Export parameters that are not frozen. |
| F | No export | Parameters are not exported. |
| *5 Export target (18) | ||
| A | All Parts | Export all parts. |
| B | Variable parts | Export variable parts. |
| C | Keyed parts | Export the keyed parts. |
| D | Parts that are not shied | Export the parts that are not shied. |
| E | No export | The part is not exported. |
| *6 Export target (19) | ||
| A | Export | Export all opacities. |
| B | Only if the key is present | Export the opacity only if the key is present. |
| C | No export | Opacity is not exported. |
| *6 Export target (20) | ||
| A | Export | Export all lip-sync settings. |
| B | Only if the key is present | Export lip-sync settings only if the key is present. |
| C | No export | Lip-sync settings are not exported. |
| *6 Export target (21) | ||
| A | Export | Export all eye blinking settings. |
| B | Only if the key is present | Export the eye blinking setting only if the key is present. |
| C | No export |
The eye blinking settings are not exported. |
TIPS
The exported motion file contains the following information.
• Curve information for [Live2D parameters]
• Opacity of [Live2D parts visibility]
• Opacity of [Placement & Opacity]
• [Lip-sync]
• [Eye blinking]
Precautions
If “@” is included in the parameter ID, motion export will not be executed.
Before exporting, remove the “@” from the parameter ID or change it to another character.
Motion Export Settings
Motion can be selected and exported as desired from the motion export settings.
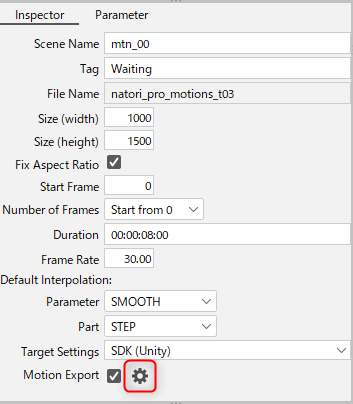
With the [Motion export] checkbox of the inspector palette selected, click the Gear button to display the Settings window.
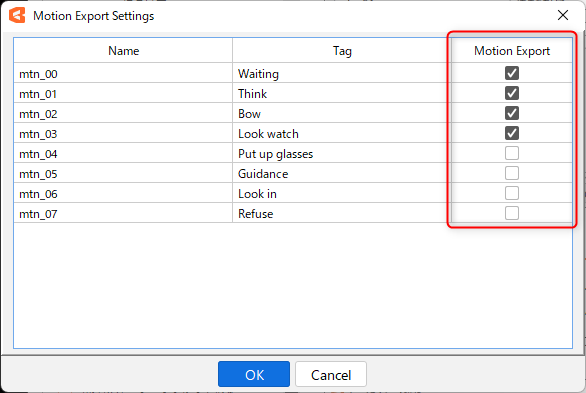
The [Motion Export Settings] dialog box appears.
You can freely select the motion you want to export using the checkboxes.
After making your selection, click [OK].
Output scenes with motion export enabled
Open the [Motion Data Settings] dialog box by following the steps below.
Click [File] menu -> [Export Embedded File] -> [Export motion file].
Select [Output scenes with motion export enabled] in the Export Scene Settings and click [OK].
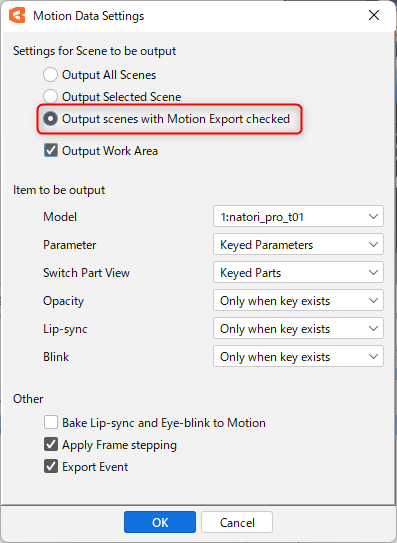
The motion selected in the [Motion Export Settings] dialog box was exported to the specified destination.
Loading Files for Embedding
Motion files exported for embedding can be imported back into animation.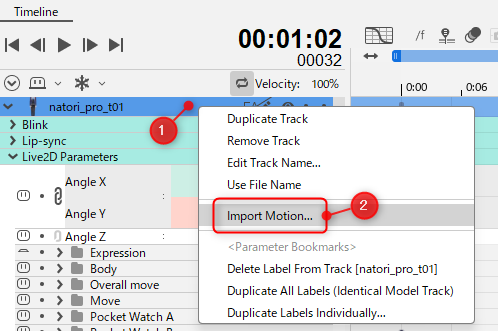
How to import:
- Select a scene
- Right-click on the part of the track name (1) of the model for which you want to import motion
- Click [Import Motion] (2).
- Select the target motion3.json file
Note: It may take some time when loading motion.