Edit Texture Atlas
Updated: 12/17/2024
A texture atlas is an image of the parts that make up a character, etc., arranged on a plane.
In [Edit Texture Atlas], you can add or delete textures, resize individual parts, etc.
Basic Operation of the Texture Atlas
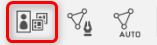
Click the [Edit Texture Atlas] button on the toolbar.
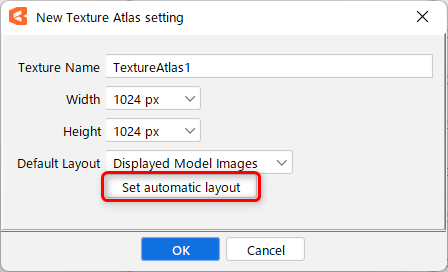
The [New Texture Atlas Settings] dialog box appears.
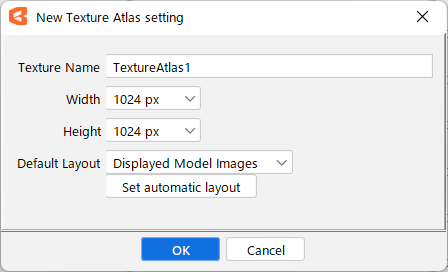
The [New Texture Atlas Settings] dialog box allows you to configure the following settings.
| Name | Details |
|---|---|
| Texture Name | You can enter any name you want. |
| Width | You can choose the width of the texture size. |
| Height | You can choose the height of the texture size. |
| Default Layout | Image for model in display state: Only ArtMesh that are visible in the [Part(s)] palette will be placed in the Atlas. Images for all models: Place all ArtMeshes on the [Part(s)] palette into the Atlas, regardless of their visibility. No placement: No ArtMesh is placed, creating an empty texture atlas. |
| Set automatic layout | ArtMesh placement is automatically done according to texture size. This button opens a dialog box for settings at the time of placement. Details are explained in the “Auto Layout” section of this page. |
Enter each item and click [OK]. The [Edit Texture Atlas] dialog box opens.
The width and height of each texture size can be changed, but depending on the SDK platform and environment at the time of embedding, there may be cases where only squares are supported, so please consult with the developer before setting up the texture size.
Edit Texture Atlas Dialog Box
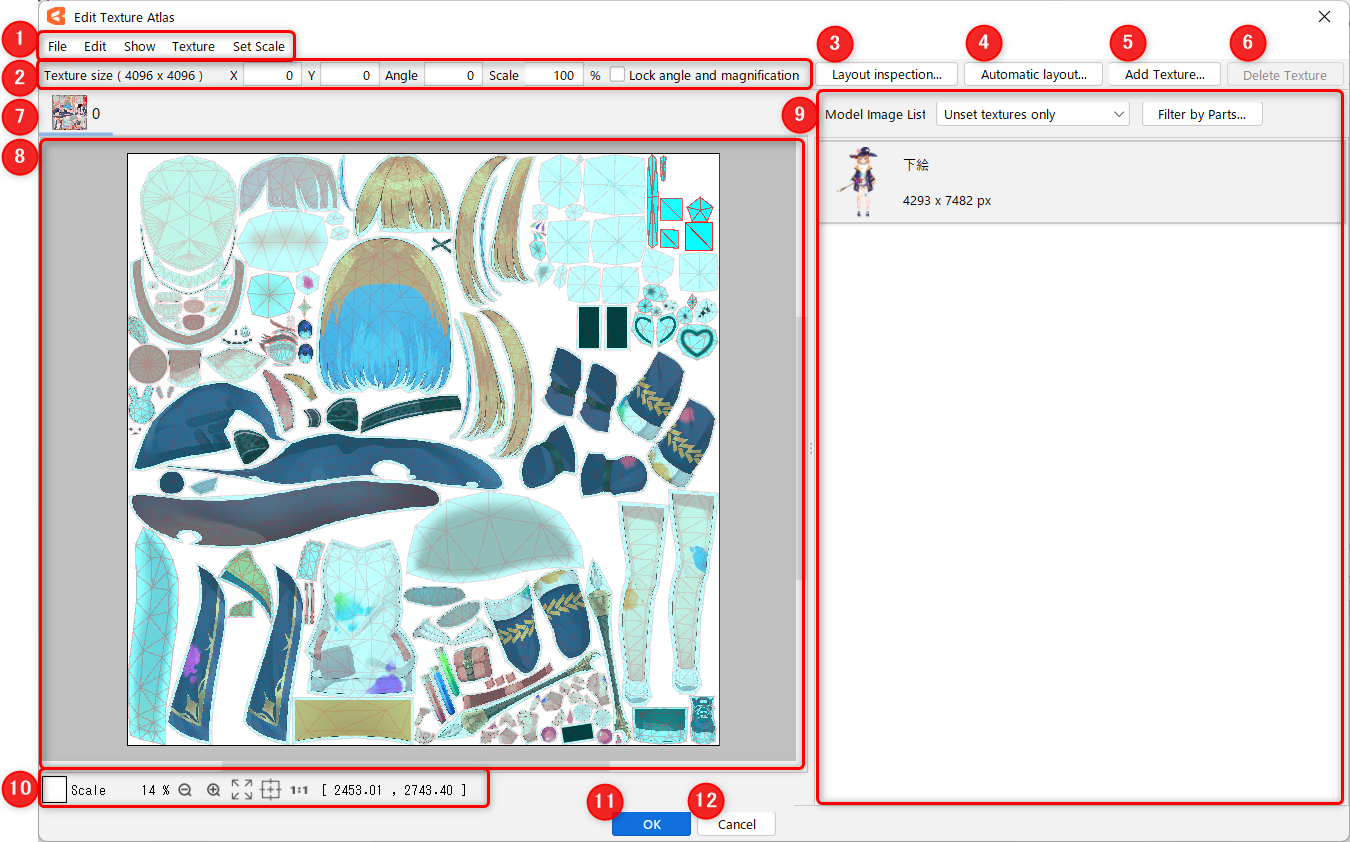
The following is a detailed description of each feature of the [Edit Texture Atlas] dialog box.
| Number | Name | Details |
|---|---|---|
| (1) | Menu | Various menus are displayed. File, Edit, Show, Texture, and Scale settings Details are explained in the “Menu Bar Details” section of this page. |
| (2) | Texture details | You can display texture size and change the position, angle, and magnification of the currently selected object. If the [Lock Angle and Magnification] checkbox is checked, the angle and magnification cannot be edited. |
| (3) | Verify placement | Specify the angle and scale and select the placed ArtMesh. You can also select an ArtMesh that overlaps or extends beyond the frame. |
| (4) | Auto Layout | Automatically changes the placement and magnification of each object. |
| (5) | Add Texture | Add texture. |
| (6) | Delete Texture | Delete texture. |
| (7) | Texture List | List of textures currently being created. Selecting a tab toggles the texture to be edited. Texture renaming: Right-click on the tab in the red frame => Rename texture (This only changes the display name of the texture in the Edit Texture Atlas dialog box, not the texture name in the exported embedded file.) 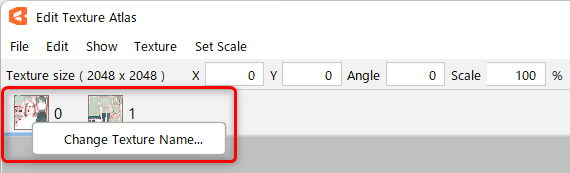 Texture name pop-ups: Hover over the tabs in the red frame area to see the texture name. 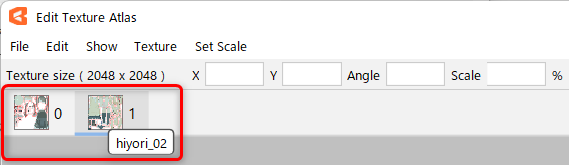 Movement of tabs for textures: The order of textures can be rearranged by dragging and dropping tabs. |
| (8) | Texture | Textures are displayed. You can also select an ArtMesh directly from here and adjust it manually. Details are explained in the “Manual Layout” section of this page. |
| (9) | Model Guide Image List | Use the pull-down menu to switch between the display of textures that are or are not placed in the texture atlas. All: Displays all textures. Placed only: Only textures placed in the texture atlas are displayed. Unplaced only: Only textures not placed in the texture atlas will be displayed. Only visible and unplaced: Only textures that are not placed in the texture atlas are displayed in the display state. Placed and selected only: Only textures that have already been placed in the model and selected in the texture atlas will be displayed. You can also narrow down the textures to be displayed with [Refine search by part]. Details are explained in the “Model Guide Image List Details” section of this page. |
| (10) | Display options | The following settings are displayed: change of background color, zoom in and out of the screen, displays all textures, displays with respect to center, displays in full scale, and displays the pointer’s current position. |
| (11) | OK | Generates a texture atlas. |
| (12) | Cancel | Cancel the editing result and close the dialog box. |
Tips
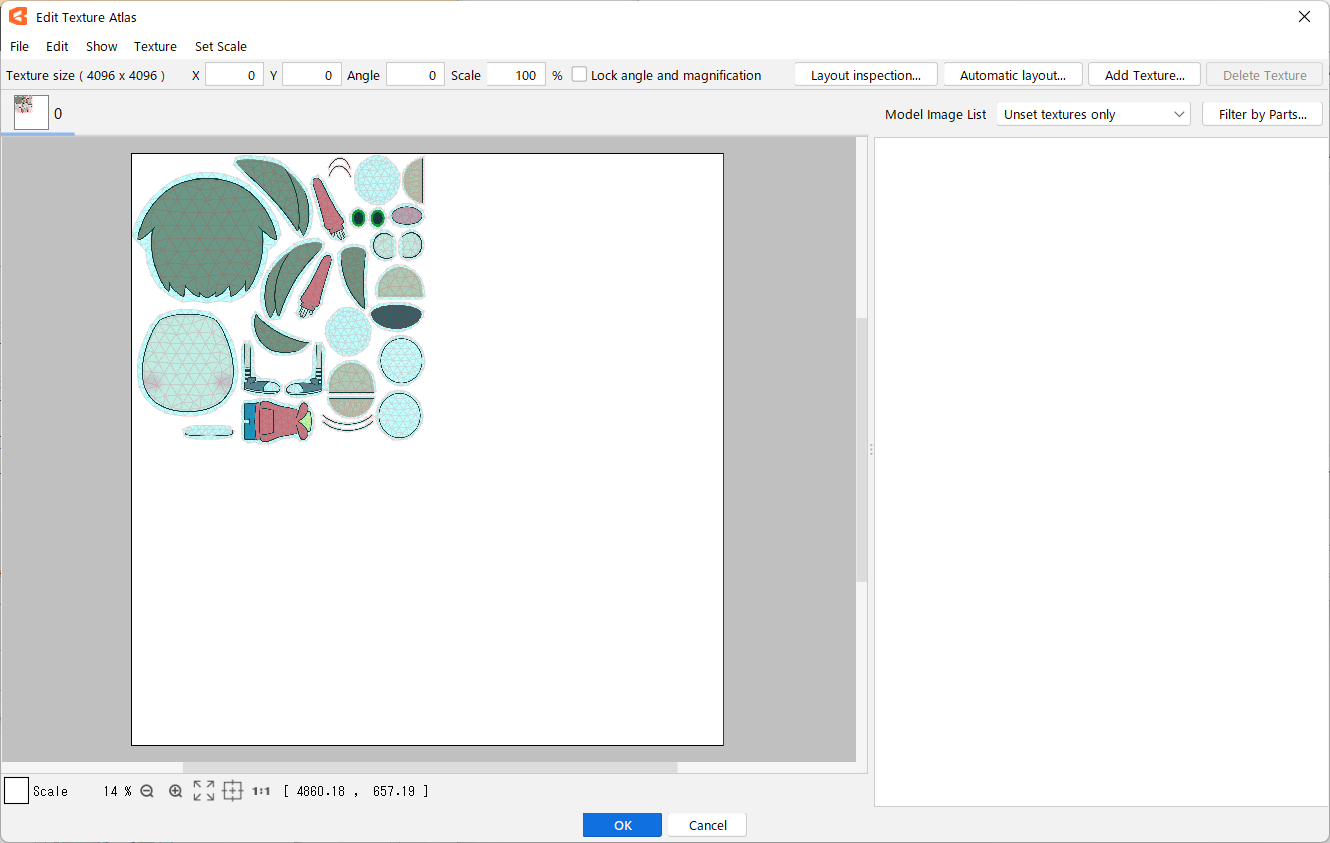
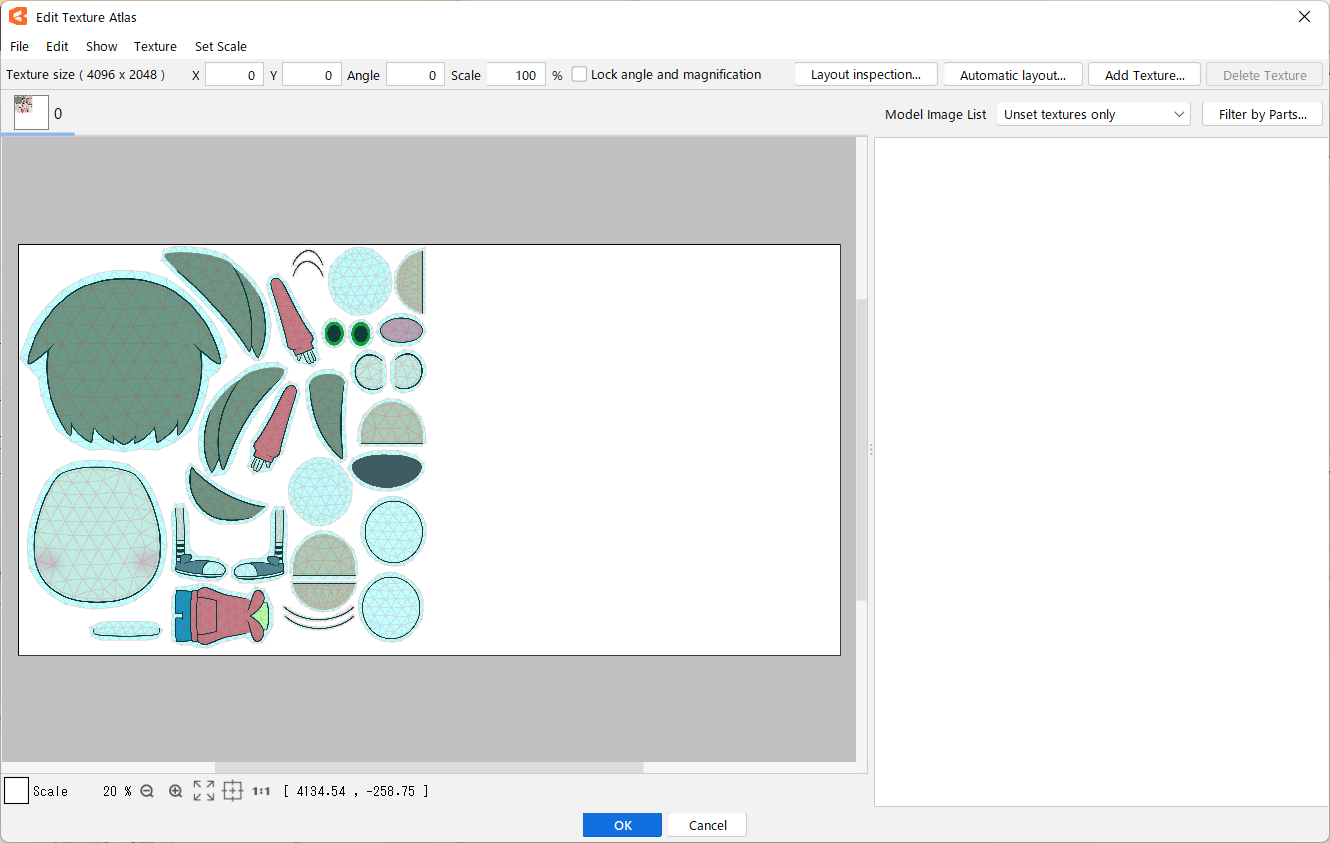
Starting with version 3.0.16, the width and height of the texture atlas size can be changed.
When resizing, you need to make sure that the SDK is supported on your platform, so it is typically recommended that the width and height be the same size.
| Texture atlas size (4096 x 4096 px) | Texture atlas size (4096 x 2048 px) |
|
|
Tips
If you open the [Edit texture atlas] dialog box with only one ArtMesh selected on the canvas, the dialog box will open with its associated texture selected.
Menu Bar Details
| Name | Description |
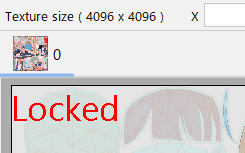
| File |
Lock texture (beta):
|
| Edit | Undo: Return to the state one step previous. Redo: Redo the action that was just undone. Select all: Select all placed textures. |
| Display |
Show original texture: |
| Texture |
Add Texture: Angle and scale lists: Refine search by part: Verify placement: TipsIf texture scaling or rotation causes degradation of texture edges, etc., make sure that the “High Quality” checkbox is checked for the texture generation method. |
| Magnification setting |
Specifies the magnification of the selected object. TipsIn Cubism 2, a texture atlas was created when the model was created, but in Cubism 3, it will be created in the final stage when it is incorporated into the SDK. |
Model Guide Image List Details
The [Model Guide Image List] allows you to view and edit images that have been placed or not placed in the Texture Atlas.
Narrowing down by part the images to be displayed in the list
Select the [Refine search by part] button to display the dialog box.
The ArtMeshes contained in the selected part are displayed in the model guide image list.
(If you have selected [Unplaced only], etc., you can further narrow down the search from there.)
When [Select Including Child Parts] is enabled, child parts are also selected when the part is selected.
How to exclude placed images
Select ArtMeshes on the texture that are not needed for export and press the [Backspace] key or the [Delete] key to exclude them.
Excluded ArtMeshes can be viewed by toggling the Model Guide Image List to [Unplaced Only] or [Visible and Unplaced Only].
How to place unplaced images
If you selected [Model Guide Image as Displayed] or [Do not place] when creating the Texture Atlas, the ArtMesh is excluded from the texture and is added to the [Unplaced Only] and [Visible and Unplaced Only] lists.
To place an unplaced ArtMesh on a texture, double-click the ArtMesh you want to place from the list.
You can also select the ArtMesh you want to place, right-click on it, and execute [Place selected elements in texture atlas].
Tips
If additional parts are loaded after the texture atlas is created, the ArtMesh will still appear in the [Unplaced Only] and [Visible and Unplaced Only] lists.
Auto Layout
The imported texture automatically sets the layout of each PSD layer so that it fits neatly within the texture area.
There are several ways to open the Auto Layout settings.
Create new texture atlas:
Click the [Perform Auto Layout] button at the bottom of the [New Texture Atlas Settings] dialog box that appears when you first create the texture atlas.
Edit an existing texture atlas:
In the [Edit texture atlas] window, select the texture you want to set and click the [Auto Layout] button.

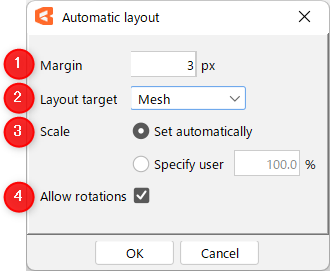
Set automatic layout
Auto Layout allows for fixed magnification, rotation, and placement of non-overlapping meshes.
The settings can be specified when creating a new texture atlas as well as when auto-laying out an existing texture atlas.
| Number | Name | Description |
|---|---|---|
| (1) | Margin | The spacing at which objects are placed Possible setting range is 0 to 50 px |
| (2) | Allocation criteria | Select parts so that they do not overlap when placed Mesh: Arrange meshes so that they do not overlap. Model Guide Image: Arrange model guide images so that they do not overlap. |
| (3) | Scale | Magnification of object (*1) Set automatically: Automatically set the magnification so that all objects can be placed. User designation: Place objects at the specified magnification (objects that cannot be placed are not placed). The range that can be set is 1 to 100%. |
| (4) | Allow rotation | Allow objects to rotate and position themselves to fit in the space |
*1 Objects that do not fit into the target texture atlas will be returned to the model guide image list when the magnification is fixed and auto-layout is performed.
Point
[Auto Layout] lays out the ArtMesh at the appropriate magnification for the size of the texture.
Therefore, if the texture size is small, the magnification may not be 100% for all ArtMeshes.
In such a case, select [Texture] menu -> [Resize texture], set a larger texture size, and execute auto layout again.
Alternately, select [Texture] menu -> [Add texture] to add a texture, move any ArtMesh that did not fit in the first texture to a new texture, and then execute auto layout again.
See the “Moving the ArtMesh to another texture” in the “Manual Layout” section below for instructions on how to move the ArtMesh to a new texture.
Manual Layout
The following manual adjustments can be made to an ArtMesh placed in the atlas.
Moving the ArtMesh
After placement in the texture atlas, if ArtMeshes overlap each other or extend beyond the texture, move the ArtMesh manually.
Layout is performed in the available space so that there is no overlap with the surrounding ArtMeshes.
If ArtMeshes overlap or extend beyond each other, they will look wrong on the model, as shown in the figure below.
| Texture atlas placement | Appearance on the model |
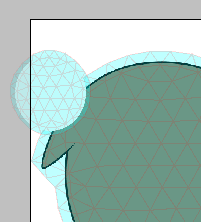 | 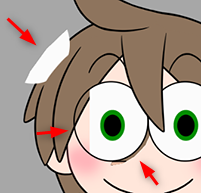 |
In such cases, the following steps can be taken to fix the problem.
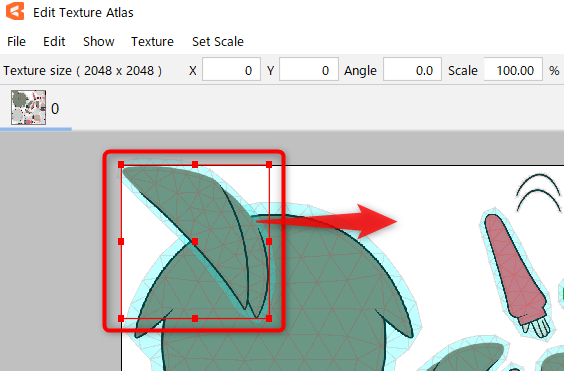
Click to select the part to be moved, then drag and drop it to a position where the ArtMeshes do not overlap each other and do not protrude from the texture.
When you select an ArtMesh, a bounding box appears, allowing you to scale, rotate, and move it.
Point
Unlike normal editing, zooming in and out maintains the aspect ratio without pressing the [Shift] key, but the [Scale] changes.
Therefore, please be careful when scaling up or down, as this may affect the appearance of the image when exported.
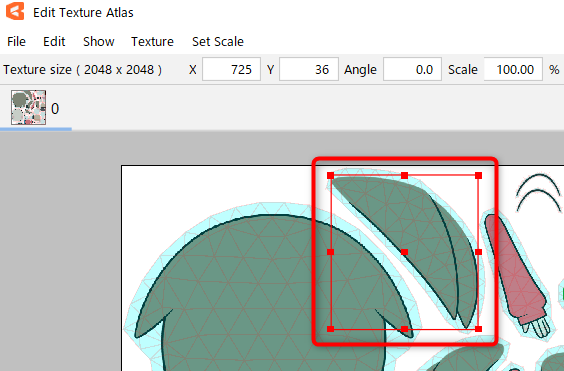
Moving the ArtMesh to another texture
To move an ArtMesh between multiple textures, first select the ArtMesh to be moved.
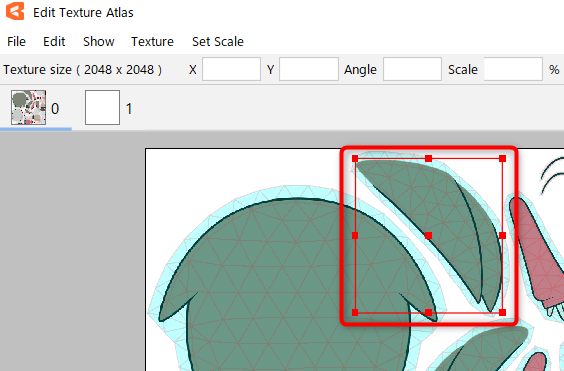
Next, select the destination texture. After moving to the desired texture, deselect it.

Tips
The ArtMesh can also be moved by removing it from the texture, selecting the destination texture, and placing the ArtMesh on it.
Changing the magnification
Select the ArtMesh for which you want to set the magnification and enter the [Scale].

Magnification can be set for each ArtMesh, and [Scale] can also be set with multiple ArtMeshes selected.
| Scale 10% | Scale 100% | Model guide image display (toggle using [T] key) |
 |  |  |
Tips
If the scale is less than 100%, the resolution of the exported model will be reduced. However, the size and number of textures can be reduced by deliberately reducing the magnification in areas that are not visible.
To see the state of the model exported from the texture atlas, press the [T] key in the Canvas View to switch to the [Texture Atlas View].
Point
If you are editing a mesh after creating a texture atlas, it may overlap the surrounding ArtMeshes or extend beyond the texture atlas.
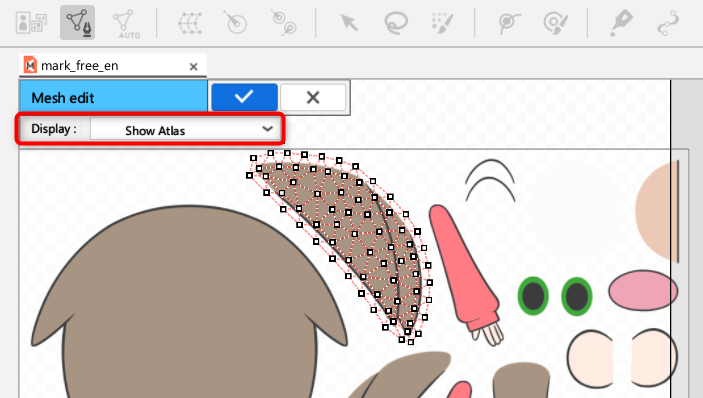
When editing the mesh after arranging the texture atlas, change the [Mesh Edit mode] display to [Atlas View] so that you can adjust the mesh while checking if it overlaps with other ArtMeshes or extends beyond the texture atlas.
Add and Resize Texture Atlas
If the area of the texture is not enough, use [Add Texture] or [Resize Texture].
Add texture
To add a texture, click on the [Texture] menu, then [Add Texture].
When the [New Texture Atlas Settings] dialog box opens, enter the [Texture Name], [Width], and [Height], then click [OK].
Resize texture
To resize the texture, click on the [Texture] menu, then [Resize Texture].
Enter the [Width] and [Height] and click [OK].
Delete Texture
If the texture is no longer needed, use the [Delete Texture] function.
At this time, [Delete Texture] cannot be performed on the texture where the ArtMesh is placed.
First, display the texture you want to delete, select all ArtMeshes using the [Ctrl] + [A] keys, and then use the [Backspace] or [Delete] keys to exclude them.
Next, click on the [Texture] menu, then [Delete Texture].
Point
If there is only one texture atlas, [Delete Texture] cannot be executed.
If you want to delete (initialize) the entire atlas, initialize the data for the atlas as described below.
Initialize Data for Atlas
Reset the texture atlas.
Click on the [Texture] menu, then [Initialize Data for Atlas].
Point
Please note that this operation cannot be undone or canceled.
When the [New Texture Atlas Settings] dialog box opens, enter the [Texture Name], [Width], and [Height], then click [OK].
If you do not need to recreate the atlas, click [Cancel].
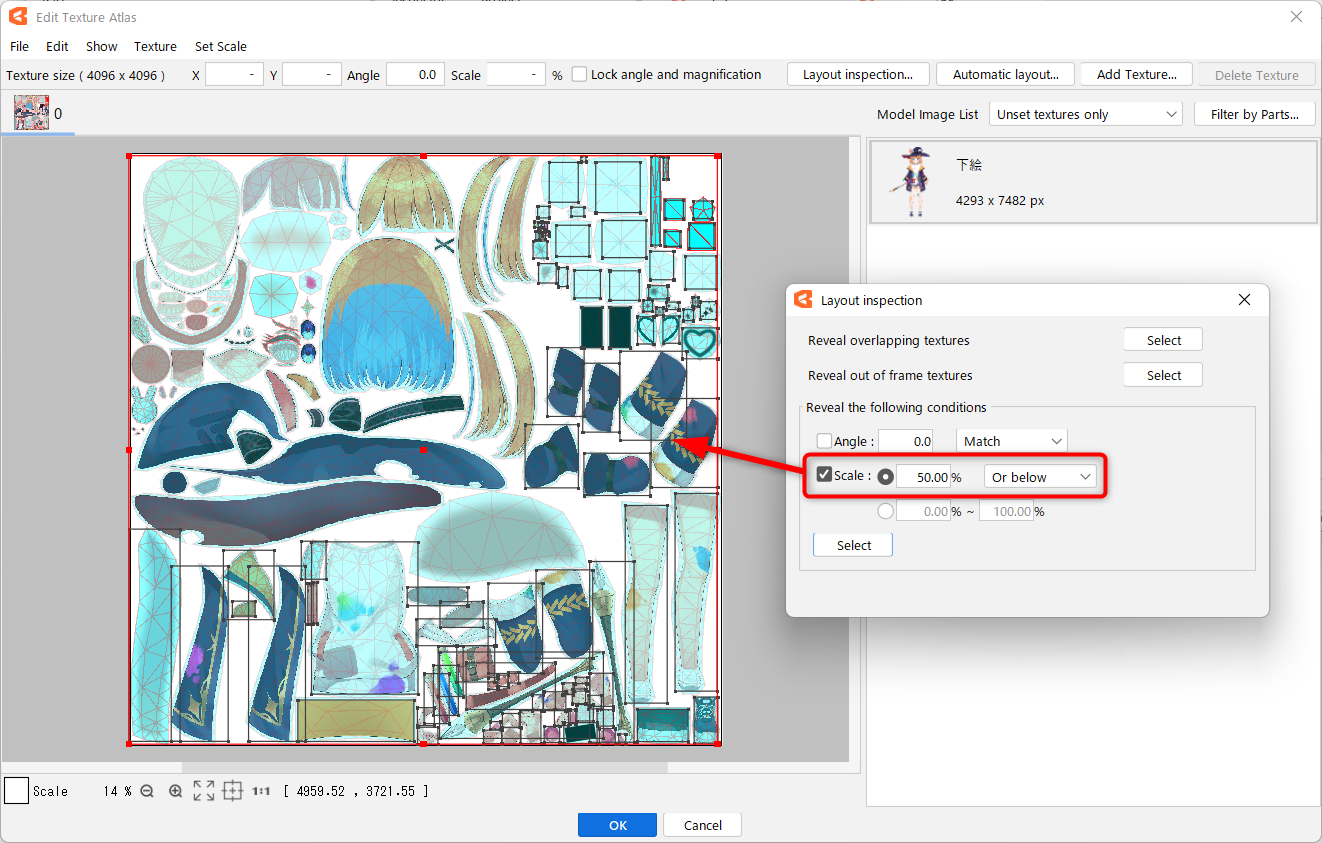
Verify placement
Verifies the ArtMesh placed on the currently selected texture.
Select the texture to be verified and click the [Verify Placement] button or the [Texture] menu -> [Verify Placement] to open the dialog box.

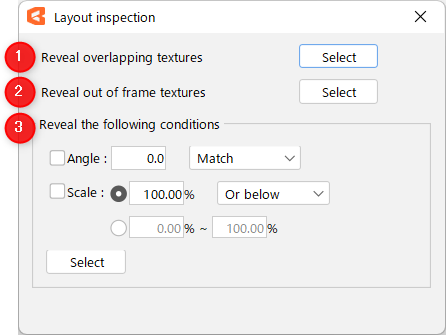
| Number | Item | Details |
|---|---|---|
| 1 | Detection of overlap | Detects overlapping ArtMeshes. Even a small overlap in the mesh area is subject to detection. |
| 2 | Detection of overhang from the frame | Detects ArtMeshes that extend beyond the frame. Even a slightly protruding mesh area is subject to detection. |
| 3 | Detection under specified conditions | Select the checkbox to detect ArtMeshes under the specified conditions. Angle: Enter an angle and specify the condition in the combo box. Scale: Select the detection method and specify the conditions. |
Click [Select] according to what you want to verify. The detected ArtMesh will be selected.
Point
Model guide images without ArtMeshes cannot be detected.
Before performing verification, make sure that ArtMeshes have been created for all model guide images.