Guide image parts
Updated: 05/19/2022
Guide image parts can be filled with a guide image. See the “Placement of Guide Image” page for details on how to place a guide image.
In addition, when a snapshot is saved, it is saved in the guide image part.
See the “Snapshot Function” page for detailed information on how to use the [Snapshot Function].
About Guide Image Parts
Features of guide image parts
If you have set that guide images are not exported when exporting, such as when performing [Export as MOC3 file], the objects contained in the guide image parts will not be exported.
Creation of guide image parts
First, select the parts you want to make a guide image of.
Next, check the Guide Image checkbox in the inspector palette.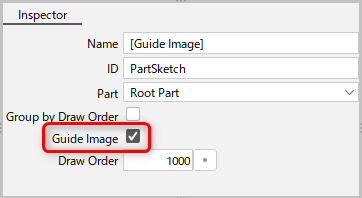
TIPS
PNG images can also be loaded as a guide image by dragging and dropping.
See the “Placement of Guide Image” page for details.
When a guide image or snapshot is placed, it is arranged as shown in the figure below.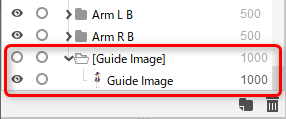
TIPS
When there are multiple guide image parts or no guide image parts, guide images and snapshots are placed according to the following conditions.
- If a guide image exists, it will be placed in the guide image part.
- If there are no guide image parts, they are placed in the root hierarchy.
- If there are multiple guide image parts, the parts are placed in the upper guide image parts in the order of the parts.
- If the guide image parts are hierarchical, they will be placed in the upper hierarchical part.