Model loading and placement
Updated: 10/16/2025
To create an animation, a model must be placed in the scene.
This section describes:
- Animation file creation procedure
- Scene creation procedure
- Model placement procedure
- Reloading and replacing models
See the tutorial video “Creating Animations” for basic instructions on how to use the [Animation Workspace].
Create a new animation file
First, let’s create an animation file.
- Launch Cubism Editor.
- Click on the [File] menu -> [New] -> [Animation].
An animation file containing one new scene has been created.
Tips
Animation files can also be created by switching to the [Animation Workspace] and dragging and dropping models onto the [Timeline] palette or view area.
Create new scene
When an animation file is created, a scene called “Scene1” is automatically created.
Settings such as scene name, size, length, and frame rate can be set and edited in the [Inspector] palette.
For more information, see the “Scene Management and Settings” page.
Adding scenes
To add a new scene, click the [Create new scene] button in the [Scene] palette.

You can enter a [Scene name] and [Tag] at the time of creation, and you can edit them later in the [Inspector] palette in the same way as above.
Load model files
Drag and drop the CMO3 (model) onto the [Timeline] palette to place the model on the view.

Reload model files
If changes are made to the model during animation creation, follow the steps below to [Reload material] to reflect the changes.
- Overwrite and save the model with changes made in the [Modeling Workspace].
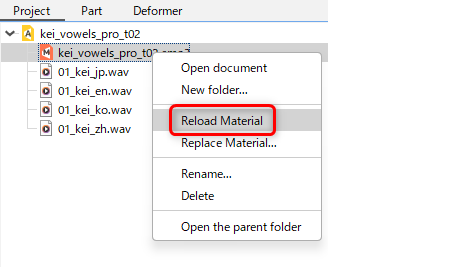
- Switch to the [Animation Workspace] and click to expand the animation data in the [Project] palette.
- Right-click on the placed model name and execute [Reload material] to reflect the changes.
Note that if the model is changed first and the animation data is opened later, there is no need to reload the model.
Replace model files
If you want to replace a model with a model saved under a different name or a different model, click [Replace material].
Tips
If the parameter IDs or ranges are different for the models before and after replacement, the movement may be incorrect.
Note that even if the same parameters are used, the pose, facial expression, and display state of the parts may change depending on the state of the parameters.
To replace the model in all scenes
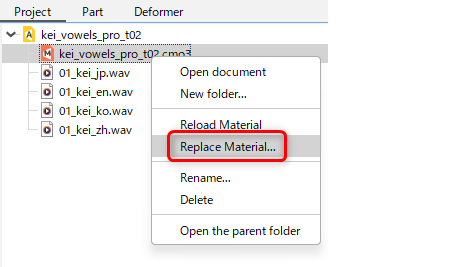
- In the [Animation Workspace], click to expand the animation data in the [Project] palette.
- Right-click on the name of the model you wish to change and click on [Replace material] to open the Explorer.
- Select the replacement model and click [Open] to apply the replacement.
To change the material only for a specific scene
- Select the [Scene name] for which you want to replace the model, and then select the model on the view or select the model track from the timeline palette.
- Click [Animation] menu -> [Material] -> [Replace materials of selected tracks] to open the Explorer.
- Select the replacement model and click [Open] to apply the replacement.
How to handle the material to maintain links to the material
If you are using materials such as model files, audio, background images, etc., and if the relative paths between the animation file and the material files are not changed, the link will not be broken when the animation file is imported the next time, even if it is moved to another drive or PC.
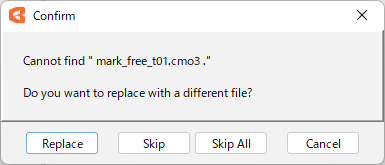
If the relative paths of the animation file and material files are changed by moving a file to a different folder, the link may be broken, and the animation file will need to be linked as follows when imported.
Notes when the link to the material is broken
Animation files may contain external links to materials such as audio or background images.
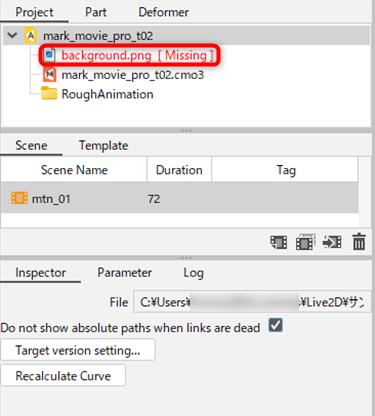
External links are managed by absolute paths, so the [Inspector] palette displays the paths in your own environment.
However, since your absolute path information is stored in the material’s link, if you pass the data to someone else and the material’s link is broken, the path will be visible to others.
If you are concerned about the display of absolute paths when links are broken, check the “Do not display absolute paths when links are broken” checkbox in the [Inspector] palette.
Once the Do not display absolute paths is checked, it will not be unchecked until the broken link is fixed.
If you want to display the absolute paths again, fix the broken links and uncheck the box.
(If you fix a broken link in your environment, it will be rewritten to the absolute path of your environment.)