Import PSDs
Updated: 02/24/2026
Before importing PSDs, make sure the data is suitable for import.
For details, please refer to “About Material Separation.”
If you have trouble importing, please refer to “Notes on PSD Creation.”
Prepare PSDs
In Cubism Editor, you can create a group (folder) hierarchy in the Parts palette, just like in Photoshop.
Eyelashes, which tend to have a large number of objects, and arms with multiple patterns can be imported as they are stored in groups.
(Layers not stored in groups can also be imported.)
The source image required as a guide image can also be included in the PSD.

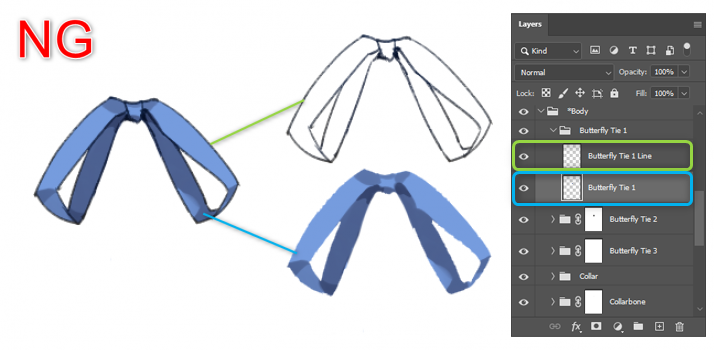
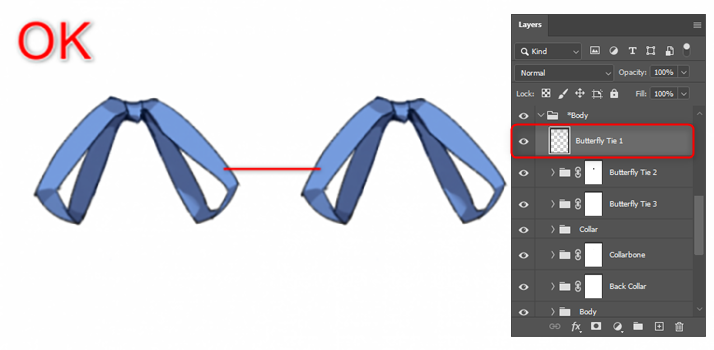
Groups can be multi-tiered, but the lowest layer in each group is ultimately imported as the “texture.”
Therefore, line drawing layers and fill layers, etc. must be combined in advance.
Import PSDs
Drag and drop the PSD into the View area of the Modeling Workspace.
You can also import a PSD by opening it from [File] menu -> [Open].

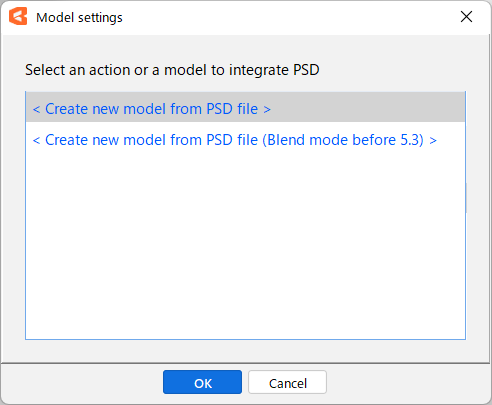
The [Model Settings] dialog box appears. Select [Create new model from PSD file].
If the target version of the model is 5.2 or earlier, select [Create new model from PSD file (Cubism 5.2 blend mode or earlier)].
See “Select target version” for more information on the target version of the model.
The PSD layer was automatically converted to an ArtMesh and placed on the canvas.
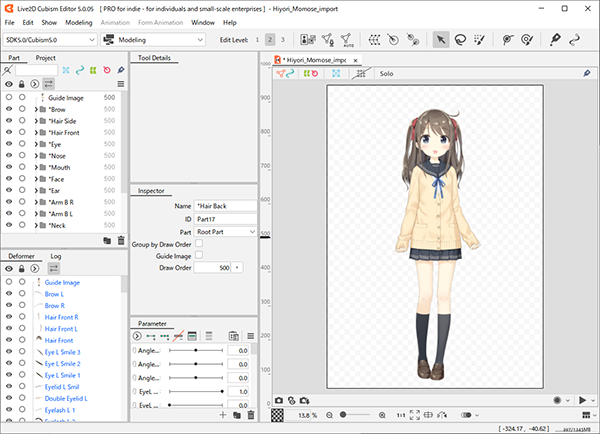
Upon placement, an ArtMesh is created with a minimal number of vertices.
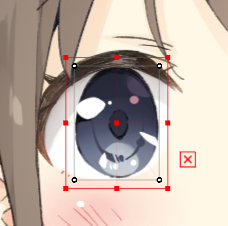
With the default settings, ArtMeshes on import are created with a 1 pixel margin relative to the layer size.
You can change the width of the margins by making the following setting before importing PSDs.
Open the [File] menu -> [Environment settings].
Under [Modeling], set the number of pixels from the [Margins inside the generated ArtMesh].
For more information on environment settings, see “Environment settings.”
Tips
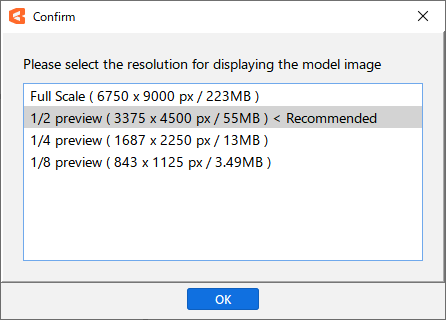
If the size of the PSD to be loaded is too large, a [Confirm] dialog box will appear.
We recommend previewing the image at half the original size, as working with the image displayed at full size may result in slow operation.
The quality of model guide images is not affected.
Even after the image has been loaded, it can be changed from the [Show] menu -> [Show Quality (Show Model Guide Image)].
Tips
- Layers (groups) that are hidden in the PSD are also imported.
- When Cubism 2.1 model data is loaded, the order of parts is forced to be reversed.
Adding or replacing PSDs
When you import a PSD with a model file open, the following [Model Settings] dialog box will appear.
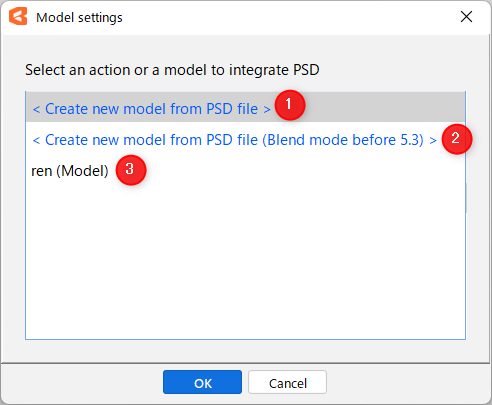
| (1) | Create a new model from the imported PSD. |
| (2) | Create a new model from an imported PSD in blend mode 5.2 or earlier. See “Blend mode” for more information on blend mode. |
| (3) | Add PSDs to or replace PSDs in the open model. |
If you select (3), the [Re-import Settings] dialog box will appear.
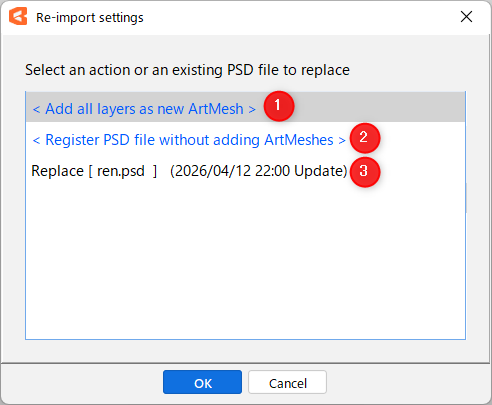
| (1) | A new ArtMesh will be added in addition to the already loaded PSD. |
| (2) | PSD files can be registered without adding an ArtMesh. The added PSDs can be viewed in the project palette. For details, please refer to “About Source Images and Model Guide Images.” |
| (3) | Replace PSDs that have already been loaded. |
See “Re-import PSDs” for detailed instructions on adding and replacing PSDs.