Multiple Keys Editing Function
Updated: 06/05/2025
Depending on model adjustments and specification changes, you may want to change the draw order or opacity tied to a parameter in large quantities.
Such operations require a considerable amount of time and effort, as it is necessary to adjust each of several different keyforms.
This function allows multiple keyforms to be edited together.
How to Use the Multiple Keys Editing Function
The following is an explanation of how to use multiple keys editing, using an example of changing the draw order of eyes.
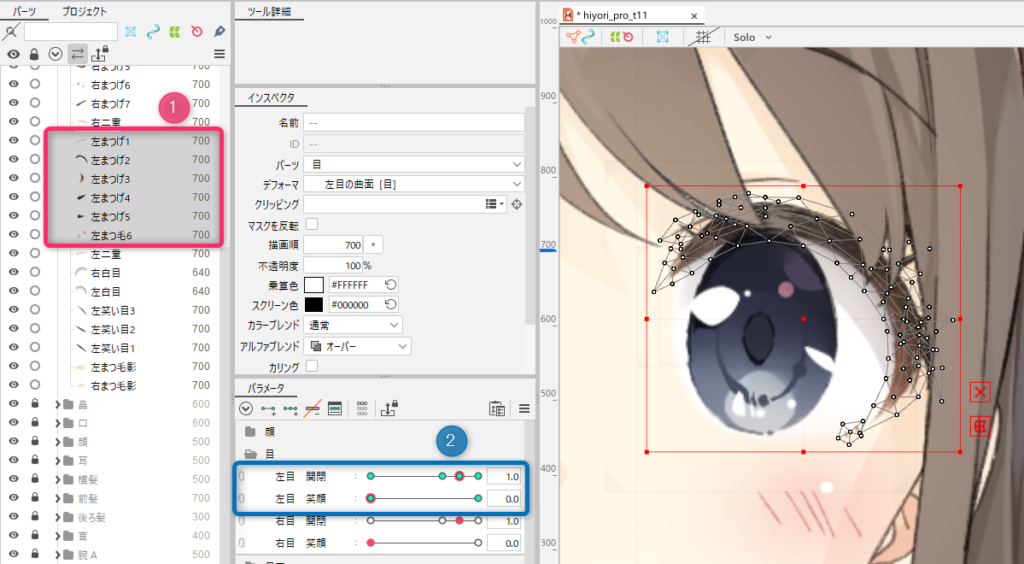
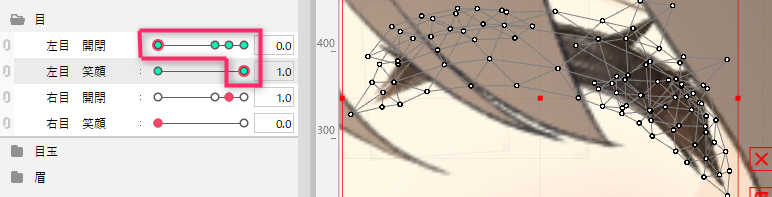
The area circled by the red frame (1) is the ArtMesh for the left eyelashes.
The ArtMesh for the left eyelashes is also tied to the “EyeL open/close” and “EyeL smile” parameters.
Since “EyeL open/close” has 4 keyforms and “EyeL smile” has 2 keyforms, there are 4 × 2 = 8 different keyforms for each of the left eyelash ArtMeshes, as shown in the blue frame (2).
If, during the normal editing procedure, you have already set the eye parameters and now want the eyelashes to come out in front of the bangs, the draw order of the ArtMesh for the left eyelashes must be edited one by one on the 8 keyforms.
Here, let’s use the multiple keys editing function to change the draw order in batches.
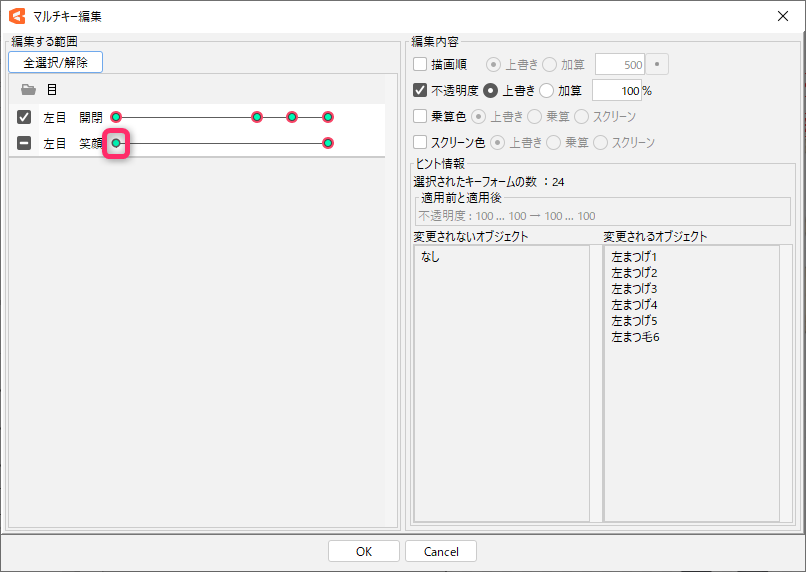
Select [Multiple Keys Editing] from the [Modeling menu] in the Modeling View.
Select/deselect the key to be edited in the “Range to be edited” on the edit screen.
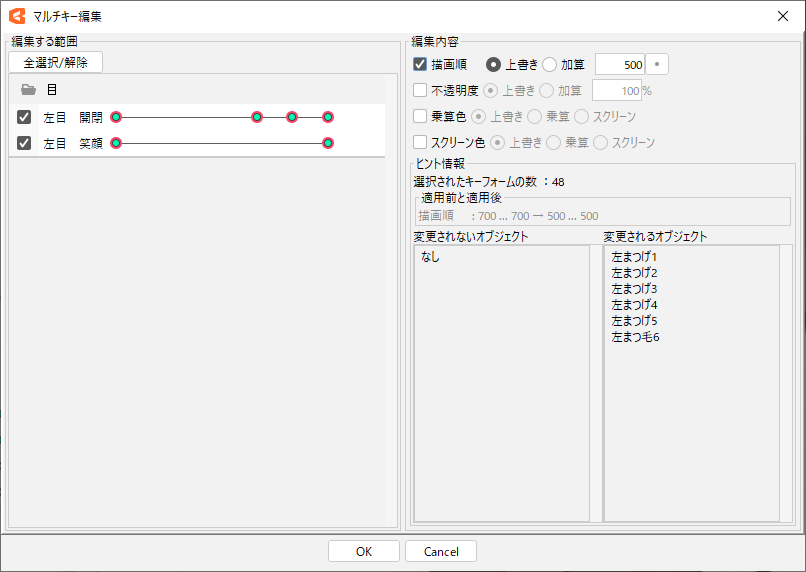
Since we will be editing all keyforms at once, make sure that all keyforms are selected.
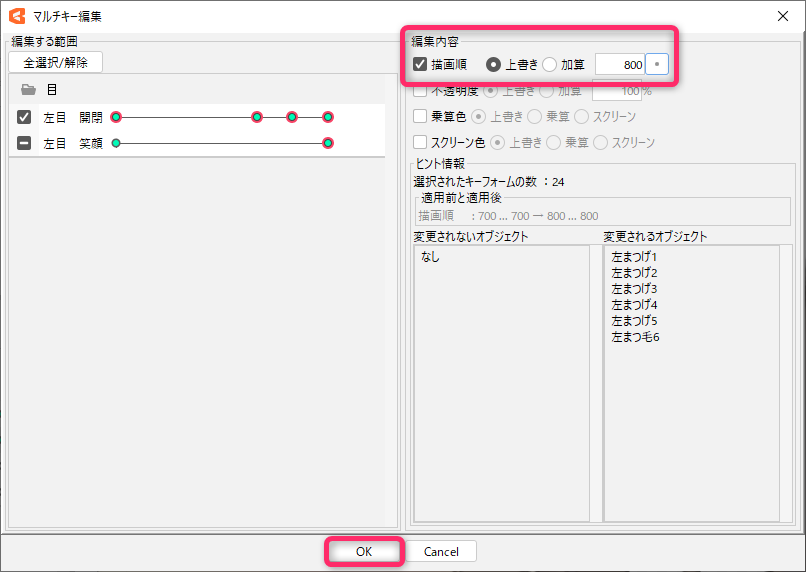
Next, make sure that the [Draw Order] checkbox and the [Overwrite] option in the [Edit contents] items are selected and change the value in the right input box to 800.
(The box on the far right allows simple setting of the draw order.)
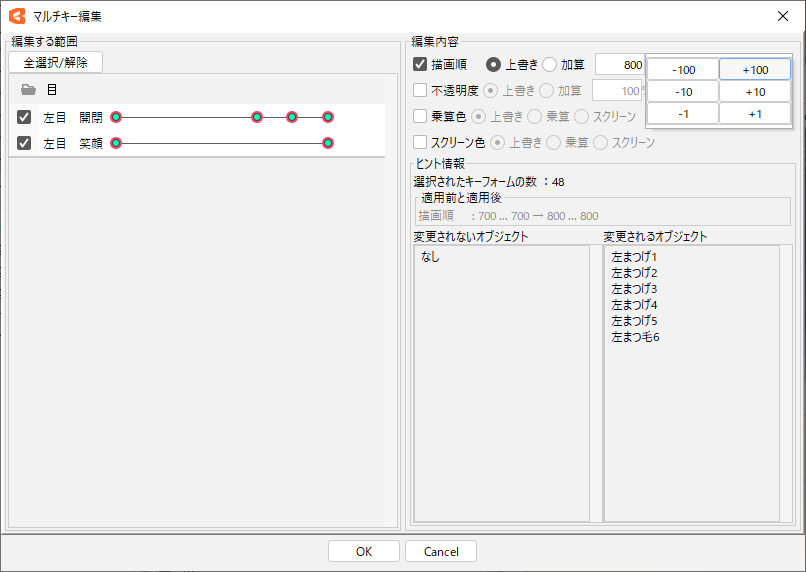
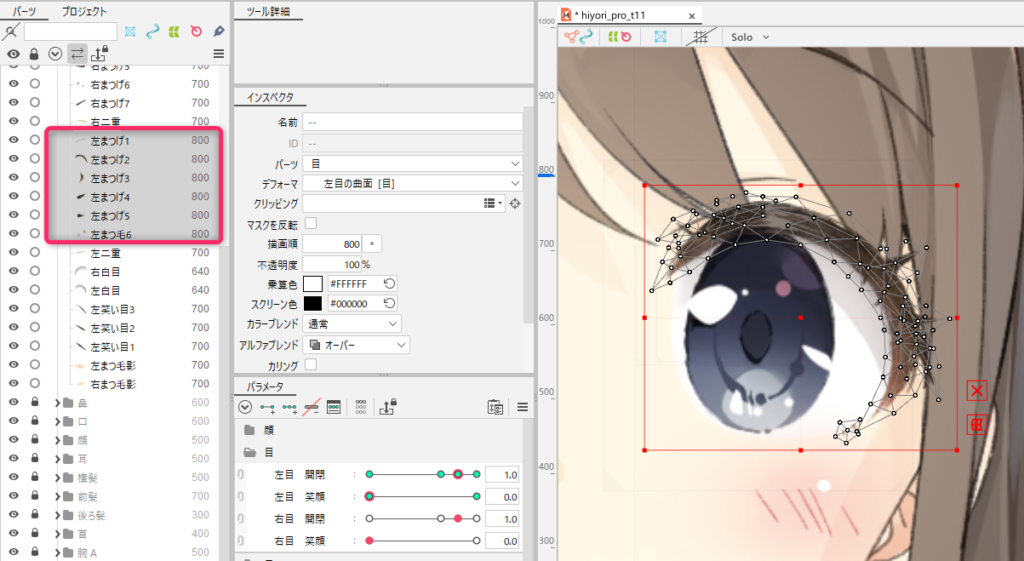
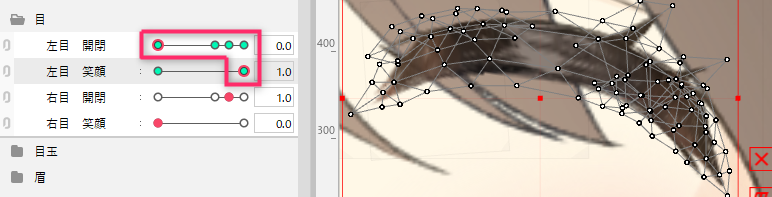
The draw order for the left eyelashes has been changed to 800 in all keyforms, and the eyelashes are now drawn in front of the bangs.
Specify a selection range
Next, we will explain how to partially set the draw order, referring to the keyframes in the red frame in the figure below.
As an example, we will use a model in which the blinking behavior can be switched between normal and smiling parameters.
Change the draw order from 500 to 800 only when “laughing eyes blinking.”
| Normal eye blinking | Laughing eye blinking |
|---|---|
 |  |
| Eye blinking for normal expression (4 keyforms) | Eye blinking for smiling expression (4 keyforms) |
Select the object(s) for eyelashes for which you wish to change the draw order.
Then select [Multiple Keys Editing] from the [Modeling menu] in the Model Workspace.
Click on the red frame area on the left screen and uncheck the box.
By doing this, the 4 keyforms of normal blinking were removed from the selection.
Then change the draw order from 500 to 800 and click “OK.”
For only the 4 keyforms of the laughing eye blinking, the draw order is changed to 800 and the eye is now displayed in front of the bangs.
| Normal eye blinking | Laughing eye blinking |
|---|---|
|  |
| Eye blinking for normal expression (4 keyforms) | Eye blinking for smiling expression (4 keyforms) |
Description of the Multiple Keys Editing Screen
The multiple keys editing function allows for batch editing of opacity, multiply color, and screen color as well as draw order.
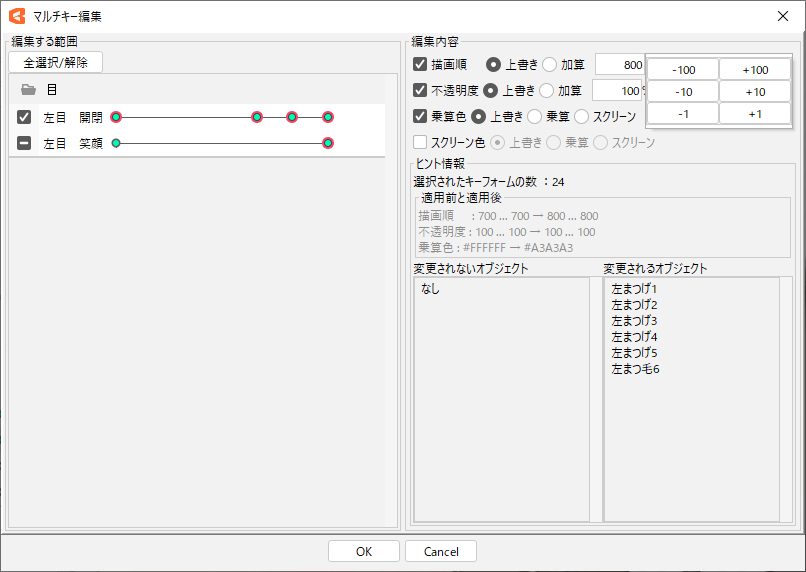
Range to be edited
Select all/unselect all:
Edits are made to all keyforms in the range to be edited.
Parameter checkbox (left side of screen):
Set selection/deselection for all keyforms of one parameter.
Keyforms of each parameter:
Select/deselect the keyform to be edited by clicking directly on the green keyform area.
Edit contents
Select the editing area:
Check the [Draw Order] checkbox if you want to edit the draw order, and check the [Opacity] checkbox if you want to edit the opacity.
If you want to edit both at once, check both.
The [Draw Order] field allows you to enter a numerical value between 0 and 1000, and the box on the right allows you to use simple setting of draw order.
[Opacity] field can be entered numerically between 0 and 100%.
[Multiply Color] and [Screen Color] can be specified directly from the color circle, entered as a color code, or selected with an eyedropper.
Select editing method:
Selecting [Overwrite] will overwrite the currently set value with the new value.
Selecting [Add] will add to the currently set value.
Selecting [Multiply] will multiply and composite colors from the current settings.
Selecting [Screen] will screen compose colors from the current settings.
Tips:
Displays the draw order, opacity, multiply color, and screen color of the selected keyform edits before and after application.
Only the lower and upper limit values are displayed.
Display the state of the object after editing:
[Unchanged Objects] displays a list of objects that are out of the range to be edited and will not be changed.
[Modified Objects] displays a list of objects that will be modified within the range to be edited.