Automatic Mesh generator
Updated: 03/03/2026
There are two types of mesh editing: “Auto Generation,” which can be generated automatically by simply specifying values related to the density of points, and “Edit manually,” in which points can be edited by clicking them one by one.
On this page you will learn how to automatically generate an ArtMesh.
For details on manual editing, see “Edit Mesh Manually.”
Automatic Mesh generator
Creation procedure
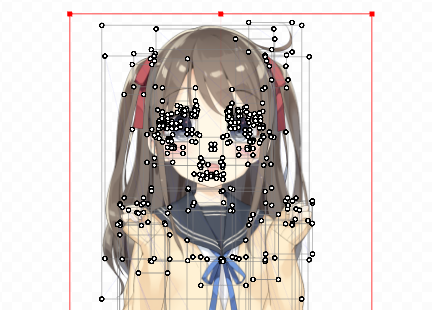
First, we will explain the simplest procedure for generating a finer mesh starting in the state immediately after PSD import.
Press [Ctrl + A] to select all ArtMeshes.
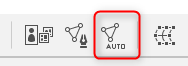
Click on [Automatic Mesh generator] on the toolbar.
The [Automatic Mesh generator] dialog box will then appear.
Note: The dialog box can also be opened with the shortcut keys [Ctrl + Shift + A].
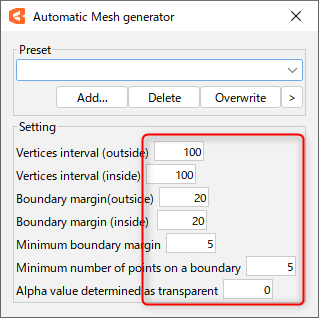
First, let’s apply the default setting values.
Click on the text box portion (anywhere) in [Setting] and press Enter.
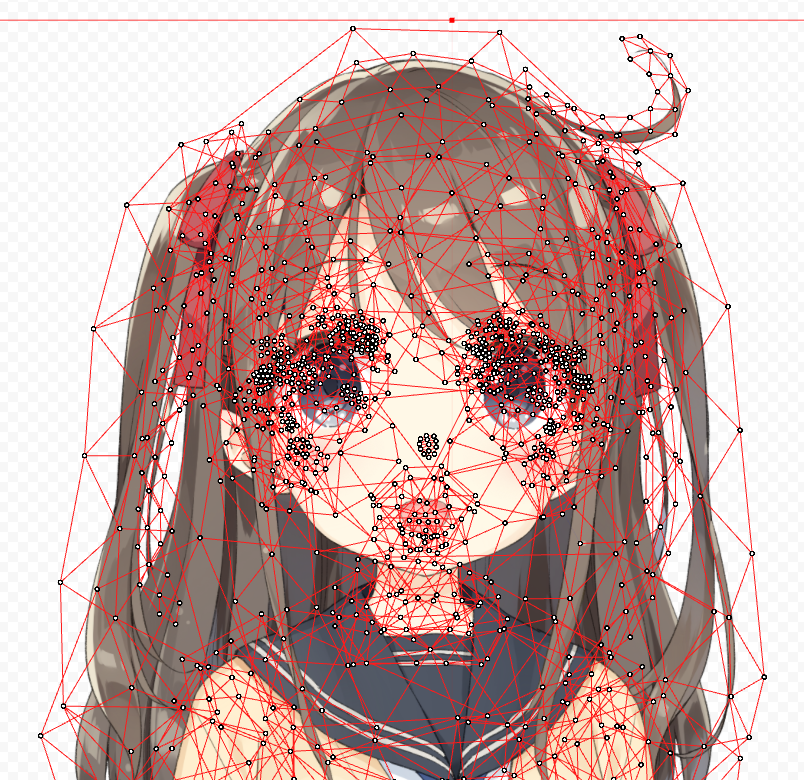
The mesh is then created with the values you have set.
Tips
The [Automatic Mesh generator] dialog box does not close automatically and remains in the foreground.
It is possible to select other ArtMeshes and change their settings, using the cursor to move the dialog box as needed.
The dialog box can also be closed with the [X] in the upper-right corner.
Automatic mesh generation can be applied to an individual ArtMesh alone.
Furthermore, the shape of the mesh can be changed after application, allowing adjustment until the desired shape is achieved.
Note: Auto generation is not recommended because the shape will change after the parameters are set.
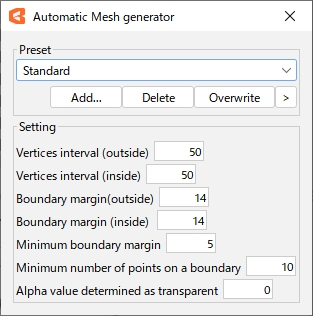
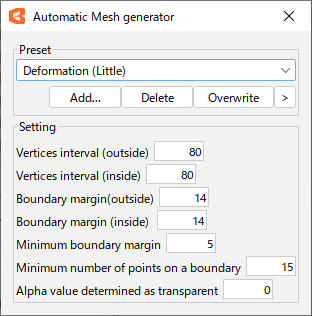
[Automatic Mesh generator] Dialog Box
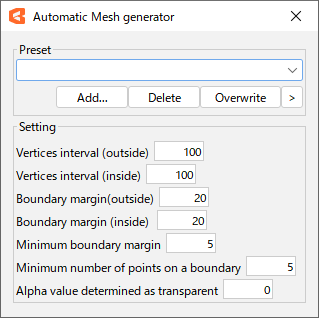
Preset:
You can save the values in [Setting] in the dialog box as a preset.
Note: Presets for the Cubism 4.2 series and earlier will not be transferred to 5.0.00 beta1 or later.
| Combo box | The name of the preset you created will be displayed. By default, the following settings are available. • Standard • Deformation (small) • Deformation (large) |
| Add | Add the current value to the preset. Click to open a dialog box to enter a name, and after entering the name, click [OK] to save the file. |
| Delete | Delete the preset selected in the combo box. |
| Overwrite | Clicking [Overwrite] after changing the value of the current preset will overwrite it with that value. |
| [>] button | Other menus will be displayed. Click [Open Settings] to open the folder where the preset data (XML format) is saved. |
Setting:
| Dot interval (outside) | Specifies the outside of the interval at which vertices are created. (Left image: Small interval value. Right image: Large interval value.)  |
| Dot interval (inside) | Specifies the inside of the interval at which vertices are created. (Left image: Small interval value. Right image: Large interval value.) 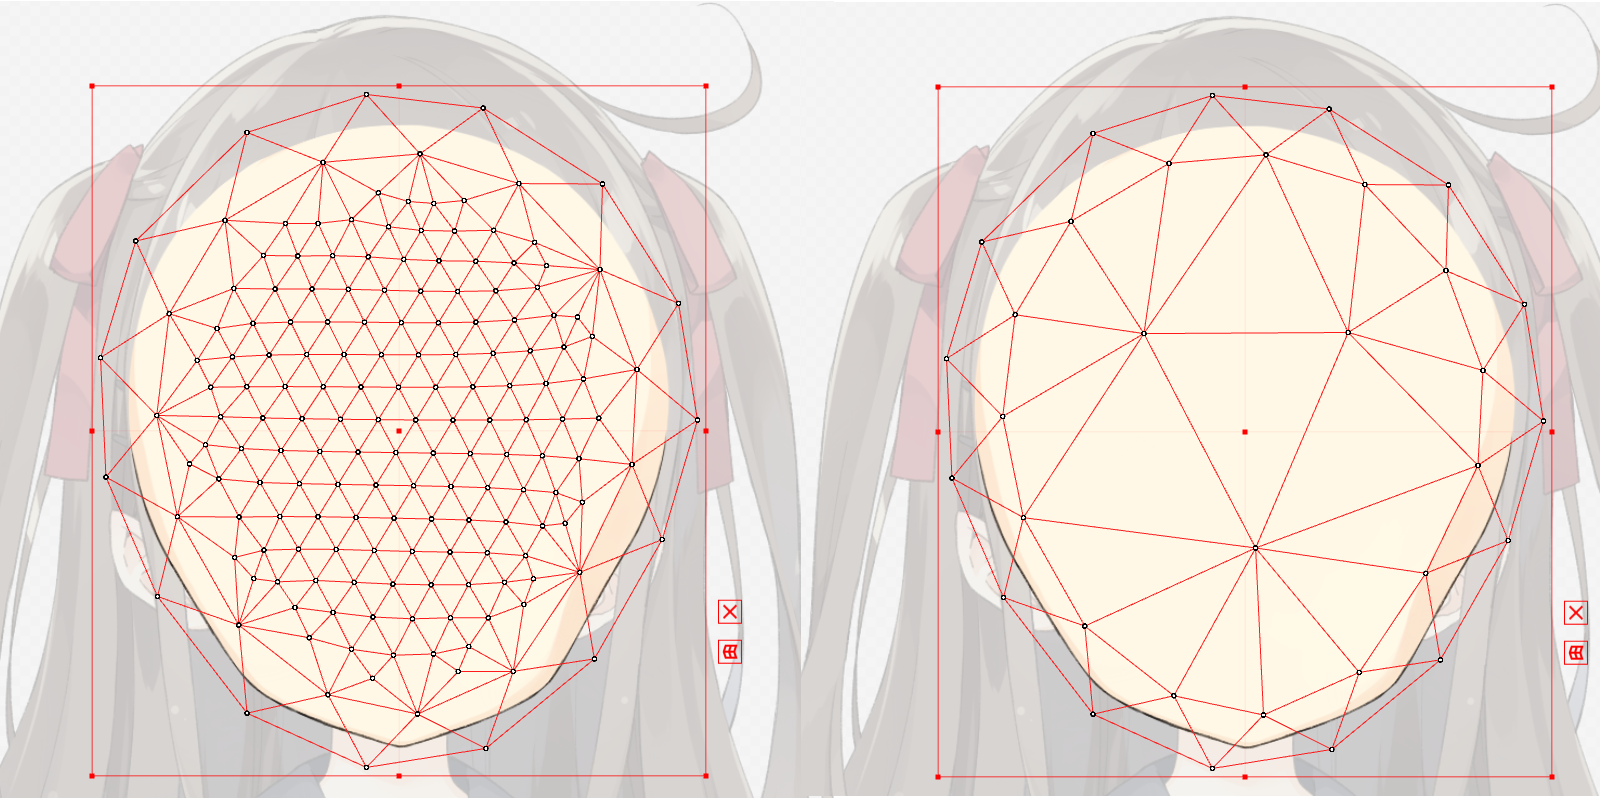 |
| Boundary margin (outside) | Specifies the average margin between the opaque pixel (the area with the picture) and the surrounding mesh.*1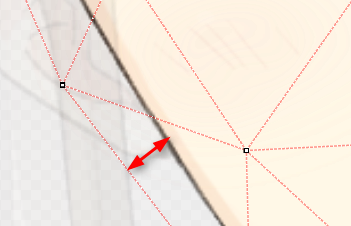 |
| Boundary margin (inside) | Specifies the average distance from the boundary of an opaque pixel (the area with the picture) to the inner mesh surrounding it.*1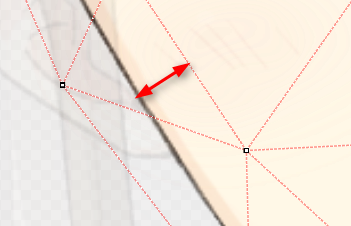 |
| Minimum margin of boundary | If the opaque pixels and the mesh are close to each other, such as at a corner, add a point so that the [Boundary margin] specified above can be maintained.*1 (The GIF compares large and small values.) 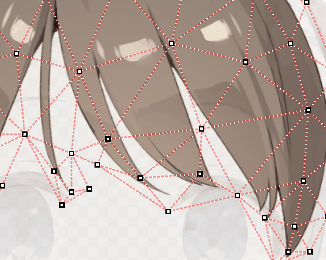 |
| Minimum number of points of boundary | Specifies the minimum number of points that enclose a single region. In the case of 3, a triangle consisting of 3 points is the shape of the least case. In the case of 4, a quadrangle consisting of 4 points is the shape of the least case. |
| Alpha value to be considered transparent | Specifies the alpha value (transparency from 0 to 255, where 0 is transparent) at which the texture is considered transparent. Increase the value if you do not want to capture near-transparent dust, etc. Usually 0 is fine. |
*1 The specified value is expressed in terms of pixels when the texture size is 1024. If the value is set to 10 and the number of pixels is 2048, the margin is actually 20.
Default setting values for automatic mesh generator
The default setting values for automatic mesh generator of the preset are shown in the figure below.
| Standard | Deformation (small) | Deformation (large) |
 |  |  |
What to do if the automatic mesh generator does not work
If the automatic mesh generator does not result in a well-formed division, such as if there are missing meshes, there may be unnecessary translucent areas left in the PSD.
(e.g., dust left over from the creation of the illustration)

The figure below shows the unnecessary translucent areas left in the PSD for easy viewing.
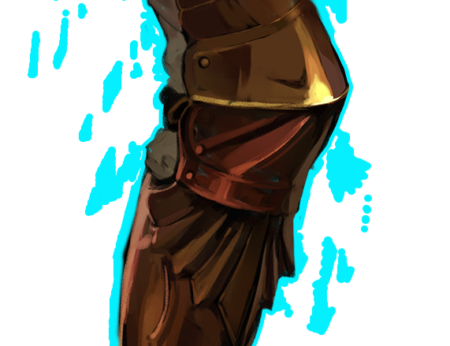
In such cases, gradually increase the “alpha value to be considered transparent” from 0 and adjust the mesh division a little at a time.
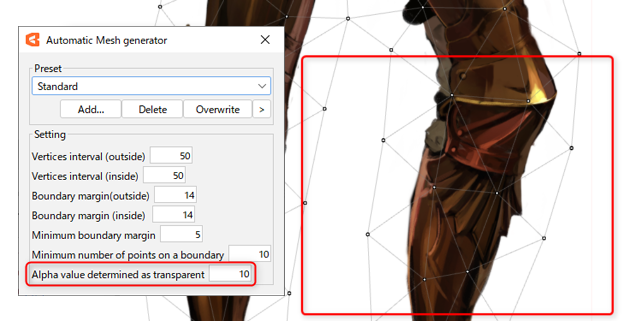
In this example, the “alpha value to be considered transparent” is set to 10.
Of the opacity from 0 to 255, the area where the opacity is up to 10 will be considered transparent.
Adjustments can be made to exclude unwanted trash areas from the calculation and create a clean mesh shape.
Precautions
What to do when the texture display disappears after automatic mesh generation
The automatic mesh generator may cause the texture display to disappear when there are meshes that are not closed.
In this case, the texture display can be restored by changing the value and automatically generating the mesh again, or by canceling the automatic generation with Undo.
Tips
Please note that if you change the keyform and then perform automatic mesh generation, the deformation may be reset to its original shape.