Easy Modeling with Template Function
Updated: 06/25/2024
Precautions
This tutorial explains the model template feature in versions prior to Cubism 5.1.
See “About model templates” in the Editor manual for the latest version.
You can download the latest Cubism Editor here.

Learn how to use the template feature for easy modeling.
Please download the data below first.

Tutorial Video
Manual: About model templates
Script for Photoshop => Download here
Note: In the tutorial video, Live2D Cubism 3 is used, but you can also use the video as a reference for Live2D Cubism 3.3 or later.
Video Review
This section describes how to use the template function and how to prepare illustrations for the template function.
Using the template function, you can easily move SD characters in Live2D.
Prepare to Draw an Illustration
First, open the data file for the template, which can be downloaded from the top of the page.
The folder contains two types of PSD files.
As an example for drawing a boy character, open “SD Template_Boy.psd.”
When opened, it will look like the following.
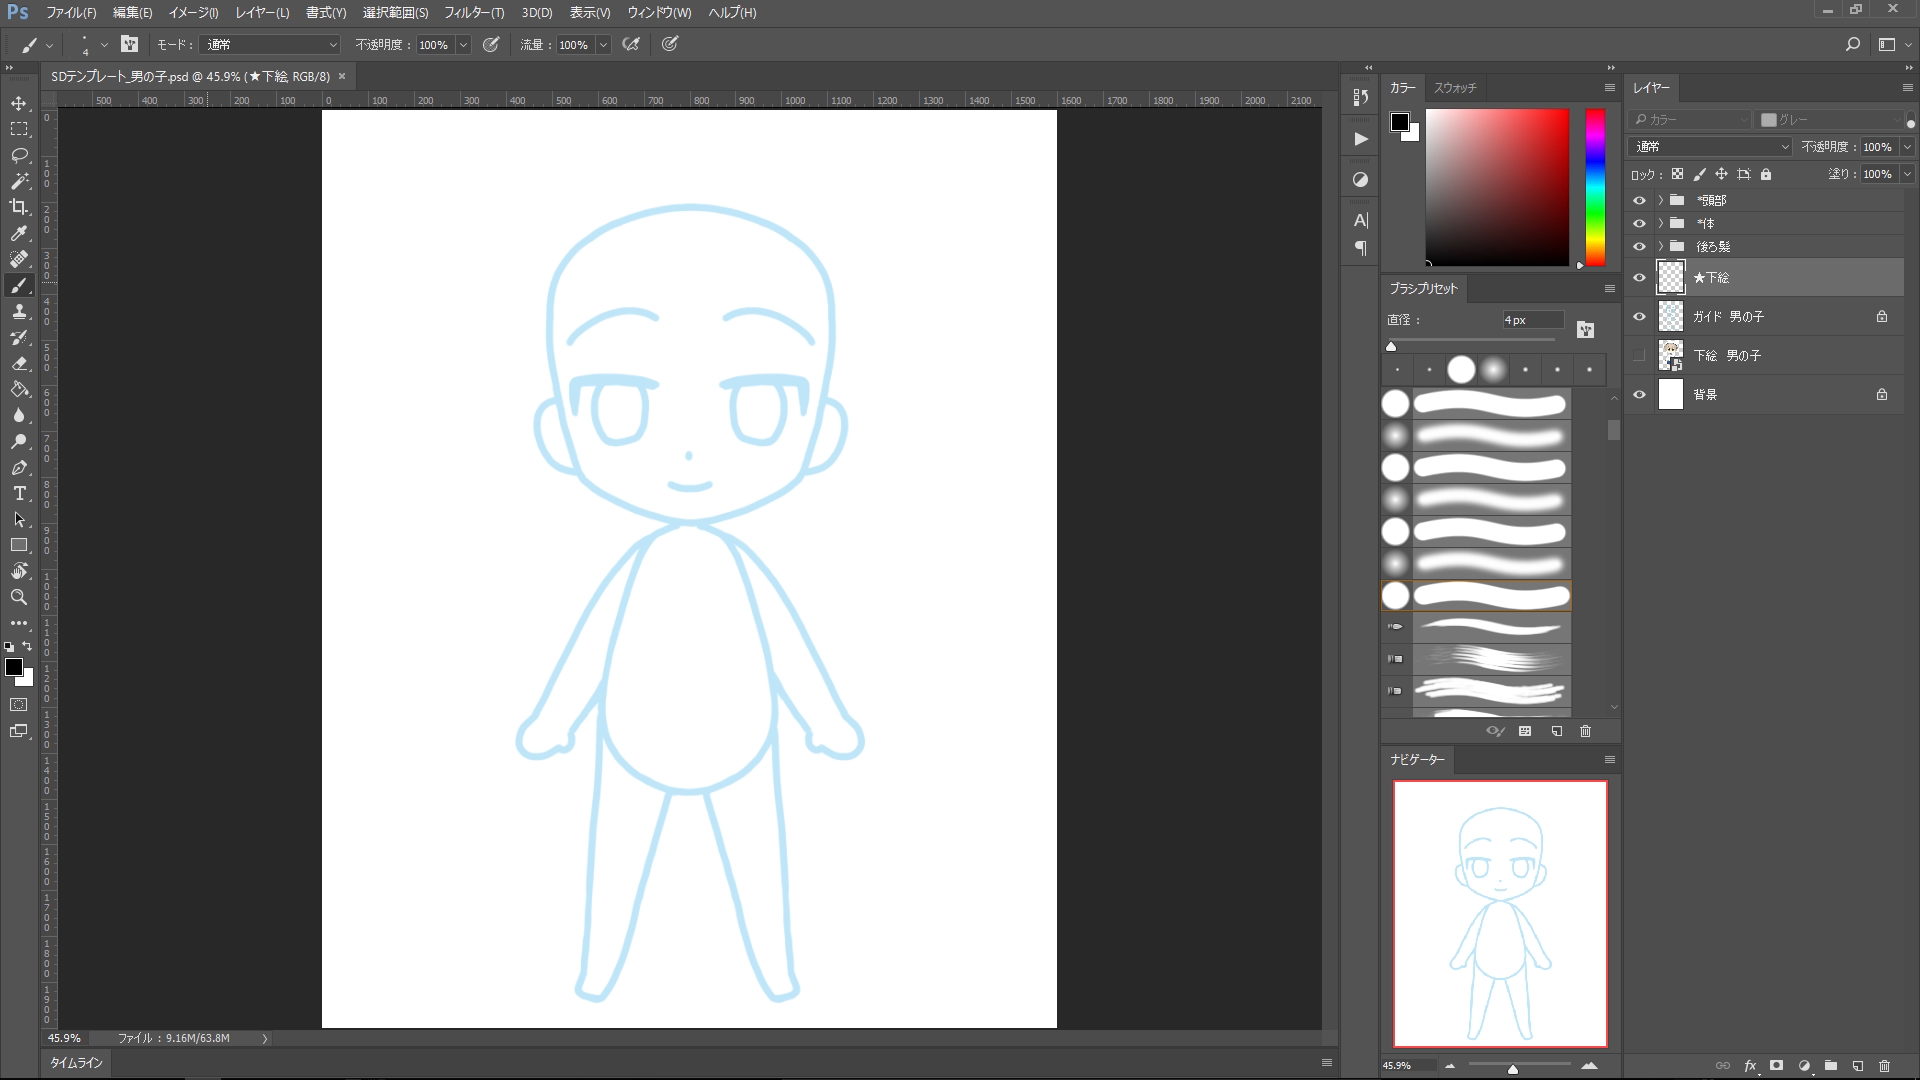
A guide line for the element should appear on the canvas.
At this time, draw an illustration according to the guide line.
Draw an Illustration
Illustrations must be drawn while separating them into parts in order to move them in Live2D.
First, prepare a guide image on a guide image layer.
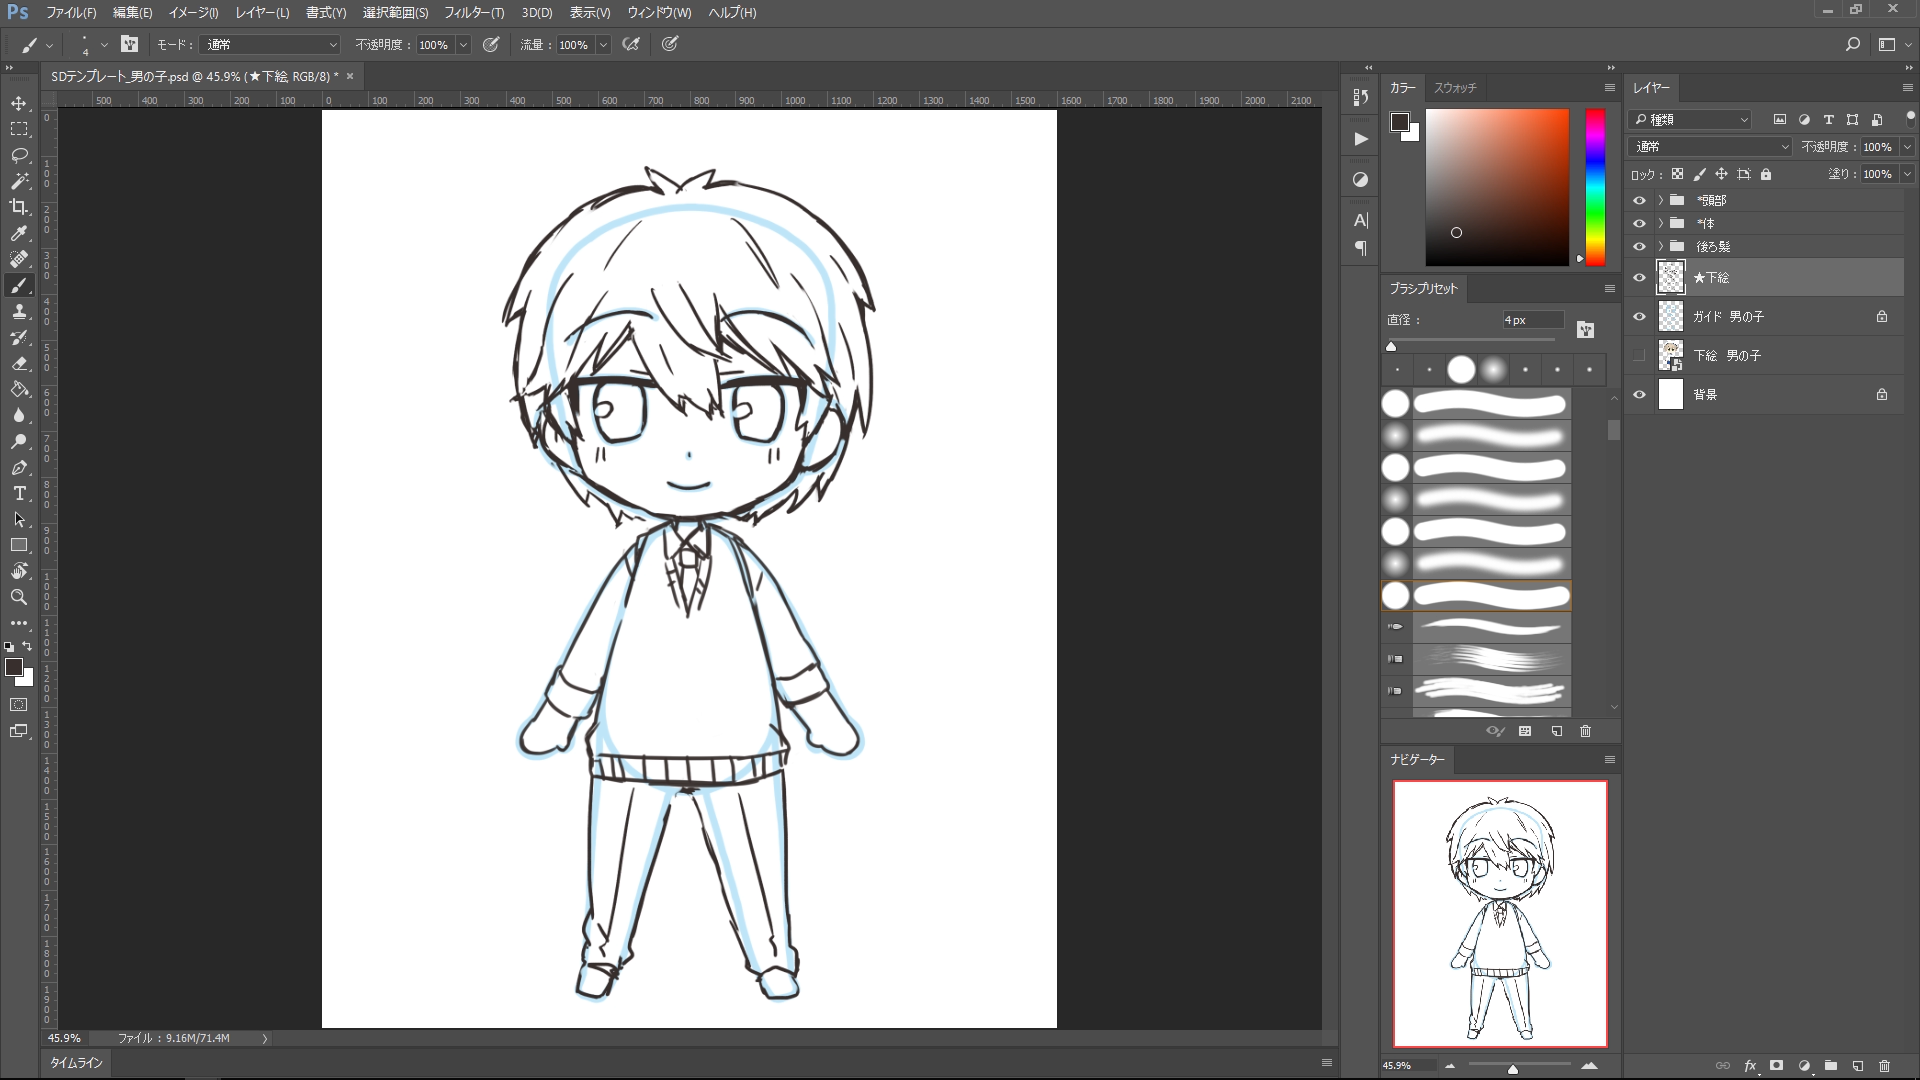
Once the guide image is prepared, the actual illustration is drawn for each part.
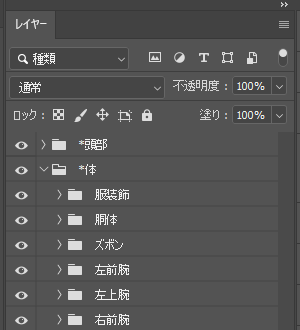
At the top, there are the groups “Head” and “Body.”
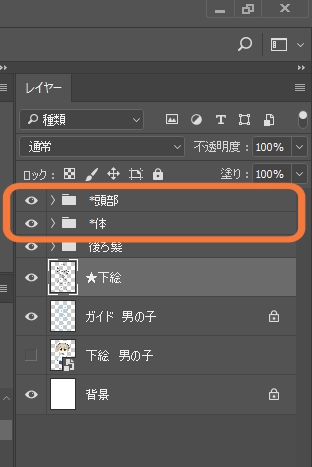
When you open each group, you will see many groups with detailed part names.
In this group, there are layers for line drawing and filling. You can draw in these layers.
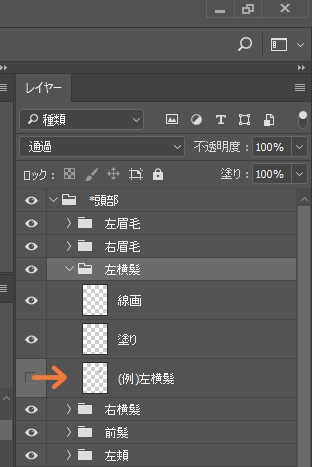
Each group has a sample layer labeled “(for example).” If you are not sure how to draw it, use this as a reference.
Notes When Preparing Materials
Drawing an extra area
It is recommended to draw an extra area for the materials since the hidden parts can be seen when the character moves.
The shape of the eyebrows and mouth will be deformed in Live2D, so it is recommended to follow the guide line for the time being.
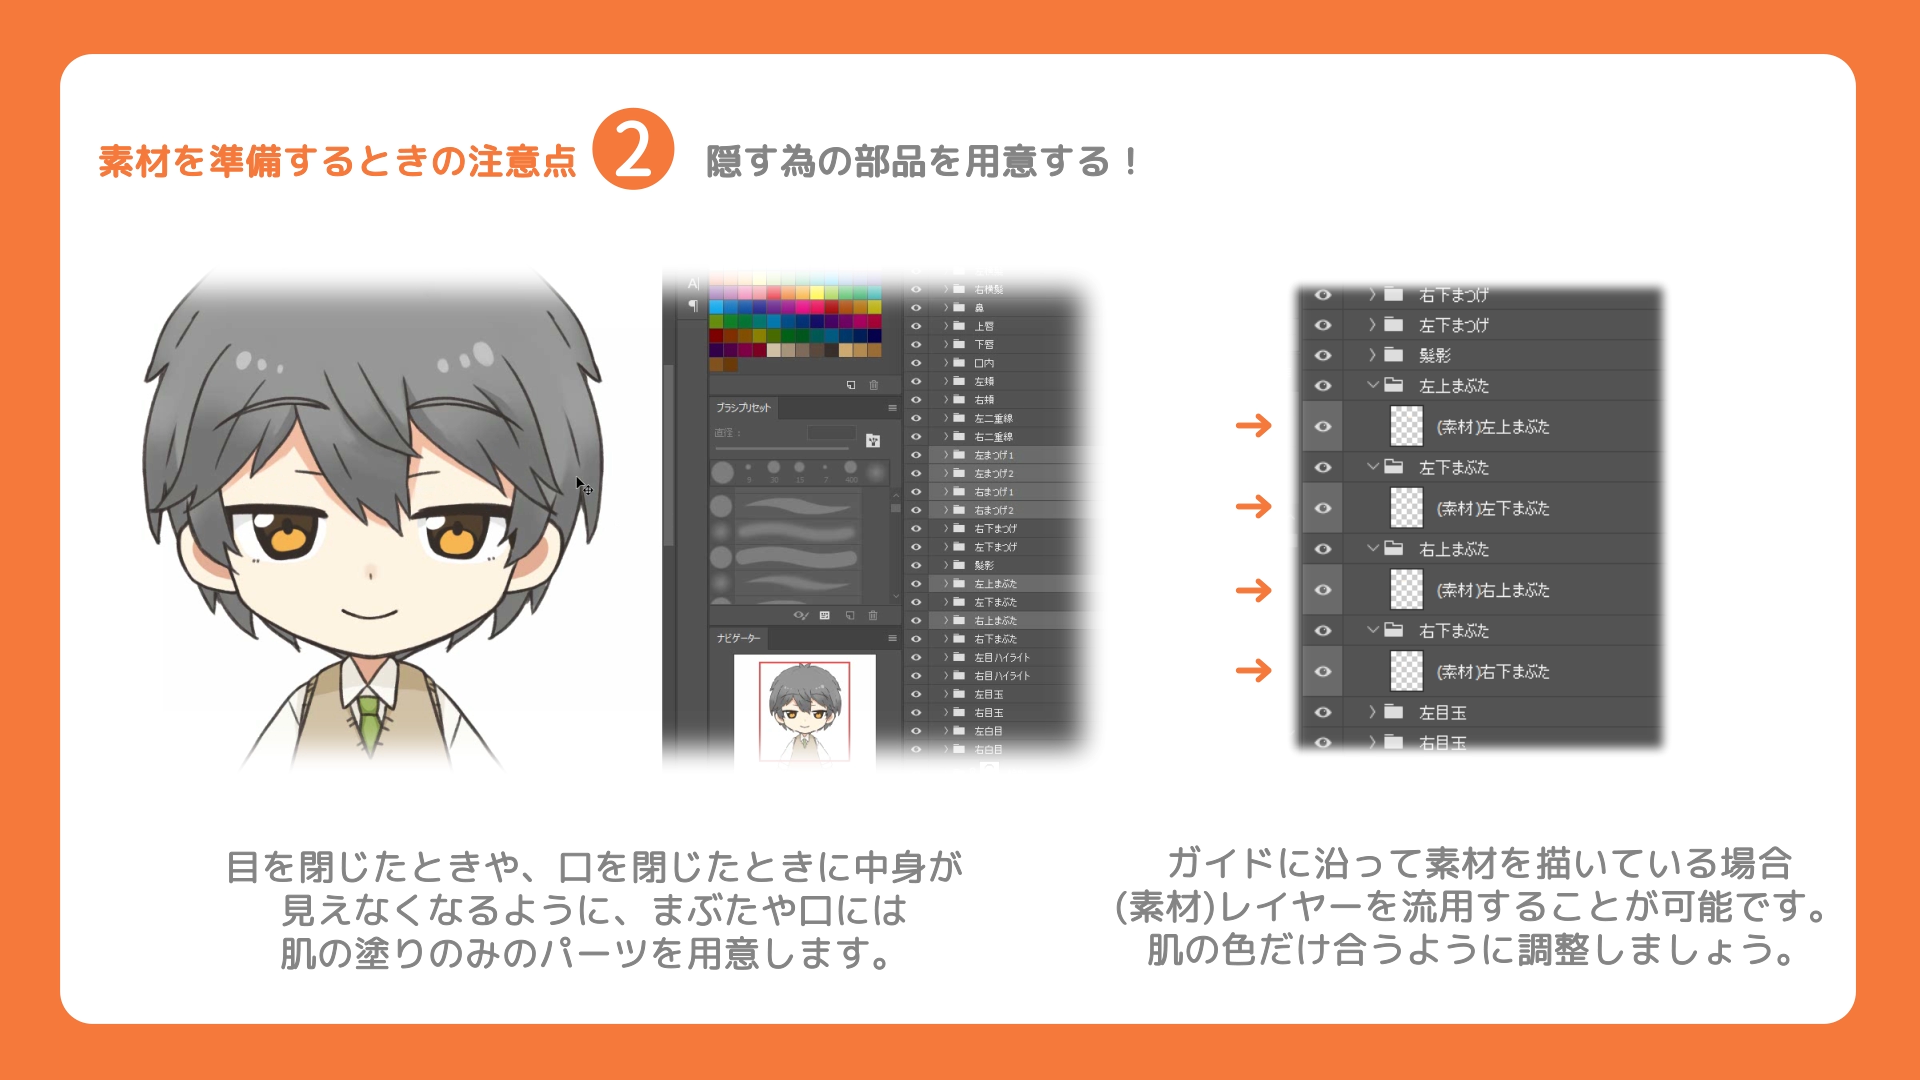
To prevent the areas from being seen when the eyes are closed or the mouth is closed, the eyelids and mouth should have skin-filled-only parts.
If you are drawing eyelashes and lips following the guide line, the base material has already been prepared, so use it while adjusting the color and range.
Merge Layers
Once the materials have been prepared, each part is made into a single layer.
If you are using Photoshop, we recommend using the merging scripts we offer.
Even if you merge manually using image software other than Photoshop, it does not matter as long as the parts are merged into a single layer.
Asterisk symbols “*” at the beginning of group names are used to prevent the groups from being combined in scripts.
Be careful not to merge them when merging manually without using scripts.
(Under groups with an “*,” groups that are not marked with an “*” should be merged into each group individually.)
Here are some notes on merging.
- Group names with “*” at the beginning are not merged.
- Be careful not to have layers with the same name.
- Leave the layer attributes as Normal.
- Opacity and Fill will be reflected in the Editor at 100%.
- Layer masks will be applied.
- The color mode should be RGB and the color profile should be sRGB.
See “Notes on PSD Creation” for more detailed information on PSD creation.
When ready, save the file in PSD format. Load the saved PSD into Live2D.
Apply Template
PSD files are loaded by dragging and dropping them into the Live2D Editor.
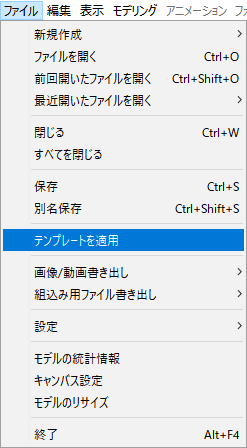
Once loaded, apply the template.
Click on the [File] menu -> [Apply Template].
You will then see a dialog box with a list of templates.
At the bottom, there are SD characters. Select Koharu for girls and Haruto for boys.
Once selected, you will see a screen like this.
Usually, the position is adjusted on this screen, but if you are drawing along the guide line, you will probably not need to make any adjustments.
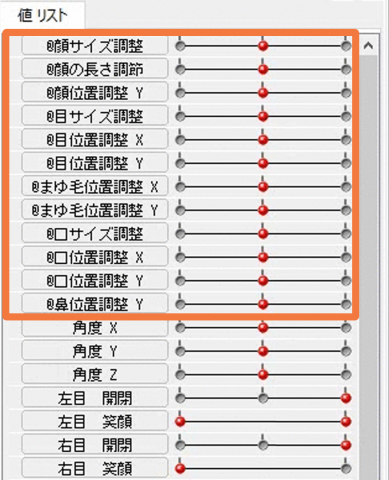
If you want to adjust it, use the parameter with @ at the beginning of the parameter list on the left.
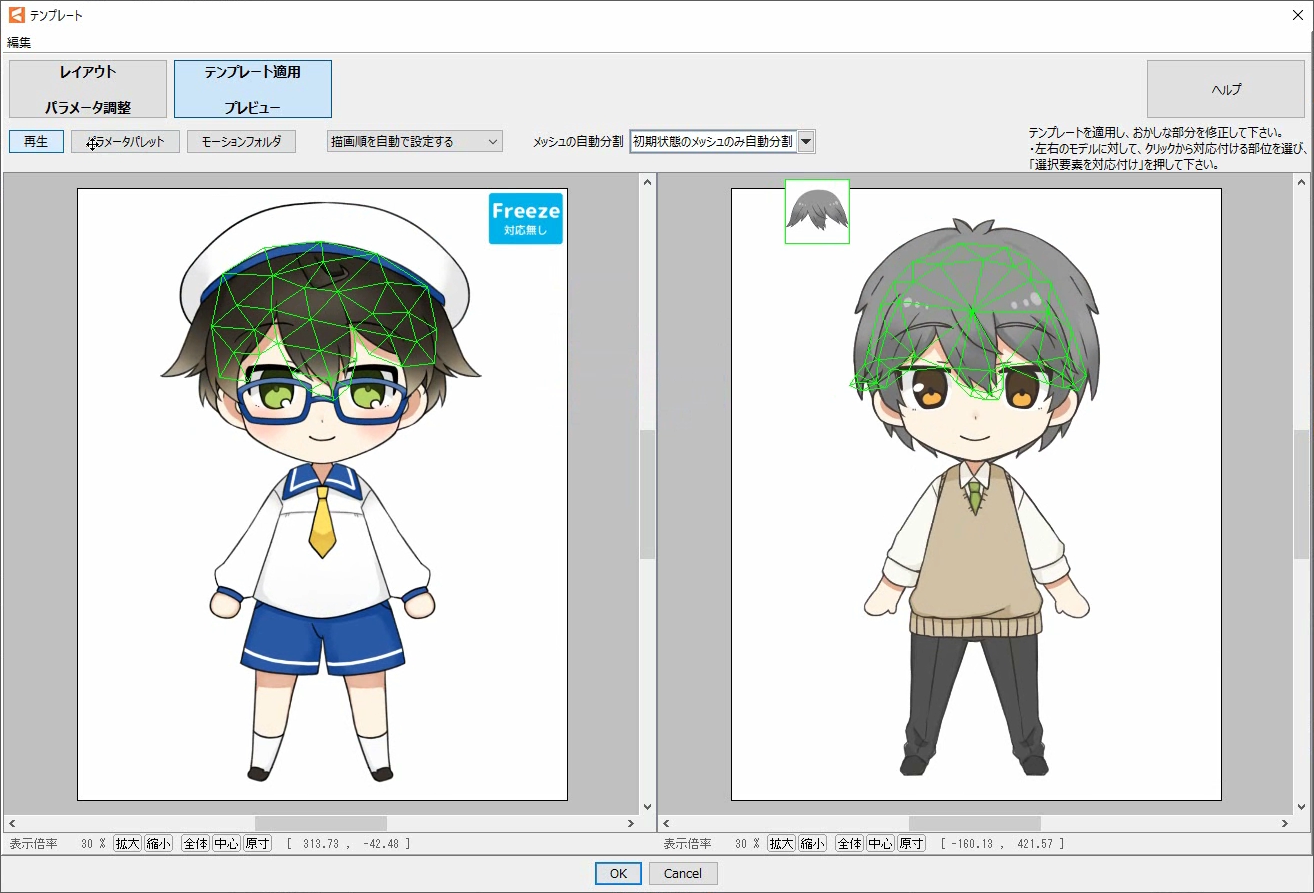
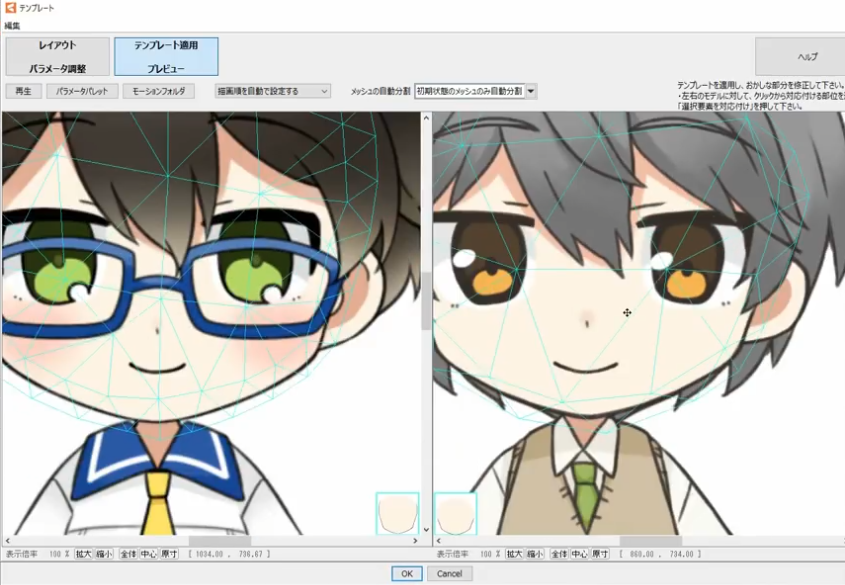
After adjusting the position, click on [Apply Template Preview].
The original template model is displayed on the left and the loaded illustration is displayed on the right with the template applied.
When a part is selected on one model, the corresponding part is also selected on the other model.
As shown in the following image, when the bangs part is selected on the left, the bangs part is also selected on the right, which is the correctly linked status.
The mapping of parts is automatic, but the mapping for each part may not be selected correctly, resulting in an incorrect appearance.
In the above image, the highlight of the left eye of the character on the right has disappeared.
When such a problem occurs, it can be solved by re-mapping the correct parts to each other.
First, select the highlight part of the left eye that is missing on the model on the right side.
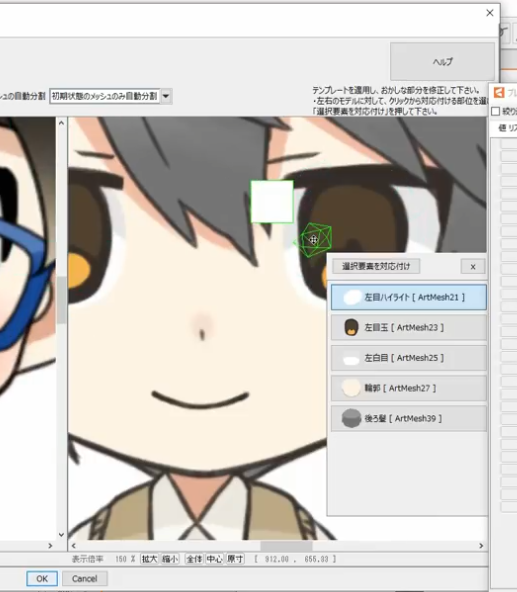
Next, select the left eye highlight from the template source model on the left side, and click on [Match Selected Elements] from the menu.
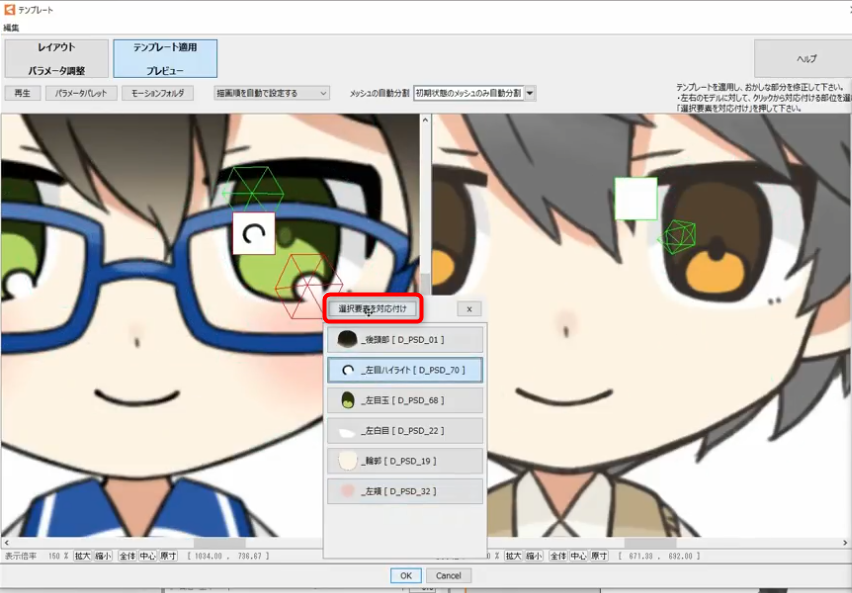
The left highlights are now mapped to each other and look correct.
Since several matches may be incorrect, check the motion carefully by playing back the motion and moving the parameters.
When you are satisfied that the mapping is correct, click [OK] at the bottom of the [Template] dialog box.
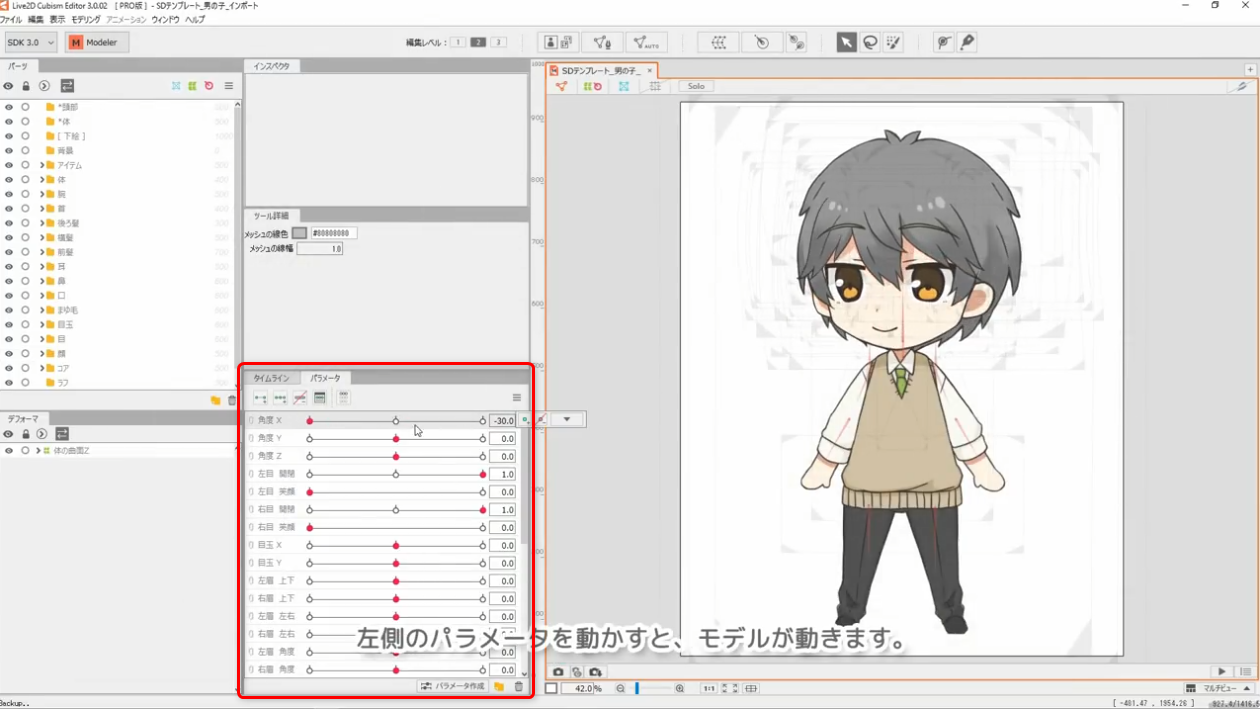
The model is now complete.
The model moves as you move the parameters in the [Parameter] palette on the left.
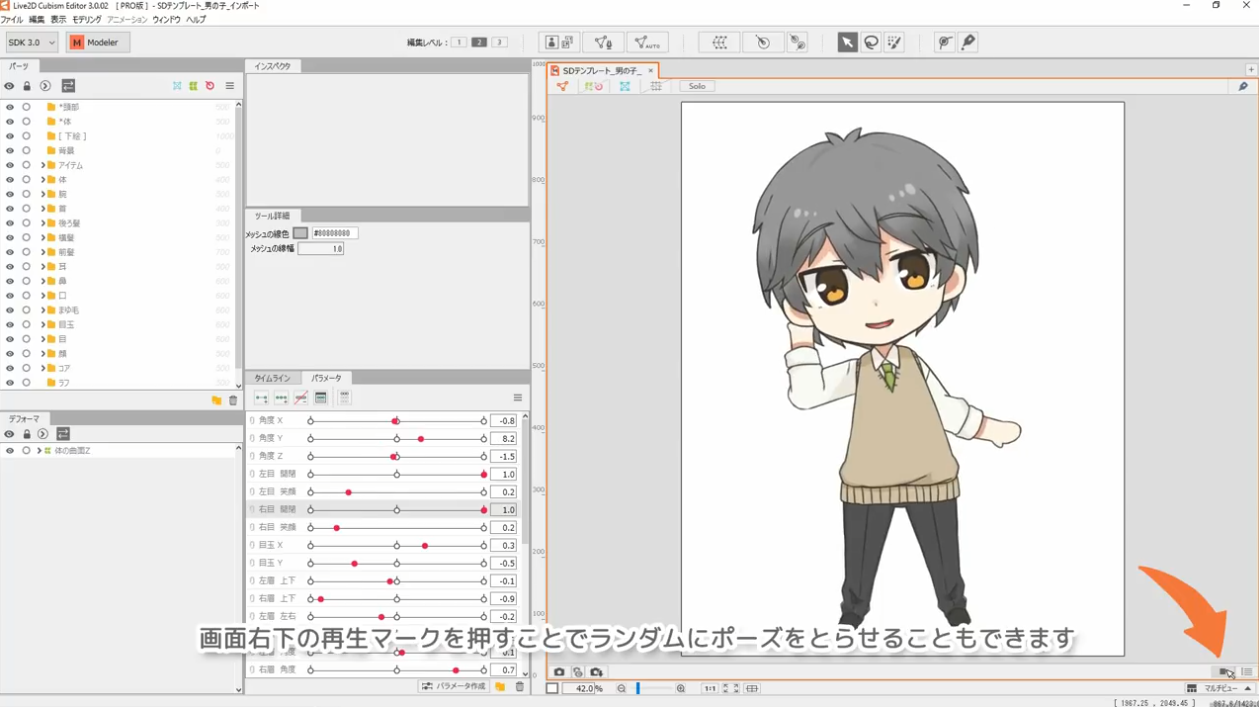
You can also make them pose randomly by pressing the play symbol in the lower right corner of the screen.
This is the end of the template description.
In addition to the SD characters used on this page, there are also models for girls and boys, so please try your hand at creating various models.