How to edit
Updated: 08/26/2025
On this page, you will learn how to edit the vertices of an ArtMesh selected with the [Selection Tool] and the division points of a warp deformer.
ArtMesh transformation
The selected ArtMesh vertices can be “moved,” “rotated,” or “scaled” to deform the texture.
Overall deformation
Select with the arrow tool. (When selected once)
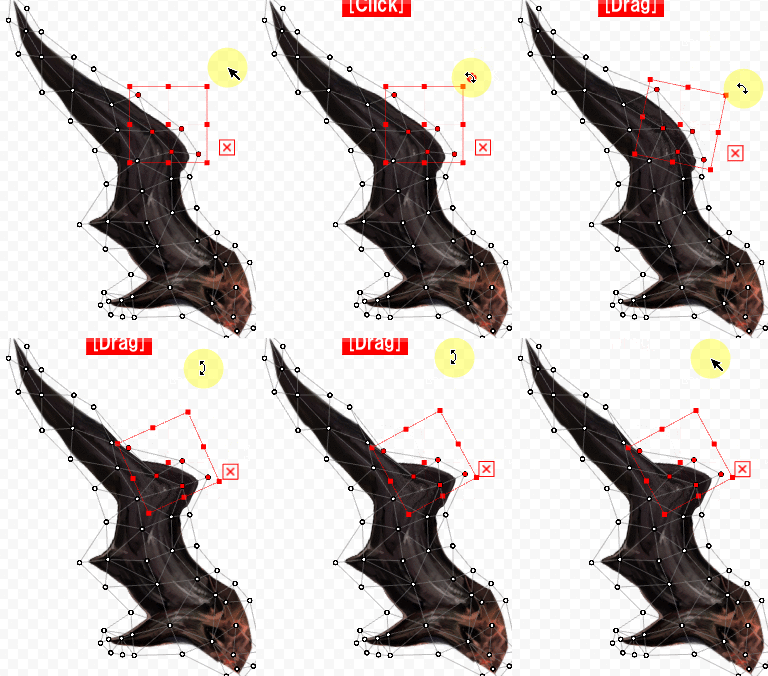
| Overall movement Drag the ArtMesh area. |
Overall rotation Drag one of the four corners of the bounding box so that it rotates. |
Overall expansion and contraction Expand or shrink one of the four corners of the bounding box. |
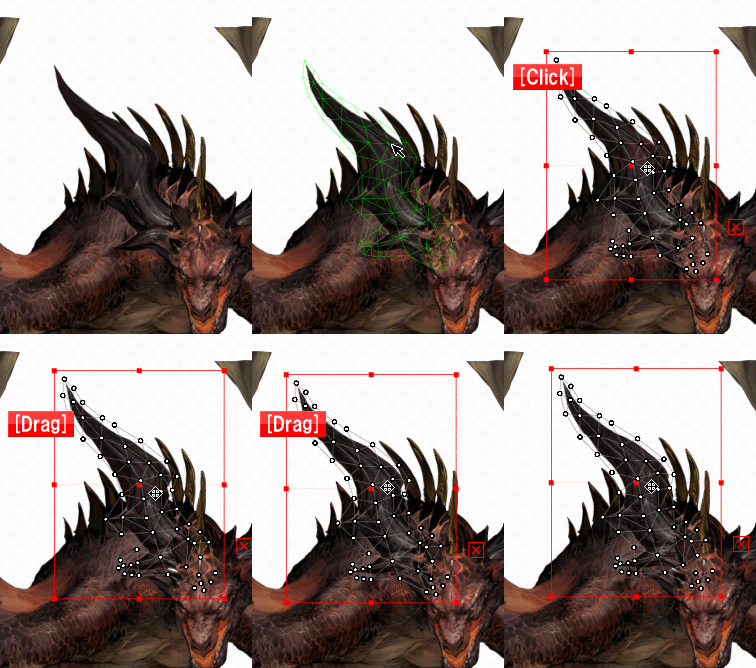 |
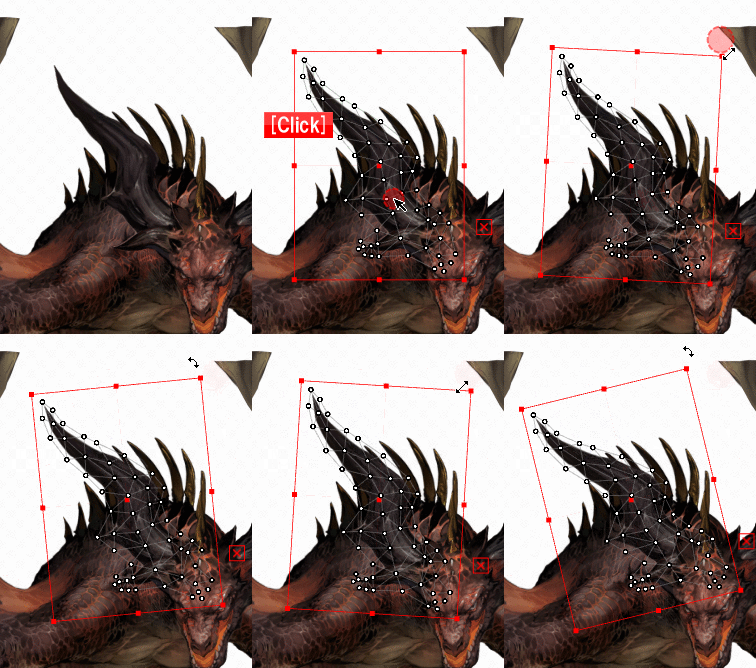 |
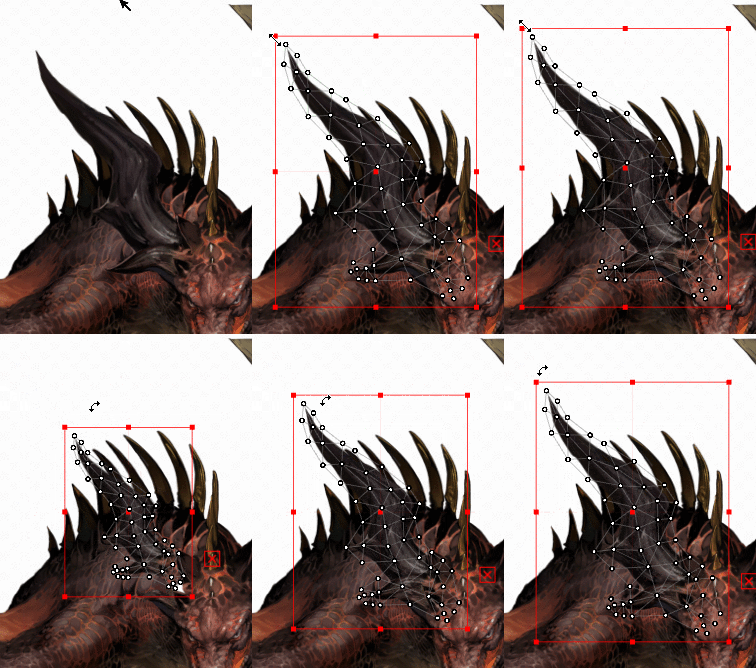 |
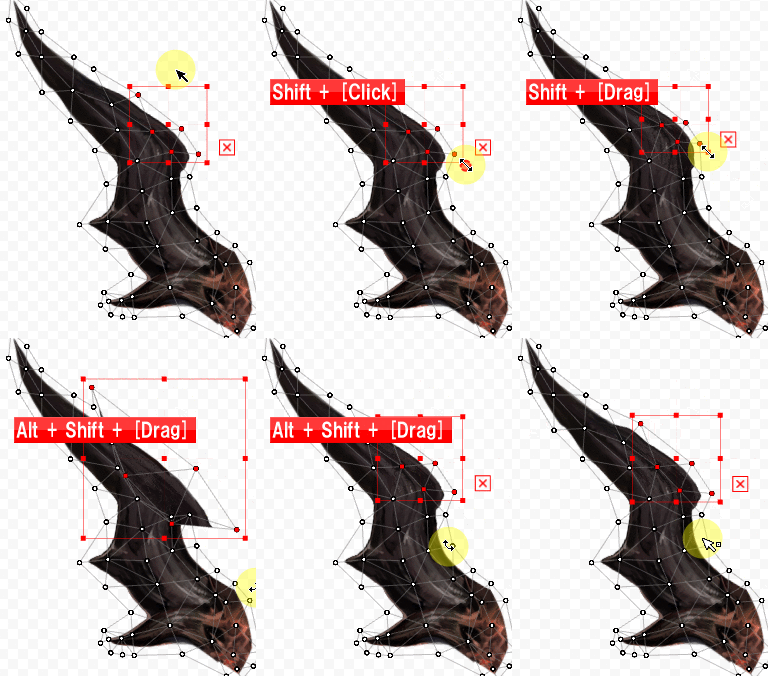
Transformation with arrow tool or lasso


| Moving a vertex | Rotating a vertex | Vertex position expansion/contraction |
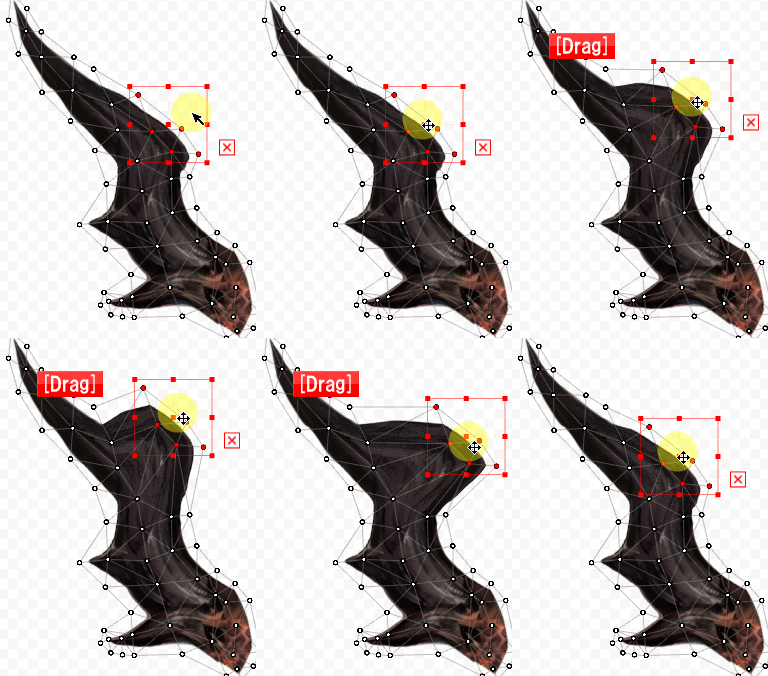 |
 |
 |
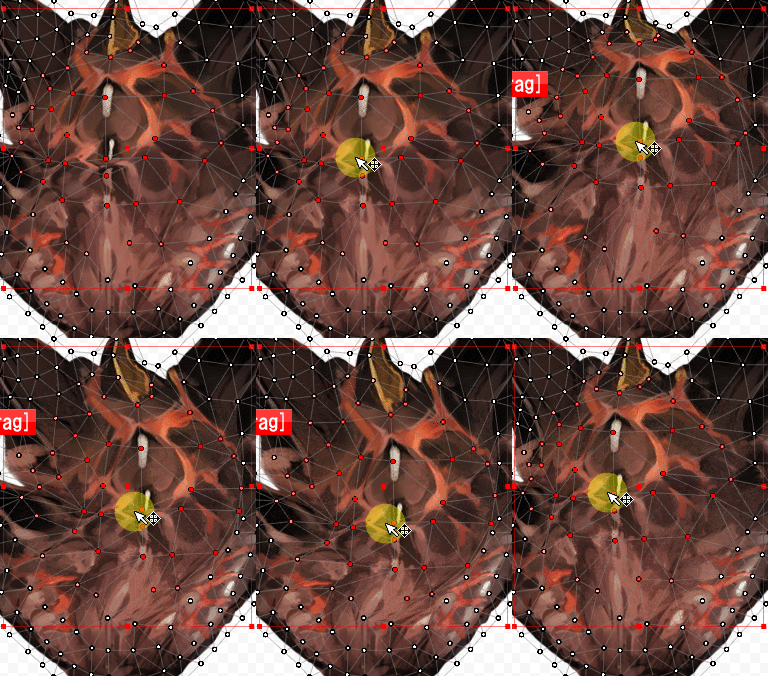
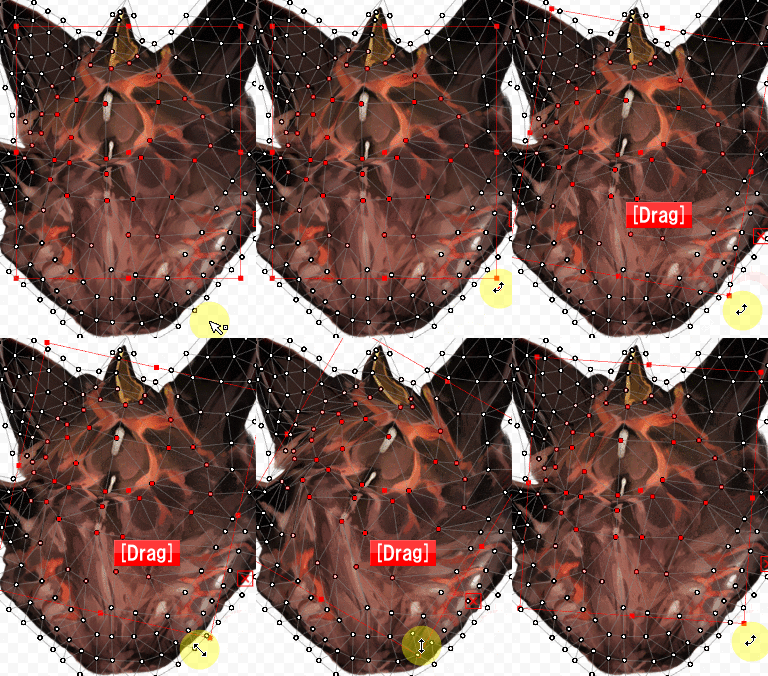
Transform with brush selection

| Moving a vertex | Rotating a vertex | Vertex position expansion/contraction |
 |  | 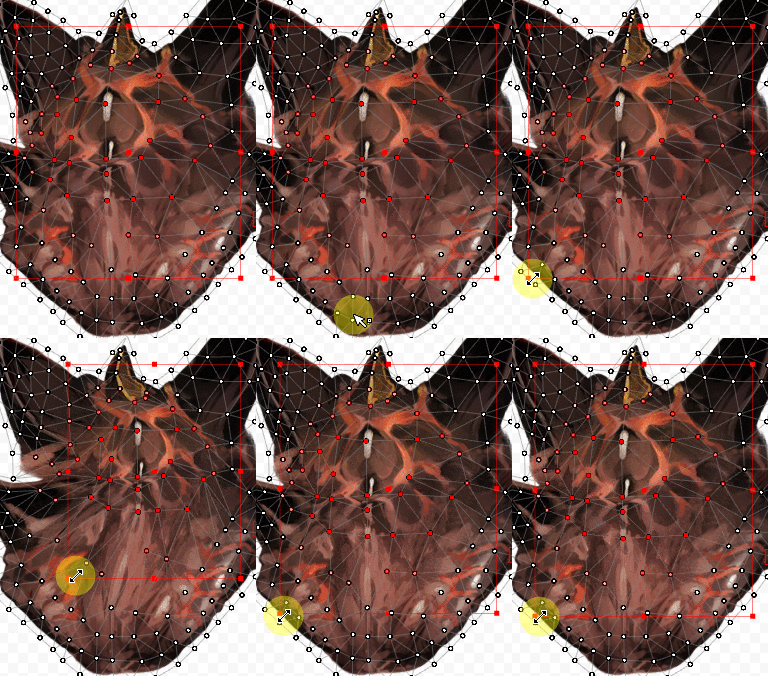 |
TIPS
Starting with Cubism 5.3, the [Brush shape] function has been added, allowing you to select a brush shape.
For details, see [Brush adjustment] under “Deform brushes.”
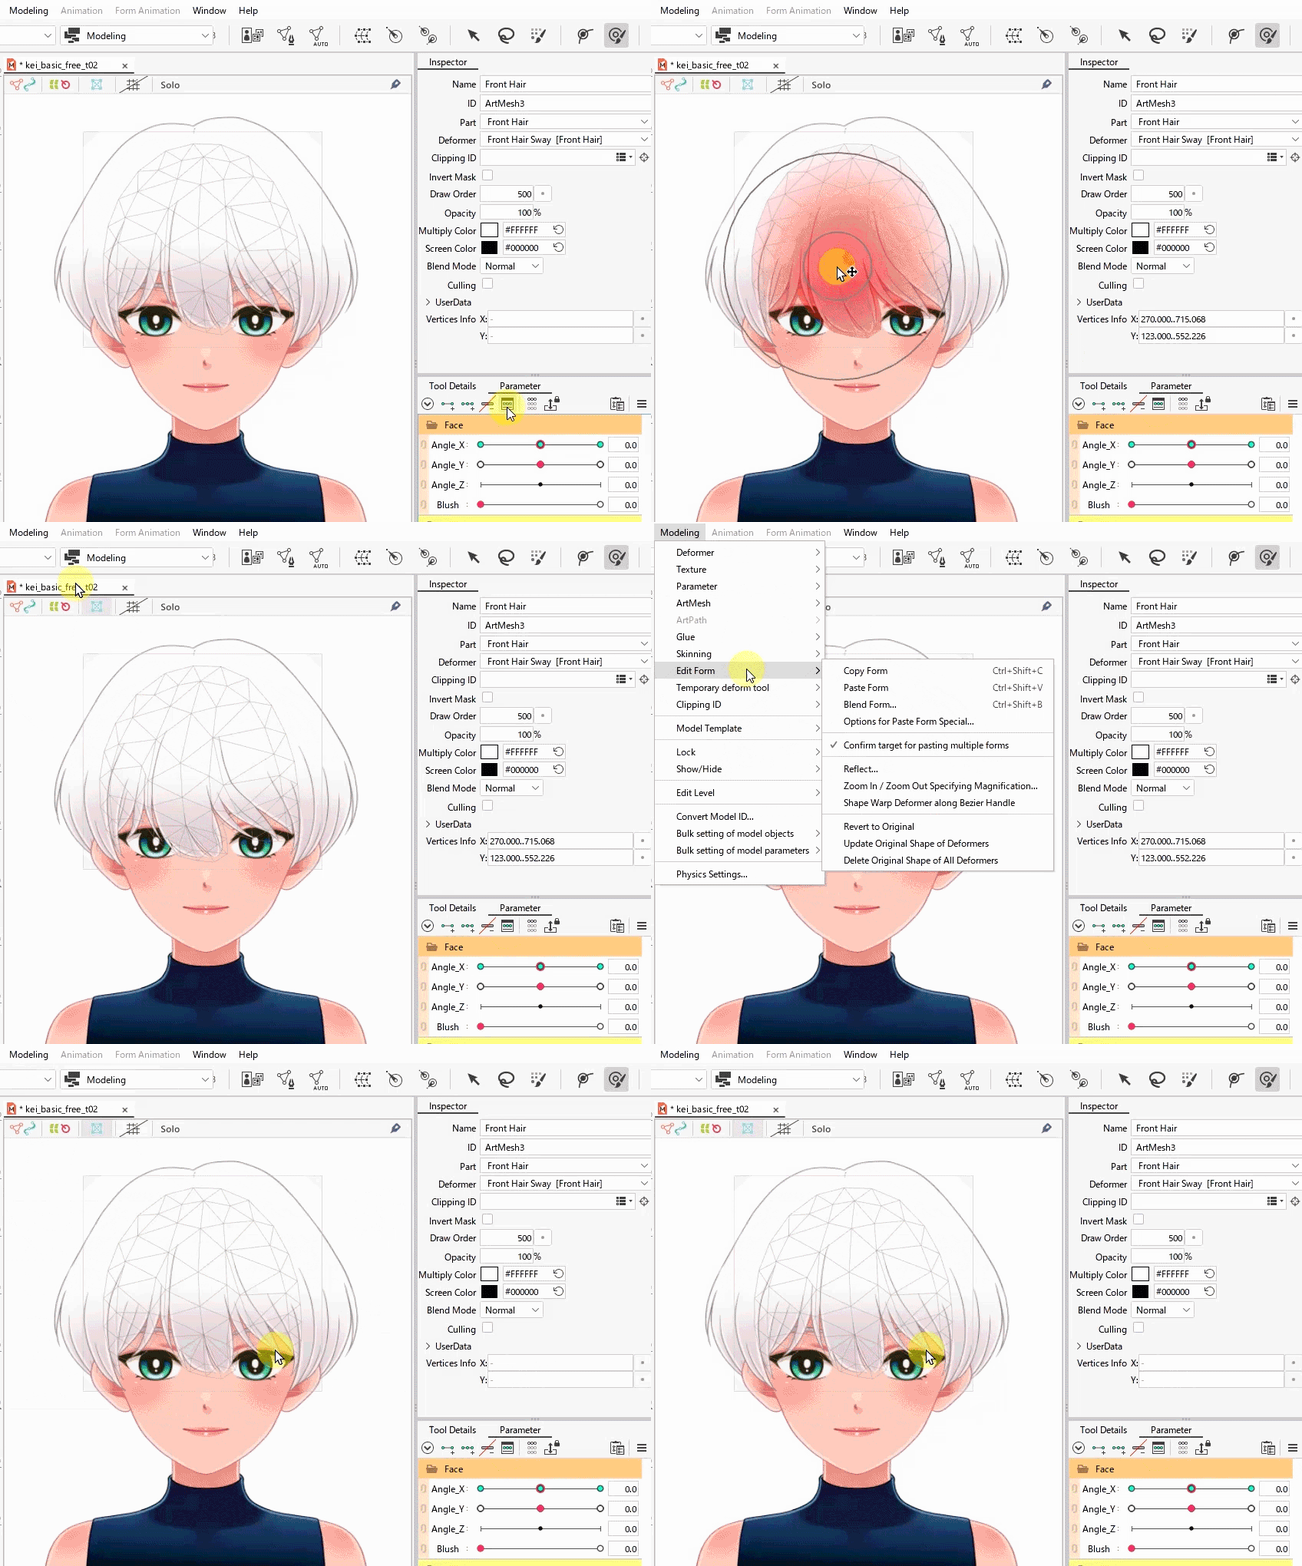
Revert to original
Deformed ArtMeshes can be restored to the original shapes of the source image.
- Select the desired ArtMesh.
- Select the key you wish to restore to the original shape of the source image.
- Click on the [Modeling] menu -> [Edit Form] -> [Revert to Original].
Precautions
This function ignores the position and shape of the deformer in the upper hierarchy and forcibly returns to the same position and shape as the source image.
TIPS
Starting with Cubism 5.2, the [Revert to original] function has been enhanced to include the ability to restore the shapes of rotation deformers and warp deformers.
See “Restore deformer shape” for details.
Shape warp deformer along Bezier handles
In the [Modeling] menu, select [Edit Form] and then [Shape warp deformer along Bezier handles]. The division points of the selected warp deformer can be adjusted to be smooth based on the position of the Bezier handles.
This is also useful for correcting the collapse of division points while deforming.
You can also check the [Automatic Vertex Shaping] checkbox in the inspector palette to smoothly adjust the division points while manipulating the Bezier handles.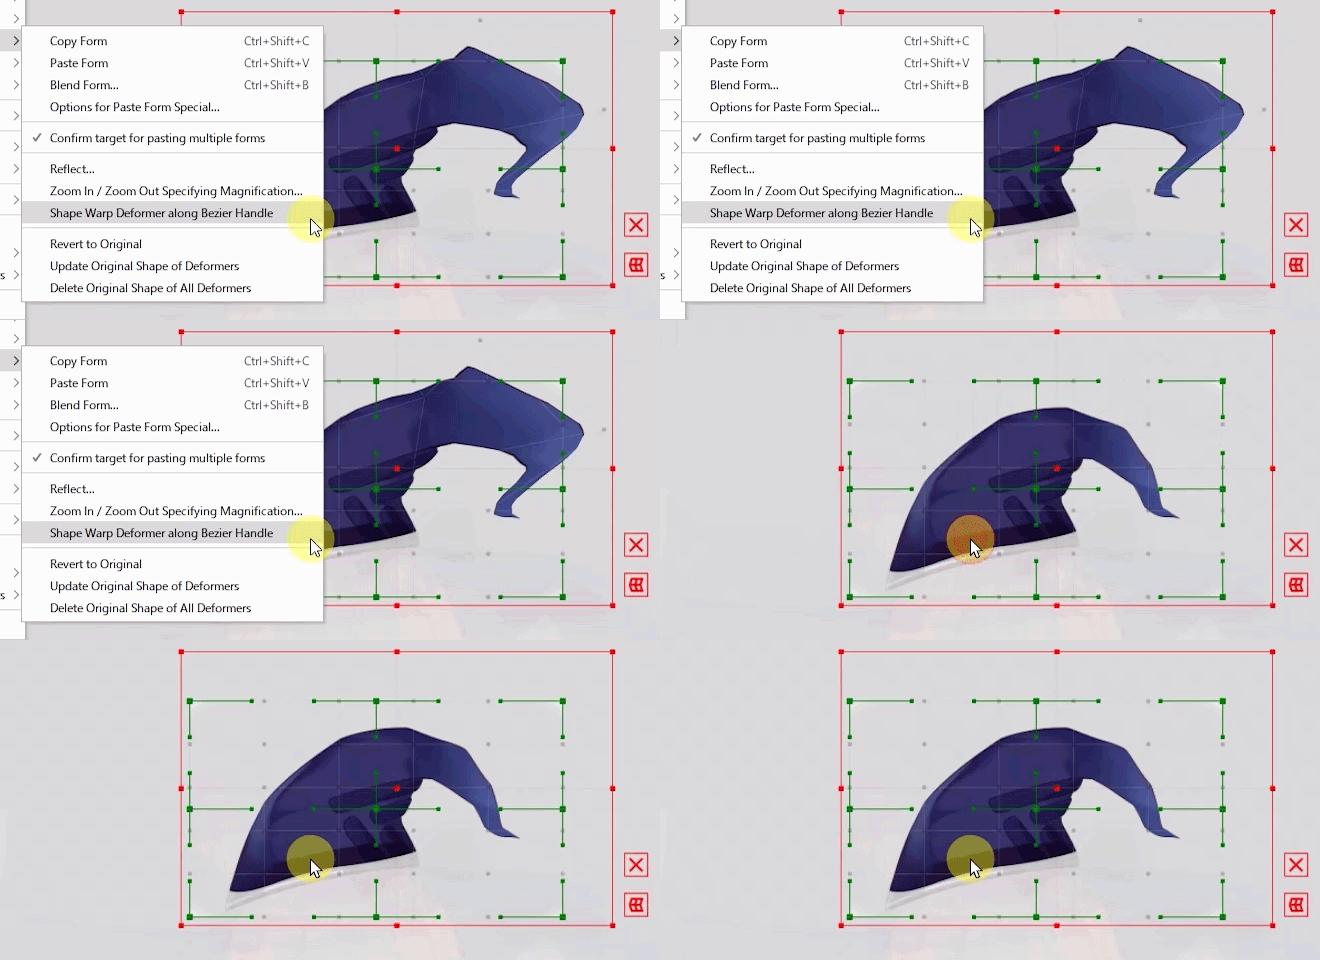
Useful Features of Bounding Boxes
Show/Hide Bounding Box
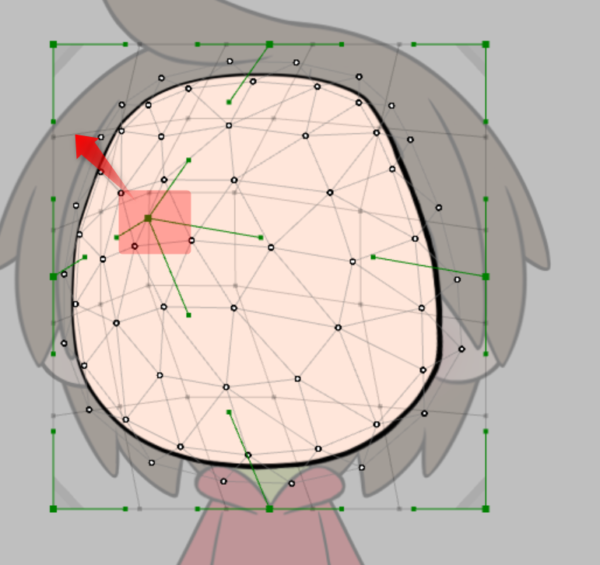
When deforming the center of a 2 × 2 warp deformer as shown below, the center control point (1) may overlap with the center of the bounding box, making the center control point difficult to drag.
In such cases, the bounding box can be hidden by clicking the X button (2) in the lower-right corner.
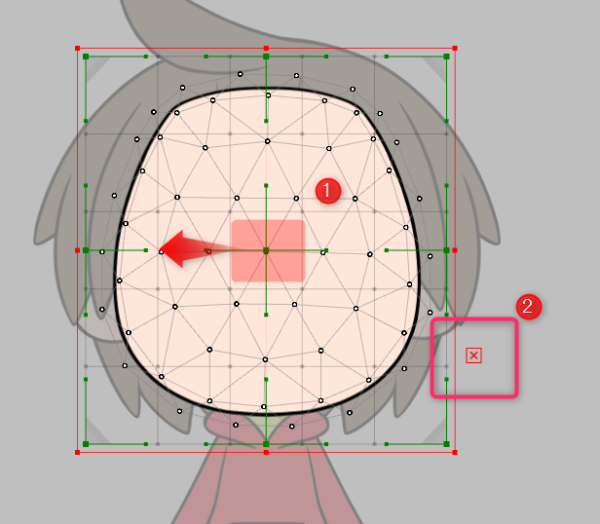
Once the bounding box is hidden, you can drag the center control point.
TIPS
Bounding boxes that have been hidden can be displayed from the [Show] menu -> [Show/Hide Bounding Box].
A shortcut can also be set to show/hide bounding boxes.
Deformation and rotation of bounding box
The bounding box that appears when an ArtMesh or warp deformer is selected can be deformed and rotated.
If the X key is pressed with the bounding box displayed, the border color turns green.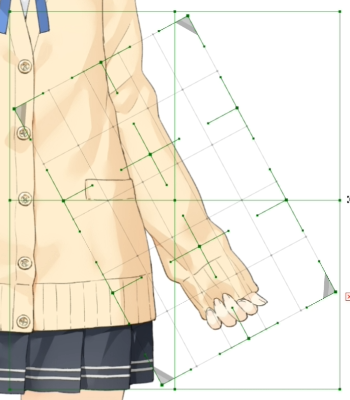
If the bounding box is deformed in this state, just the bounding box can be deformed without affecting the object.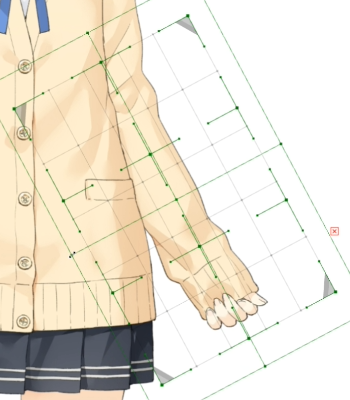
This is useful when you want to apply a deformation to an object tilted at an angle, such as an arm.
The warp deformer can also be set to deform the bounding box to match the angle of the warp deformer by selecting the center button that appears next to the bounding box.
You can also do this from the [Modeling] menu -> [Deformer] -> [Align the angle of the bounding box].
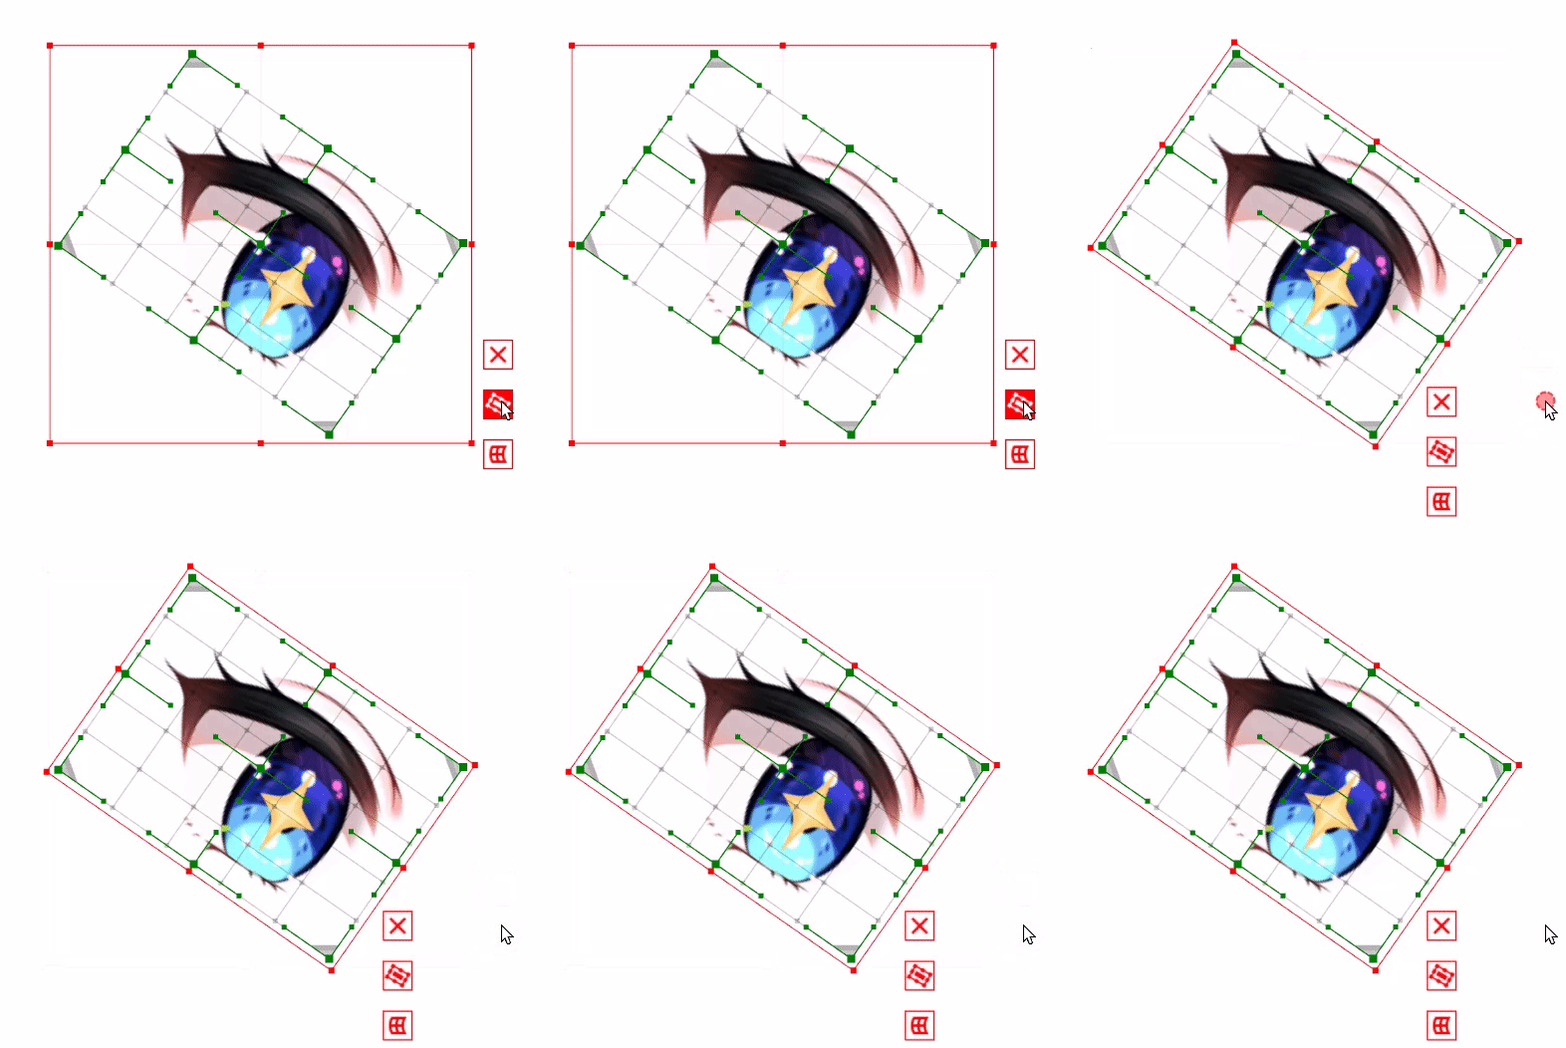
See the tutorial page “Useful Functions” for a video explanation of how to use this function.
