Deform Paths
Updated: 06/09/2025
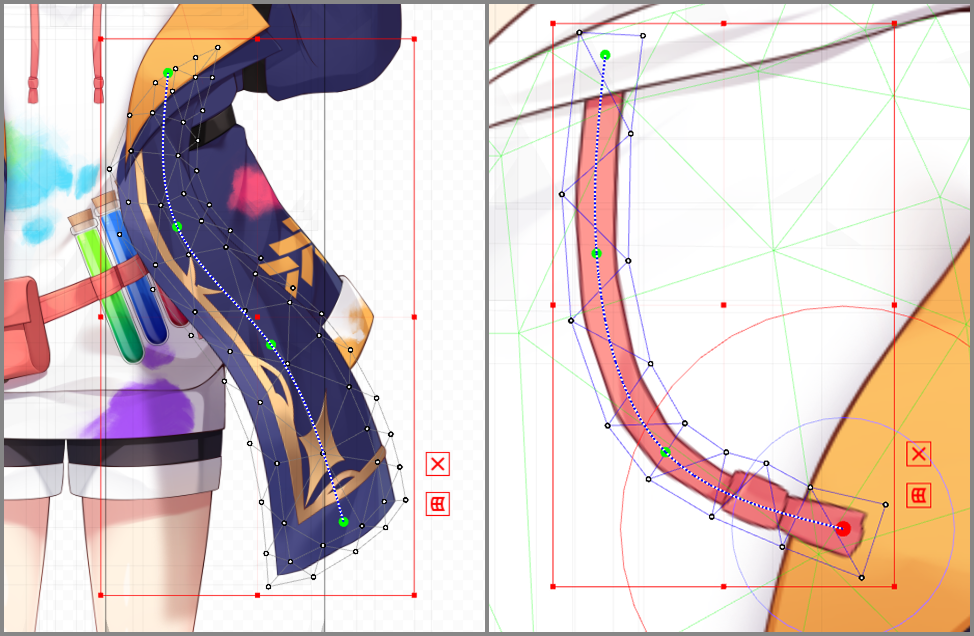
If you want to create large deformations in an ArtMesh or express soft deformations such as hair or long cloth, you can use deform paths to create deformations easily and cleanly.
Multiple deform paths can be set for a single ArtMesh.
This allows ArtMeshes with large areas, such as cloaks, to be deformed as desired.
Setting Up Deform Paths
Click the button below to use the Deform Paths edit function.

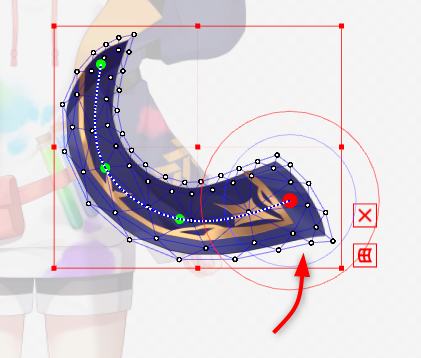
With the ArtMesh you want to move selected, click the (1) [Deform Paths] button to switch the display of (2) [Tool Details] palette and edit the Deform Paths.
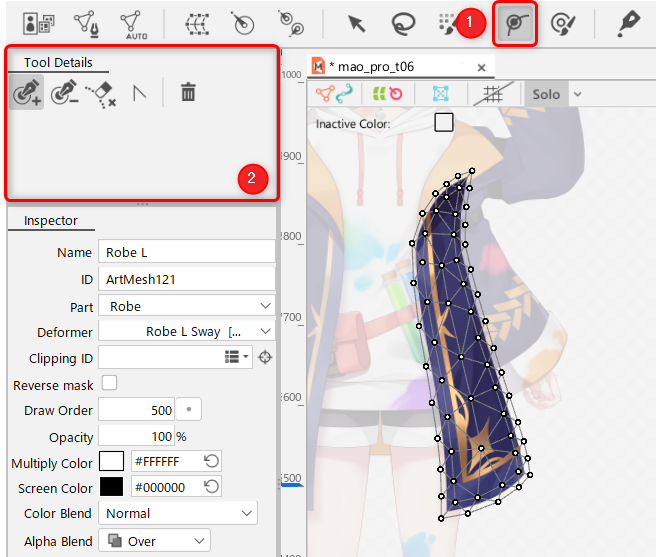
Make sure the [Add control point] button is selected in the (2) [Tool Details] palette.

Clicking on the canvas in this state will place a control point (green dot).
Place control points along the flow of the ArtMesh.
Instead of dragging, click as you set it up.
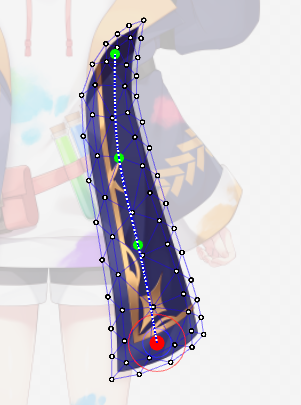
To correct the position, directly drag and move the control point.
If you are editing a deform path, moving a control point does not deform the ArtMesh.
See the “Tool Details Palette” page for other sub-tools.
Transformations Using Deform Paths
With the Deform Path edit tool selected, you can only edit control points.
After setting up, click the [Arrow tool] icon on the toolbar to switch tools.

Move the control points to deform the ArtMesh.
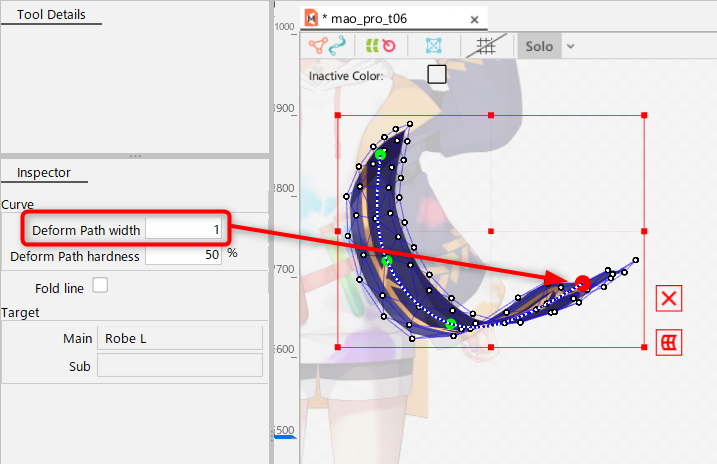
Adjustment of deform path width
When deforming, you can change the degree of influence between ArtMeshes in the [Inspector].
This prevents the ArtMesh from turning over and allows it to deform gently while maintaining some spacing.
On the other hand, if you want to create the effect of turning the cloth inside out, set the [Deform Path width] to a smaller value.
For a gradual deformation while maintaining spacing:
Increasing the value of the Deform Path width increases the size of the red circle around the control point.
Inside the circle, the mesh vertices interact with each other and deform gently as they try to maintain their shape.
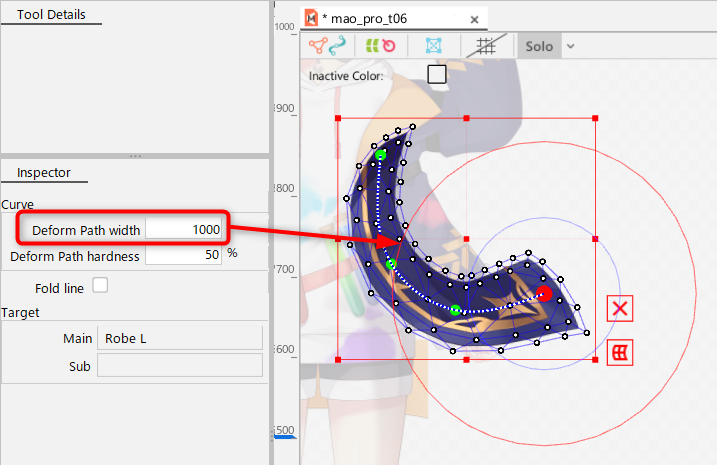
For a large transformation, such as flipping over:
Decreasing the value of the Deform Path width reduces the size of the red circle around the control point.
The loss of influence between the vertices of the mesh causes it to flip over and deform significantly.
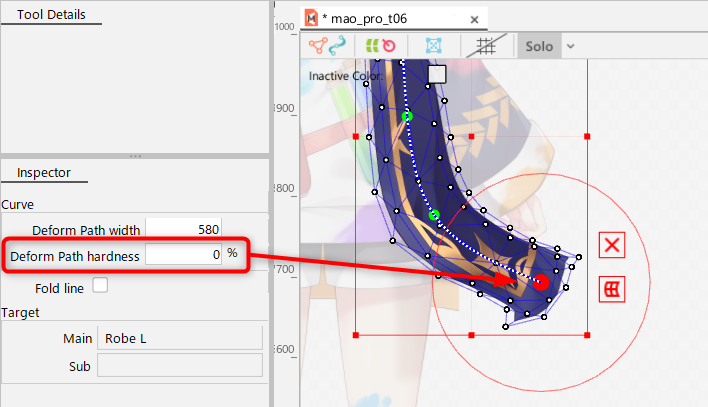
Adjustment of hardness of deform path
The hardness of the deform path is an item that sets how much the deformation is affected within the range set for the deform path width.
Influence is indicated by a blue circle, and the influence can be changed in %.
Note: The reference image is colored light blue inside the blue circle to make it easier to see.
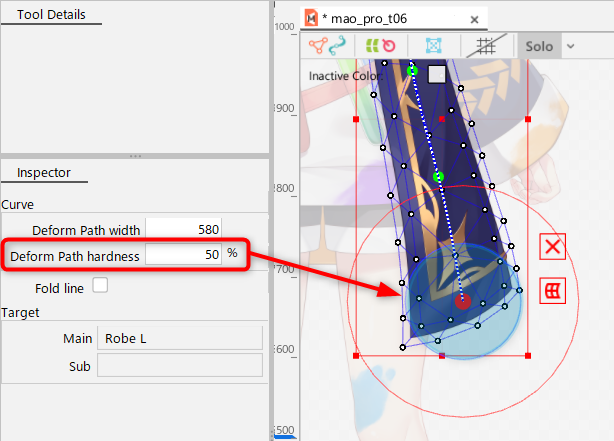
For maintaining the mesh shape:
When the hardness value of the deform path is set to 100%, the blue circle overlaps the red circle set by the deform path width.
This will gently deform the mesh in the light blue filled areas as it tries to retain its shape.

For significant deformation of the mesh shape:
When the hardness value of the deform path is set to 0%, the blue circle becomes smaller toward the center.
In this way, the degree of influence is eliminated and the deformation becomes large.
Setting up a deform path to move multiple ArtMeshes together
Multiple ArtMeshes can be moved together with a single deform path.
Select all the ArtMeshes you want to move together and set the deform paths.
The deform paths you set up can be moved to deform the image collectively.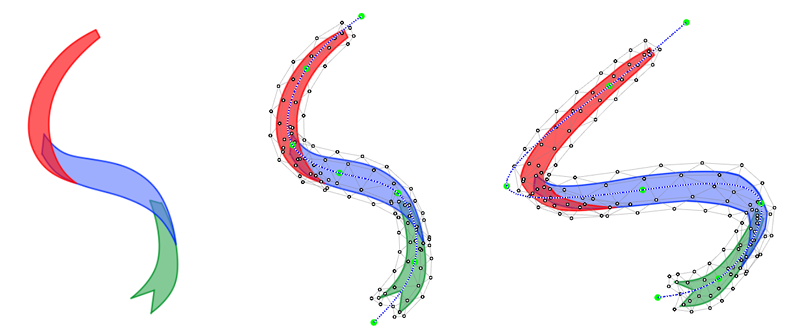
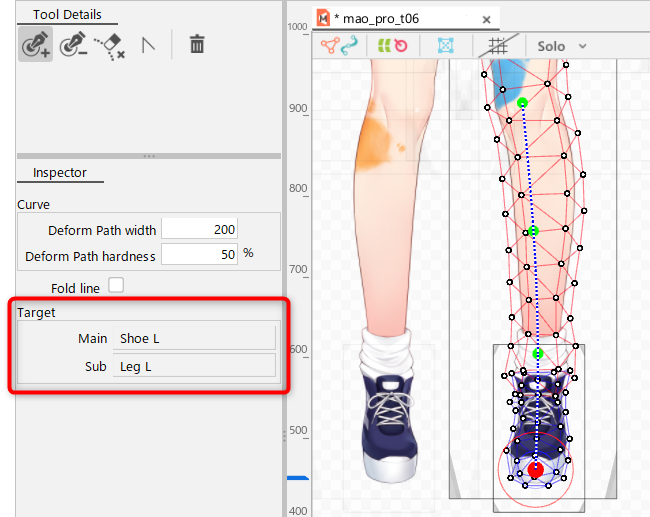
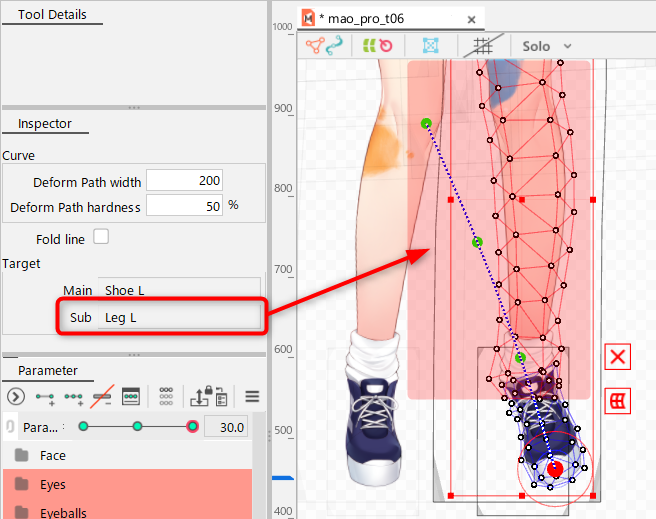
About targets
If you create a deform path on multiple ArtMeshes, the targets are divided into “main” and “sub” targets.
The “main” mesh is shown in blue and the “sub” mesh in red.
The target types are determined by the order of selection, with the last ArtMesh selected becoming the “main” target.
Notes on setting up keyforms
If a keyform is created for a parameter while deform paths are created for multiple ArtMeshes, the deform paths associated with the sub ArtMeshes will be misaligned.
This does not affect the deformation of the ArtMeshes, but may result in unintended deformation because the deform path is operated from a misaligned position.
If you create deform paths for multiple ArtMeshes at once and use them to edit keyforms, we recommend that you use them temporarily, creating and deleting deform paths as needed each time.
Set Up Multiple Deform Paths for an ArtMesh
Multiple deform paths can be set for a single ArtMesh or for more than one ArtMesh.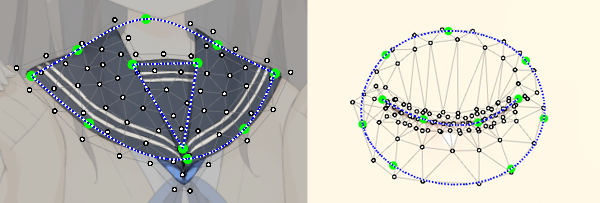
Here are some ways to reduce silhouette collapse when there are areas that you do not want to move.
Below are examples of cases where the silhouette has been destroyed.
In the image, an attempt was made to move two ArtMesh closures together in one deform path, resulting in a broken silhouette.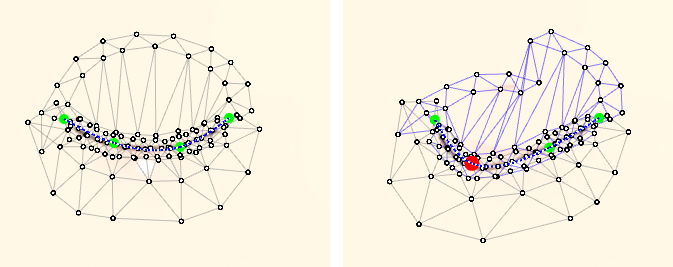
By placing another deform path in the area you do not want to move, you can deform the silhouette without destroying it, as shown below.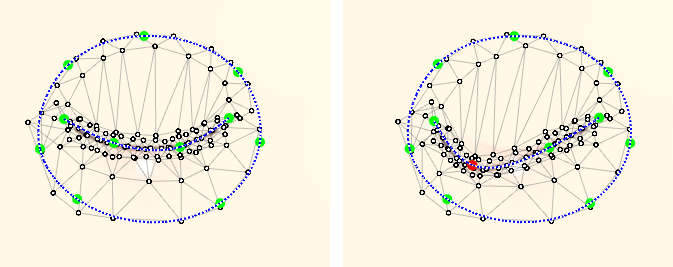
Tips
When placing deform paths, including two or more ArtMeshes that already have deform paths set, be sure to switch between edit levels beforehand.
Level Edit of Deform Paths
You can edit deform paths by switching between three levels of editing.
The default Level edit is [2].
With Level edit [2] and [3], you can create different deform paths for the same ArtMesh.
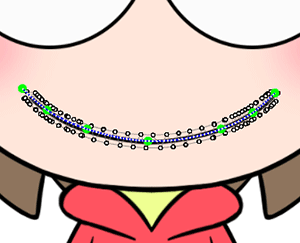
Here is a useful example of how to create mouth deformities.
- In Level edit [2], deform paths are set at the top and bottom parts of the mouth respectively, to create an open mouth.
- In Level edit [3], a single deform path is set at the top and bottom parts of the mouth to create a closed mouth.
This is a useful feature and we encourage you to use it.

Level edit 1
Only the ArtMeshes can be edited.
Deform paths are hidden, allowing for fine-tuning.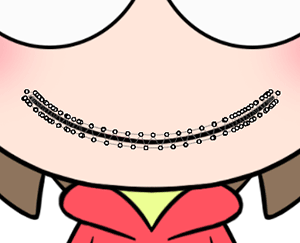
Level edit 2
The deform paths are displayed.
The default Level edit is [2].
In the example below, deform paths to open the mouth are created and displayed.
At Level edit [2], the movement of opening and closing of the mouth is created by setting the deform paths for the ArtMesh for the top part of the mouth and the ArtMesh for the bottom part of the mouth, separately.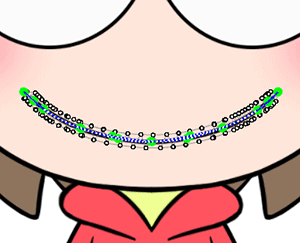
Level edit 3
The deform path is displayed.
In the example below, a deform path to close the mouth is created and displayed.
At Level edit [3], the deformation of the closing mouth is created by setting the same deform paths for the ArtMeshes for both the top and bottom parts of the mouth.