Notes on PSD creation
Updated: 08/26/2025
This section explains how to create PSDs that can be used in the Cubism Editor and what to look out for.
Please check this page before creating PSDs or if they do not load properly upon import.
See “About Material Separation” for the procedure for separating illustrations into parts such as eyelashes, eyeballs, outlines, and so on.
Please refer to “How to create PSDs to import” for the procedure for creating PSDs to import.
Image Editing Applications That are Guaranteed to Work
The following two image editing applications have been confirmed to load PSDs correctly in Cubism Editor.
- Adobe Photoshop
- Celsys CLIP STUDIO PAINT
PSDs created with applications other than those listed above may not load properly.
Notes on PSD Creation
The following conditions must be met for a PSD to be imported correctly into Cubism Editor.
- Save format should be [PSD].
- Color mode should be [RGB].
- The color channel setting should be [8bit/channel].
If even one of these conditions is not met, import cannot be performed.
Please also note the following when saving PSDs for import.
- Set the color profile to [sRGB].
- Check to see if there are any layers with the same name
- Layer attributes after merging should be those in [Color blend] in the Cubism Editor
- [Opacity] settings in the PSD are also reflected in the Cubism Editor, but [Fill] is output at 100%.
- Merge line drawings and clipping masks.
- Do not use layer masks
Point
The use of the above functions is not a problem during the illustration creation process.
Each is described in detail in the following sections.
Note: This page describes the process using Photoshop.
Save format
Only [PSD format] image data can be loaded in Cubism Editor.
Be sure to save the image data used as the model in PSD format.
Point
As an exception, images in PNG format can be loaded.
This is an image format that can be used as a guide image for modeling or as a background for animation.
Textures can also be replaced (beta function) using PNG images exported from the Texture Atlas.
For details on texture replacement (beta function), please see “Exporting and Replacing PNG Files (beta).”
Color mode
The only color mode for PSDs that can be loaded in Cubism Editor is [RGB].
Color modes [other than RGB], such as [Grayscale] and [CMYK], cannot be imported.
How to convert the color mode
In Photoshop, select [Image] menu -> [Mode] -> [RGB Color].
Color channel
The only color channel for PSDs that can be imported by Cubism Editor is [8bit/channel].
Color channels [other than 8bit/channel], such as [16bit/channel] and [32bit/channel], cannot be imported.
How to convert the color channel
In Photoshop, select [Image] menu -> [Mode] ->[8bit/channel].
Color profile
If a color profile other than sRGB is set for the PSD during “PSD Import,” the color may change to an unintended color.
Therefore, PSDs with profiles set to other than sRGB must have their color profile converted to sRGB in Photoshop.
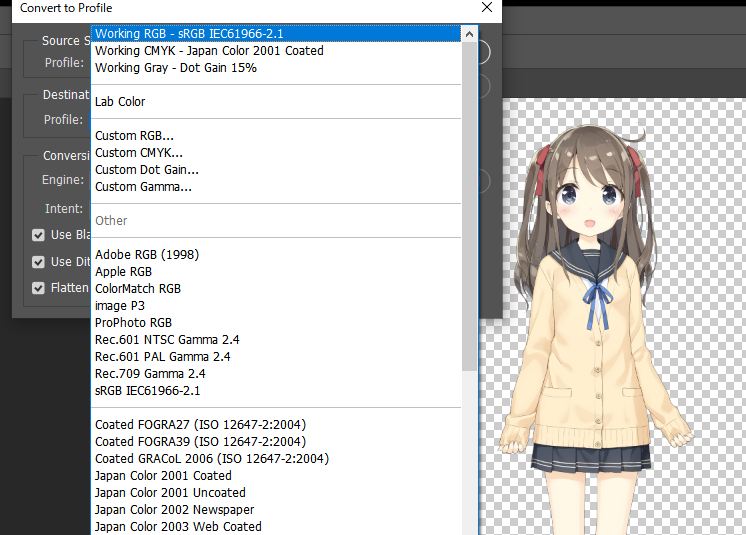
How to convert the color profile
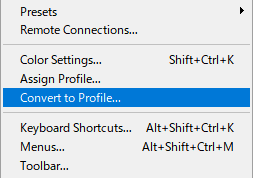
In Photoshop, select [Edit] menu -> [Profile Conversion (V)].
(Caution: This is not a “profile specification.”)
In CLIP STUDIO PAINT, select [Show] menu -> [Color profile] -> [Preview settings].
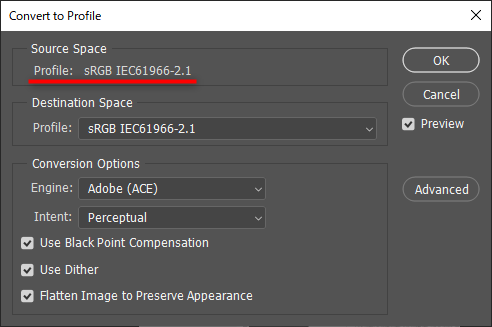
If the “Source color space” is sRGB (with IEC61966-2.1, etc.), cancel the conversion since the image is already in sRGB and conversion is not necessary.
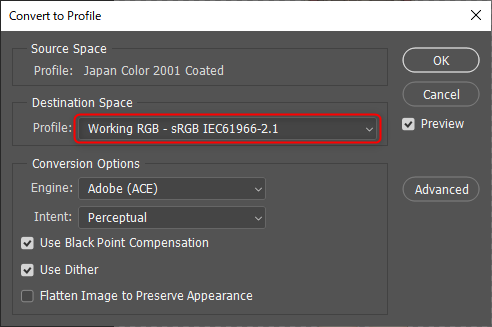
If “Source Color Space” is set to other than sRGB, set “Color Space After Conversion” to sRGB.
Normally, the standard settings are fine, but if the color changes significantly when the preview is checked on or off, please change the conversion option settings.
For a detailed explanation of conversion options, please refer to Adobe Corporation’s Photoshop manual.
Check to see if there are any layers with the same name
Typically, the same layer name can be imported into Cubism Editor, but the same layer name can cause confusion, which can lead to problems later on.
To avoid such problems, all the layers should be named differently in the material separation PSD stage.
Layer attributes after merging should match those in [Color blend] in the Cubism Editor
Layer attributes set in the PSD may change to unintended colors upon import if there is no corresponding item in the Cubism Editor’s [Color blend].
Tips
Layer attributes can be set in the Cubism Editor.
After importing, select the ArtMesh for which you wish to change the attribute and open the [Inspector] palette -> [Color blend] to reset it.
If a layer attribute other than “Normal” is set in the PSD, it will be automatically set when imported into the Cubism Editor if there is a corresponding item in [Color blend].
If none are applicable, the attribute will be “Normal.”
See “Blend mode” for details.
[Opacity] settings in the PSD are also reflected in the Cubism Editor, but [Fill] is output at 100%
If [Opacity] is set to 50% in the PSD, the opacity will be set to 50% when imported into the Cubism Editor.
[Fill] is not reproduced in the Cubism Editor, so even if it is set to “50%,” etc., it will be set to 100% in the Cubism Editor.
For cheek dyeing, for example, where the density needs to be adjusted, it is recommended to use [Opacity] instead of [Fill].
Tips
Opacity can also be set in the Cubism Editor.
After importing, select the ArtMesh you want to change, then select the [Inspector] palette -> [Opacity] setting.
Merge line drawings and clipping masks
The PSD to be imported places one part on one layer.
Combine all line drawings, fills, filter effects, clipping masks, etc. for each part into a single layer.
If you want to separate line drawings, shadows, etc., use one layer per part.
Do not use layer masks
If the PSD to be imported still has layer masks, execute “Apply Layer Mask” to combine them into one layer.
Check to see if path information is included
If path information is included in a PSD created with Photoshop CC2019 or later versions, it may not be imported into the Cubism Editor.
If path information is included, it should be deleted before merging.
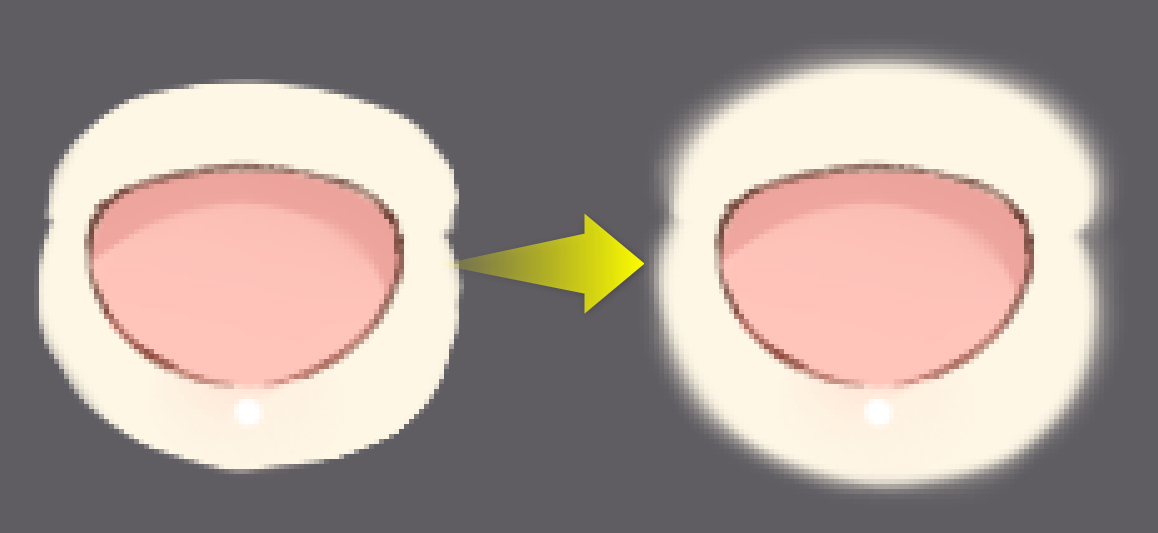
When the ArtMesh has edges around it using “tracking software,” etc.
In some cases, a line-like object is drawn on the edge of the ArtMesh when checked by tracking software.
Note: The image is drawn without any problem in the Editor.
Please try blurring the edges of the ArtMesh as shown below, as this may improve the result.