How to Set Up Physics
Updated: 09/19/2024
This page describes the basic physics setup procedures.
For more information on physics settings, see “About physics.”
Point
When swing is controlled by physics, it is necessary to prepare parameters with swing motion in advance.
How to save physics settings
The physics settings are recorded in the model file (.cmo3).
Note that while the model file is open, the settings are temporarily retained even if the physics settings are closed.
Remember to save the model file before closing it.
Procedure for Physics Settings
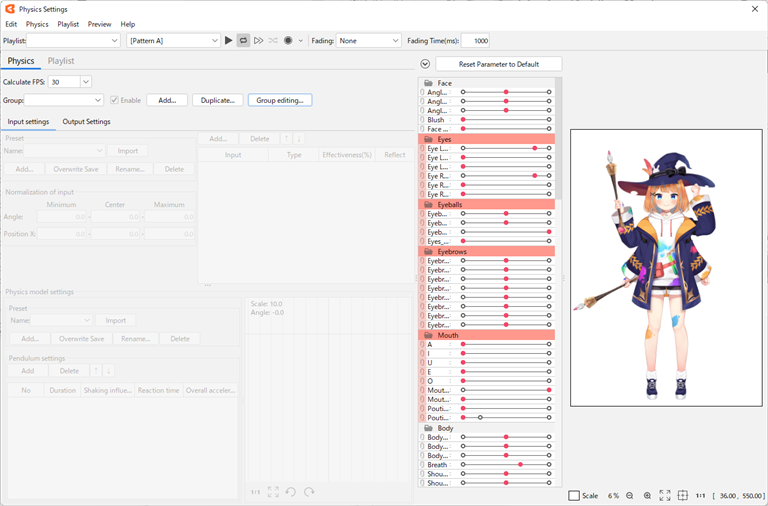
Open physics settings
Click the [Modeling] menu -> [Physics settings] to open the Physics settings dialog box.
Input and output settings cannot be manipulated before the physics group is created.
Create a group
| Number | Item | Details |
|---|---|---|
| (1) | 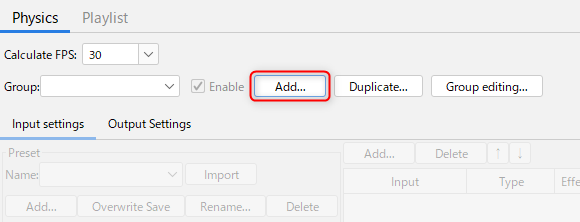 | Click [Add] to open the [Add Group] dialog box. |
| (2) | 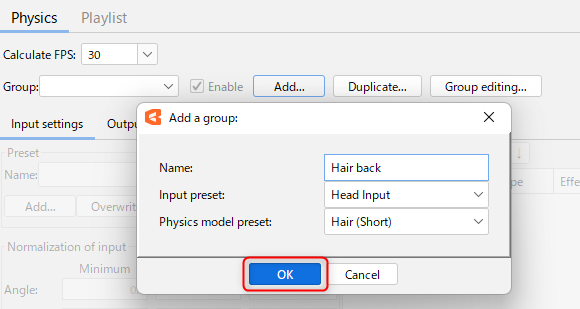 | Enter the [Name], and select whatever you want for [Presets for Inputs] and [Presets for Physical Model]. When settings are complete, click [OK]. Groups can be created even if [Presets for Inputs] and [Presets for Physical Model] are left unset. These items can also be changed after the group is created. |
Set output parameters
| Number | Item | Details |
|---|---|---|
| (1) | 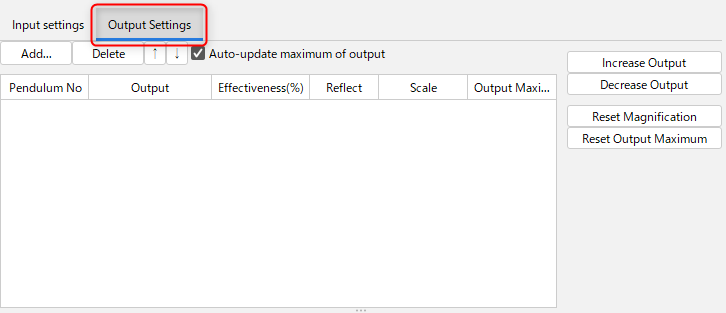 | Set the swing parameter to work with the created group. Click [Output settings] to switch to the Output settings screen. |
| (2) | 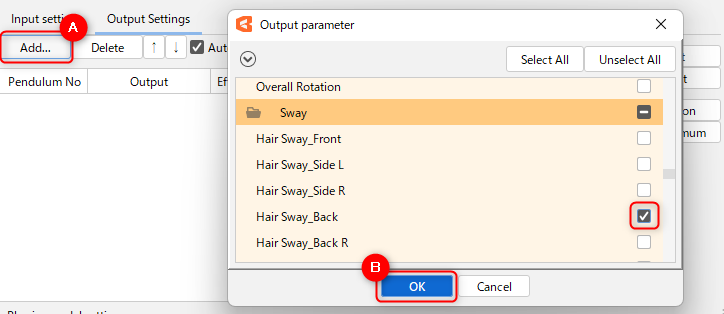 | Click [Add] (A) to open the [Output parameter] dialog box. From the [Output parameter] dialog box, select the parameter you want to move, and then click [OK] (B). |
| (3) |  | Drag the View area to move the model’s face and body to follow the cursor. It also reacts when the parameters set for the input are moved from the list. Make sure that the swings you have set up are working properly. |
Tips
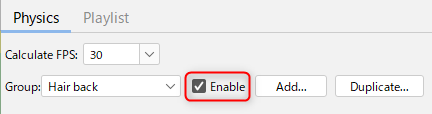
Select the [Valid] check box to enable the physics calculation, allowing you to check the swaying you have set.
Select and clear this check box as needed.
Now, we will explain how to adjust the swinging.
Change Input Settings
In physics operations, changes in the values of the parameters set as inputs will cause fluctuations in the parameters set for [Output].
Even for the same movement, changing the input settings will change the way it swings.
Change input parameters
In the preset, “Angle X,” “Angle Z,” “Body rotation X,” and “Body rotation Z” are set, but it is also possible to set the input parameter to another parameter.
For example, by setting the input parameter to “Body rotation Y,” you can make the hair fluff up during the jumping motion.
Furthermore, accessories and similar items on the arms can be swayed in accordance with arm movements by setting arm-related parameters as input parameters.
Change in Influence
When the influence level, another input parameter, is changed, the way it swings will change.
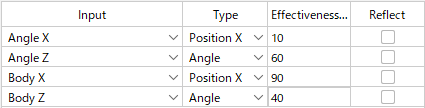
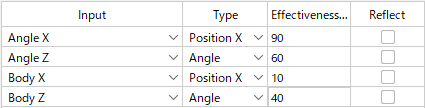
The following table shows a case, for the same model with the same motion, physical model settings, and output parameter settings, in which only the influence of the input parameters “Angle X” and “Body rotation X” was changed.
 |
 |
 |
 |
| The influence of “Angle X” is set weak and the influence of “Body rotation X” is set strong. During motion, the movement of “Body rotation X” is weak, so the hair and ribbon hardly swing. |
The influence of “Angle X” is set strong and the influence of “Body rotation X” is set weak. During motion, the movement of “Angle X” is strong, so the hair and ribbon swing well. |
Thus, differences in the influence of inputs also have a significant impact on swinging.
Change Physical Model Settings
In the physical model settings, the speed of swinging and reaction time can be adjusted.
Duration
In [Duration], you can adjust the speed of the swinging.
The smaller the value, the quicker the swinging; the larger the value, the slower the swinging.
If you want to change only the speed without adjusting the amount of change in the parameter value, adjust the [Reaction time] item.
| [Duration] value | Small | Large |
| Change in swinging | Quick | Slowly |
| Pendulum preview |  |  |
Ease of swinging
In [Ease of swinging], you can adjust the amount of swinging.
The larger the value, the larger the swing will be for even a small input.
As a rule of thumb, use a setting in the range of 0.7 to 0.99.
| [Ease of swinging] value | Small | Large |
| Change in swinging | Not much swinging | Swings well |
| Pendulum preview |  |  |
Reaction time
In [Reaction time], you can adjust the reaction speed of swinging. This is a setting for how agilely it responds to input.
The response is equal at “1”; greater than “1” makes it more agile, and less than “1” makes it less agile.
If the pendulum is multi-staged, the setting is based on how agile the child pendulum is in response to the movements of the parent pendulum.
| [Reaction time] value | Small | Large |
| Change in swinging | Slow to react | Quick to react |
| Pendulum preview |  |  |
Speed of convergence
In [Speed of convergence], you can set how quickly the swing will subside.
The convergence is equal at “1.” If it is greater than “1,” the convergence is faster, and if it is less than “1,” the convergence is slower.
| [Speed of convergence] value | Small | Large |
| Change in swinging | Slow | Fast |
| Pendulum preview |  |  |
Adjust Output Settings
The swinging calculated in the [Input Settings] and [Physical Model Settings] will be applied to the parameters set in [Output].
Under [Output Maximum (%)], you can see what percentage of the destination parameter has moved from 0 to the maximum value.
In addition, the [Scale] can be set to any value to adjust the swing, or it can be adjusted automatically according to the [Output Maximum (%)].
Magnification adjustment
The [Scale] can be set to any value to adjust the swing.
To reduce swing, set [Scale] to a value less than “1”; to increase swing, set it to a value greater than “1.”
However, if the swing is too great, the parameter may swing out.
In that case, we recommend using [Increase Output (down)].
For details on [Increase Output (down)], please refer to the “Automatic adjustment of output” section below.
Tips
The magnitude of the swing is also affected by the [Input Settings] and [Physical Model Settings].
If the swaying is small, review those settings as well.
Automatic adjustment of output
Check the movement of the output parameters using cursor tracking or scene playback before automatically adjusting the output.
Then check the value of [Output Maximum (%)].
Point
[Output Maximum (%)] indicates the percentage of movement by which the output value obtained from multiplying the input by the scale has moved between 0 and the maximum value of the destination parameter.
Let’s take the case where the default value is 0 with the parameter settings as shown in the figure below.
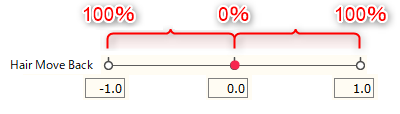
Note: Input normalization is not performed in this example.
When the Output Maximum is well below 100% (if the movement is small):
The Output Maximum represents how much the output parameter was running.
As shown in the figure below, when [Output Maximum (%)] is set to 50%, only about half of the movement attached to the parameter is in motion.
If you want to increase the motion, click [Increase Output (up)] to automatically adjust the output.
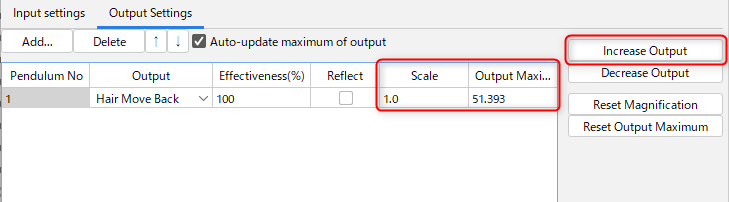
By performing automatic adjustment, [Scale] will be adjusted so that [Output Maximum (%)] is set to 100%.
This allows the swing movement to be increased within the proper range.
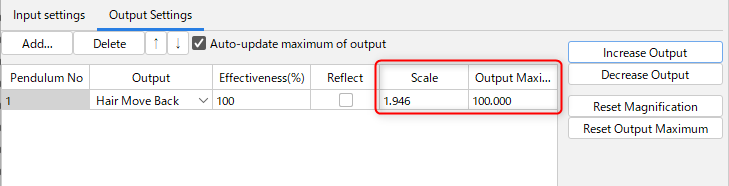
When the Output Maximum is well above 100% (if the movement is swinging out of control):
The Output Maximum represents how much the output parameter was running.
If [Output Maximum (%)] exceeds 100%, the swing of the pendulum is out of the range of the parameter.
The pendulum is trying to move to a range where it is not creating movement, which causes choppiness.
If you want to reduce the motion, click [Increase Output (down)] to automatically adjust the output.

By performing automatic adjustment, [Scale] will be adjusted so that [Output Maximum (%)] is set to 100%.
This reduces output and eliminates choppiness.
Redo Increase Output
If you do not get the result you want during adjustment, you can reset the output result by clicking the button below.
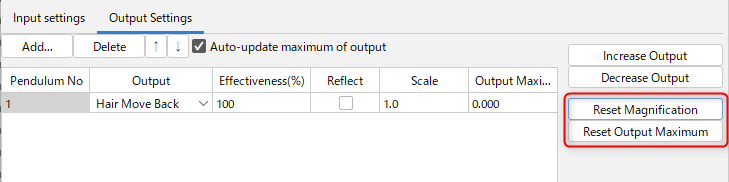
Reset scale:
Resets the adjusted scale to “1.0.”
Reset maximum output:
Resets the value of the maximum output detected by cursor tracking or scene playback.
How to Set Up Applied Physics Operations
Set the pendulum in multiple stages
This section describes the procedure for setting up applied physics operations such as multi-stage pendulums and skinning swings.
Please refer to the “Skinning” page for skinning settings.
| Number | Item | Details |
|---|---|---|
| (1) | 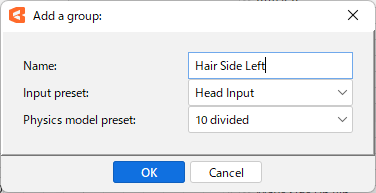 | Add a physics group. For [Presets for Physical Model], select “Hair 2-step pendulum,” “Hair 3-step pendulum,” “10-step,” or “20-step.” Note: The preset should be determined by the number of parameters for swinging. |
| (2) | 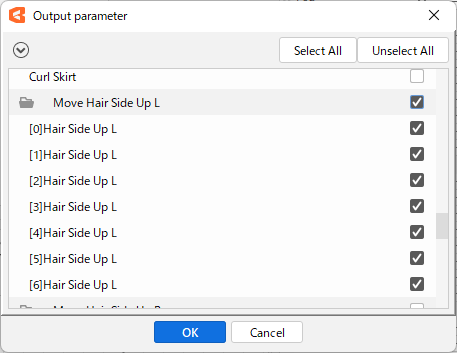 | Switch to the [Output Settings] tab to set output parameters. Select all output parameters from the [Output Parameter] dialog box. You can select a range by pressing [Shift] + click. |
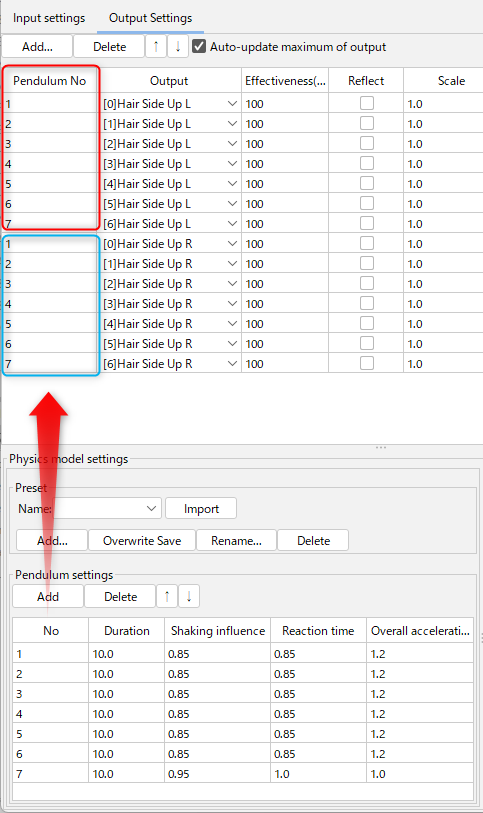
| (3) | 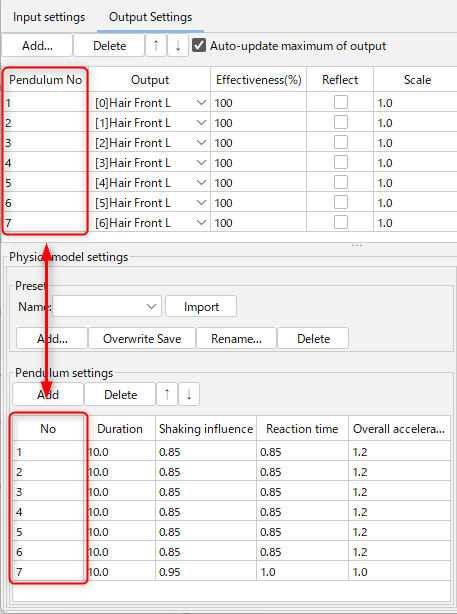 | In the [Physical Model Settings], check that the number of parameters used for output matches the [No.] in the [Pendulum Settings]. For example, if you use a “10-step” preset with 5 parameters used for output, click [Delete] to delete the pendulum after “6” in [No.]. Conversely, if there are not enough pendulums for the parameters to be used for the output, [Add] should be used. Note that even if the pendulum is set to multiple stages in the [Physical Model Settings], it will not swing cleanly if the [Pendulum No.] in the [Output Settings] are all set to “1” or if the numbers are misaligned. |
| (4) |  | Check the swinging using cursor tracking or scene playback |
Tips
Even if the parameters for swinging are divided between left and right, they can be set together in one group by setting them as shown in the image.
Skinning scale adjustment
If [Increase Output (up)] is used for skinning, the value will be too large for the parameters set by skinning, and the parameters will be swung out.
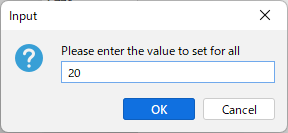
If skinning is set to a multi-stage setting of about 10 steps, setting the scale factor to around “20” will result in optimal movement.
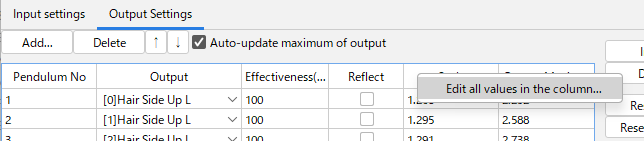
To change the scale factor for multiple output parameters at once, right-click on [Scale] and select [Change Value Batch].
Output inversion
In the case of a swinging object that is divided into left and right parts, the motion can be inverted to express a fluffy, spreading motion.
To invert the motion, go to [Output Settings] and check the [Reflect] checkbox for the parameter to be inverted.
Tips
If the same parameter is set as an output in multiple groups, be sure that the total [Influence] in the [Output Settings] section does not exceed 100%.
If the [Influence] value exceeds 100%, the parameter will be out of balance, resulting in jerky motion.