Onion Skin
Updated: 08/17/2023
The states before and after keyframes and keyforms are displayed, allowing the transition of movement to be checked.
In addition, the Modeling View allows visualization of parameter trajectories with lines, facilitating adjustments such as extended interpolation.
Onion skin activation
The onion skin can be activated by a button added to the bottom of the View area.
The ON/OFF status is linked to the open view ([Modeling], [Animation], [Form Animation]).
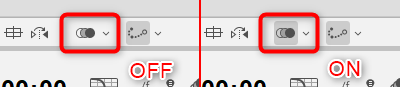
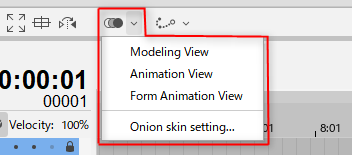
Click the adjacent v button to toggle the onion skin on or off for each view.
The Onion skin settings dialog box can also be launched from here.
Onion Skin Settings Dialog Box
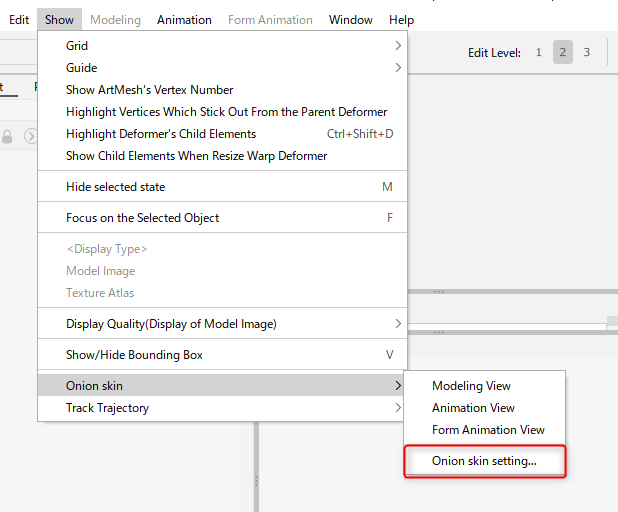
Click on [Show] menu -> [Onion skin] -> [Onion skin settings].
Modeling View display settings
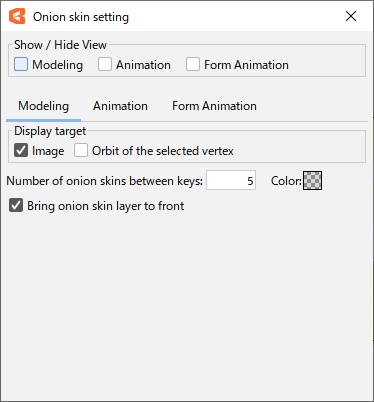
The Modeling View allows the following settings.
Image / Orbit of the currently selected vertex
[PRO version exclusive features]
Toggles the orbit display on or off.
You can toggle the display of the image (the displayed texture) and the trajectory of the vertices of the currently selected object.
The orbit of a vertex is for the control point of the currently selected vertex and deform path.
Color and transparency settings
Onion skin color and transparency settings are also available in the Modeling View.
Onion skin layer in the foreground
When checked, the onion skin layer is always displayed in front of the other parts, and when unchecked, it is displayed in its original draw order.
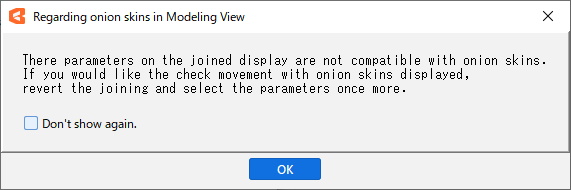
Link Parameters
The onion skin of the linked parameters is not displayed.
Accordingly, when the onion skin in the Modeling View is activated for the first time, the following hint dialog box will appear.
Onion skin marker
Onion skin markers are special markers that are placed at any frame position on the timeline palette to set the display position of the onion skin.
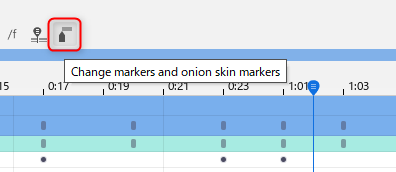
Clicking the newly added button (indicated with the red frame in the following figure) in the left pane of the timeline palette toggles between the marker and onion skin marker functions.
Note: The onion skin marker function and the marker function are mutually exclusive.
Onion skin markers are enabled:
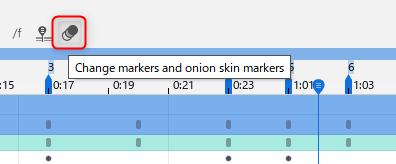
Markers are enabled:
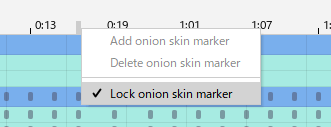
Onion skin markers can be added/removed by right-clicking at the top of the timeline while onion skin markers are enabled.

Onion skin markers can be moved by dragging with the mouse.
Once an onion skin marker is locked, it cannot be added, deleted, or moved. This helps prevent accidental operation such as when dragging the indicator bar.
You can skip the indicator bar to the previous onion skin marker by pressing [Ctrl] + [Shift] + [J] and to the next onion skin marker by pressing [Ctrl] + [Shift] + [K].
Onion skin marker information and lock settings are retained for each scene and written to the .can3 file when saved.
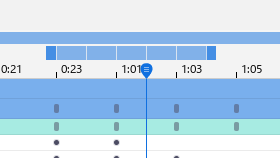
Visualize the display range of the onion skin on the timeline
A red bar has been added to indicate the range of frames in which the onion skin will be displayed.
The length of the onion skin display range bar is linked to the display range of the frame to be displayed (see below) and the previous and next frames in the onion skin settings.
The frame to be displayed is indicated by a white line in the bar.
Whole frame

Keyframe

Onion skin marker

Drag the start/end position handles to adjust the display range of the previous/next frame.
Values in the Onion skin settings dialog box are also synchronized.

Animation View display settings
The following settings are available in the Animation View.
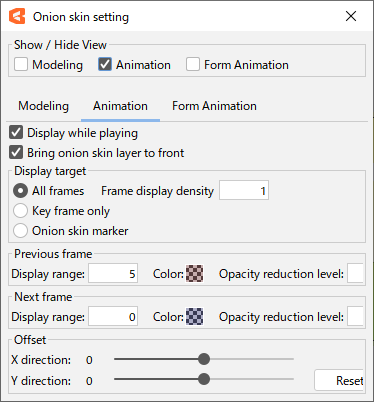
Display during playback:
Onion skin display can be toggled on and off during animation playback.
This is useful if you want to reduce the drawing load during playback while the onion skin function itself is turned on.
Onion skin layer in the foreground:
When checked, tracks in the onion skin are always displayed in front of other tracks; when unchecked, tracks are displayed in their original draw order.
Displayed in:
The target frame for displaying the onion skin can be selected.
Selecting all frames makes all drawing frames visible in the onion skin, regardless of the key being struck on the track.
When all frames are selected, the number of onion skins actually displayed can be thinned out by setting the frame display interval.
For example, if the display range of the previous frame is “10” and the frame display interval is “5,” then 5 frame spacing, or two onion skins, will be displayed within 10 frames of the indicator’s position.
This is useful for animations with a large number of frames, for example, when it is difficult to see the changes before and after in the onion skin for each frame.
Selecting Keyframe only makes the keyframes of the currently selected track the target of the onion skin display.
The onion skin will not be displayed on tracks where no keyframes have been hit.
When an onion skin marker is selected, the frame corresponding to the position of the onion skin marker set on the timeline palette is targeted for display.
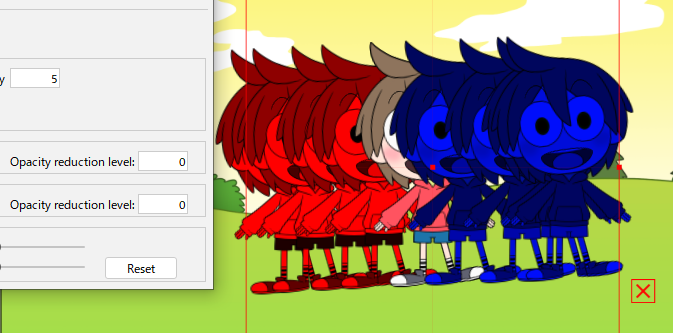
Opacity Reduction Level
The opacity of the onion skin frame can be set to decay one move away from the current position. The reduction level can be set on a 10-point scale.
This setting is only affected from the second frame onward and does not affect the opacity of the first frame.
It can be set for each of the previous and next frames.
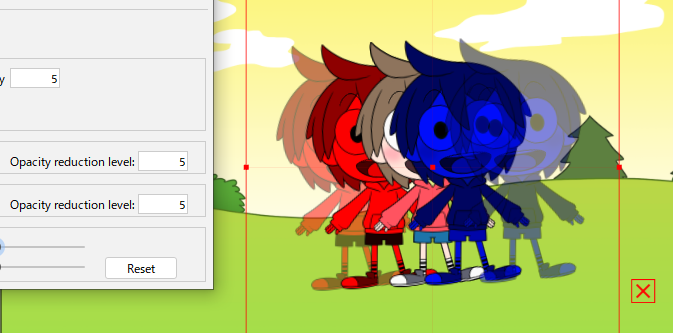
No attenuation at level 0 and completely transparent except for one frame at level 10.
Opacity reduction level 0 (no attenuation)
Opacity reduction level 5 (3rd frame onwards becomes transparent)
Opacity reduction level 10 (displays only the first frame)

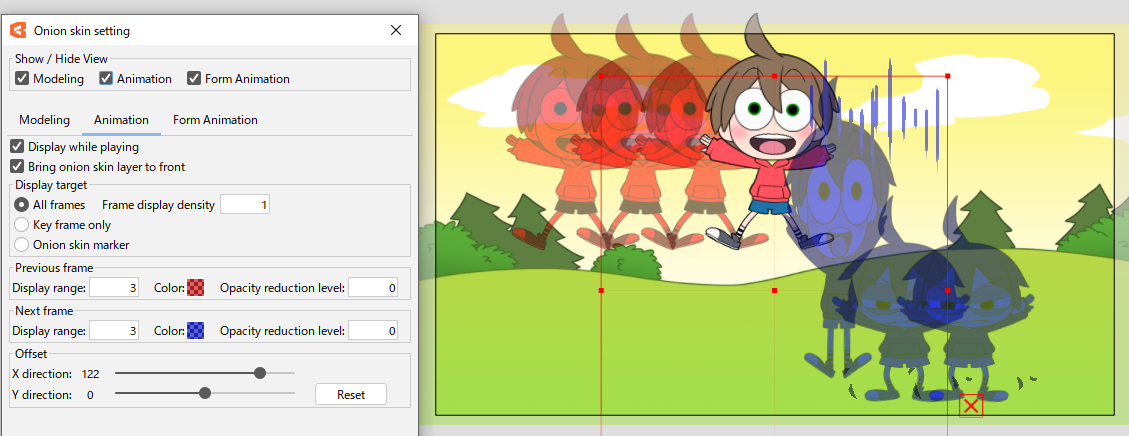
Offset
The drawing position of the onion skin can be shifted in the X and Y directions.
This function is useful when you want to check the previous and next frames on a track with few coordinate shifts.
Form Animation View display settings
The following settings are available in the Form Animation View.
Note: These are almost the same functions as the settings with the same name added to the Animation View.
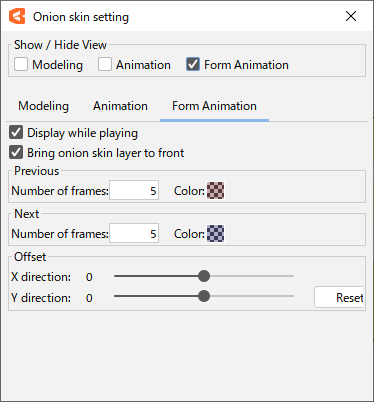
Display during playback:
Onion skin display can be toggled on and off during animation playback. This is useful if you want to reduce the drawing load during playback while the onion skin function itself is turned on.
Onion skin layer in the foreground:
When checked, the onion skin layer is always displayed in front of the other parts, and when unchecked, it is displayed in its original draw order.
Offset:
The drawing position of the onion skin can be shifted in the X and Y directions. This function is useful when you want to check the previous and next frames on a model with few coordinate shifts.