Production Flow
Production Flow With Cubism Editor
Live2D achieves three-dimensional expression by changing the source image itself.
Here is the general flow of the process of creating a model from a single illustration.
STEP 1: Preparation and processing of source images
Separate the illustration into pieces for each part to be moved.
Add the parts of the illustration that are visible when the illustration is moved.
 |
 |
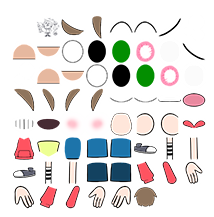 |
| Original source image illustration | Cropped illustration with opacity reduced | Illustration separated out for each part to be moved |
STEP 2. Modeling
Import the data prepared in STEP 1 into the Cubism Editor and add motion.
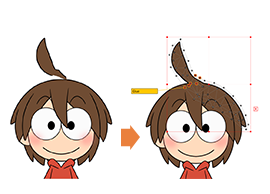
Here, editing functions such as “Deformer,” “Parameter,” and “Glue” can be used to efficiently add a range of motion.
 |
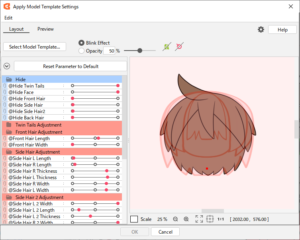 |
| “Glue” function to attach objects to each other | Template function can automate the process of adding movement to some extent |
STEP 3. Animation
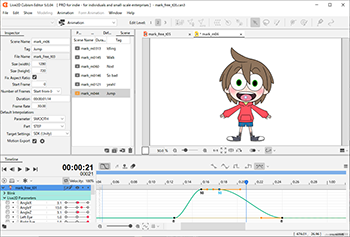
Import the model with motion added in STEP 2 into the Animation Workspace and create an animation.
Using the “Dope Sheet” and “Graph Editor,” you can create subtle and smooth animations by specifying keyframes along the timeline.
STEP 4: Exporting to video and incorporating into applications
The animation created in STEP 3 can be used for a variety of purposes by exporting it as a video file, GIF animation, still image (sequential number), or file for applications and games.
 |
 |
 |
 |
| Video GIF animation |
Still image (sequential number) | iOS, Android, Unity, OpenGL, DirectX, Web browsers, home game consoles, etc. |
|
See “Tutorial” for detailed production procedures.
