Blend Shape
Updated: 10/16/2025
This function adds differences to the model geometry. This is a convenient feature that allows modeling without worrying about the number of parameter multiplications.
Blend Shape can be added to the following six types of objects.
- ArtMesh
- Warp deformer
- Rotation deformer
- Part(s)
- ArtPath
- Glue
Create Blend Shape Parameters
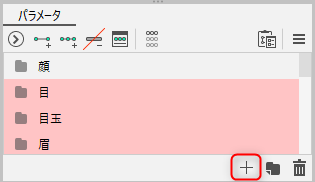
To create a parameter for a Blend Shape, click the [Create New Parameter] button at the bottom of the parameter palette.
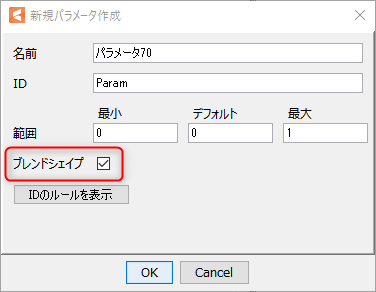
In the [Create New Parameter] dialog box, check [Blend Shape] to create Blend Shape parameters.
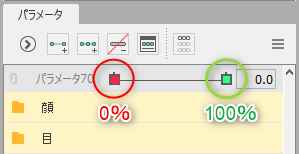
It is recommended that the range of Blend Shape parameters be set to a minimum value of “0,” a default value of “0,” and a maximum value of “1.”
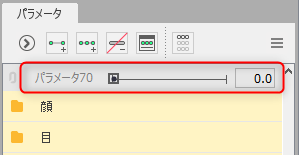
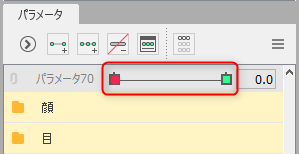
The created Blend Shape parameters will be marked with a rectangular border at the value of “0.0.”
About Blend Shape’s Keyforms
Adding keys
Select the Blend Shape parameters and the object to which you want to add the keyform, then execute [Add 2 Keyforms].
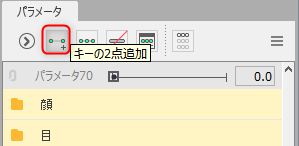
Then, a rectangle key is added to the minimum value “0.0” and the maximum value “1.0” of the Blend Shape parameters, one at a time.
Precautions
Blend Shape parameters cannot be used in the following functions.
- Keyform editing
- Delete deformer and pass on its parameters to child component (if the parent is the Blend Shape itself)
Deleting keys
Blend Shape keys can delete the keyforms in the same way as normal parameters.
When editing keyforms
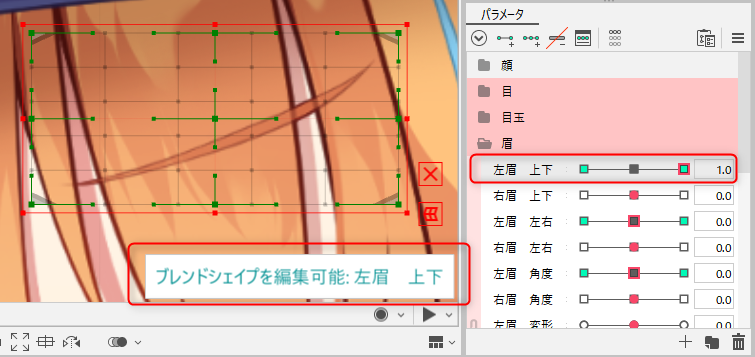
The keyform can be edited by selecting the Blend Shape key in the Parameter palette.
When a Blend Shape’s keyform is editable, the message “Blend Shape is editable: <<parameter name>>” appears in the lower right of the View.
About keys
There are two types of keys for Blend Shape parameters.
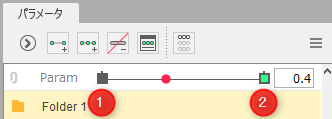
- (1) Base key:
- This is the Blend Shape parameters’ own key and is used to determine the parameters’ influence.
One is automatically added to every Blend Shape parameter, and no object can have a keyform.
When no other keys are available, the base key is automatically deleted. - (2) Blend shape key:
- The object has the keyform of the Blend Shape in the key at (2).
Adding a key to a Blend Shape parameter adds the key to the Blend Shape.
Precautions
You can also [Select], [Reflect], [Adjust], and [Change] keyforms for Blend Shape keys. The behavior is basically the same as before, but please note the following specifications specific to Blend Shape parameters.
- [Reflect] swaps the positive and negative values of the key. This behavior differs from the normal “reflect” function.
- [Adjust] cannot change the value of the base key from “0.0” to another value, nor can it set the value of another key to the same value as the value of the base key.
- [Change] can only be applied to Blend Shape parameters for which the currently selected object does not have a key.
If multiple Blend Shape keys are selected
If multiple Blend Shape keys are selected, one editable keyform is selected for each selected object.
Multiple keyforms of a single object cannot be subject to editing at the same time.
Please see below for specific specifications.
| Number | Description | Details |
|---|---|---|
| (1) | With only one Blend Shape key selected | You can edit the keyforms of Blend Shape.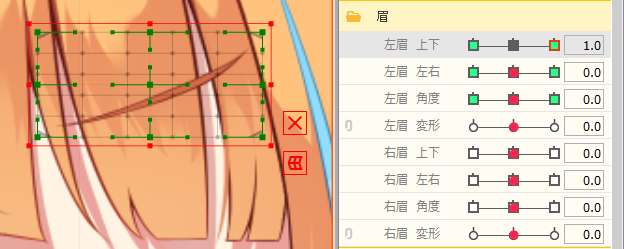 |
| (2) | With two Blend Shape keys selected | When only one parameter is selected, it can be edited.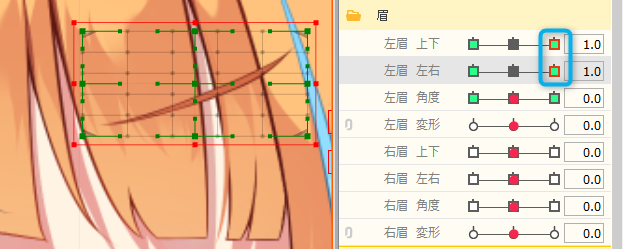 |
| (3) | With multiple Blend Shape keys selected | When multiple Blend Shape keys are selected, the parameter to be edited cannot be specified. Select one parameter and edit it.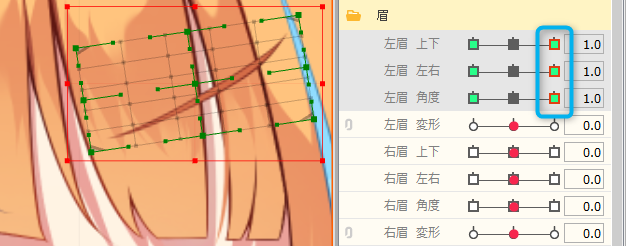 |
Tips
Editing the keyforms of objects with Blend Shape is more complex in behavior than for objects without Blend Shape.
To prevent accidental editing, it is recommended that when editing the keyform of a Blend Shape, the value of the Blend Shape parameter that is not being edited be set to the same value as the base key (0.0).
Key merging
Blend Shape parameters can be linked.
However, since arbitrary selection of keyforms is not possible when linking, unlink parameters as necessary.
| Both parameters are for Blend Shape | 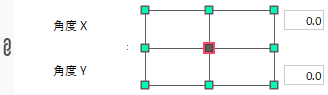 |
| One parameter is for Blend Shape | 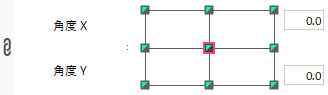 |
Blend Shape Deformation
Blend Shape deformation consists of two components: [Weight] and [Form Difference].
Weight
This is based on the distance between the current value of the parameter and the key, which is always 0% at the base key and can vary up to 100%.
Form Difference
The difference between the Blend Shape keyform and the “keyform closest to the default form of the non-Blend Shape keyform.”
Inspector properties
The following properties can be edited in the keyforms of Blend Shape.
| Property | ArtMesh | Warp deformer | Rotation deformer | Part(s) | ArtPath | Glue |
|---|---|---|---|---|---|---|
| Draw order | ✓ | ✓ | ✓ | |||
| Opacity | ✓ | ✓ | ✓ | ✓ | ||
| Multiply Color | ✓ | ✓ | ✓ | ✓ | ||
| Screen Color | ✓ | ✓ | ✓ | ✓ | ||
| Line Width | ✓ | |||||
| Line Color | ✓ | |||||
| Opacity of control points (ArtPath) | ✓ | |||||
| Angle | ✓ | |||||
| Scale | ✓ | |||||
| Compatibility | ✓ |
Each property has a defined minimum and maximum value.
Please see the table below for specific figures.
| Property | Minimum value | Maximum value |
|---|---|---|
| Draw order | 0 | 1000 |
| Opacity | 0% | 100% |
| RGB (Multiply Color, Screen Color, Line Color) | 0 | 255 |
| Angle | -3600 degrees | 3600 degrees |
| Scale | 0.01% | 10000% |
| Line Width | 0 px | 2000 px |
| Compatibility | 0% | 100% |
Using multiple Blend Shape parameters at the same time may cause the values to exceed the defined range.
In such cases, the value exceeding the defined range is rounded down and the actual property value is restricted to be the same as the minimum or maximum value.
Inspector palette
The entry field for each property in the [Inspector] palette displays the value after the restriction has been applied.
Also, to the right of the input field, the value before it is restricted is displayed only while editing the Blend Shape.
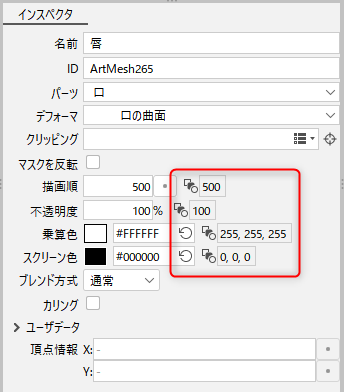
If the property values do not change as you would like when using multiple Blend Shapes at the same time, check the values before they are restricted.
Tips
When using multiple Blend Shape parameters, it is not recommended to manipulate the same properties of one object at the same time, as this can make the model too complex.
Notes on editing Blend Shapes
Precautions
Changing the “default form” property of an object changes the behavior of all Blend Shapes.
To prevent accidental edits, please keep the following points in mind when creating Blend Shapes.- Default values for all parameters must be keyed.
- [Lock default forms] must be enabled.
- After editing a Blend Shape’s keyform, do not change the default values of the object and its associated parameters.
- Do not edit the default form.
Tips
With the above caveats in mind, it is strongly recommended that Blend Shape-related modeling work be undertaken only after it is no longer necessary to change default forms or edit surrounding keyforms.
Example of Blend Shape Creation
Here is an example of creating a Blend Shape, using the following square shape.
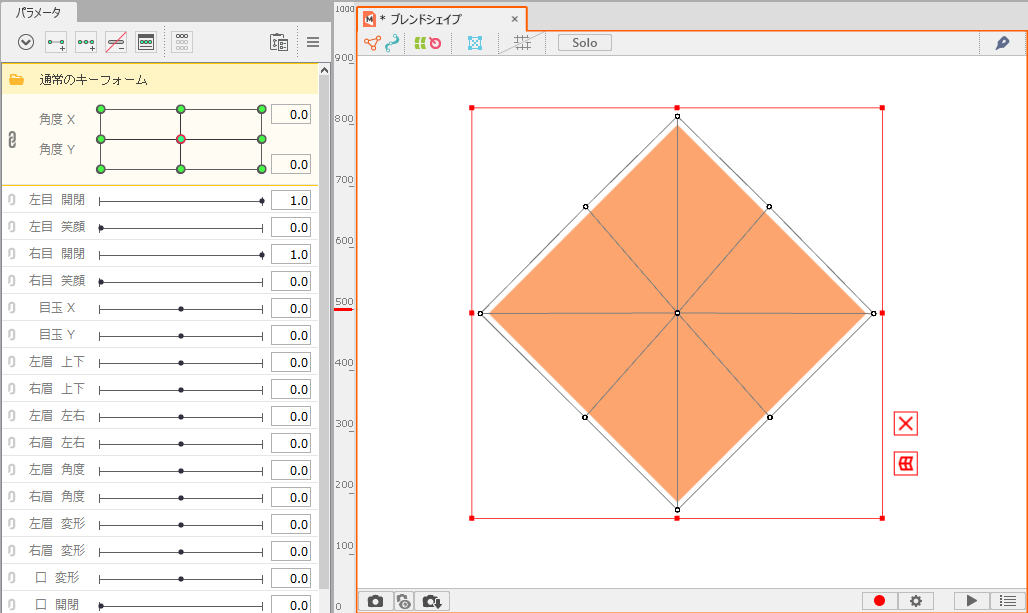
After adjusting the square in its normal keyform (angle X,Y), create a keyform for the Blend Shape.
In the created keyform for the Blend Shape, the square is the base key (0.0) and the Blend Shape key (1.0) is transformed to an octagon.
If you move the normal keyform with the Blend Shape key set to (1.0), you will see that an octagon has been added to all (angle X,Y) keys.
To set multiple blend shapes
In addition to the “octagonal shape” created, the following “triangular shape” is created and explained below.
| “Octagonal shape” | “Triangular shape” |
 | 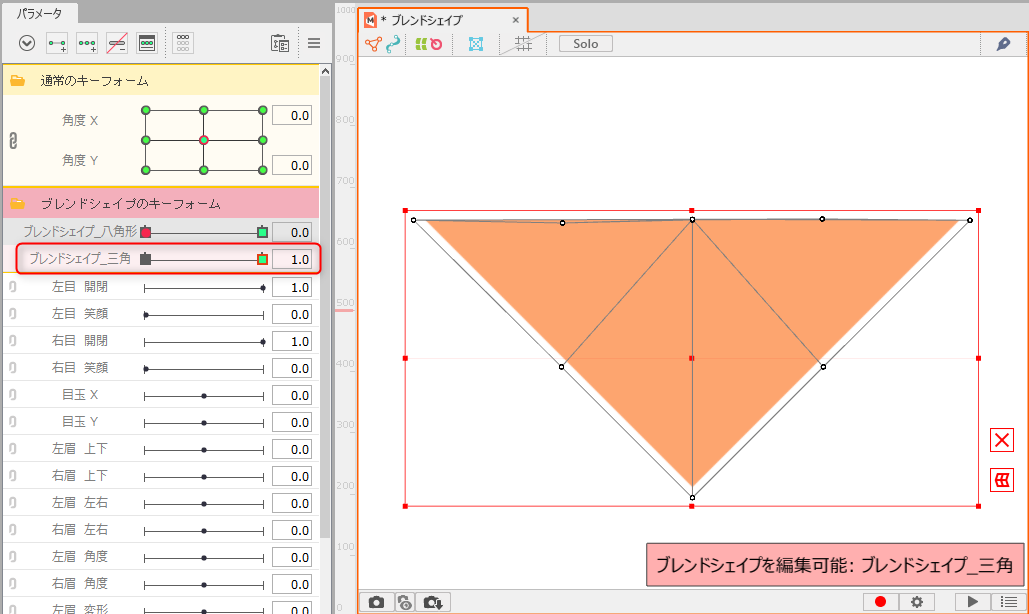 |
After creating a “triangular shape” for the Blend Shape key, the shape was added in the normal keyform.

However, when both Blend Shape keyforms are set to (1.0) and the object shapes are checked in the View, the shape is not octagonal nor triangular, but another shape, and it has lost its shape.
Unintended shape suppression can be adjusted using the [Limit Settings for Blend Shape Weights] function.
See the “Limit Settings for Blend Shape Weights” page for a detailed explanation of the setting method.