Rotation Deformer
Updated: 08/26/2025
About Rotation Deformers
Rotation
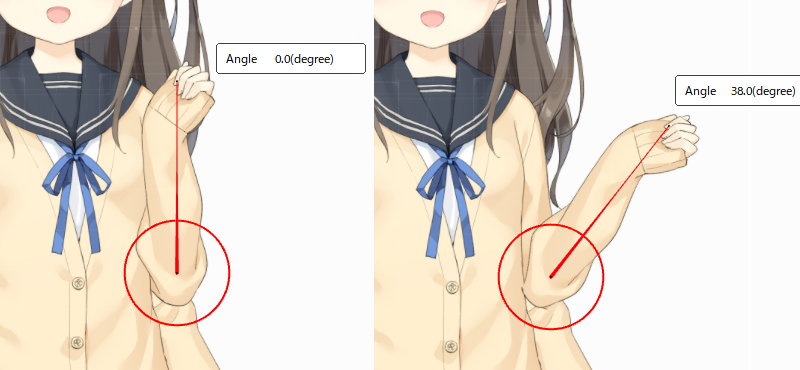
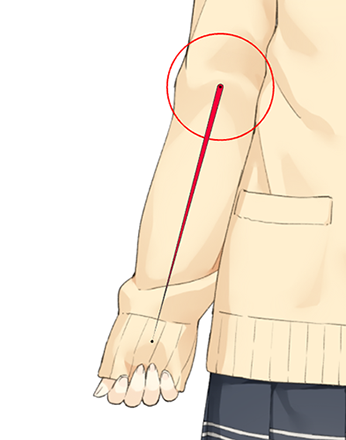
By setting a rotation deformer on the object’s parent, the object inside can be rotated.
To use this function, drag the tip to adjust.
Note: Please see the “Repeat” page for instructions on how to rotate the deformer once.
Expansion and contraction
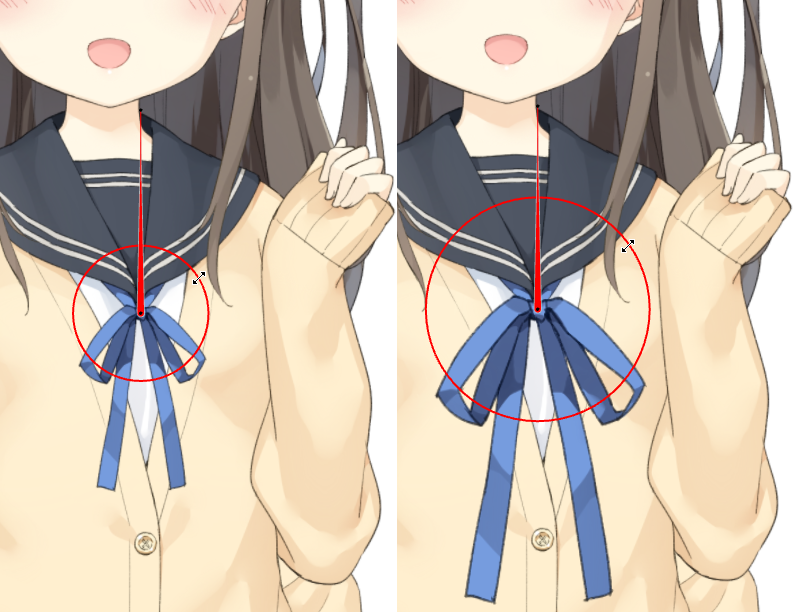
The object can be scaled by adjusting the round “scale handle” on the rotation deformer.
Create a Rotation Deformer
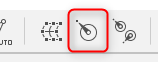
1. Click [Create Rotation Deformer].
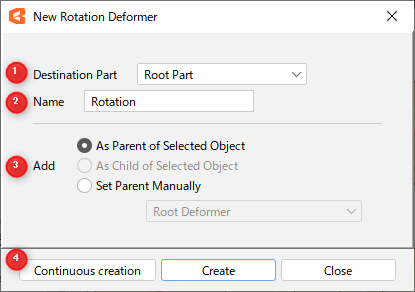
2. The [Create Rotation Deformer] dialog box opens.
Enter the desired settings and click the [Create] button to create a rotation deformer on the view.
| No. | Name |
Description | |
| 1 | Parts to be inserted | Select the part to insert. | |
| 2 | Name | Set the name of the new rotation deformer. It can also reflect the name of the currently selected object. See “Environment settings” for details. |
|
| 3 | Location | Select where to add the new rotation deformer. For details on how to set up a parent-child hierarchy, see “Setting up parent-child hierarchies.” |
|
| 4 | Sequential creation | Create rotation deformer sequentially without closing the dialog box. | |
| Create | Create a rotation deformer and close the dialog box. | ||
| Close | Close the dialog box without creating a rotation deformer. | ||
3. Adjust the position and angle of the rotation deformer to match the object on the canvas.
To adjust the length of the rotating handle, use Alt + Drag at the end of the handle.
4. Select the object -> Select the created rotation deformer from the “Deformer” in the inspector palette -> Set as parent.
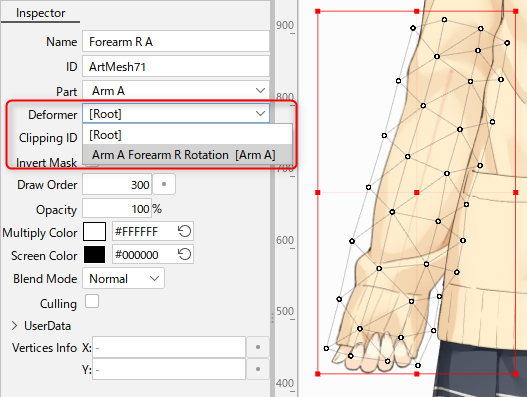
That completes the settings.
Let’s check the settings by moving the handle of the rotation deformer.
After setting the parent, Ctrl + Drag can be used to adjust the position and angle of the rotation deformer, and Alt + Drag to adjust the length of the handle.

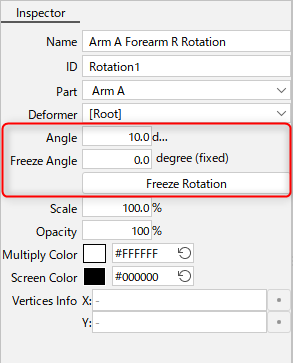
How to set the standard angle
In the inspector palette of the rotation deformer, you can set [Standard Angle], which considers the specified angle to be 0 degrees.
- In the [Angle] text box, enter a number to match the angle of the character, such as the tilt of the head, or drag the handle of the rotation deformer.
- Click [Set Standard Angle] to set the angle to the [Standard Angle] and make it the base of rotation (0 degrees).
- To restore the original value, enter a value in [Angle] that reverses the positive and negative values of the standard angle, and click [Set Standard Angle] again.
Note: For a detailed explanation of the inspector palette, please refer to the “Inspector Palette” page.
How to Use the Rotation Deformer Creation Tool
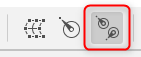
This function allows you to instantly create a rotation deformer while dragging the mouse pointer.
With the object selected, click the tool icon and drag it on the view to create a rotation deformer.
No dialog box is opened and the operation is performed directly on the view.
Names and other information must be added later, but the parent-child hierarchy as well as the rotation deformer orientation and its length are created instantly, so use this function according to the application.
Edit Rotation Deformer
By holding down a key on the keyboard and dragging, you can edit the rotation deformer without affecting the children.
For more information, please refer to the chart below.
Note: For Mac users, please replace [Ctrl] with [Command].
| Shortcut | Rotating handle | Scale handle |
|---|---|---|
| Drag | Rotation | Zoom In |
| Shift + Drag | Rotate by 45 degrees | [None] |
| Alt + Drag | Enlarge only the rotating handle display without affecting the object. | [None] |
| Alt + Shift + Drag | [None] | [None] |
| Ctrl + Drag | Rotate without affecting the object. | Enlarge without affecting the object. |
| Ctrl + Shift + Drag | Rotate by 45 degrees without affecting the object. | [None] |
| Ctrl + Alt + Drag | Enlarge only the rotating handle display without affecting the object. | [None] |
| Ctrl + Shift + Alt + Drag | [None] | [None] |
Shift + drag operation of rotating handle
The angle interval can be set for editing the angle of a rotation deformer using [Shift] + dragging the handle.
You can also set it to truncate the decimal point of an angle when editing the handle with [Shift] + dragging.
The settings can be changed in [File] menu -> [Environment settings] and then [Rotation Deformer] under [Modeling].
See “Environment settings” for details.