Auto Generation of Sway Motion
Updated: 09/12/2024
This function automatically generates the movement of swaying objects such as small objects and hair.
The degree of swaying can be adjusted from the dialog box while viewing the generated motion, streamlining the process of adding motion to swaying objects.
Supported sway types
The following two types of motion can be generated.
| Hair sway | Drooping by angle Z |
 |  |
Creating complex sway motion that does not fall into these categories may not result in the intended movement.
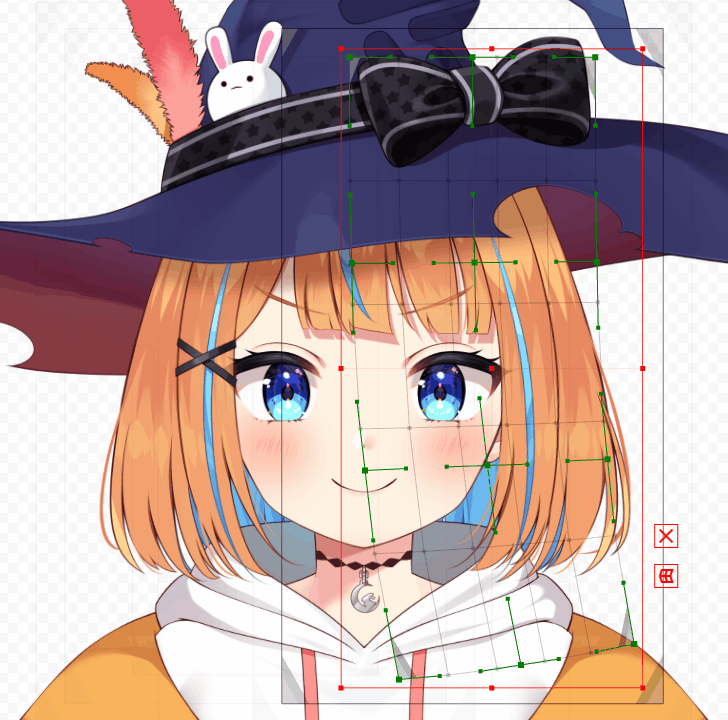
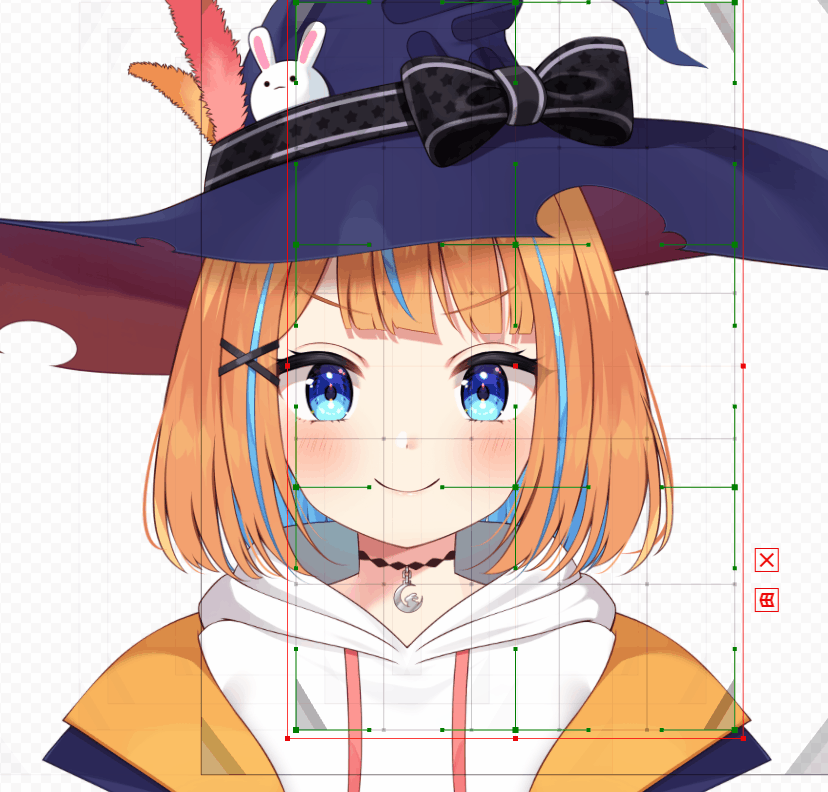
This function applies deformation to the warp deformer containing the ArtMesh of the area to be moved.
Therefore, sway motion using the rotation deformer is not covered by this function.
Auto generation of sway motion
Displaying the settings dialog box
The following setting dialog box can be displayed in the [Modeling] menu -> [Parameter] -> [Auto generation of sway motion].
| Number | Item | Description |
|---|---|---|
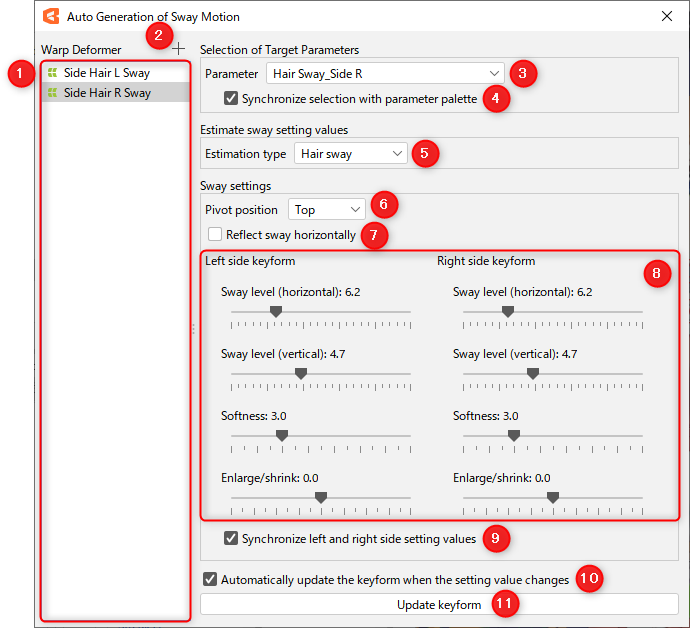
| (1) | Deformer list | Displays a list of registered warp deformers. The warp deformer selected here is the target of the sway deformation. |
| (2) | Register warp deformer | Register the warp deformer selected in the Modeling View to the list. |
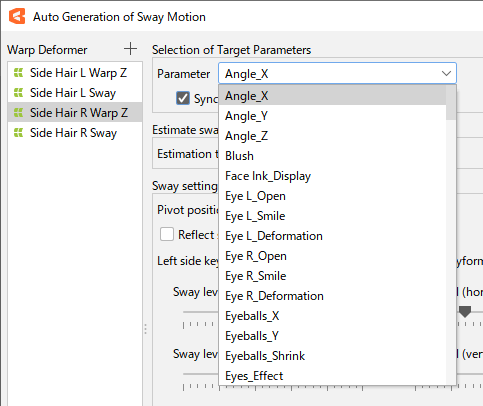
| (3) | Parameters | Select the parameter that is the target of the sway deformation. |
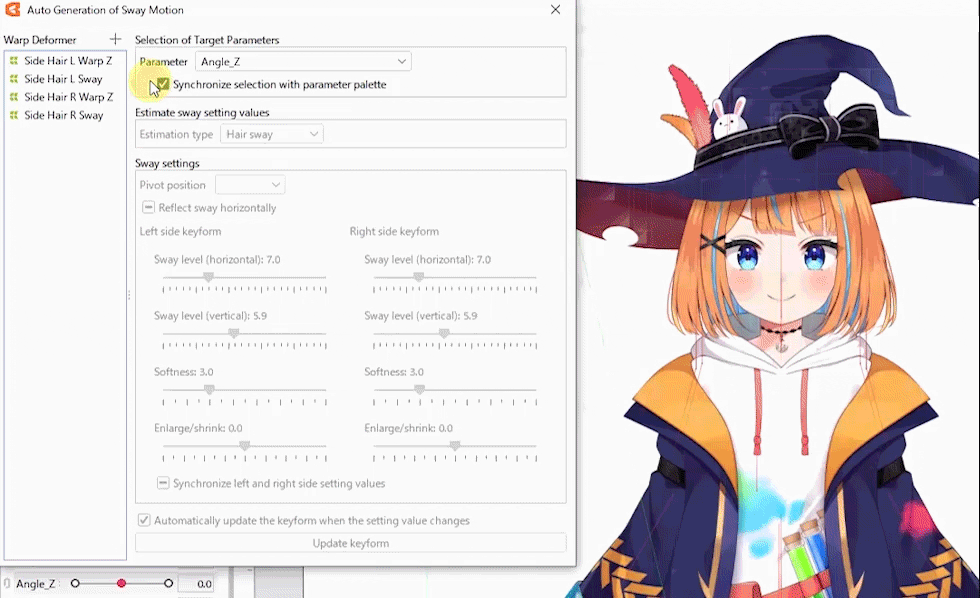
| (4) | Synchronize selections with parameter palette | When checked, the parameter selection of this dialog box synchronizes with that in the parameter palette. |
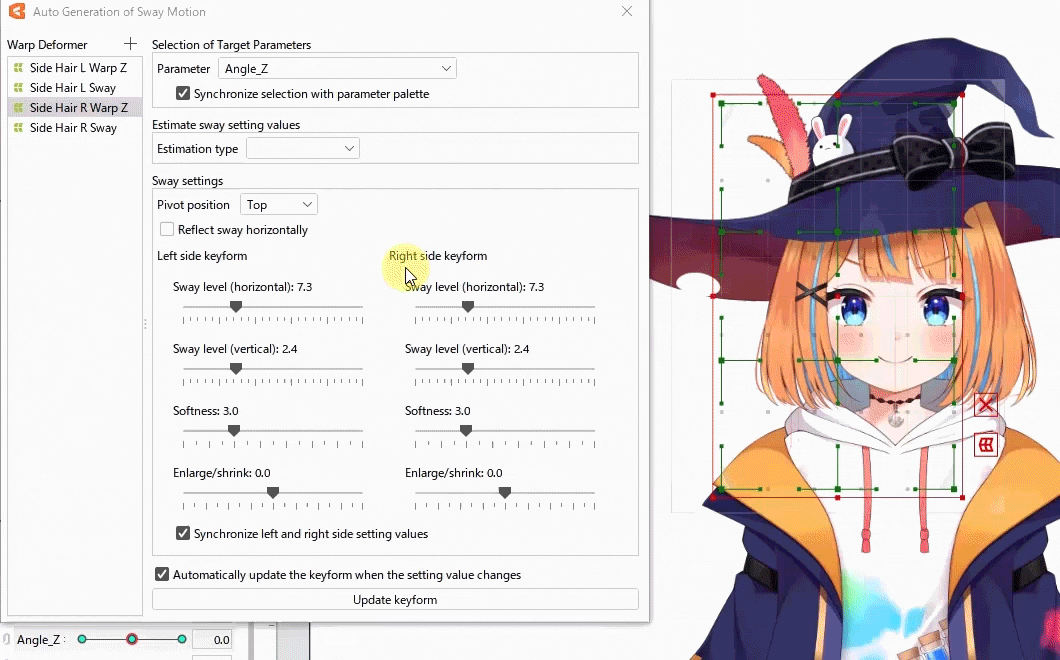
| (5) | Estimation type | Estimates the appropriate sway setting value for the deformer and changes the sway setting. You can choose between two types of estimation: [Hair sway] and [Generate droop by angle Z]. |
| (6) | Position of fulcrum | The position of the fulcrum of the sway can be changed. You can choose from four settings: [Top], [Bottom], [Right], and [Left]. |
| (7) | Flip sway horizontally | If checked, flips the direction of the generated sway horizontally based on the fulcrum. |
| (8) | Adjustment of sway settings | Adjust the degree of deformation of the sway. Descriptions of each setting value are given below. |
| (9) | Synchronize left and right setting values | When checked, the setting values of the keyform on the left side and the keyform on the right side of [Adjustment of sway deformation] are synchronized. It is checked by default, so if you want to create asymmetrical sway deformations, uncheck the box. |
| (10) | Automatically update keyforms when setting values are changed | If checked, the keyform is automatically updated each time the setting values are changed. It is checked by default. |
| (11) | Update keyforms | Clicking the [Update keyforms] button actually updates the keyform by calculating the shape of the sway deformation from the current settings. |
Operating procedure
1. Select the deformer to which you want to add the sway motion in the view and click [Register warp deformer] from the dialog box to register it in the deformer list.
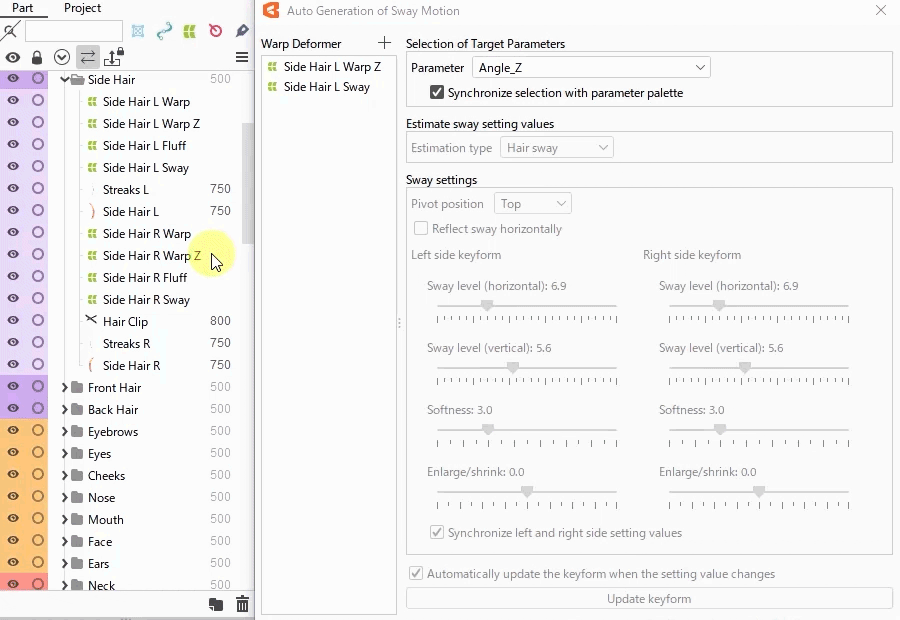
2. Select the parameter to which you want to add sway motion from the parameter combo box.
3. Select [Estimation type] from Estimation of sway setting value.
4. In [Sway settings], slide the bar to change the setting value.
After making changes, click [Update keyforms] to reflect the sway deformation in the keyform.
If the [Automatically update keyforms when setting values are changed] checkbox is checked, the keyforms will be automatically updated when settings are changed.
Because of the non-modal dialog box, you can adjust the sway deformation while manipulating parameters and views in the main window to check the motion.
Multiple deformers can also be set at the same time.
If the selected deformers have different values for the sway settings, the first deformer’s value is displayed in green.
Precautions
Automatic key generation
When you are applying sway deformation, a confirmation dialog box will appear if the number of keys is zero or a number other than three for the target parameter.
• Selecting [OK] deletes the existing keys and creates three new keys.
• If [Cancel] is selected, the existing keys will remain in place and the sway deformation will not be reflected.
Right-click menu
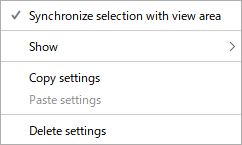
Right-click on [Default list] to display the following menu.
| Item | Description |
|---|---|
| Synchronize selections with the view | If checked, the selection state is synchronized between the setting dialog box and the canvas. |
| Display | Change the display type of the list. By checking the checkbox, you can set whether the object is displayed by “Name” or “ID.” |
| Copy settings | Copies the settings in [Sway settings] of the selected object. |
| Paste settings | Paste the contents copied in [Copy settings] into the selected object. |
| Delete settings | Removes settings related to the auto generation of sway motion for the selected object. Objects whose settings have been deleted will disappear from the default list. |
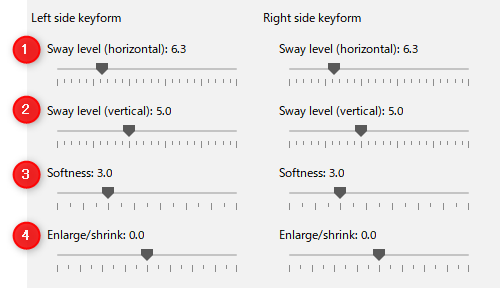
Effect of each setting value in adjusting sway settings
| Number | Item | Description |
|---|---|---|
| (1) | Magnitude of sway (horizontal) | Sets the magnitude of the horizontal oscillation. |
| (2) | Magnitude of sway (vertical) | Sets the magnitude of the vertical oscillation. If the value is set lower than 0, it can be used to create a downward pulling motion. |
| (3) | Softness | You can adjust the way the top and bottom of the deformer swings. If the value is increased, the upper part will almost stop moving and only the lower part will sway. |
| (4) | Zoom In/Zoom Out | Deformations can be made to increase or decrease the width of the deformer. Larger than 0 means expansion, and smaller than 0 means contraction. |
Tips
For sway magnitude (horizontal) and sway magnitude (vertical), reasonable values are automatically estimated based on the target deformer information (size, etc.) and used as initial values.
Also, once the sway is created for the deformers and parameters, when the auto generation of sway motion is run again for these deformers and parameters, the settings from the last time the sway was created will be displayed as the initial values.
This setting is retained even if the model is reloaded.
About AI technology
In this function, AI technology is used to estimate a reasonable amount of deformation based on information such as the position and size of the target deformer.
Among the works submitted to “nizima,” those for which we have received permission to use them in AI research are used as learning data.
For more information, see the “Live2D AI Research Policy and Request for Cooperation.”