How to Apply Model Templates
Updated: 09/19/2024
This page explains how to apply model templates.
See “About model templates” for a description of basic functions.
Applying templates
We will apply the template model assuming that no deformers or keyforms are set in the model to which we are applying.
First, let’s partially apply the arm template.
Select the model to which you want to apply the template
Select the ArtMesh for the right upper arm, forearm, and hand, respectively.
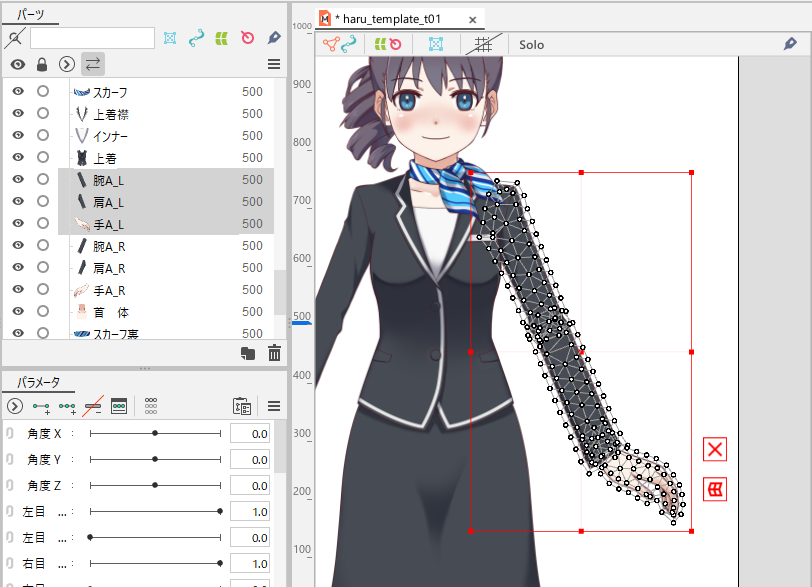
You can apply the template partially by selecting the area to which you want to apply it.
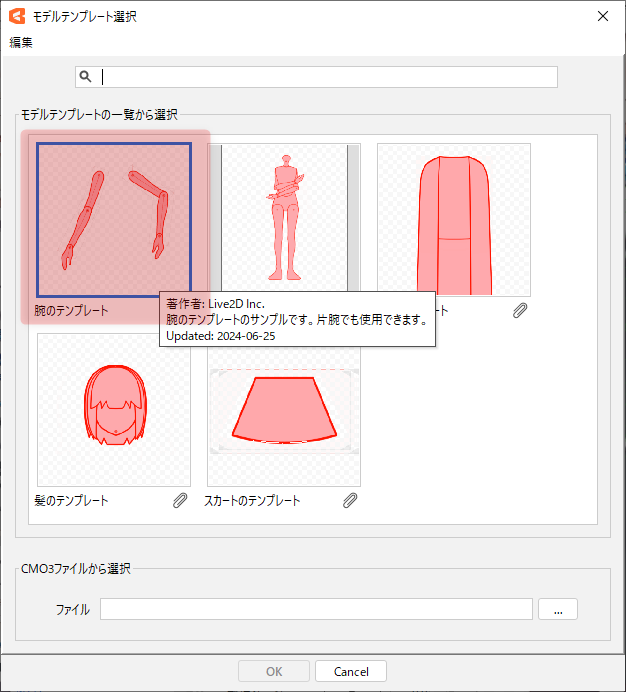
Select a template model
Select the [Modeling] menu -> [Model template] -> [Apply template] to open the [Model template selection] dialog box.
Click on the “arm template” image.
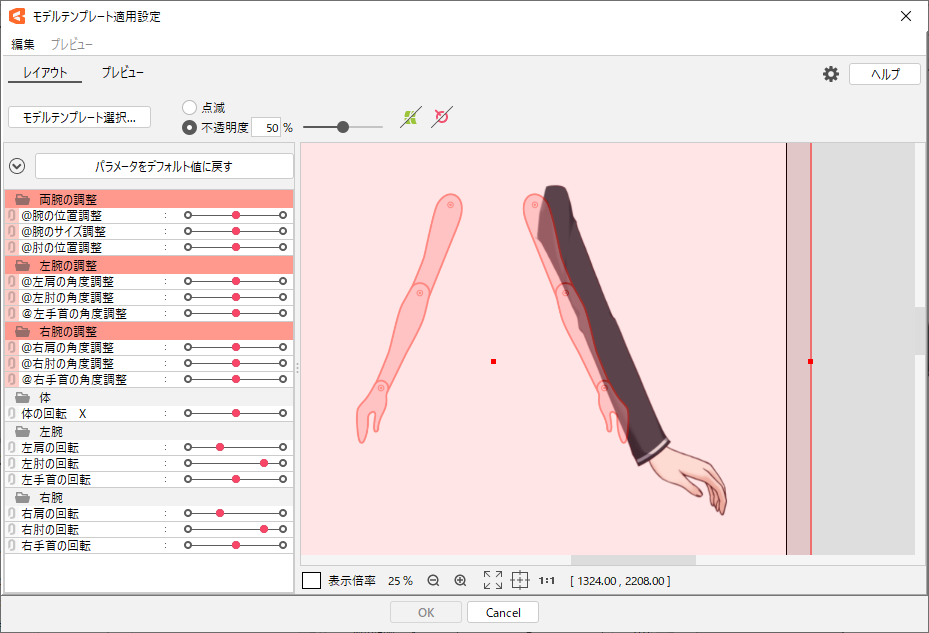
Initially, the [Layout] screen appears, with the selected “arm template” overlapping the front of the model to which it is applied.
Match the position and size of the template
Click on a template to select it, and use the bounding box to move, scale, and rotate it.
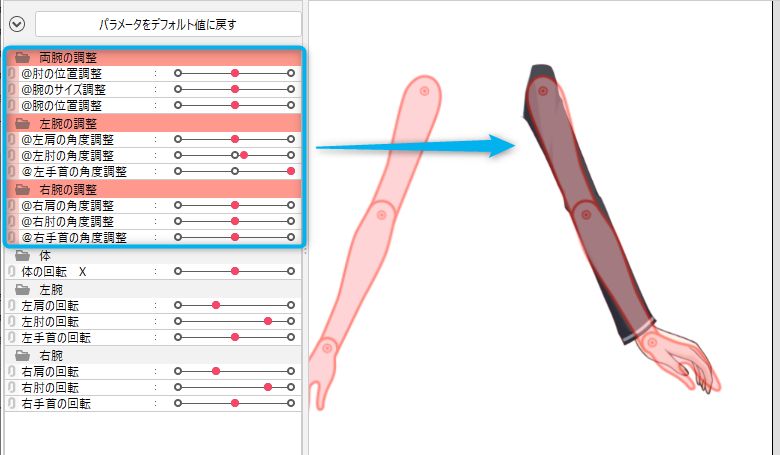
Once the approximate position is aligned with the bounding box, fine-tune the template with the parameters.
Adjust the position and angle of the template by manipulating the parameters for adjustment with “@” at the beginning.
See “Creating/exporting model templates” for information on parameters for adjustment.
Precautions
Matching positions and angles with normal parameters may change the appearance of the model to which they are applied.
It is recommended to use the adjustment parameters to match the position and angle.
Map ArtMesh
Switching to [Preview] displays the template model and the model to which it will be applied side by side.
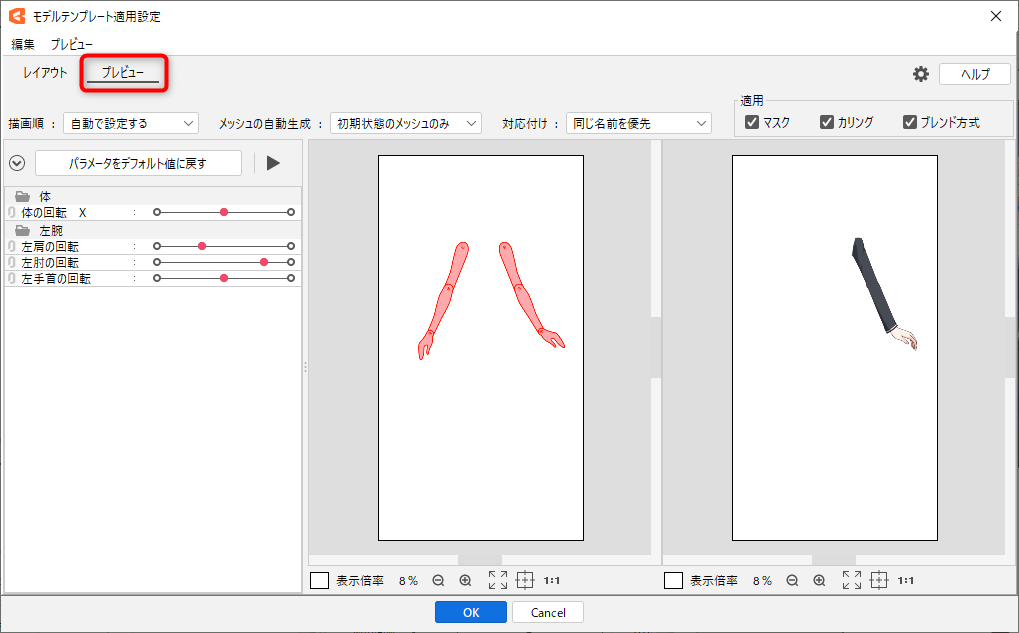
Click the [Playback] button to check the automatically played motion to see if each ArtMesh corresponds as intended.
Some parts of the body may not automatically play back motion, in which case you should directly manipulate the parameters to check the motion.
For information on how to manually change the mapping, see “Manual mapping of selected elements” in “About model templates.”
Click [OK] to apply the template model’s parts, deformer structure, and parameter keyforms, etc. to the destination model.
Tips for applying templates
Here are some tips on how to successfully apply the template in various cases.
Move keyforms to the same parameter
When a template is applied, the parameters and parameter groups of the template model are newly added to the destination model.
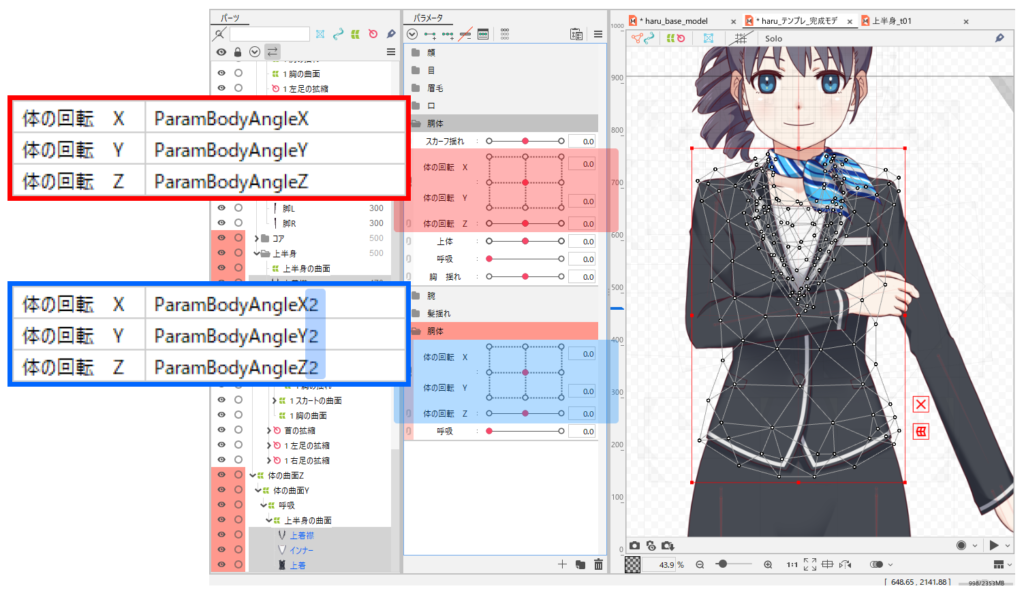
If the same parameters such as facial motion (angles X and Y) or body movement (body rotations X, Y, and Z) already exist in the destination model, the keyform can be moved if the following items match in the template model and the destination model.
- Parameter type (normal parameters, blend shape parameters)
- ID
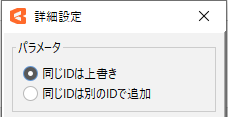
In that case, set [Parameter] in the advanced settings dialog box to [The same ID is overwritten].
The [Advanced Settings] dialog box is opened by clicking on the gear icon in the upper right corner.
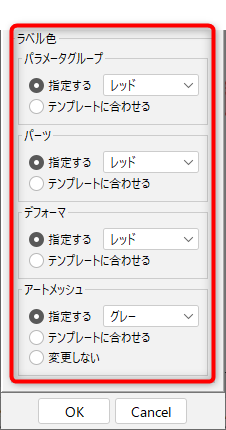
Set the label color at the point of application
In the application setting dialog box, select [Change to specified color] for the [Label color] setting and set any color you like to make it easier to see what has changed after applying the label.
Precautions
If a keyform is moved to a parameter of the model to which the template is applied, for example, by using the [Overwrite] setting, the label color setting will not be applied.
Increase accuracy when applying
The template function is good at reusing deformer structures and movements.
However, depending on the layout, the ArtMesh may extend far beyond the deformer, resulting in unintended movement.
By utilizing the overall scaling and adjustment parameters of the template model, it is possible to match the shape of the ArtMesh as much as possible to avoid outliers from the deformer and to increase the accuracy of the movement.
Template accuracy can also be improved by using the template model as a guide image to create an illustration of a similar shape.
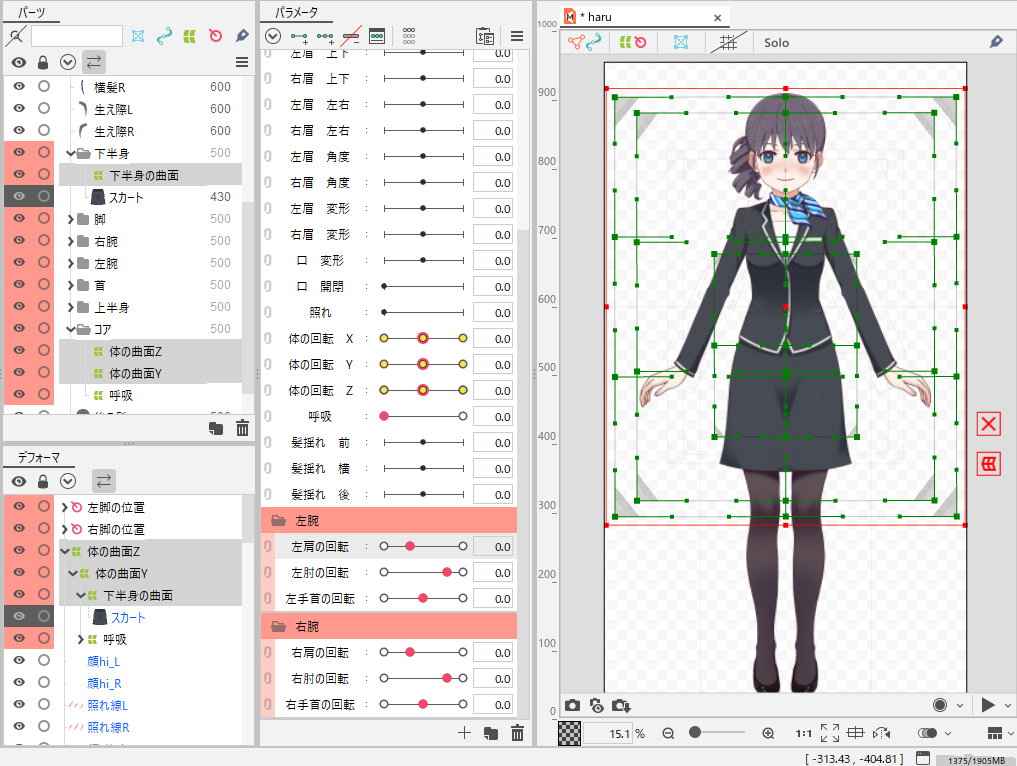
Adjust the model after applying templates
Organize parts and draw order
Parts in the template model are inserted near the ArtMesh that was selected before the template was applied.
Since the relationship of the order of drawing with parts to which the template is not applied may change, adjust the position and drawing order of the parts after applying the template to improve the appearance of the parts.
If necessary, delete empty parts as well.
You can also use [Delete empty parts] in the Parts Palette menu to delete all the parts at once, so take advantage of this feature.
Adjust deformer parent-child hierarchy
If the template is partially applied to hair or other parts of the model, it is necessary to adjust the parent-child hierarchy by setting it to the children of the reference rotational deformer, since the applied template must match the head movement of the model.
In addition, the position and deformation are also adjusted to match other parts of the body.
Shape the ArtMesh
Similarly, the ArtMesh should be adjusted when applying a partial template, as it is likely to be misaligned with the movement of other parts of the image.