Editing Parts
Updated: 10/04/2018
On this page you will learn how to edit parts.
Part Structure When Importing
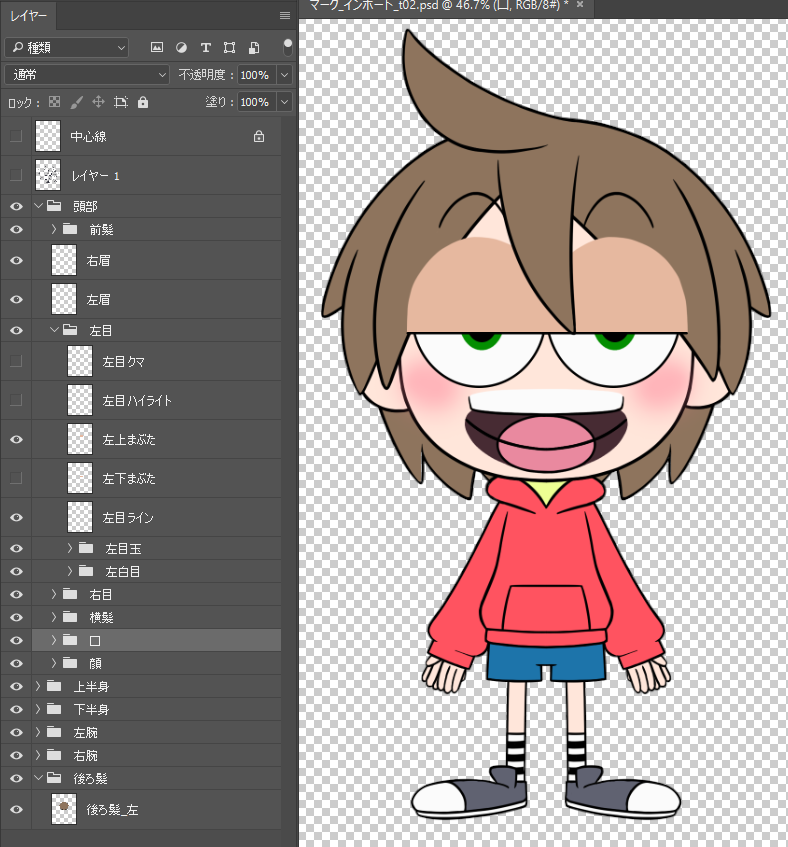
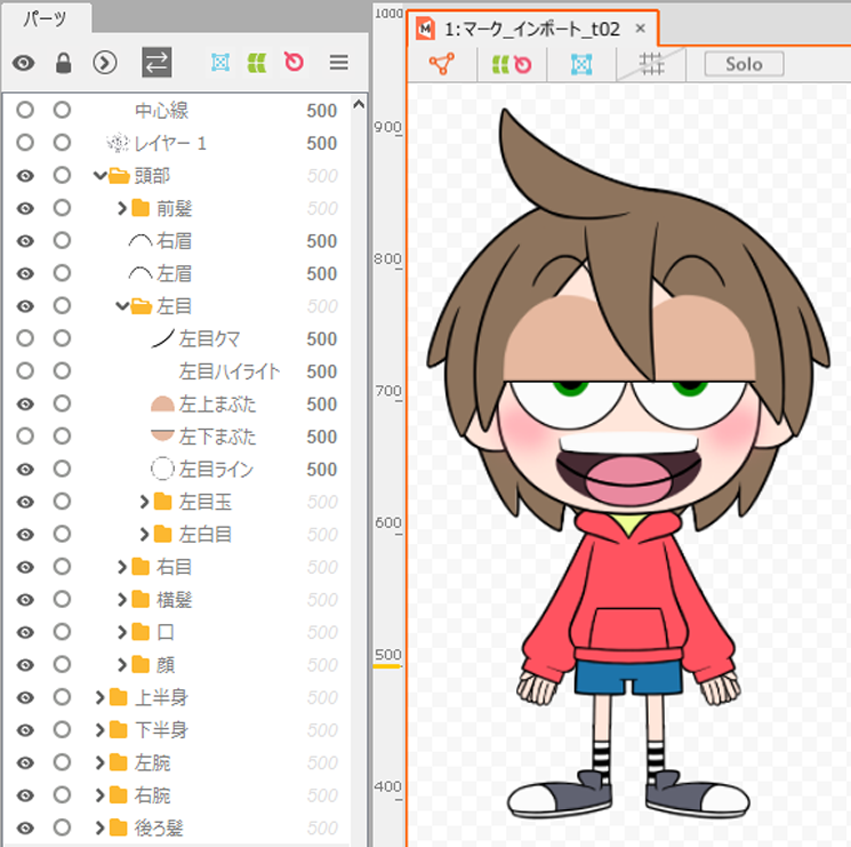
The [Group] created in Photoshop will be replaced by [Part(s)] in the Cubism Editor.
(If there are multiple layers on the PSD side, there will also be multiple layers on the Editor side.)
Groups can be grouped together on the PSD side in advance to save time in replacing them after import.
Basically, the group structure in the PSD is directly reflected in the Parts palette.
| Layered structure of PSD | Object structure of Cubism Editor |
 |  |
Hierarchy of Parts
Even within the Editor, drag and drop a part to any part or between the objects you want to move, and it will be layered as a child element.
Note: The image is stored in a folder.
Multiple layers can be added, so that parts such as eyes and eyeballs can be grouped together in a head part.
There are two patterns of hierarchization.
| Before stratification | After stratification | |
| (1) | 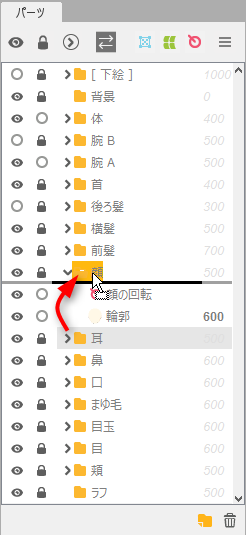 |
 |
| Drag the part to the part where it is to be inserted, causing the destination part to be highlighted in yellow, and drop it. | It will be placed at the bottom in the part where it is inserted. | |
| (2) | 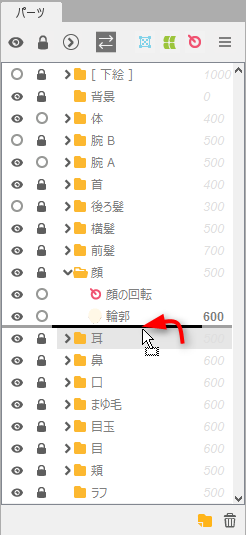 |
|
| Drag the part between any objects in the part where it is to be inserted, causing a black line to appear, and drop it. | It will be placed at the bottom in the part where it is inserted. |
For detailed information on how to use [Guide Image Parts], please refer to the “Guide Image Parts” page.