Skinning
Updated: 08/25/2022
This section describes the skinning function.
Skinning Function
Illustrative explanatory video
Watch the video below to learn about the skinning function.
Skinning is a function that allows multiple rotation deformers to be set on a single ArtMesh to deform it fluidly.
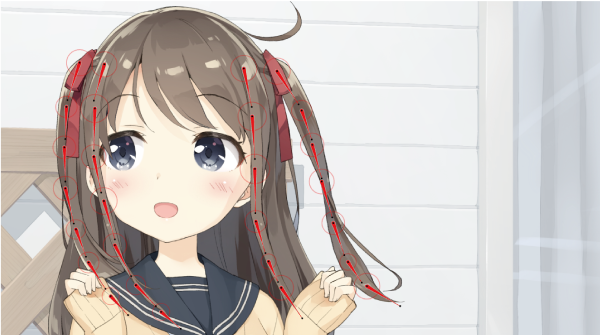
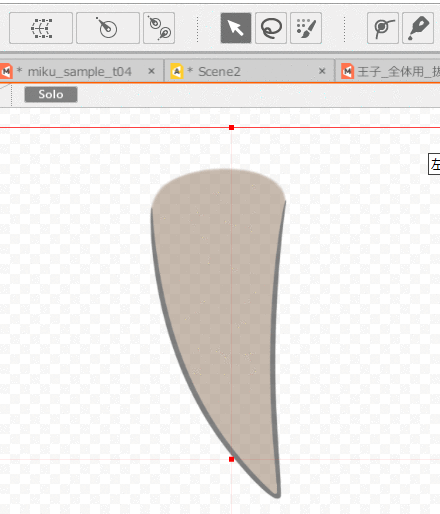
This is a simple skinning function that can be used to create fluid deformation effects with long hair, swaying strings, and other long, thin ArtMeshes.
(A full skinning function, which allows free deformation like 3D, will be supported in the future.)
Precautions before applying skinning
Currently, the recommendation for skinning is letting the target ArtMesh build a deformer parent-child hierarchy before applying skinning.
After skinning, if the parent has a rotation deformer, etc., the deform paths may result in unintended movement in the Animation Workspace.
This can be controlled by setting the Level edit to 1 and using the rotation deformer, but the parent-child hierarchy must be established in advance before skinning.
Precautions after applying skinning
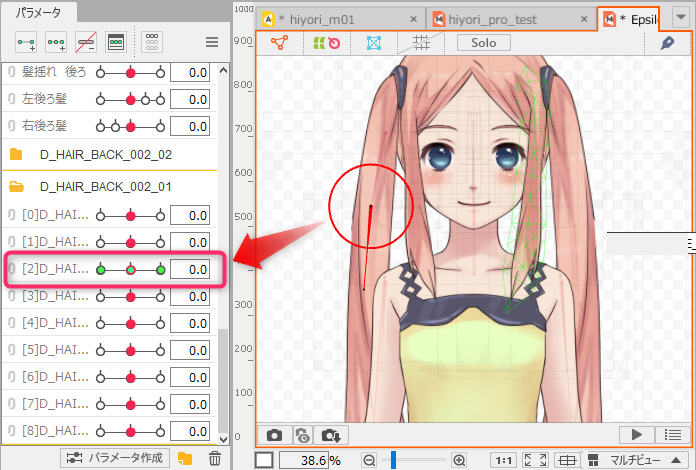
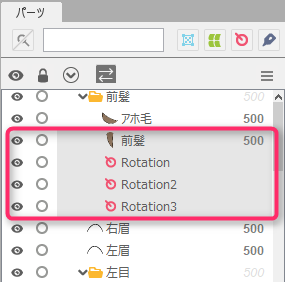
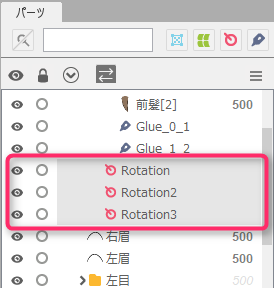
After skinning is set, multiple parameters are automatically generated at the bottom of the palette, so use the parameter sliders to check hair sway and other movements on the Model Workspace.
(If you accidentally add a rotation on the View, the keyform will change.)
How Skinning Works
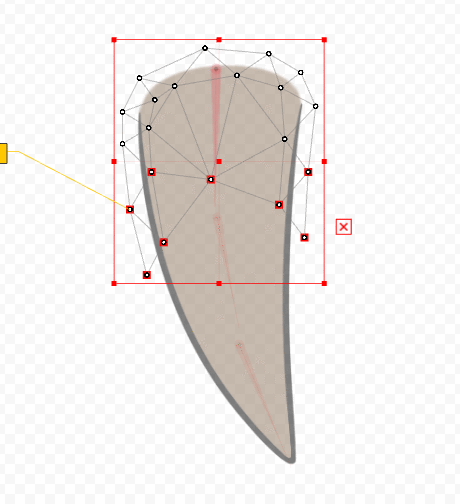
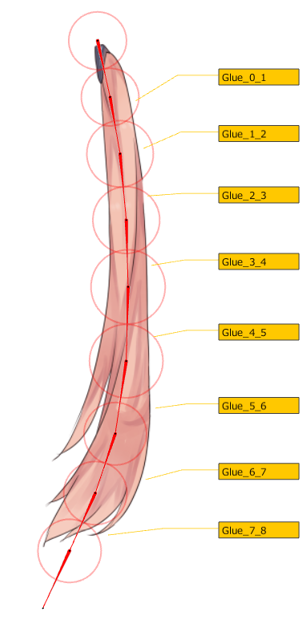
The skinning mechanism is that when multiple rotation deformers are set for a single ArtMesh the ArtMesh is automatically split in the middle between the rotation deformers and glued together.
| Automatic division | Automatic adsorption |
|---|---|
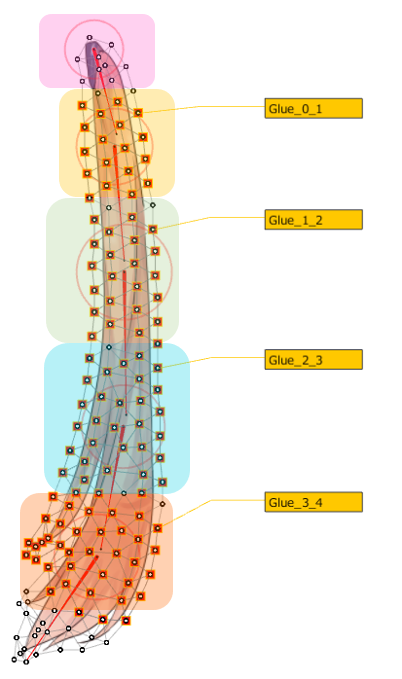 | 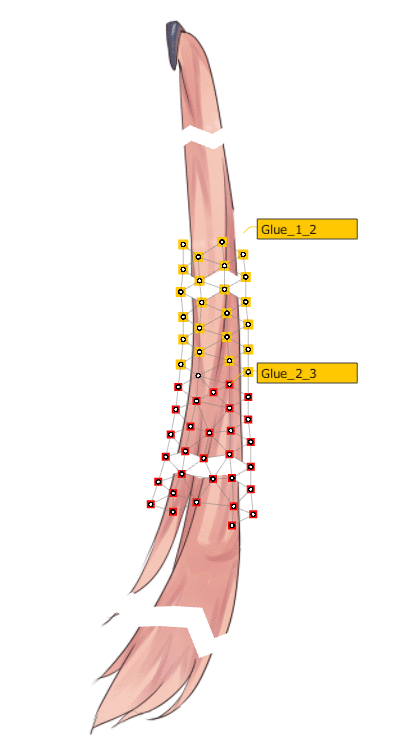 |
How to Set Up Skinning
Skinning can be set up in two different ways.
- Set a rotation deformer for skinning
- Set deform paths for skinning
The method of skinning by setting up deform paths is recommended because the parameters are also generated automatically.
Set a rotation deformer for skinning
First, select the ArtMesh and use the [Rotation Deformer Creation Tool] to set the rotation deformer.
Then, select the ArtMesh for which you want to set skinning and the multiple rotation deformers you have set.
Once you have made your selection, follow the steps below to set up skinning.
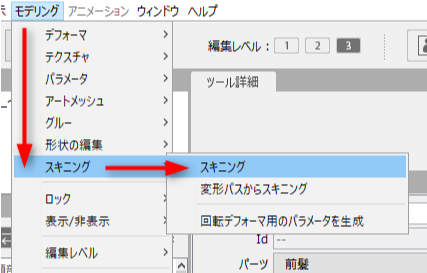
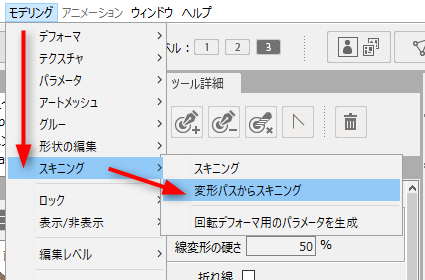
In the main menu, select [Modeling] -> [Skinning] -> [Skinning]
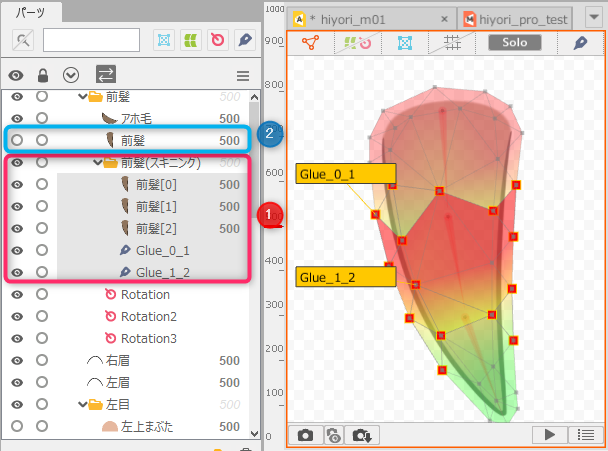
After skinning is set, the divided ArtMesh and the glue settings that connect the ArtMeshes are automatically combined into a single part in the [Part(s)] palette. (1)
The original ArtMesh from which the division originated is hidden and remains intact. (2)
After skinning, move the rotation deformer to check the movement.
Finally, the parameters are set together.
Select all rotation deformers used for skinning at once.
Once you have made your selections, follow the steps below to automatically generate parameters.
In the main menu, select [Modeling] -> [Skinning] -> [Generate parameters for rotation deformer]
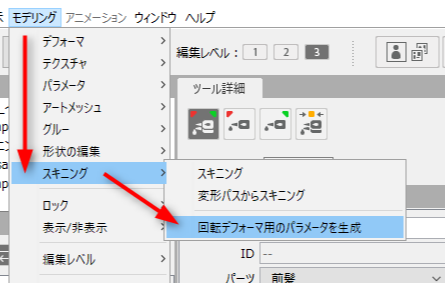
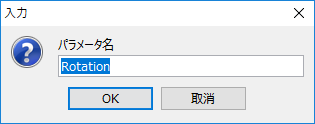
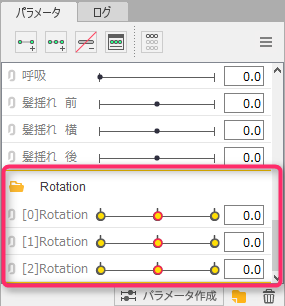
One parameter is generated for each rotation deformer, so set the parameter name and angle range.
 |
 |
| Enter a name for the parameter. The names are numbered from top to bottom. |
Set the range of parameters. By default, the angle range is set to “30,” so the middle is set to “0” and the range is from -30 to 30. |
After setting up, the parameters are automatically generated in a folder.
Point
The generated parameters are generated at the bottom of the palette.
Set deform paths for skinning
Skinning can be set up more easily by using deform paths.
First, select the ArtMesh and set the Deform Paths.
A rotation deformer is created starting from the first control point struck.
Therefore, when skinning is used on hair, create deform paths from root to tip.
After setting up, follow the steps below to set up skinning.
In the main menu, select [Modeling] -> [Skinning] -> [Use deform paths for Skinning]
After setting, the deform paths change to a rotation deformer and is skinned.
After skinning is set, the divided ArtMesh and the glue settings that connect the ArtMeshes are automatically combined into a single part in the [Part(s)] palette. (1)
Rotation deformers generated from deform paths are also combined into a single part and automatically generated on the part. (2)
The original ArtMesh from which the division originated is hidden and remains intact. (3)

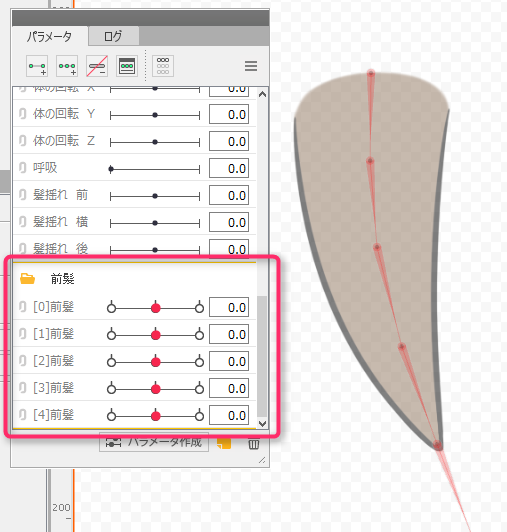
Furthermore, the parameters are automatically generated in a folder.
Point
The generated parameters are generated at the bottom of the palette.
When skinning is generated from deform paths, the following rules are used to set the parameters.
- The name of the selected ArtMesh is set to the parameter name
- Parameter range is set by default at “-45 to 45”
Tips
- When deform paths are converted to a rotation deformer, a rotation deformer is automatically generated in the middle of the deform paths.
- In modeling, when skinning is set from deform paths, the deform paths are selected according to the current Level edit of the Model Workspace.
 |  |  |
Utilize skinning function to express shaking objects
Set physics and shake automatically
“Long hair” and “swaying strings” for which skinning is set can be softly swayed in real time according to the movement of the model by setting physics operations.
See “How to Set Up Physics” for details.
Set the sway directly on the Animation View
Depending on the editing level of the Animation Workspace, parameters can be moved on the View.

When skinning is handled in the Animation Workspace, the “Level edit” settings are as follows:
Level edit 1: Manipulate rotation deformers (move parameters tied to them)
Level edit 2: Manipulate deform paths (move generated rotation deformers together)
Level edit 3: None (bounding box for entire model)
If skinning is set with a deform path, the animation can be edited by path in the View.
See “Insert keyframes” section of the “Timeline and Dope Sheet” page for more information.
Notes on skinning
- If a dialog box appears:
- A dialog box may appear when skinning is applied.
If this is the case, please return to the process with Undo and do one of the following before trying skinning again. -
- Fine mesh mapping of the ArtMesh.
- Increase the spacing of control points for rotation deformers or deform paths.
- To make the best use of skinning:
- Use the following values as a reference to set up the system.
[Recommended balance]
Example 1: Automatic Mesh generator with 100 spacing points and 3 deform path vertices (equal spacing)
Example 2: Automatic Mesh generator with 50 spacing points and 4 deform path vertices (equal spacing)