Model Template Function
Updated: 09/27/2021
This function allows the structure and movement (parameters) of an already completed Live2D model to be reflected in the model being created.
Information
Starting with the 4.1.01 release version, template models of Series 3 and later versions can be used.
In an offline environment, the list of templates is not displayed.
Download the template model from the “Template Model” page and select the file from the “Select from File” menu.
Note: However, the only template model format that can be downloaded is [.cmox].
Template Function
We also have a Tutorial Video page that introduces the procedure in detail for modeling SD characters using the template function, starting with the preparation of the illustration.
See “Easy Modeling with Template Function” for the Tutorial Video.
How to Use the Template Function
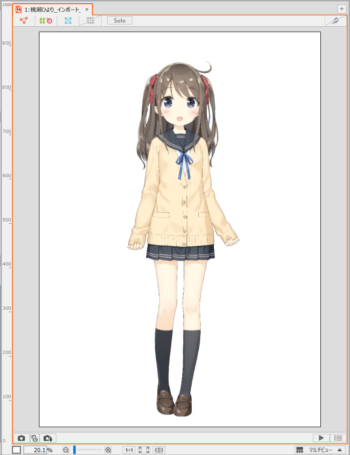
First, prepare the model to which the template will be applied.
It is okay if only the ArtMesh is in place.
POINT
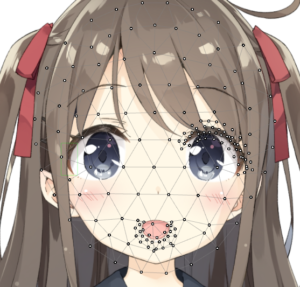
To better fit the template, the polygon should be divided into smaller pieces in advance to make it more similar to the template model.
POINT
To better fit the template, the polygon should be divided into smaller pieces in advance to make it more similar to the template model.
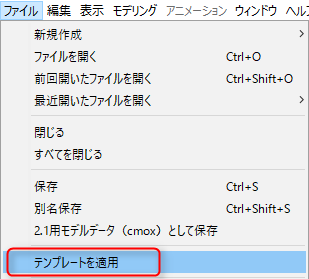
To use the template function, click on the [File] menu -> [Apply Template].
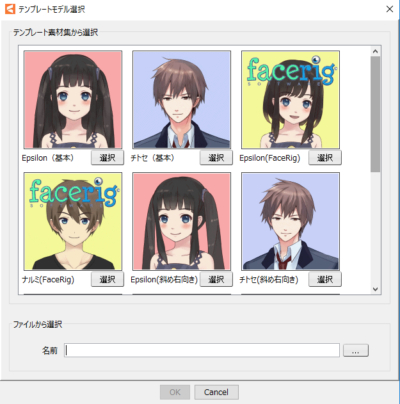
The [Select Template Model] dialog box opens.
Here you choose the template model to which you want to apply the movement. It is best to choose a model that is similar in style to the model you are creating.
Standard models are provided in the [Template Materials Collection].
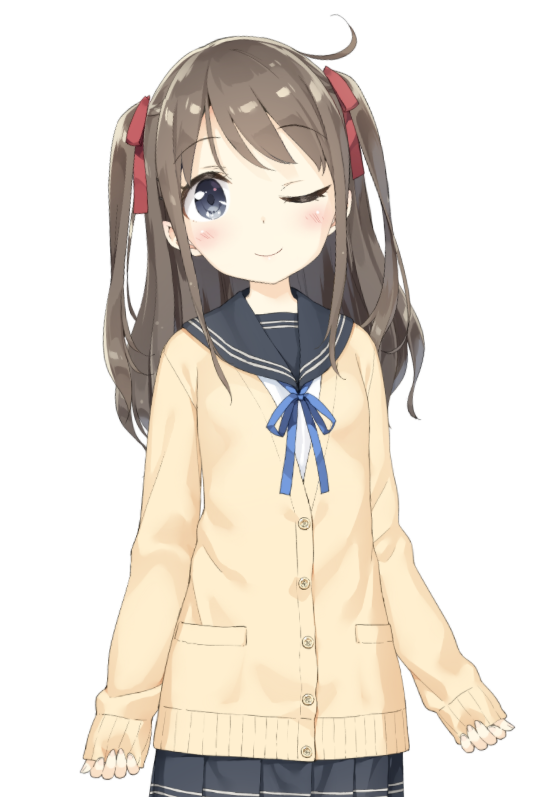
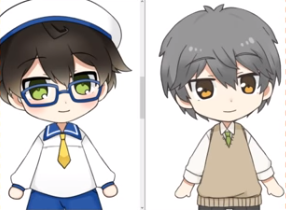
We recommend “Epsilon” for female models and “Chitose” for male models.
Click to download the model data.
You must be connected to the internet to use the collection of template materials.
If you want to use your own model data as a template, select a file from [Select from File] and load it.
Note: Models using the [Blend Shape] function included in sample models such as “Nijiiro Mao” are currently not available for use as a template.
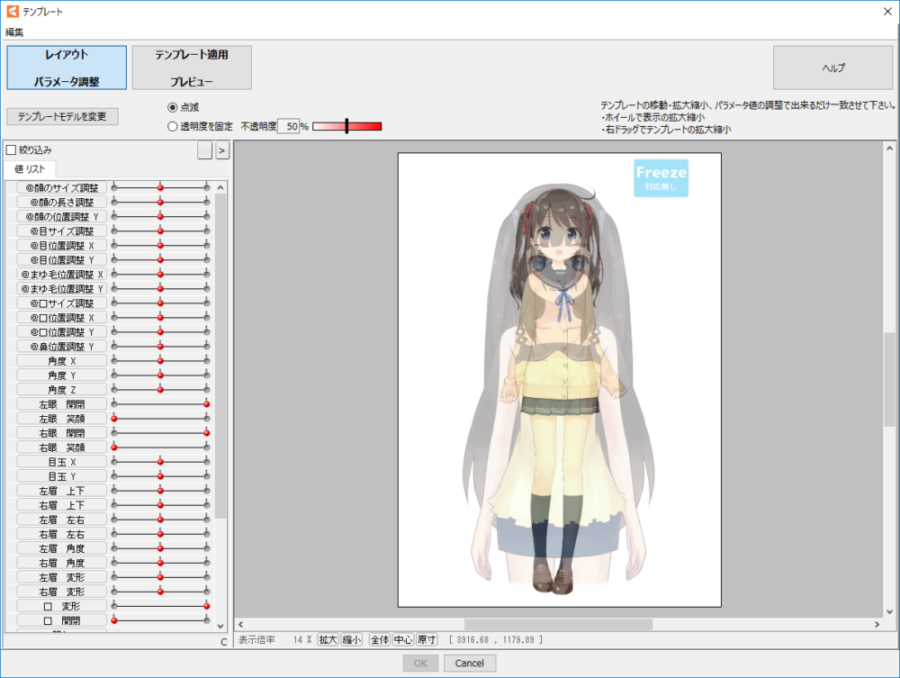
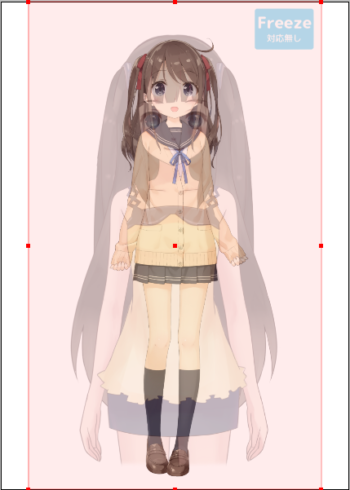
Adjust Model Position and Size
A new window will open once the template model has been loaded.
The model that was on the canvas and the model opened as a template are superimposed.
Basic operations during layout
Note: For Mac users, please replace Ctrl with Command.
| Operation | Contents |
|---|---|
| F | Toggle blinking and fixing transparency of template model. |
| Ctrl + Z | Undo. Reverse one layout operation. |
| Ctrl + Y | Redo. Restore one layout operation that was undone. |
| Wheel up/down | Enlarge/reduce the display. |
| Left-drag the template model | Move the template model. |
| Right-drag the template model | Enlarge/reduce the template model (click position is center). |
| Left-drag other than the template model | Scroll the screen. |
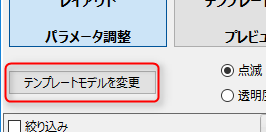
Clicking the [Change Template Model] button opens the [Select Template Model] dialog box, where you can change the model.
Click [Fix Opacity] to stop the template model from blinking and fix the opacity.
You can specify opacity by entering a numerical value in the text box or by moving the slider.

Clicking on a model will cause the template model to become selected, allowing it to be moved, scaled, and rotated.
Match the size of the model.
With this function, use the template adjustment parameters (prefixed with “@”) to adjust the position of the eyes, mouth, etc.
You can adjust other parameters such as angle X, Y, etc. to match the orientation of the face.
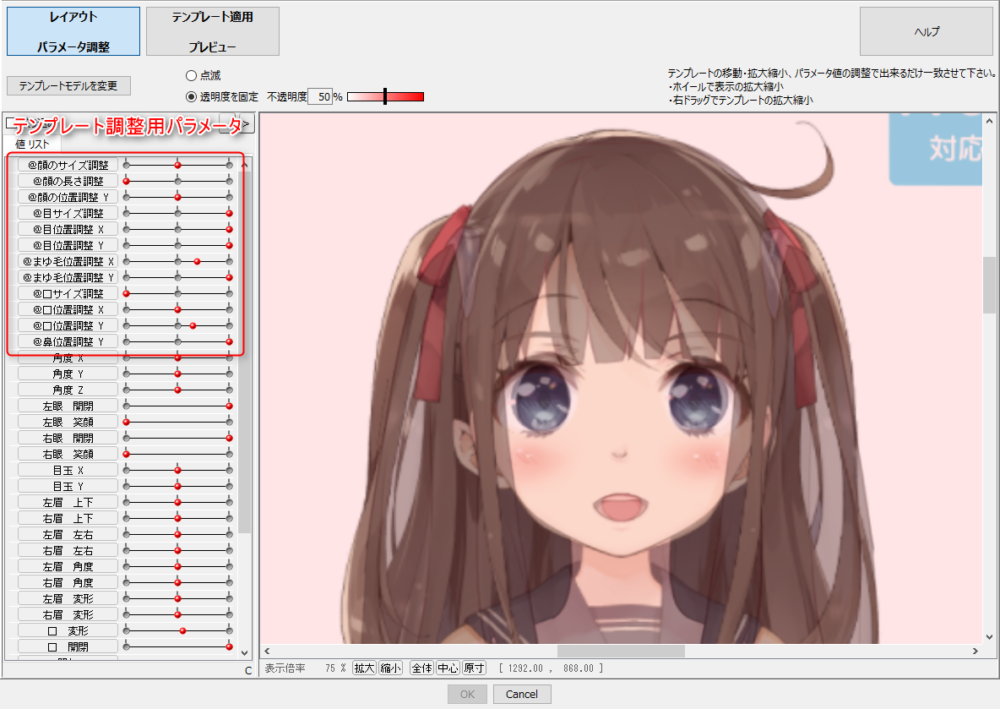
Once the size and position are adjusted, click the “Apply Template Preview” button.
Mapping of Parts
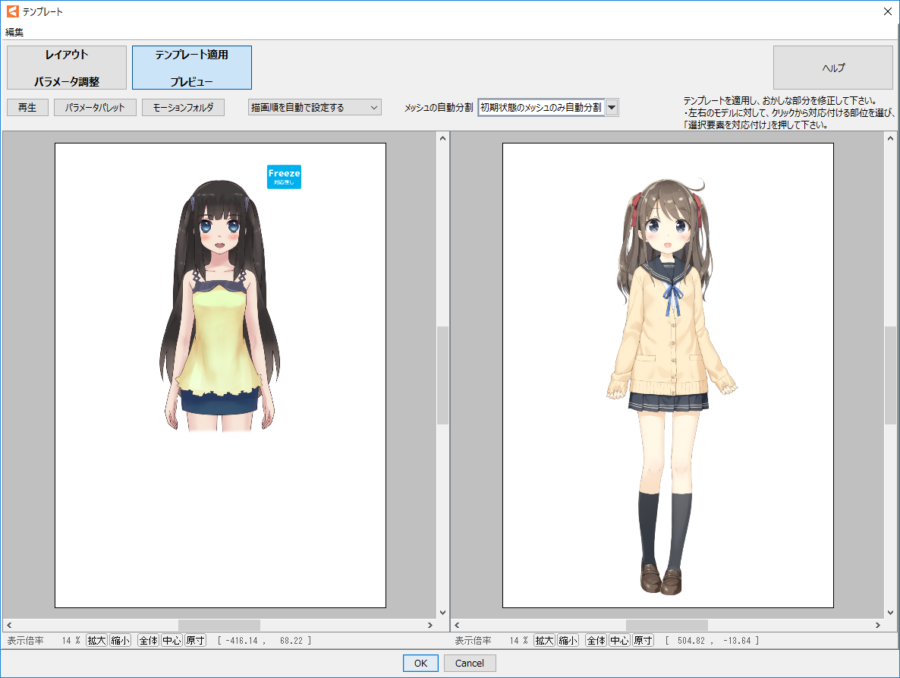
The two models are displayed side by side in the [Apply Template Preview] screen.
Motion will be played back in conjunction with the template model.
(Click the “Playback” button to play/stop the motion.)
The motion played here is selected at random from the motion files in the folder opened by clicking the [Motion Folder] button.
Basic operation of Apply Template Preview
Note: For Mac users, please replace Ctrl with Command.
| Operation | Contents |
|---|---|
| F | Toggle playback and stop of motion. |
| S | Shortcut for [Match Selected Elements] |
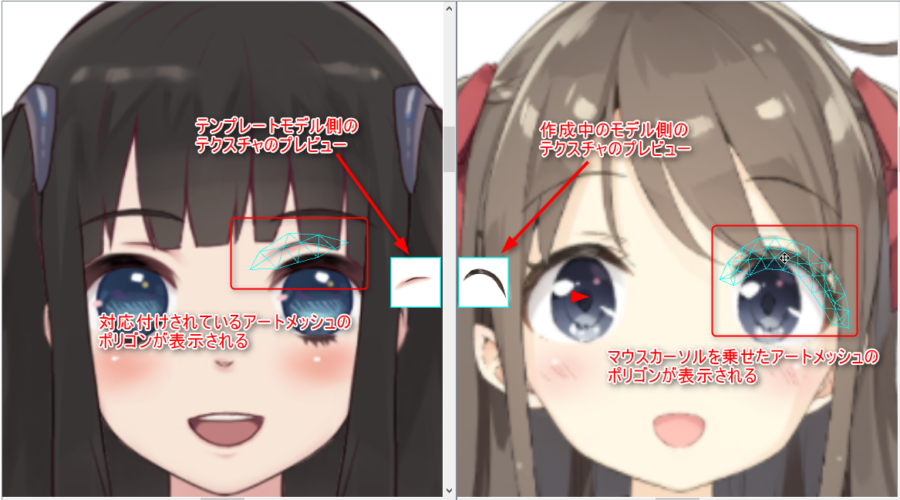
| Hover the mouse cursor over the model | At the cursor position, the polygon of the foremost ArtMesh is highlighted to check the correspondence of parts with the template model. |
| Click (or right-click) on the model | At the cursor position, the foremost ArtMesh is selected. A list of ArtMeshes at the cursor position pops up. |
| Drag | Scroll the screen. |

| Operation | Contents |
|---|---|
| Click the [Playback] button | Toggle playback and stop of motion. |
| Click the [Parameter palette] button | Display the Parameter palette. Parameters can be moved manually to check operation. 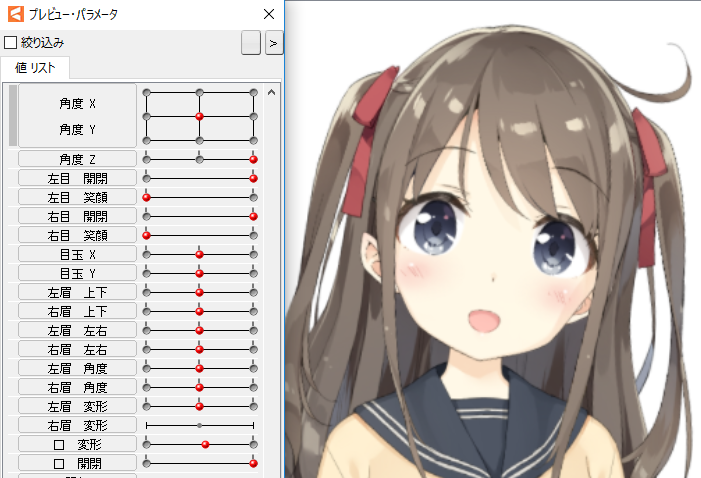 |
| Click the [Motion Folder] button | Open the folder where the motion files used in the template function are stored. Motion files in this folder are played at random. |
Configure settings related to draw order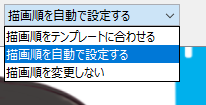 | [Match Draw Order to template] The draw order is set the same as the mapped ArtMesh. [Automatic Draw order] The draw order is automatically set to maintain the appearance before the template is applied. [Do not change Draw Order] Keep the draw order before the template is applied. Select this option if you do not want to change the draw order, which is set manually or automatically by PSD import. |
Configure settings for [Automatic Mesh Segmentation]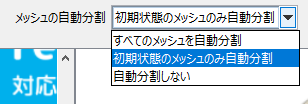 | [All meshes automatically split] Automatically divides polygons into smaller pieces. Enabling this when deformations are choppy may result in an improvement. Note, however, that keyform editing to move vertices may become more difficult as the number of polygon divisions increases. [Automatic division of mesh only in initial state] Automatically split ArtMeshes other than those for which splitting was adjusted prior to template adaptation. [No automatic splitting] Keep the polygons as they were before applying the template. |
When first applied, each part is not well mapped, and this will be corrected.
The parts around the eyes and mouth are finely divided and often lose their shape.
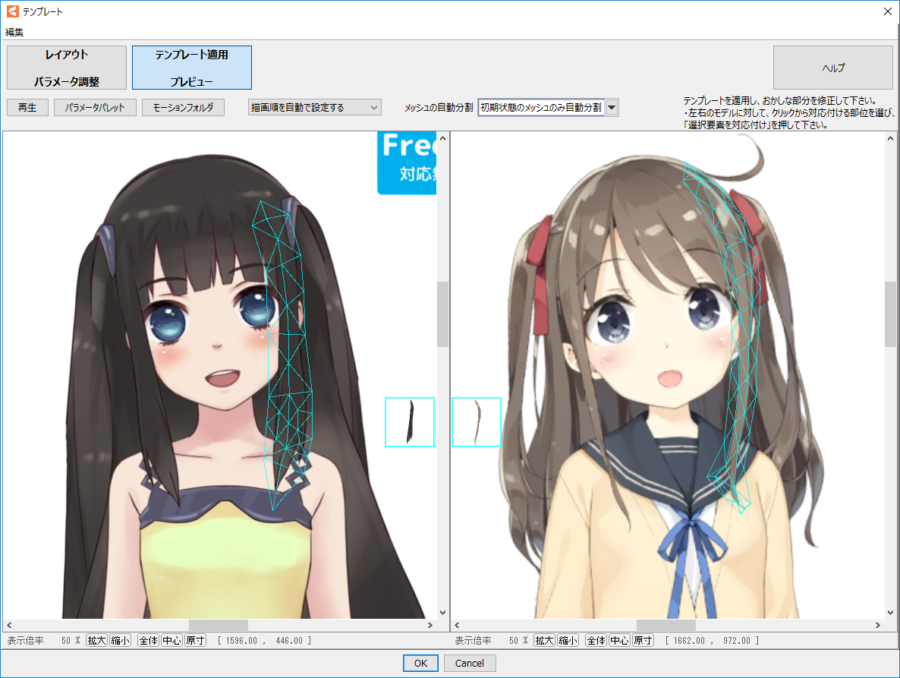
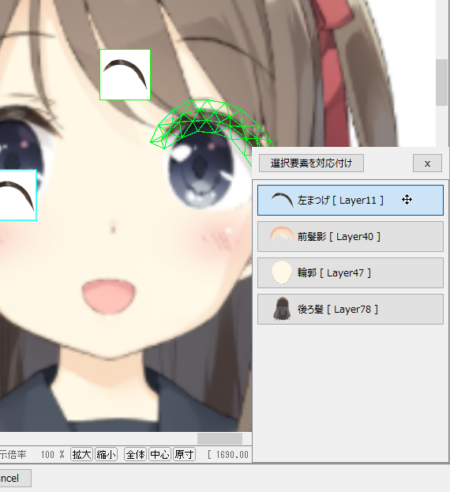
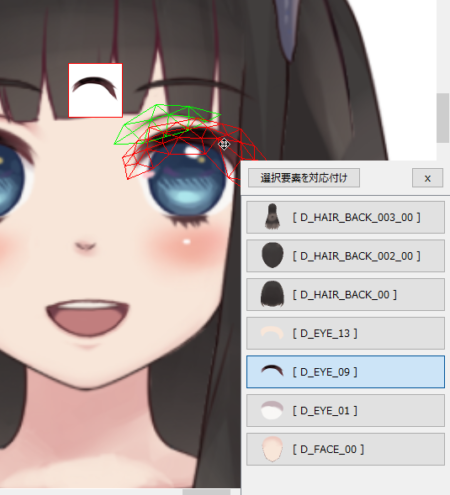
In this case, as an example, the left eyelashes will be modified.
When you hover the mouse cursor over an ArtMesh, you can see the ArtMesh to which the movement is mapped.
Click over the area where the left eyelashes is located to select it.
The menu then displays a list of ArtMeshes that overlap the clicked area.
When selected, the polygon will turn green and a preview of the currently selected texture will appear in the upper left.
TIPS
If you cannot select the desired ArtMesh, click on the menu item to select it.
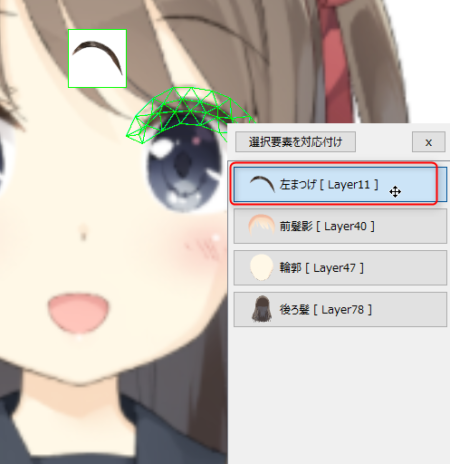
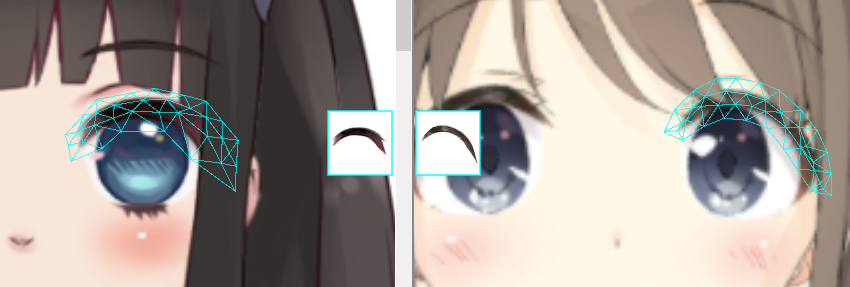
The currently mapped part will then be displayed in green on the template model side.
You can see that it corresponds to the left double eyelid.
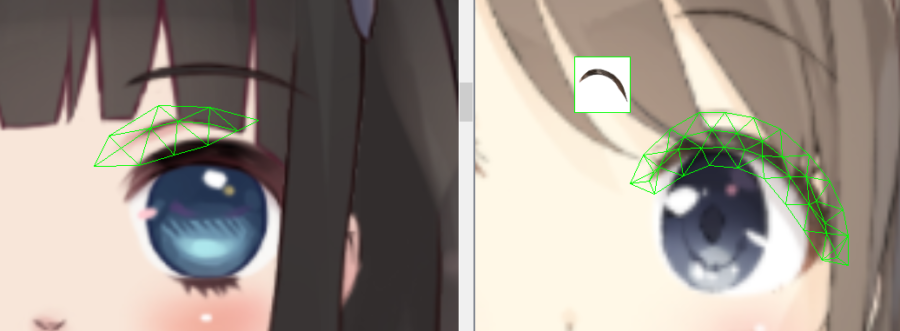
Likewise, click on the eyelashes on the template model side.
When selected, the polygon will turn red and a preview of the currently selected texture will appear in the upper left.
Select the ArtMesh for the eyelashes.
Once you are satisfied that it is selected, press the [Match Selected Elements] button (shortcut: S key).
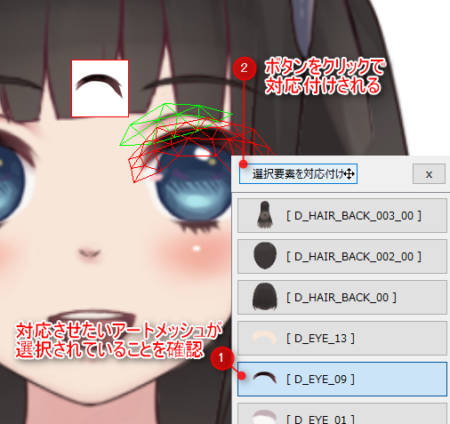
By hovering the mouse cursor over it, you will see that the eyelashes have been successfully mapped to each other.
The same procedure is used to correct the mappings of parts with incorrect mappings.
When you have finished mapping, click the “OK” button below.
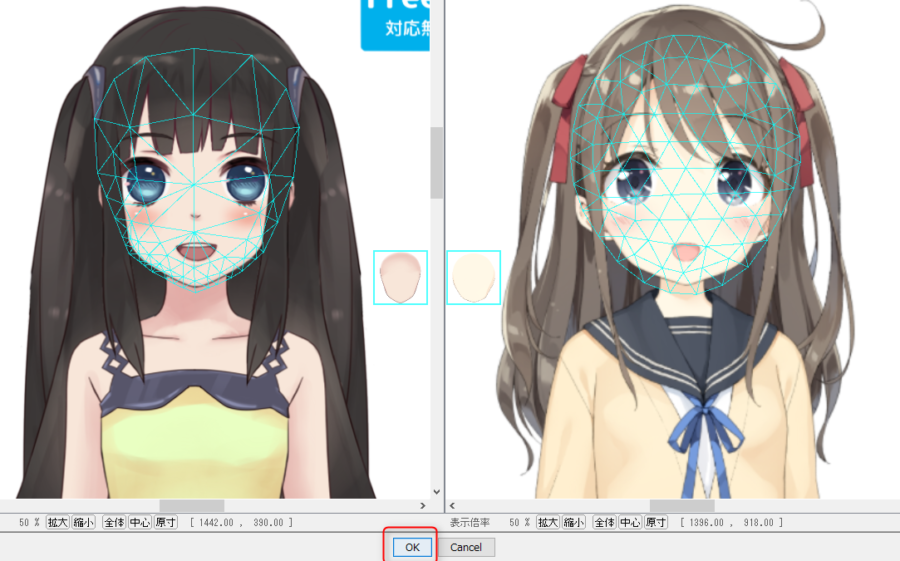
Click the [OK] button to return to the canvas with the template applied.
Parameters are set automatically.

If you want to adjust the template again, undo by pressing “Ctrl + Z” and then click again on the “File” menu -> “Apply Template.”
You can now make the adjustment from the previous state.
Be sure to undo before reapplying a template.
Final Adjustment
After applying the template, manually adjust parts if the movement is wrong.
In most cases, the eyes and mouth will need to be adjusted. Let’s correct this example.
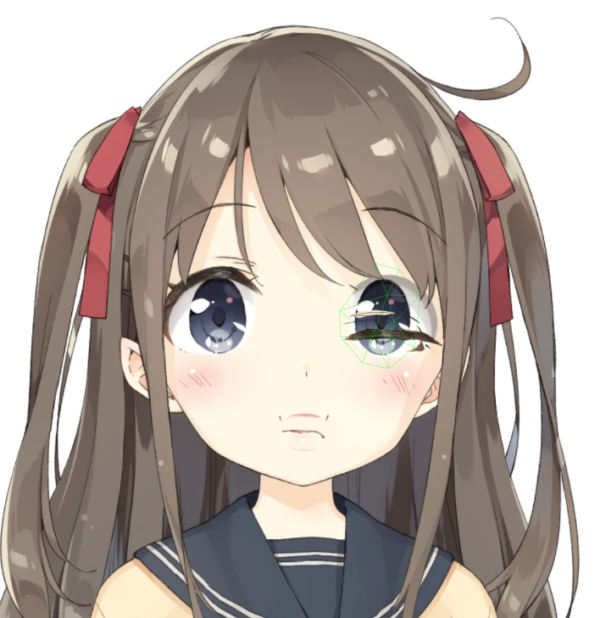
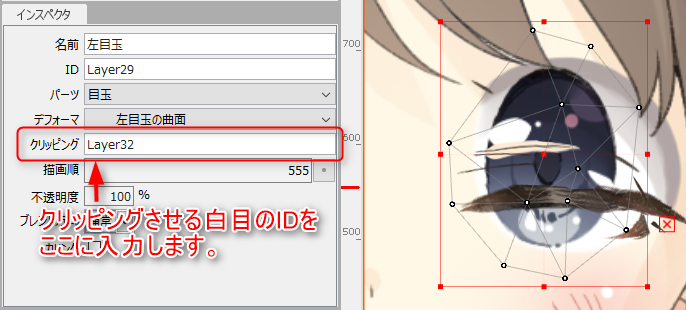
For the eyeballs, the white part of the eyes are clipped.
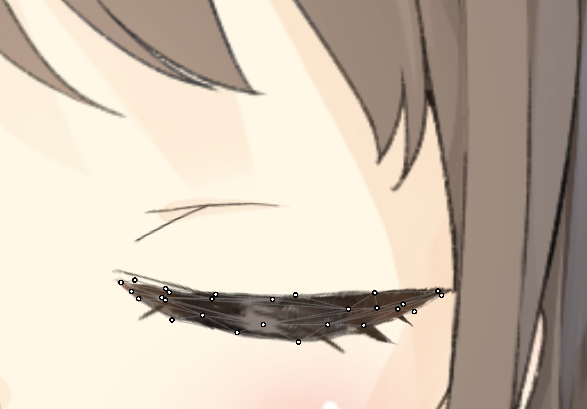
Make the eyelashes the correct shape and adjust the shape of the whites of the eyes so that they are hidden by the lashes when the eyes are closed.
 |  |  |
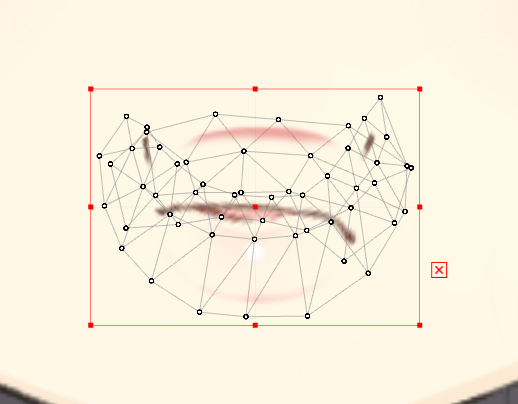
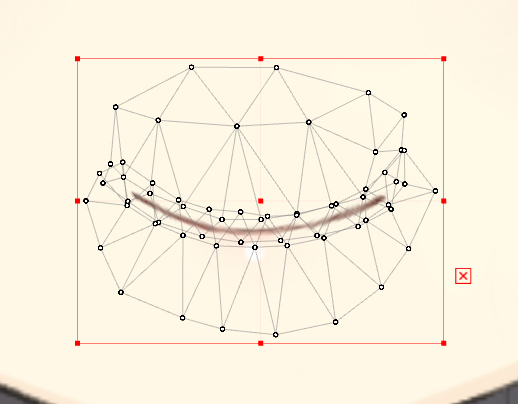
Make the mouth the correct shape and make the parts inside the mouth the correct size.
 |  |
Once the modifications are complete, the adjustment is finished.