Shy function
Updated: 09/04/2019
You can work more efficiently by hiding parameters that you do not need, for example, when creating animations for embedding in an SDK.
(For example, breathing to operate autonomously, hair swaying to be set by physics calculations, etc.)
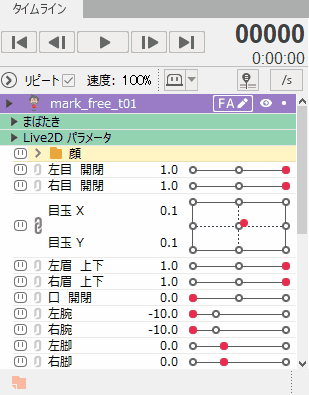
Hide Properties
Use the [Shy] function to hide properties.
First, click on the small [Shy Button] to the left of each property.
Then, click on the large [Shy Button] above the track to hide the specified elements.
Click the large [Shy Button] again to return to the original view.
To hide multiple properties, you can efficiently hide them by [dragging] the small [Shy Buttons] one after the other.
If properties are grouped by folders, the shy can be applied to each folder.
Click the small [Shy Button] to the left of the folder name, as you would if you were hiding the property by itself.
Clicking the large [Shy Button] above the track hides the specified elements.
Click the large [Shy Button] again to return to the original view.
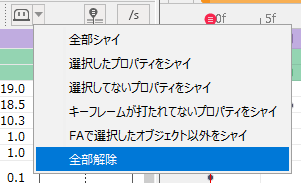
Shy can also be applied to all properties at the same time.
Click [Shy all] in the pull-down menu to the right of the large Shy Button, and you will see the small [Shy Button] clicked in all properties.
In this state, clicking the large [Shy Button] will apply Shy to all properties.
To cancel, click [Show all].
In the following video, the Shy is applied once to all properties to show only the angle Z.
It can be used in various situations, such as when you want to display only a portion of many properties.
Tips
You can use the Shy function in various ways, such as hiding the parameters for facial expressions when you want to create body movements first, or hiding the parameters for parts that do not need to be moved.
Hide Selected Properties:
Shy can be applied to only the selected properties.
Shy unselected properties:
Shy can be applied to only the properties that are not selected.
Shy extra properties where keyframes are not struck:
Shy can be applied to extra properties that are not keyframed.
Show only selected Form Edit object:
Shy can be applied to all objects except for the object selected in the Form Animation.
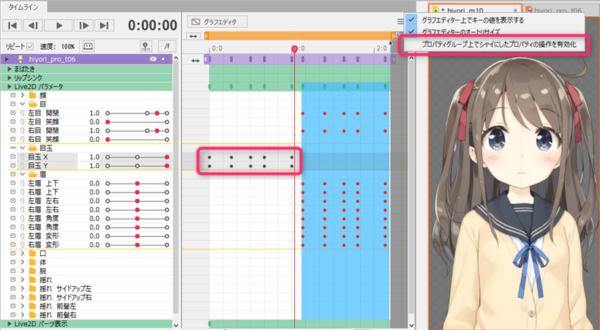
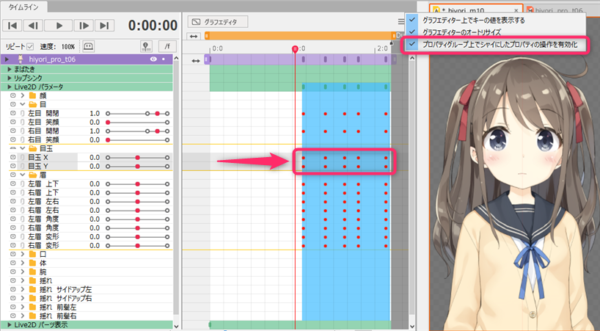
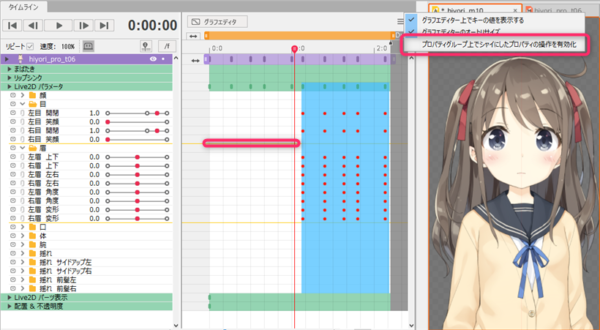
Enable keyframe operations for properties hidden with Shy
Keyframes for parameters to which Shy is applied are not selected.
Therefore, if multiple keyframes are selected and edited across parameters to which Shy is applied,
the keyframes with hidden status are not affected by editing.
If you move keyframes together with a parameter folder or a track section selected, the keyframes of the parameters to which Shy is applied will be moved at the same time. You can control the movement of the selected keyframes by unchecking “Enable keyframe operations for properties hidden with Shy,” in the menu at the upper-right of the timeline.
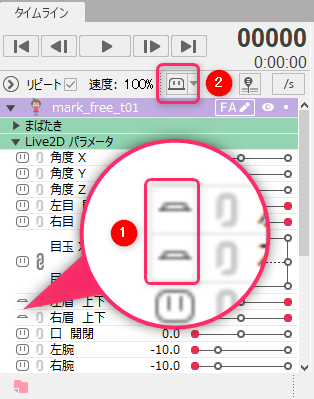
Checked (default):
In the following image, Shy is applied to the “eyeballs” and the entire keyframe is moved to the right after selecting the green property group.

Then, remove the Shy and check the “eyeball” keyframe, and you will see that it has moved to the same position.
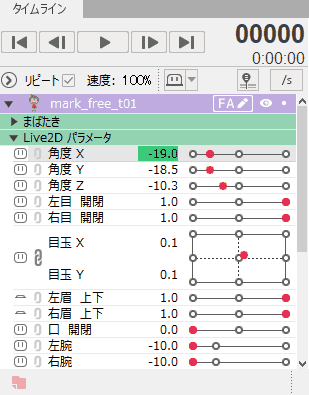
Unchecked:
Likewise, in the following image, Shy is applied to the “eyeballs” and the entire keyframe is moved to the right after selecting the green property group.
Then, remove the Shy and check the “eyeball” keyframe to confirm that it is not affected by the overall movement.