Re-import PSDs
Updated: 12/20/2018
Using PSD re-import, adjustments to the source image can be reflected in the model or new parts can be added to the model.
The following two adjustment methods are described on this page.
- Adjust existing parts
- Add new parts
Point
As things like changing or duplicating part names (or layer group names in PSDs) or changing the layer order, etc., can easily cause malfunctions, try to avoid these as much as possible.
Adjust Existing Parts
This section describes the procedure for adjusting parts that already exist in the model.
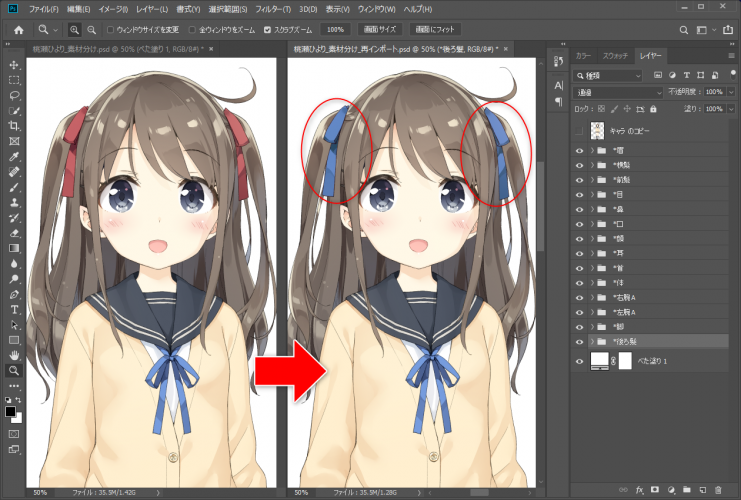
1. First, open the PSD imported into the model and adjust the appropriate areas.
Here, as an example, the color of the hair ornament is changed.
2. Save the PSD in a state ready for import.
What is the state of being able to import? Notes on PSD Creation
It is recommended to save the PSD with a name that is different from any other PSDs that have already been imported into the model.
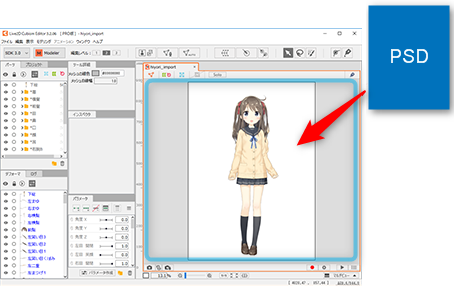
3. Open the model to be replaced.
4. Drag and drop the PSD into the View area.
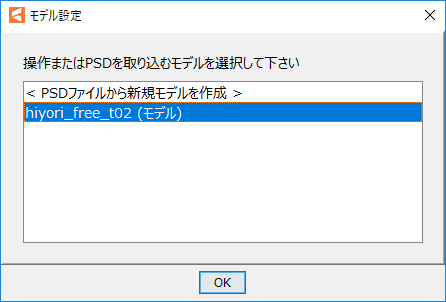
5. The [Model Settings] dialog box appears.
Select the model you want to replace in the list of models currently open in the Editor.
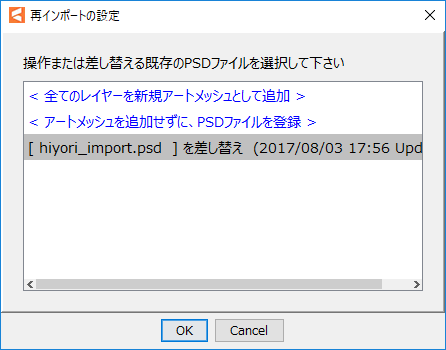
6. The [Re-import Settings] dialog box appears.
The names of PSD files that have already been imported are displayed, so select the PSD you want to replace.
The third line shows the name of the last imported PSD file, so typically select that one.
7. Click [OK] at the bottom of the dialog box.
The PSD has been replaced.
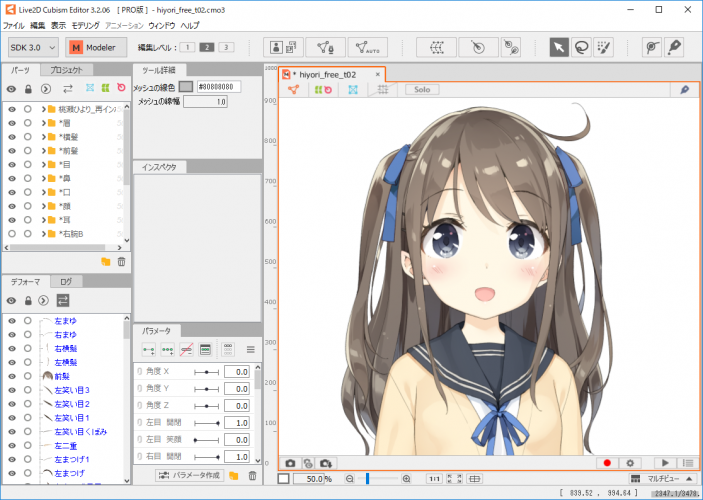
If you have made a large shape adjustment and the image is sticking out of the mesh, please refer to “Change Shapes of Existing Parts” below.
Change Shapes of Existing Parts
This section describes how to change the shape of an existing part.
Here, as an example, the length of hair is extended.
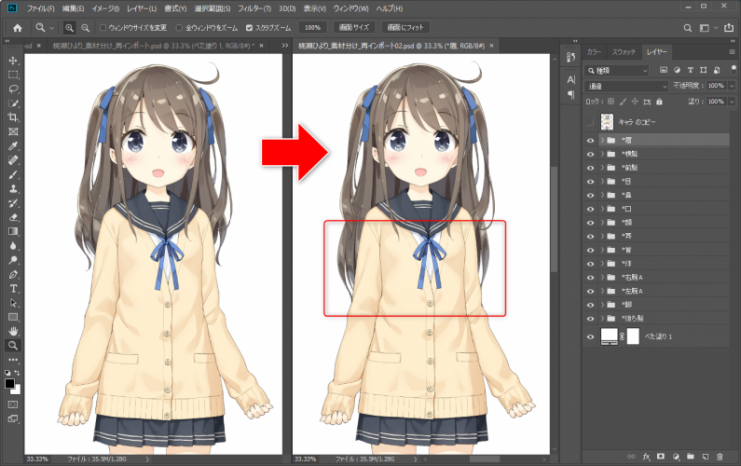
Please make sure that you have completed the import process (see “Adjust Existing Parts”).
If the existing mesh was made to fit the size of the original texture, the extended area will appear to be missing, as shown in the image.
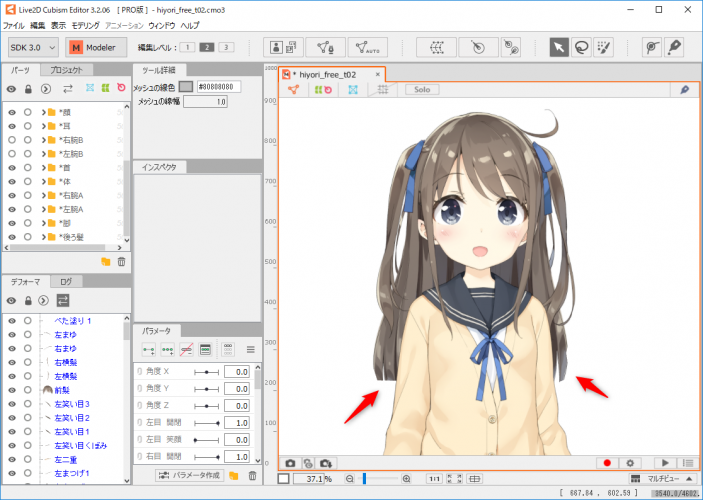
This condition is resolved by adjusting the mesh.
There are two ways to adjust the mesh.
- Edit the mesh manually
- Generate the mesh automatically
Edit the Mesh Manually
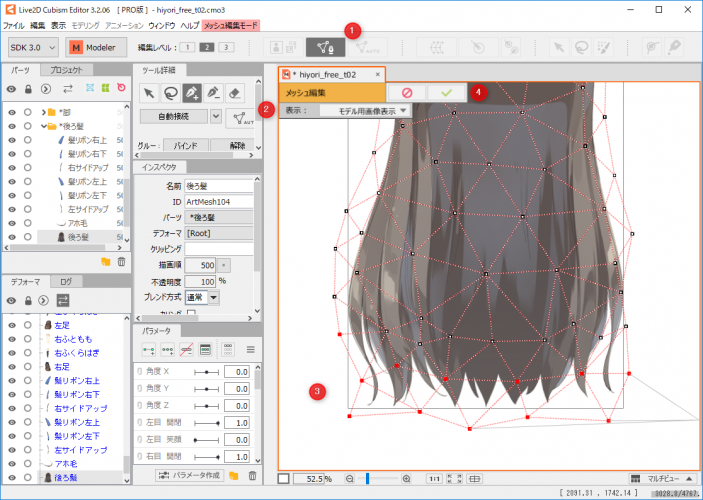
If you wish to keep the manually edited mesh, you can adjust it by following the procedure in “Edit Mesh Manually.”
- Click on [Edit Mesh manually] on the toolbar.
- Switch the display to [Model Guide Image Display] to display the entire texture.
- Add the missing mesh to fit the entire texture.
- When mesh adjustment is complete, click [✔] to exit Mesh Edit mode.
The above procedure will result in a normal display state.
Generate the Mesh Automatically
If you do not need to edit the mesh manually, you can use the procedure in “Automatic Mesh generator” to get the mesh to display properly.
Point
If the ArtMesh already has motion attached to it (keyforms have been created), changing the mesh may change the keyforms.
To some extent, this is compensated for automatically, but manual editing is recommended if you want to ensure that the keyforms are not changed.
- Click on [Edit Mesh manually] from the toolbar.
- Enter any value or adjust the preset.
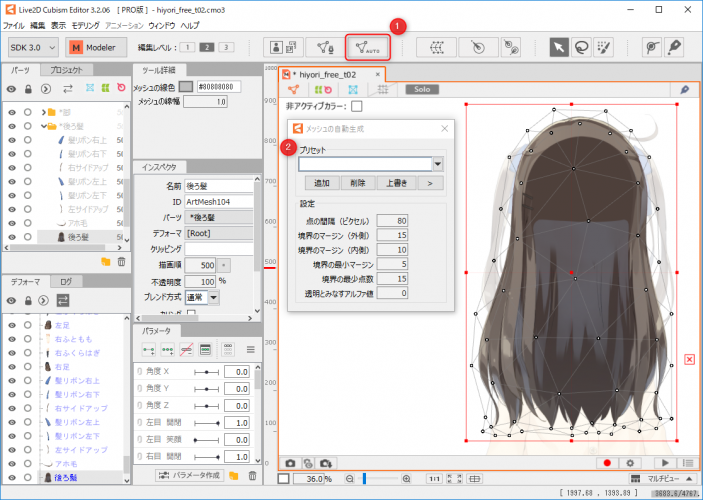
Tips
When a warp deformer has already been set up for the parent of an ArtMesh, if the child ArtMesh extends beyond the parent’s warp deformer, it will cause a load during data embedding.
If you encounter the above situation with the assumption that model data will be used for embedding purposes, we recommend adjusting the size of the warp deformer.
See “Combination of Parent-Child Hierarchy” for details.
Tips
If a match is unintentionally missed, the mesh or movement can be diverted by reassigning it from the [Project] palette.
See “Replace Incorrectly Mapped Layers” below.
Add New Parts
This section describes the procedure for adding a new part that does not exist in the model.
The process up to import is the same as “Adjust Existing Parts” above.
1. First, open the PSD imported into the model and adjust the appropriate areas.
Here, as an example, glasses are added.
2. Save the PSD in a state ready for import.
What is the state of being able to import? Notes on PSD Creation
It is recommended to save the PSD with a name that is different from any other PSDs that have already been imported into the model.
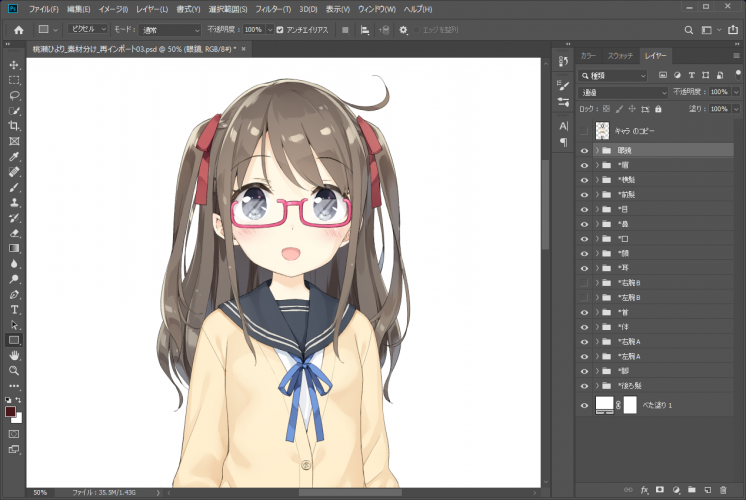
3. Open the model to which you want to add parts.
4. Drag and drop the PSD into the View area.

5. The [Model Settings] dialog box appears.
Select the model you want to add from the list of models currently open in the Editor.

6. The [Re-import Settings] dialog box appears.
The names of PSD files that have already been imported are displayed, so select the PSD you want to replace.
The third line shows the name of the last imported PSD file, so typically select that one.
Tips
In the above procedure, parts are added to PSDs that have already been imported, so they are replaced with PSDs that have already been imported.
If you are importing a PSD that only has a layer for the new part, click on [Add all Layers as new ArtMesh] instead of replacing them.

7. Click [OK] at the bottom of the dialog box.
8. New parts have been added.
A parts group with the name of the loaded PSD file will be created at the top of the [Part(s)] palette.
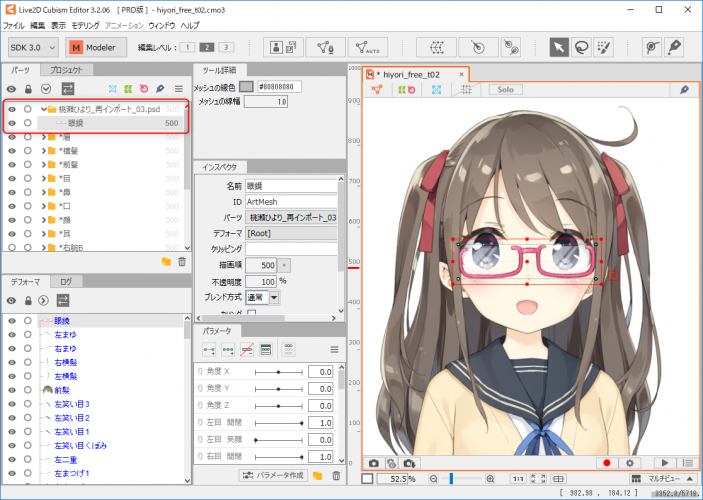
Tips
It will always be added to the top of the [Part(s)] palette in draw order 500, so it may not look as expected.
In this case, you can adjust the display order by moving the parts group, or set the draw order so that it looks correct (see “Draw Order”).
Replace Incorrectly Mapped Layers
PSD files with layer names changed or re-imported PSD files that have been re-edited in different applications may not map correctly.
If the wrong layer is used for a certain ArtMesh, it can be replaced by following the steps below.
- Select the ArtMesh whose layer needs to be replaced.
- Open the [Project] palette.
- On the [Project] palette, expand the model you are editing in the tree and find the PSD file you re-imported for replacement in the [Source Image].
(Clicking on [Source Image] will display the import history in the [Inspector] palette.) - Find the correct layer in the re-imported PSD file and select “Set as input image for selected object” from the right-click menu to replace the layer.
Switch the Source Image (PSD Image)
When the PSD image is replaced during re-import, the replaced PSD image will also be retained in the [Project].
The old and new PSD images can be viewed in the [Source Image] section of the [Project] palette.
You can replace the new image with the old image, i.e. PSD image before re-importing, by right-clicking on the old source image and selecting [Switch to current].
Consolidate Multiple Source Images Generated by Re-import
If you repeatedly re-import PSDs to modify the source images, multiple images will accumulate in the [Project] palette.
If the currently used (current state) source image layer exists across multiple source images, it can be combined into one.
We will start with an example.
Re-import mark_free_import_t03.psd to mark_free_import_t02.psd.
| mark_free_import_t02.psd | mark_free_import_t03.psd |
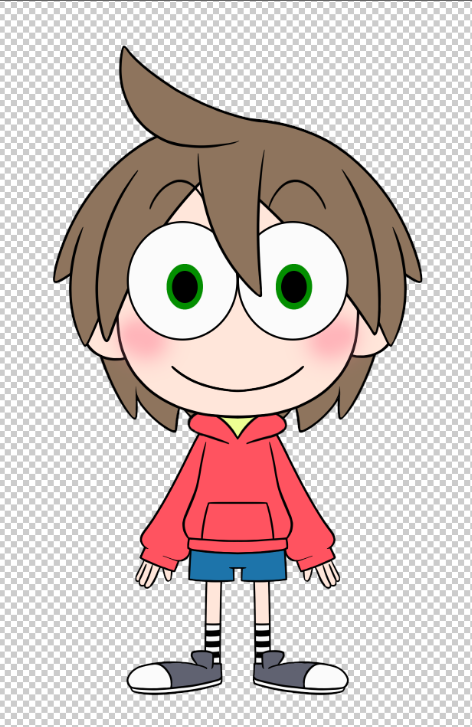 | 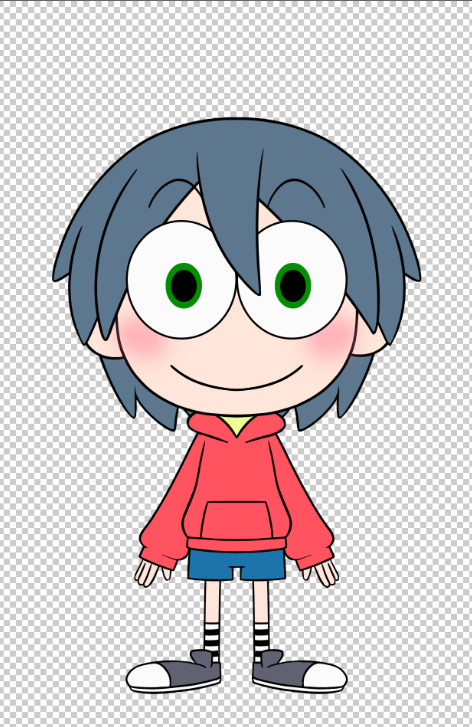 |
When the re-import is complete, the model will appear as shown below.
A cowlick that was not in the re-imported “mark_free_import_t03.psd” will appear tied to the original “mark_free_import_t02.psd.”
Select the original “mark_free_import_t02.psd” and check the [Inspector] palette.
The “Number of images used for modeling” is set to ‘1,’ which is the cowlick. (Current state)
Below that, the “Number of connections to image for model” is ‘32,’ which means that the original PSD that was re-imported is still linked.
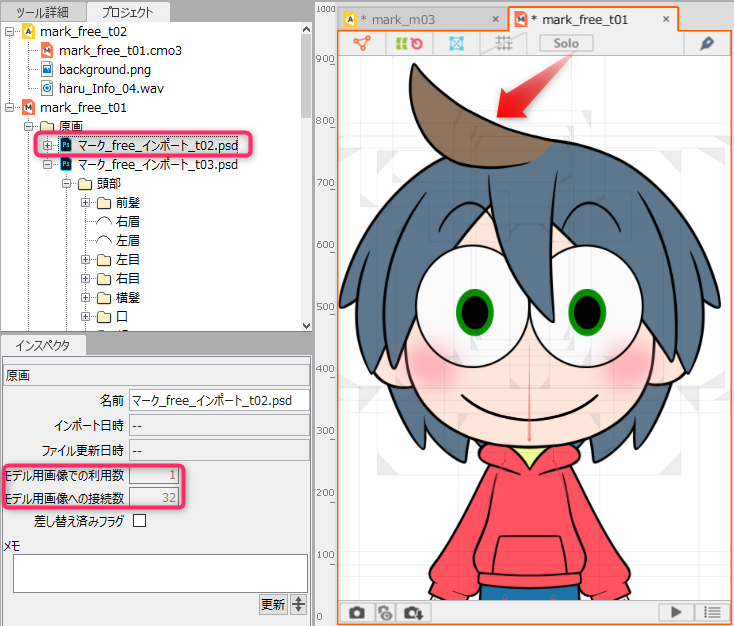
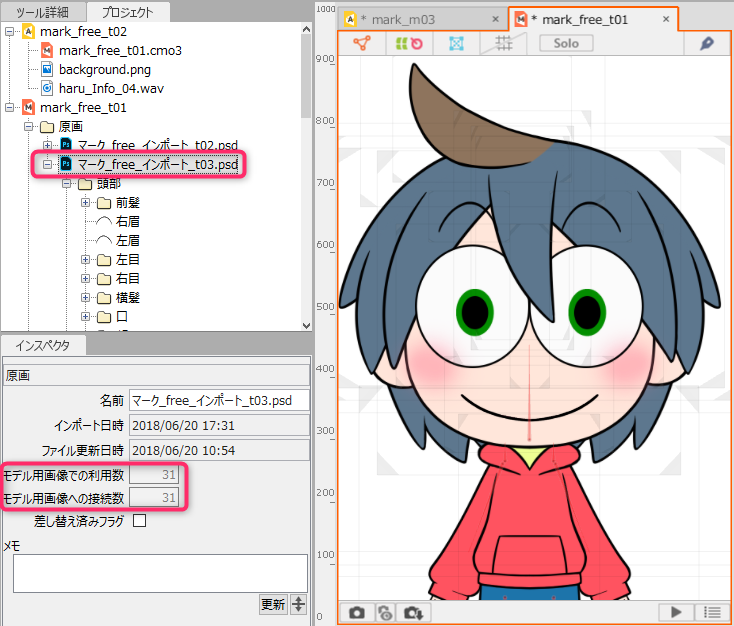
Then, select the re-imported “mark_free_import_t03.psd” and check the [Inspector] palette.
This one has the same number ‘31’ for “Number of images used for modeling” and “Number of connections to image for model.”
You can see that all layers are used as model guide images.
However, the absence of the cowlick makes the figure one less than the source image.
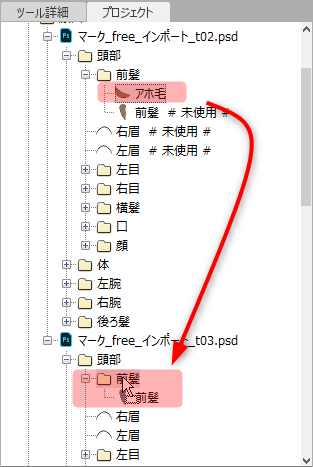
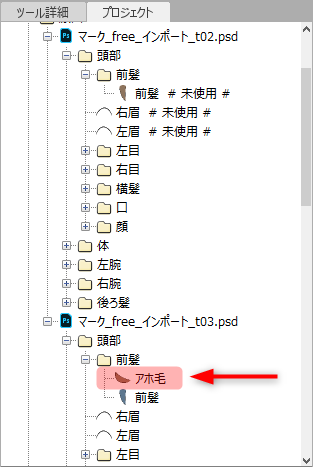
Since the model guide image now spans two source images, drag and drop the cowlick from the source image into the re-imported image, as shown below.
By doing this, everything in the source image became “# unused #” and the “Number of images used for modeling” and “Number of connections to image for model” in the re-imported image became ‘32’ with an increase in the number due to the cowlick.
 |  |
Delete the Source Image (PSD Image)
The source image that is no longer in use can be deleted from the right-click menu.
(You can also leave it as is and change it later.)
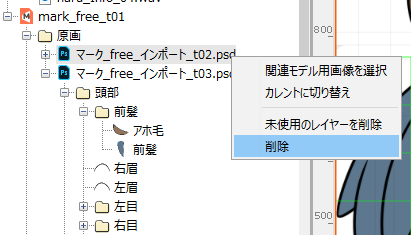
If the original PSD image layer is used as an ArtMesh, a warning will appear.
