Temporary deform tool
Updated: 02/08/2022
This function allows objects with vertices to be deformed more conveniently.
Tips
Transformations can also be performed on deformers.
Common Usage
Selecting each deformation item from the [Modeling] or [Form Animation] menu under the [Temporary deform tool] displays a grid of control points that can be used to deform the selected object.
The number of control points to be displayed can also be edited, allowing for more detailed deformation.
When using the Temporary deform tool, the arrow tool’s function to move objects will no longer be available, and the Parts and Deformer palettes are grayed out and unavailable. Once editing is complete, perform the following operations to deactivate the Temporary deform tool.
How to cancel the Temporary deform tool:
- Click the green check mark in the [Temporary deform tool] in the upper left of the View area
- Click [Unbind] displayed under Transform Method in the Tool Details palette
- Click [Modeling] menu -> [Temporary deform tool] -> [Deselect the temporary deform tool]
- Set and execute the shortcut for [Deselect the temporary deform tool]
Temporary path deformation
By creating and moving a disposable deform path, you can deform the shape to follow the path.
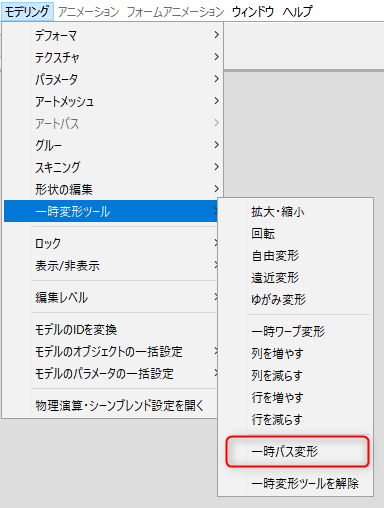
With an object with vertices selected, click [Modeling] menu -> [Temporary deform tool] -> [Temporary path deformation].
Alternatively, click on the [Form Animation] menu -> [Temporary deform tool] -> [Temporary path deformation].
Operation method
| Click to add a control point. (1) (Red circles are control points.) | Drag control points to deform the path. |
 | 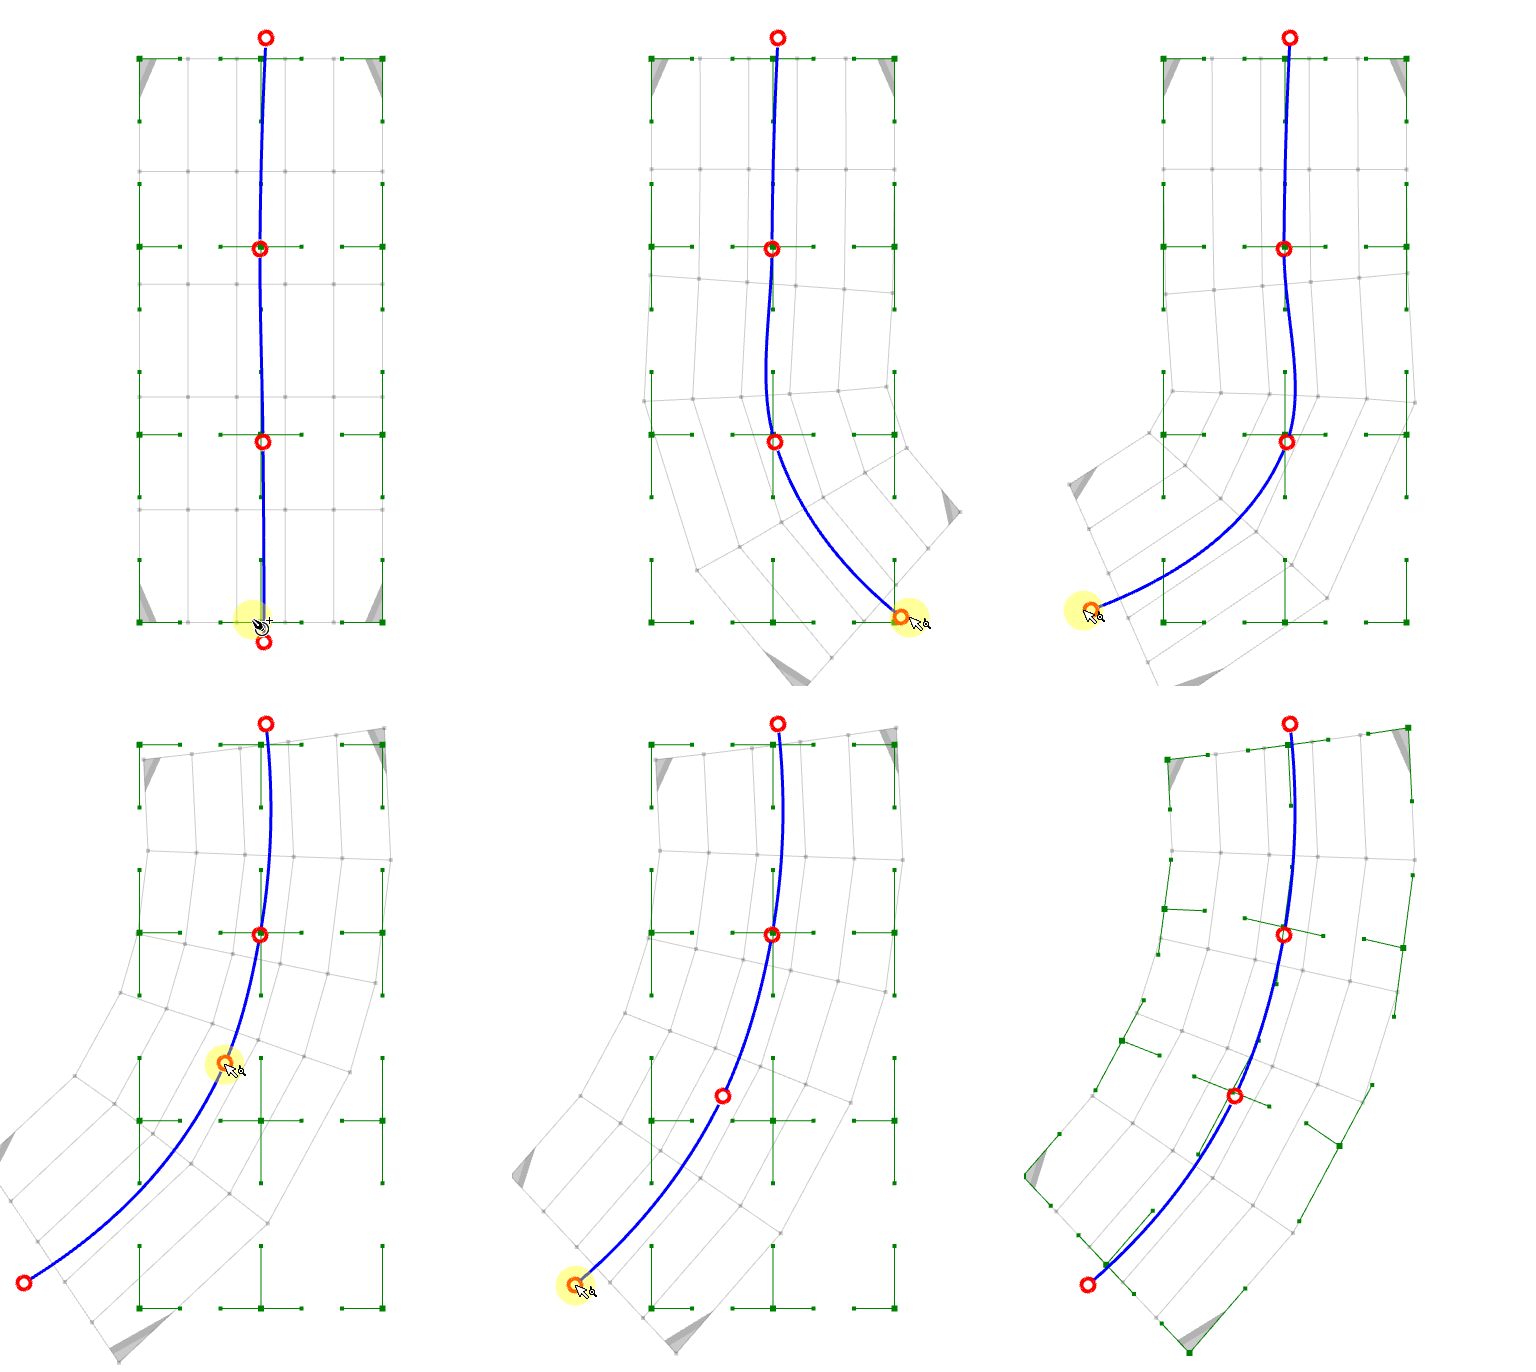 |
Transform only the path using [Ctrl] + dragging the control point.
Control points can be deleted by [Alt] + click.
Click on the path to insert a control point.
Temporary warp deformation
The control points connected in a grid can be moved and deformed.
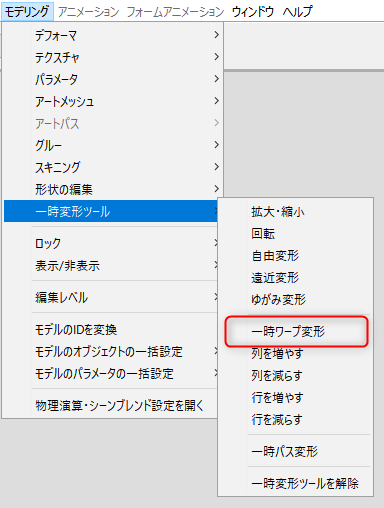
With an object with vertices selected, click [Modeling] menu -> [Temporary deform tool] -> [Temporary warp deformation].
Alternatively, click on the [Form Animation] menu -> [Temporary deform tool] -> [Temporary warp deformation].
Temporary warp deformation can also be initiated by clicking the icon in the lower right corner while the Bounding Box is displayed.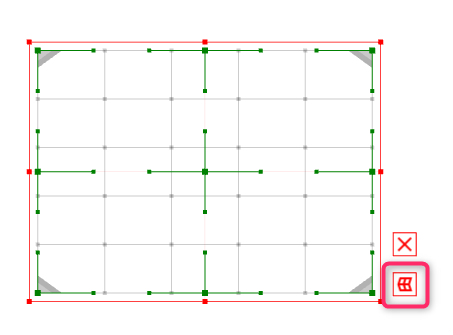
Operation method
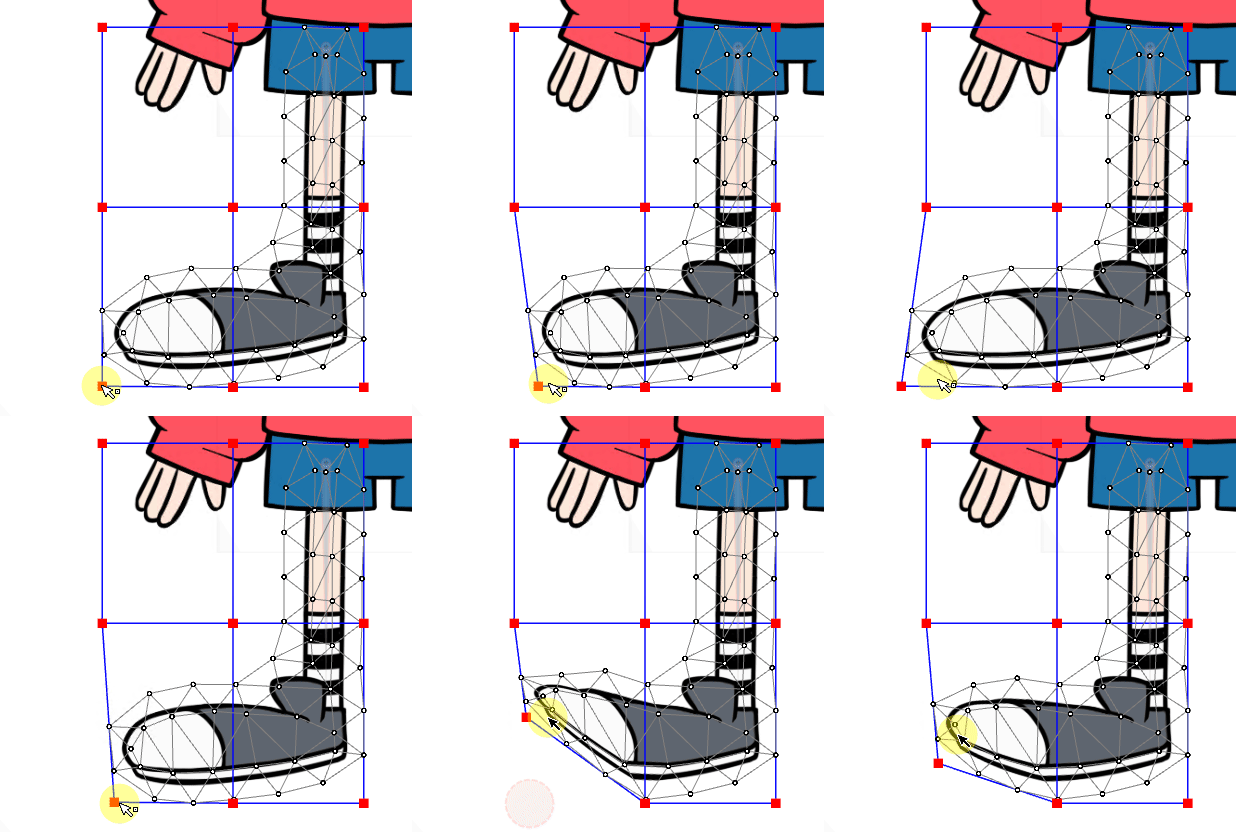
Drag the control point (red dot) to deform it.
(You can also use [Ctrl] + drag to move only the control point.)
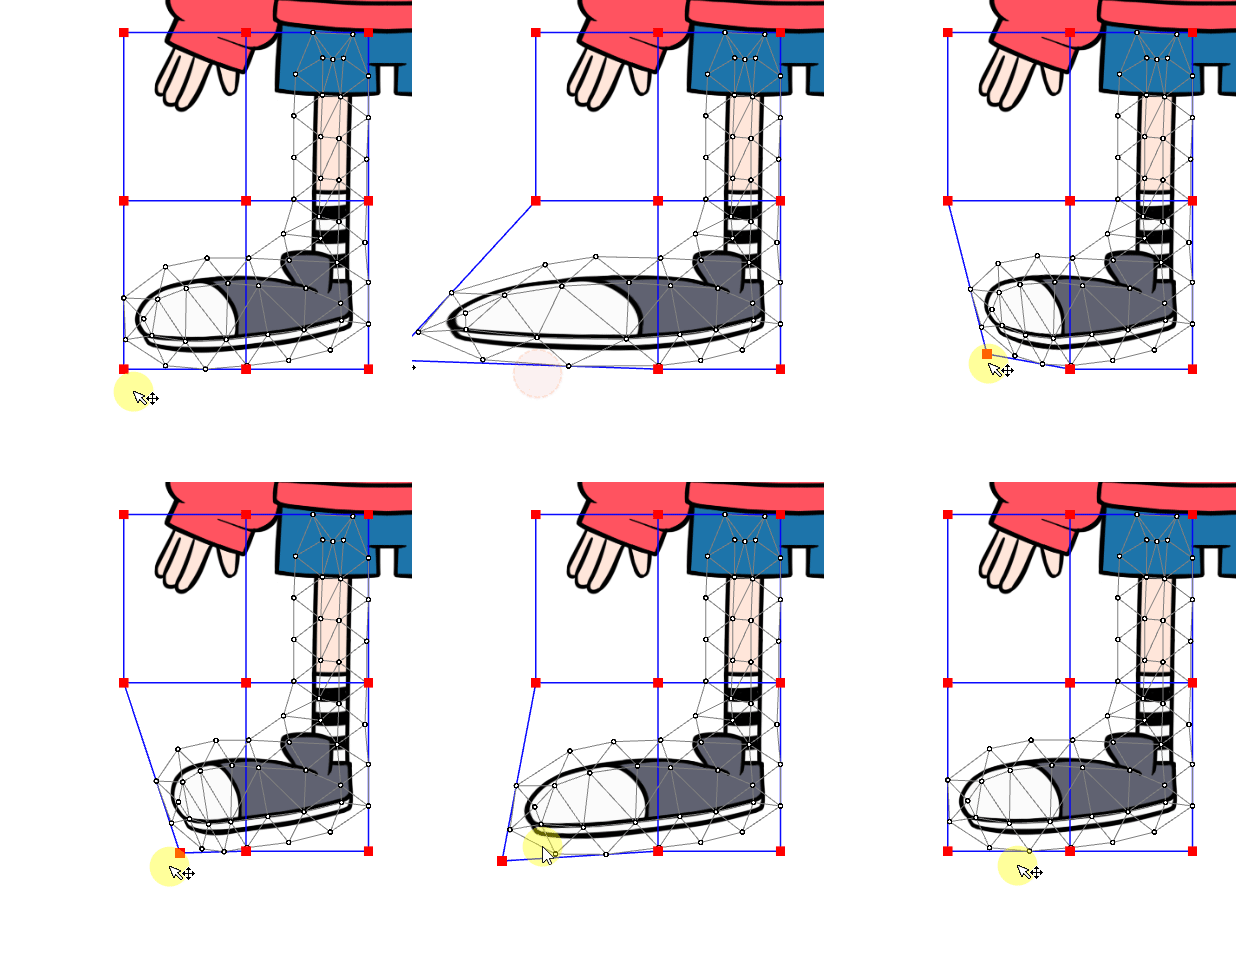
Hold down [Shift] and drag the control point to apply parallel movement to it.
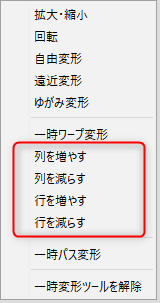
Change the number of columns and rows in the grid
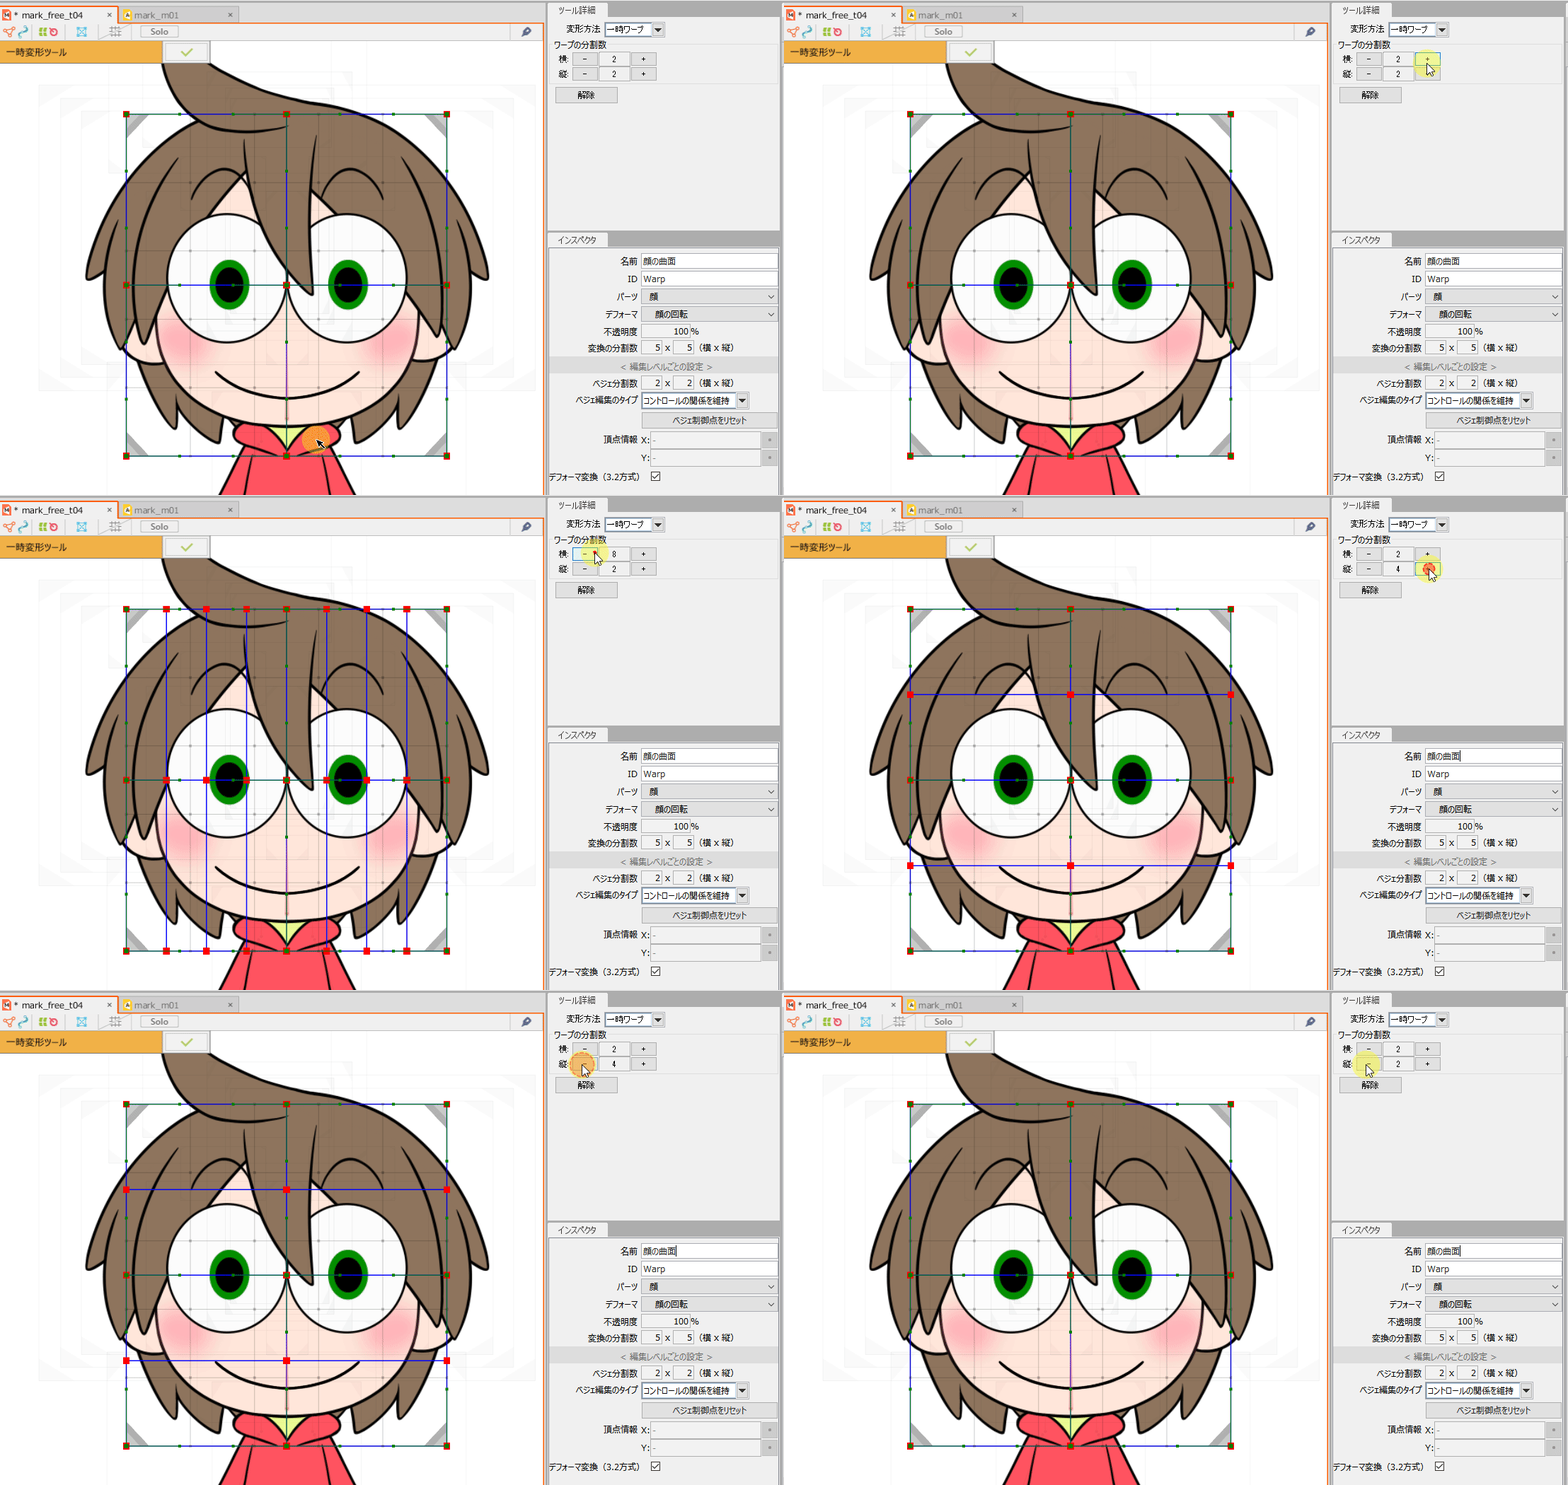
You can change the number of columns and rows in the grid of temporary warp deformations.
This function can be used when temporary warp deformation is used.
Alternatively, select [Temporary warp] from the Transform Methods in the Tool Details palette to manipulate the Number of Warp Divisions items.
Other temporary deform tools
Objects with vertices can be deformed in various ways.
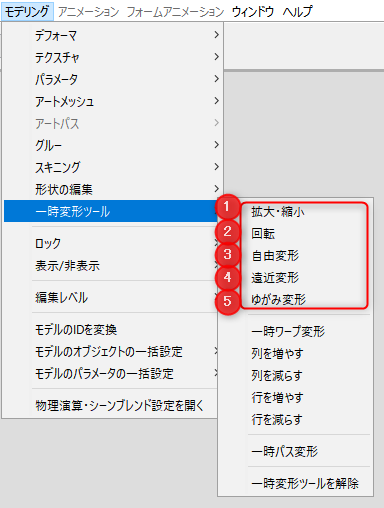
With an object with vertices selected, click [Modeling] menu -> (1) to (5) of [Temporary deform tool].
Alternatively, click [Form Animation] menu -> (1) to (5) of [Temporary deform tool].
Tool Details palette:
When using the Temporary deform tool, you can also select the transform method from the Tool Details palette.
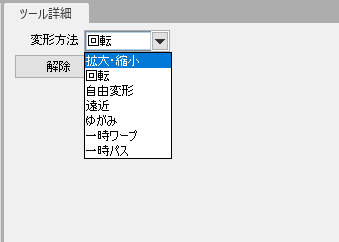
Operation method
When menus (1) through (5) are executed, the following control points are displayed and various deformations can be performed.
| (1) Enlarge/reduce | (2) Rotation | (3) Free transform |
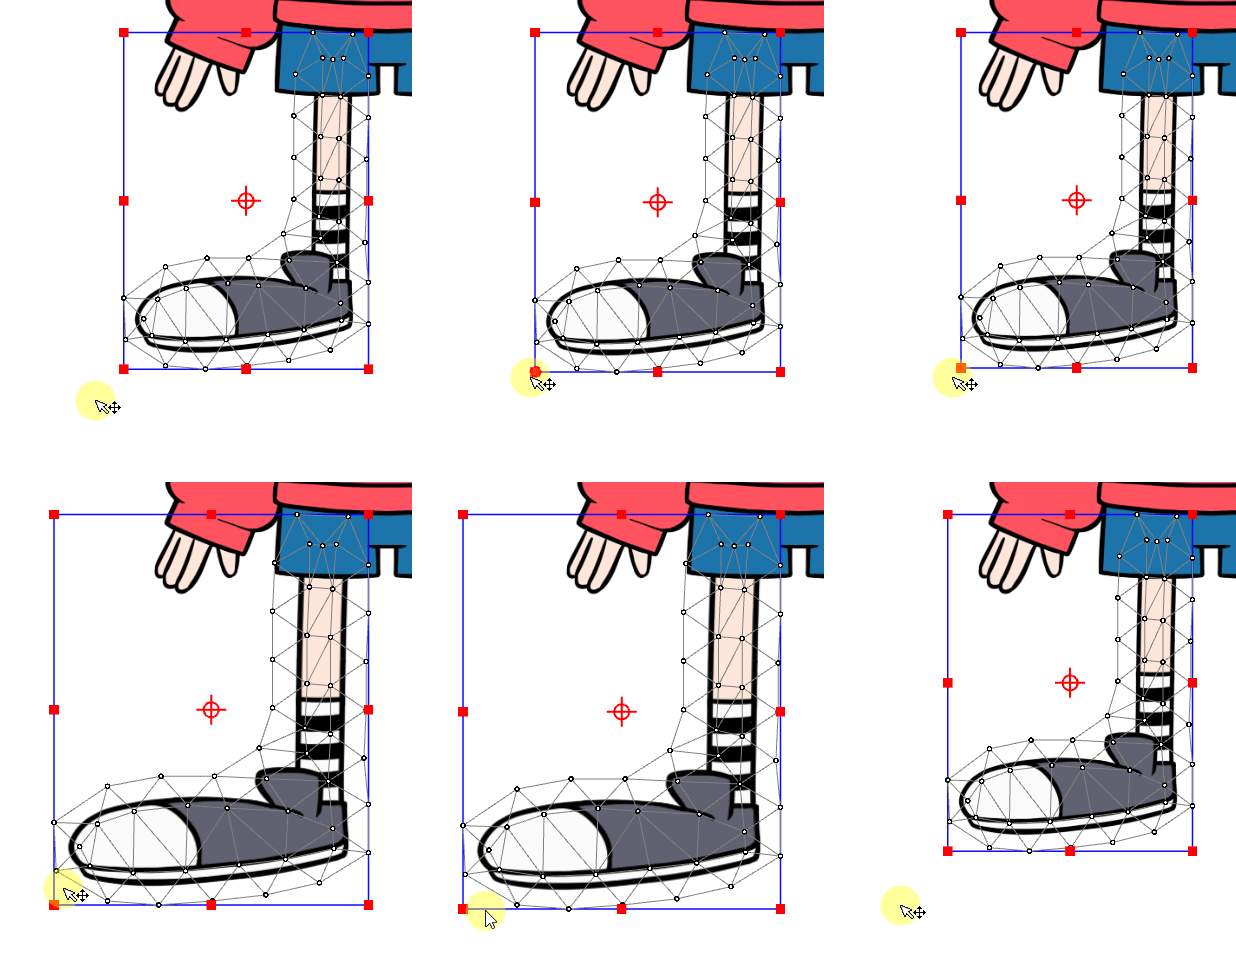 |  | 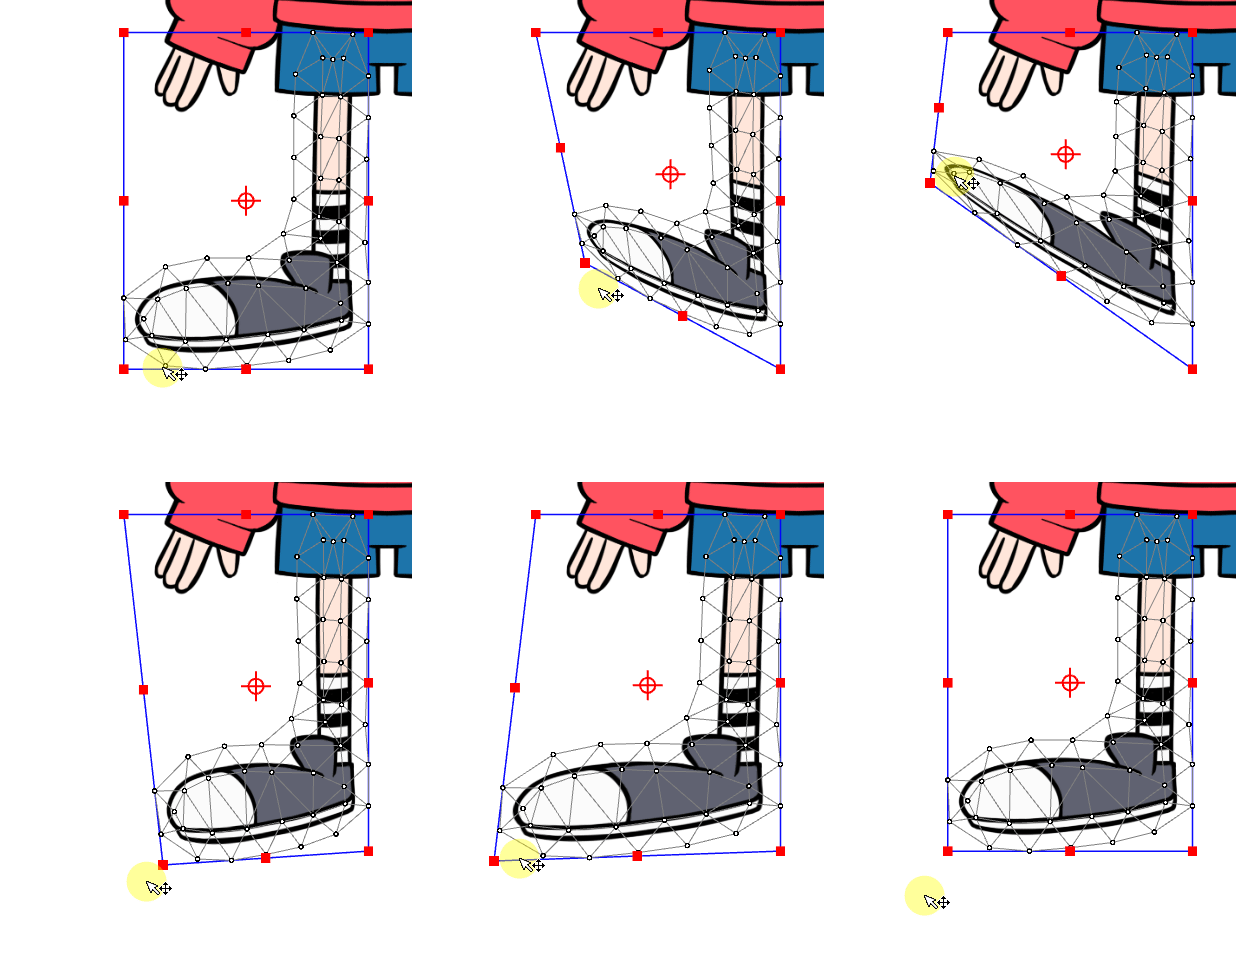 |
| (4) Perspective | (5) Distort |
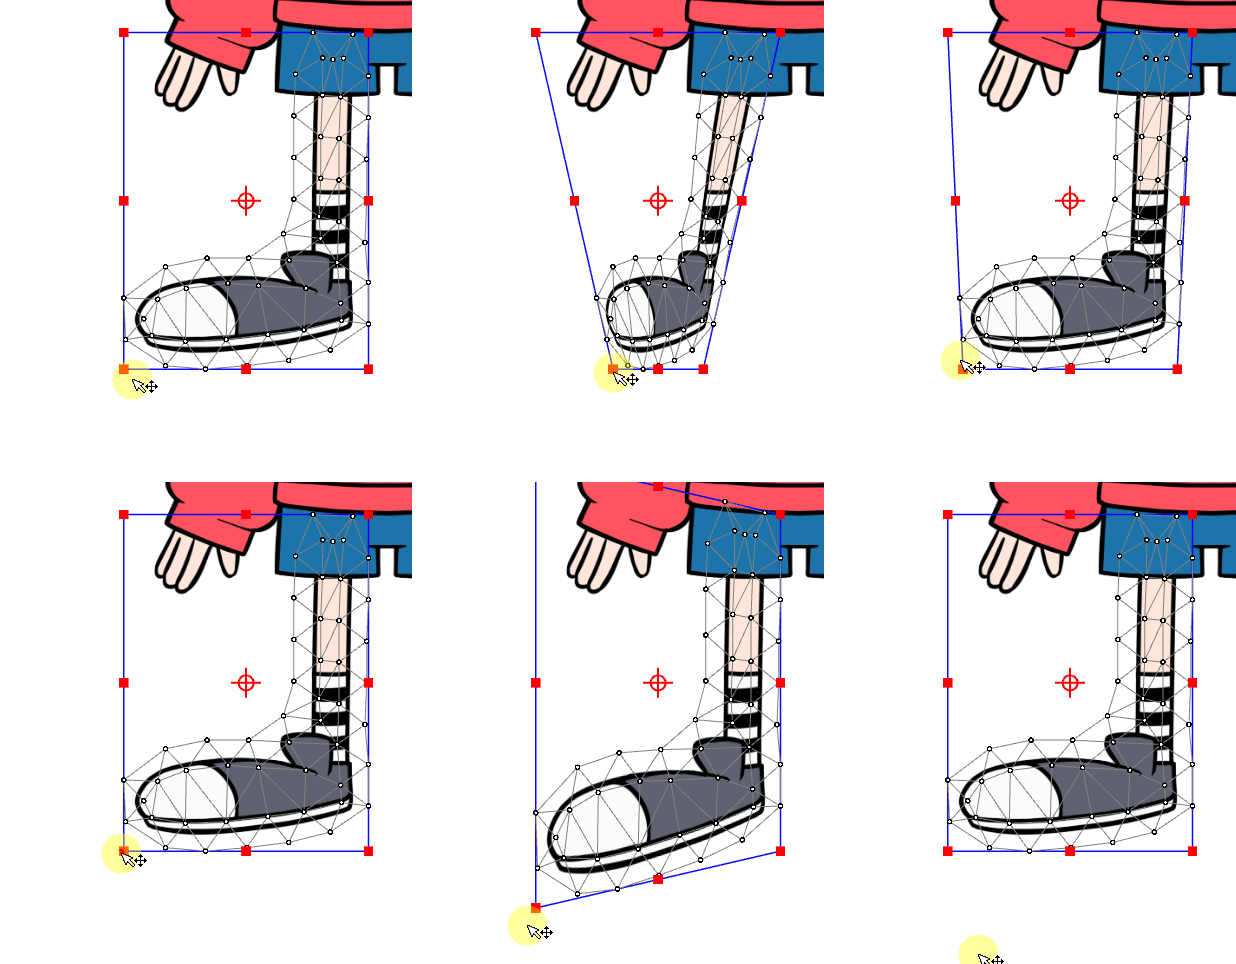 | 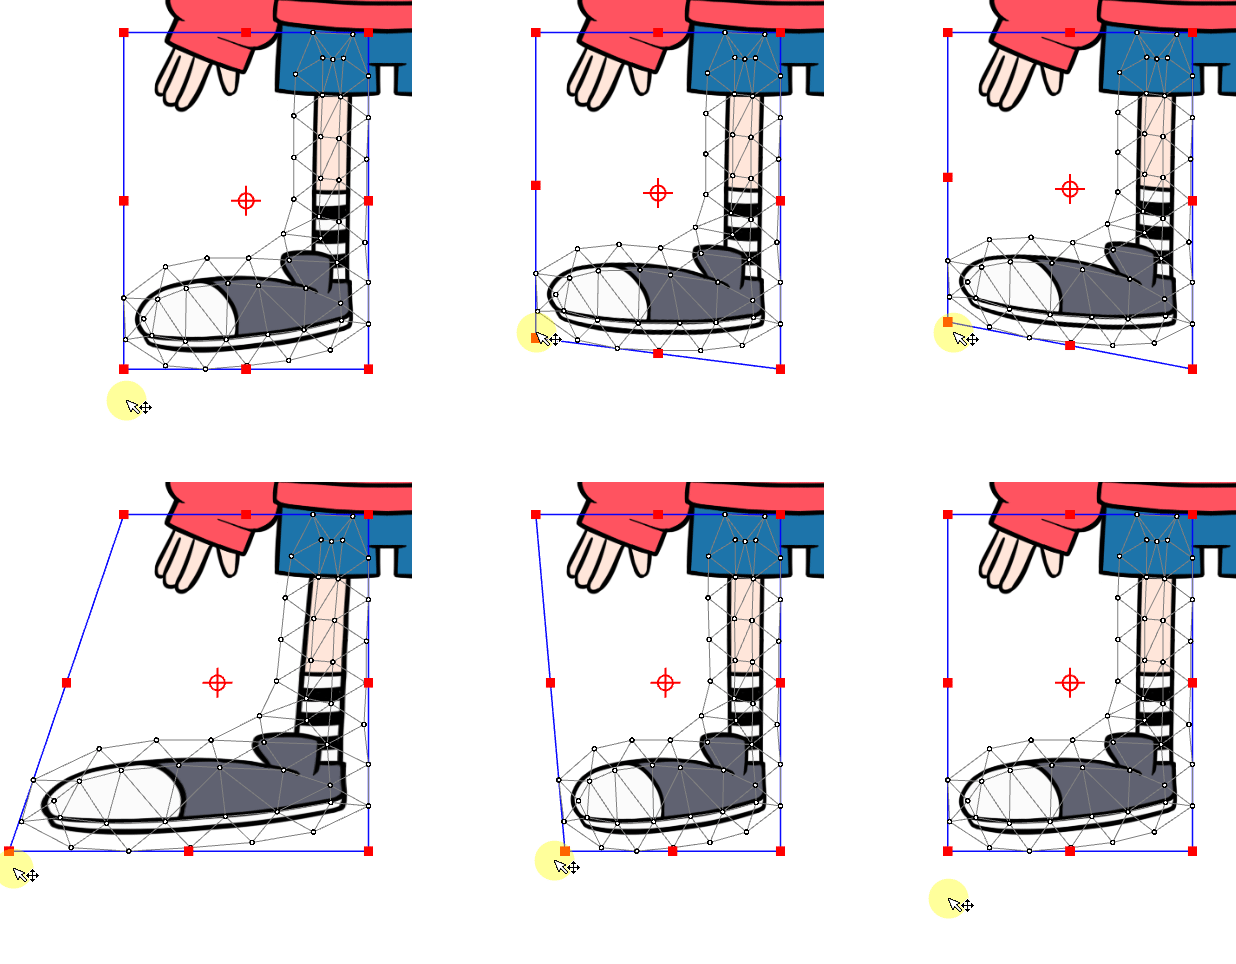 |
Drag a control point to perform the deformation.
Move only the control point using [Ctrl] + dragging the control point.
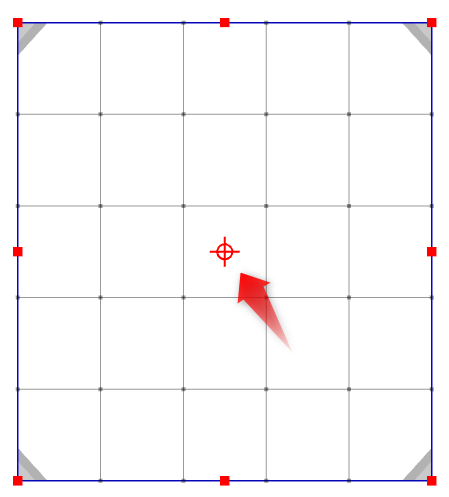
Anchor points can be moved by dragging.
Hold down [Shift] and drag the anchor point to apply parallel movement to it.
Anchor point:
The center position of [Rotation] can be changed by moving the anchor point placed in the center.
Shortcuts:
The Temporary deform tool can be assigned a shortcut.
Since it is not set by default, you can assign any key as desired.
See the Modeling item on the “Shortcut Key List” for details on setting a shortcut.
