How to Set Scene Blending
Updated: 05/16/2023
This page describes the procedure for setting up scene blending.
See “Scene Blending Settings” for a more detailed explanation of the setting screen.
In advance, prepare model data (cmo3) for which you want to set the scene blending and the animation data (can3) for which you created the scene.
See “Model Loading and Placement” and “Creating Animations” for information on how to create animation data in the Animation Workspace.
Scene Blending Setup Procedure
Click [Modeling] menu -> [Physics and Scene Blend Settings] to open the Scene Blending Settings dialog box.
If scene blending is not set, the setting item is grayed out and the operation is disabled.
Load animation data
| Number | Images | Details |
|---|---|---|
| (1) | 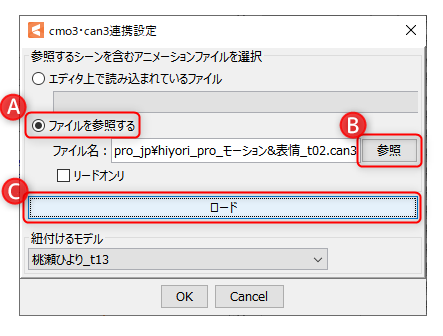 | Load the [can3] file. Click [Scene Blending] menu -> [Settings of the cmo3-can3 linkage]. If [can3] is already loaded in the editor, select the file from the pull-down menu under [Files loaded in the editor] and click [OK]. If [can3] is not open, select [Browse Files] (A), then select the [can3] you want to open from [Reference] (B). Click [Load] (C) to display the [cmo3] associated with [can3] in the [Linked models] combo box. Select the model to be tied to the model data currently open in the Editor and click [OK]. |
| (2) | 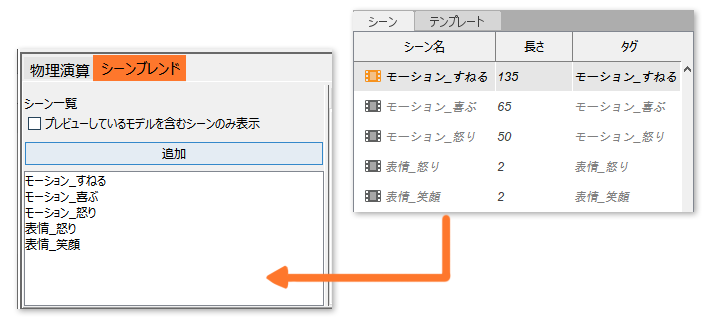 | Once the [can3] file is loaded, you can switch to the [Scene Blending] tab. The loaded scenes in the [can3] file will be displayed in the [Scene List]. Note: If a tag is set for a scene, the name will appear in the list with the tag. |
Tips
If you want to only play back scenes without editing the playlist, suppress the GUI settings by checking the [Read only] checkbox.
Create a playlist
| Number | Images | Details |
|---|---|---|
| (1) | 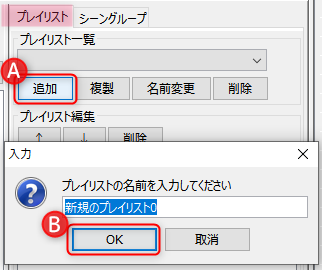 | From the [Playlist] tab, click [Add] (A). Enter any name and click [OK] (B). |
| (2) |  | Once the new playlist has been added, select the scene you want to add from the [Scene List]. With a scene selected, click [Add] (A) in the scene list to add the selected scene to [Edit Playlist]. (B) |
| (3) | 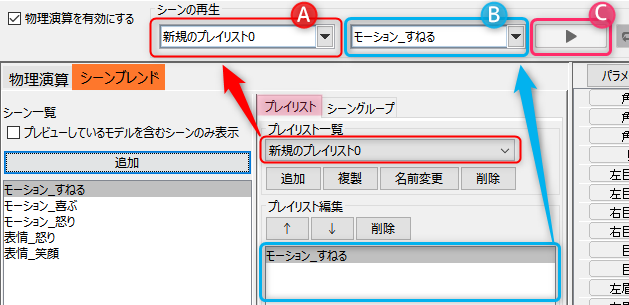 | Select the playlist you created and the scene you want to play from (A) and (B) on the playback bar, and click [Playback] (C) to play the scene. See “Physics and Scene Blend Settings” for more information on the playback bar. |
If you are using a model with preconfigured physics, by playing back the scene with the [Enable Physics] checkbox checked, you can check the shaking during scene playback.
See “How to Set Up Physics” for details on how to set up physics calculations.
Scene Group Setup Procedure
Scene group is a function that combines and plays back separate scenes such as “facial expressions” and “body movements.”
You can check the blend ratio while changing it in real time.
Create a scene group
| Number | Images | Details |
|---|---|---|
| (1) | 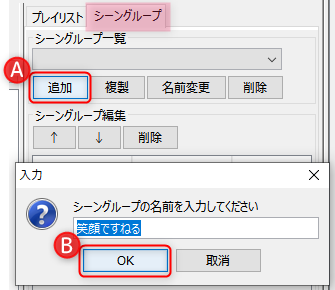 | From the [Scene Group] tab, click [Add] (A). Enter any name and click [OK] (B). |
| (2) | 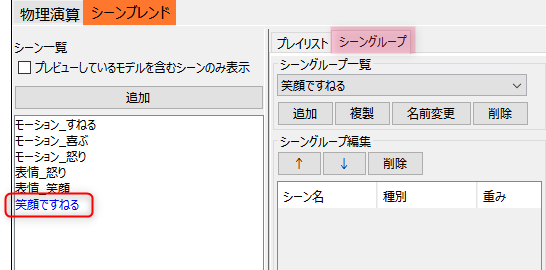 | The created scene group will be added to the [Scene List]. Note: The name of the scene group is displayed in blue. |
| (3) | 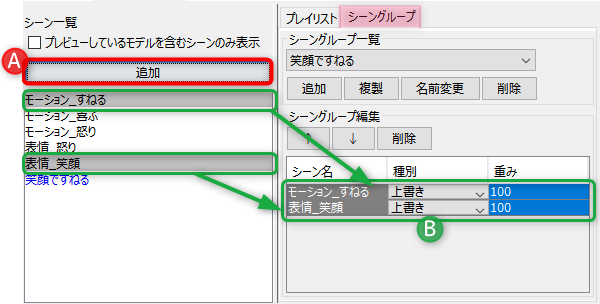 | Select the scenes you want to combine from the [Scene List] and click [Add] (A) to add them to the [Edit Scene Group]. (B) The blend mode for combining scenes can be selected from [Overwrite] or [Additive] in the [Type] tab. [Weight] allows you to set the degree of influence of each scene to a desired value. Note: When blending scenes, they are applied in order from the top. Note: A scene group cannot be added to a scene group. |
| (4) | 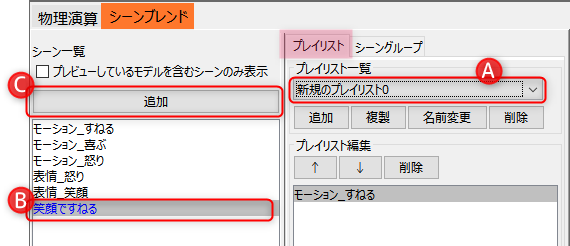 | Switch to the [Playlist] tab and select the desired playlist (A) from the [Playlist List]. Select the scene group you want to add from the [Scene List] (B) and click [Add]. (C) |
| (5) | 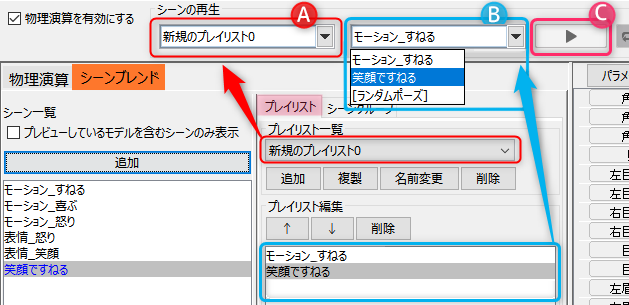 | Select the playlist and the scene group you want to play from (A) and (B) on the playback bar, and click [Playback] (C) to play the scene. |
Point
Playlist scene group settings are stored in animation data (can3).
If you want to save the settings, overwrite the animation data.
Check the blending condition while playing back
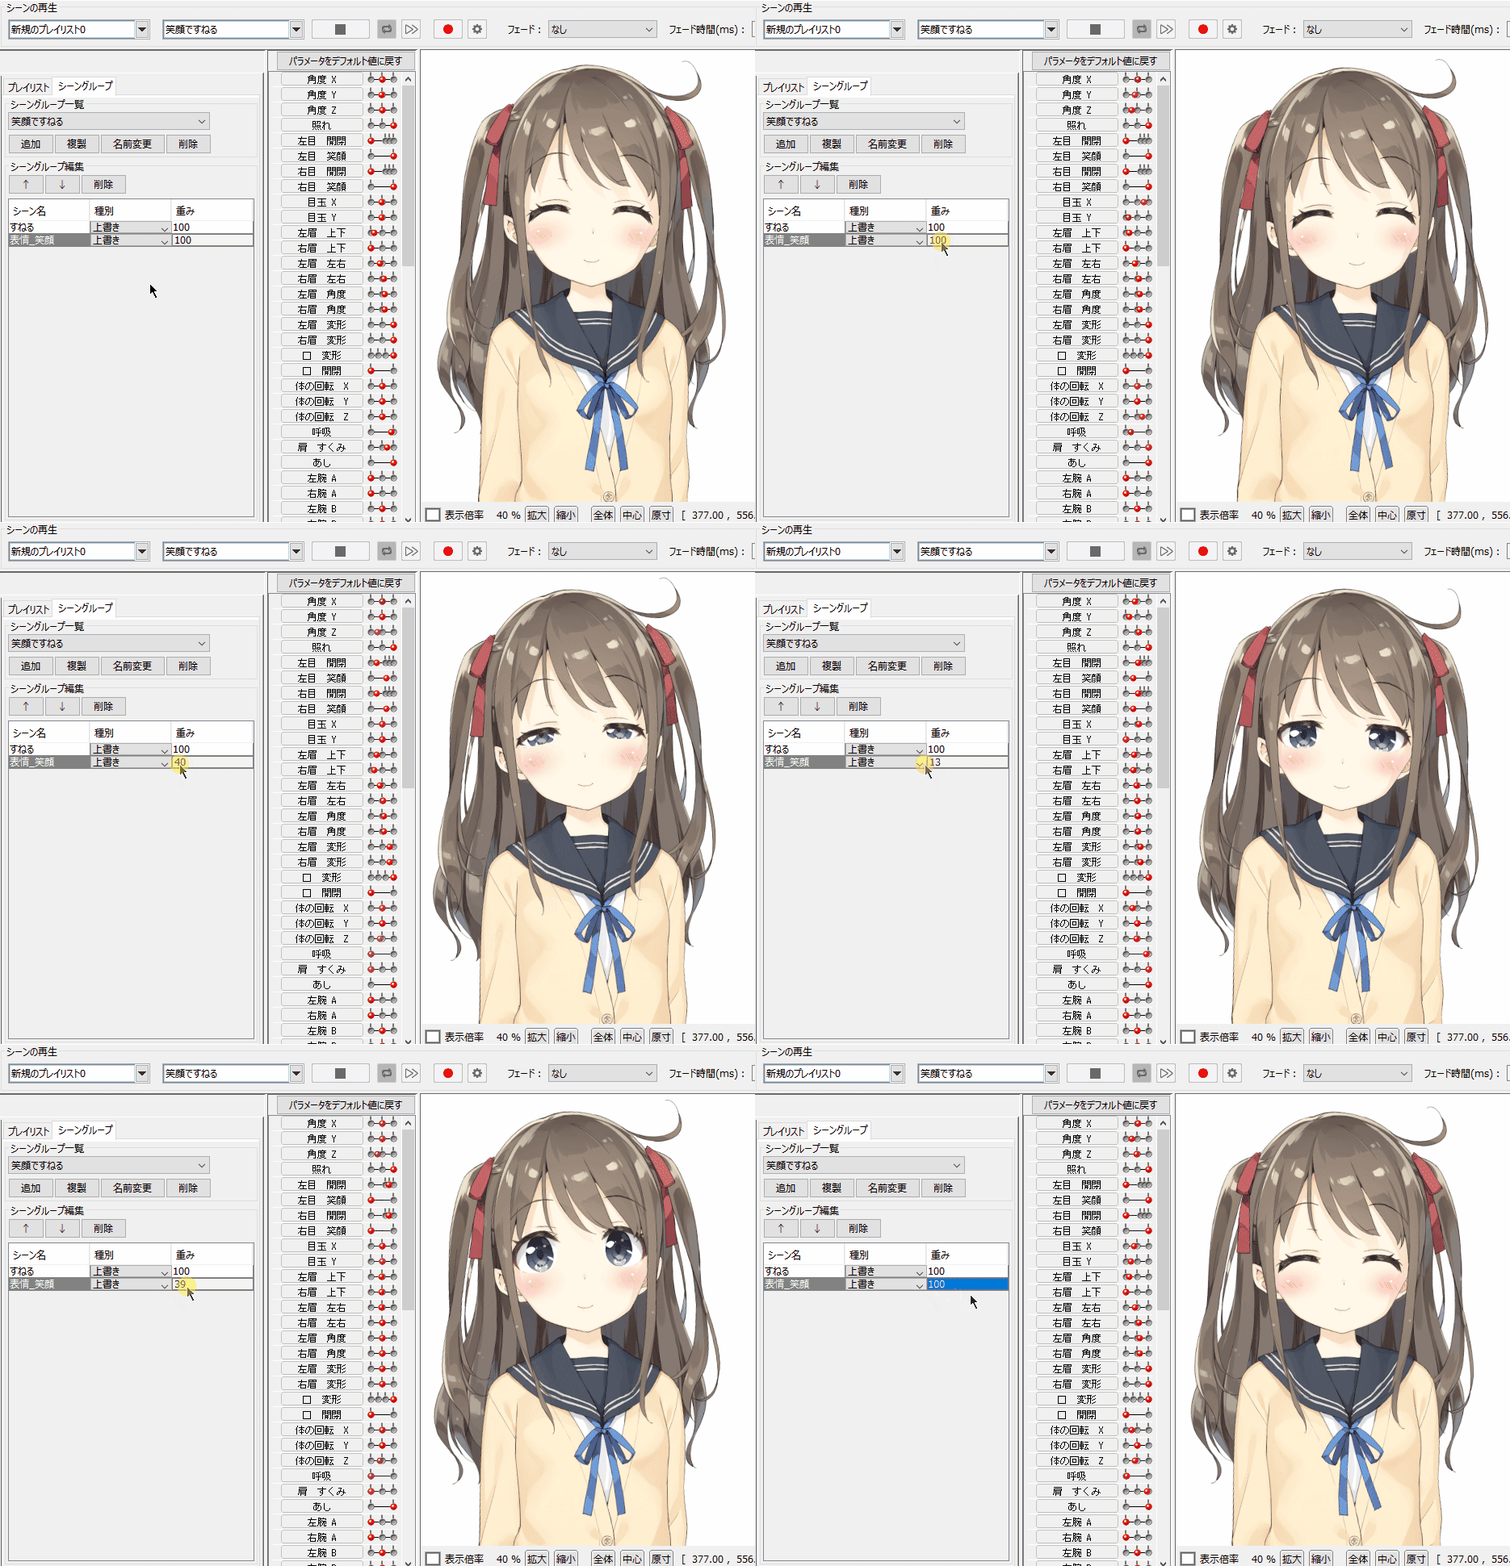
While playing back the set scene group, by dragging the numerical value of the [Weight], you can see how the blend ratio changes in real time.
Check the View and simulate it.
