Limit Settings for Blend Shape Weights
Updated: 05/19/2022
Describes the ability to limit the weights of Blend Shape.
Objects to which Blend Shape are added may lose their shape depending on the combination of parameters.
In such cases, unintended deformations can be suppressed by adding a weight limit setting to the Blend Shape.
Limit Settings for Blend Shape Weights
Displaying the Settings dialog box
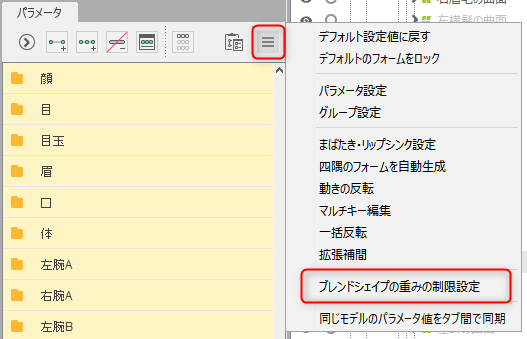
Select [Limit Settings for Blend Shape Weights] from the Parameter palette menu to display the Settings dialog box.
Procedure for adding weight limit settings
This section describes the procedure for adding a weight limit setting.
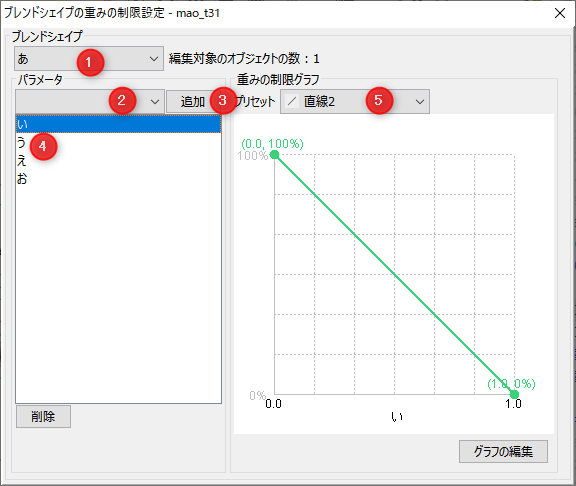
- Select the object for which the Blend Shape is set. It is convenient to use [Select] on the parameters.
- (1) Under [Blend Shape], select [Blend Shape parameters].
- (2) From [Parameter], select the parameter for which you want to add a weight limit setting. (3) Execute [Add].
- (4) Verify that the parameter has been added to the list and is selected.
- (5) Select the desired item from [Preset].
Tips
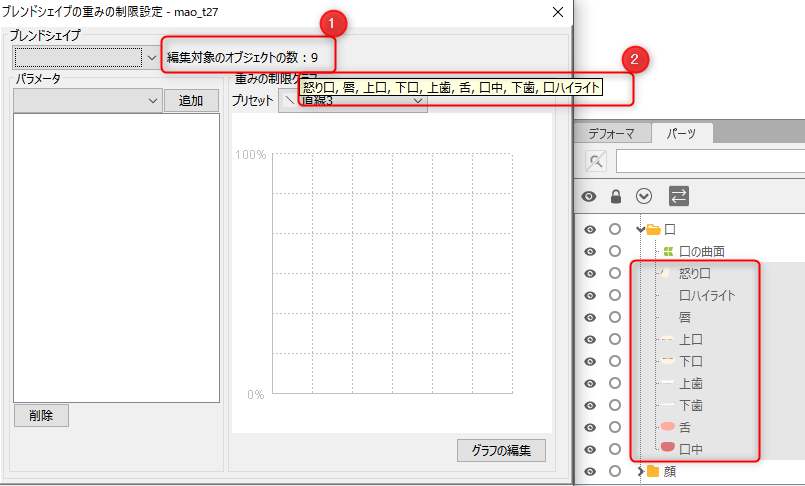
When an object is selected, a number is displayed in (1) [Number of objects to be edited:].
In addition, when you hover over it, a tooltip will show (2) [Target Object Name] so you can see which object you have added the restriction to.
About weight limit graph
[Weight Limit Graph] shows the relationship between parameters and [Weight limit].
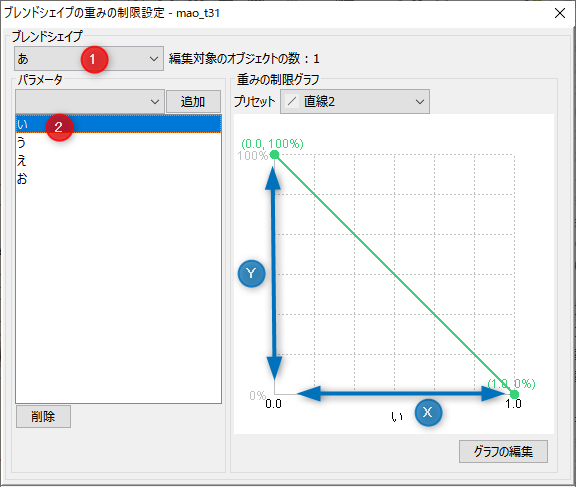
The X axis is the value of the parameter currently selected in (2).
The Y axis is the “Weight limit” value of the blend shape in (1).
The weight of a blend shape to which the limit setting has been added is the original weight multiplied by the “Weight limit” value.
If multiple weight limit settings have been added, one of the smallest values of the “Weight limit” for each parameter will be multiplied.
Precautions
The blend shape with the weight limit settings added will not be able to add keys or edit keyforms with parameter values where the “Weight limit” is less than 100%.
Example of creating a weight limit setting
In this section, we will use the square shape used in “Example of Blend Shape Creation” of “Blend Shape.”
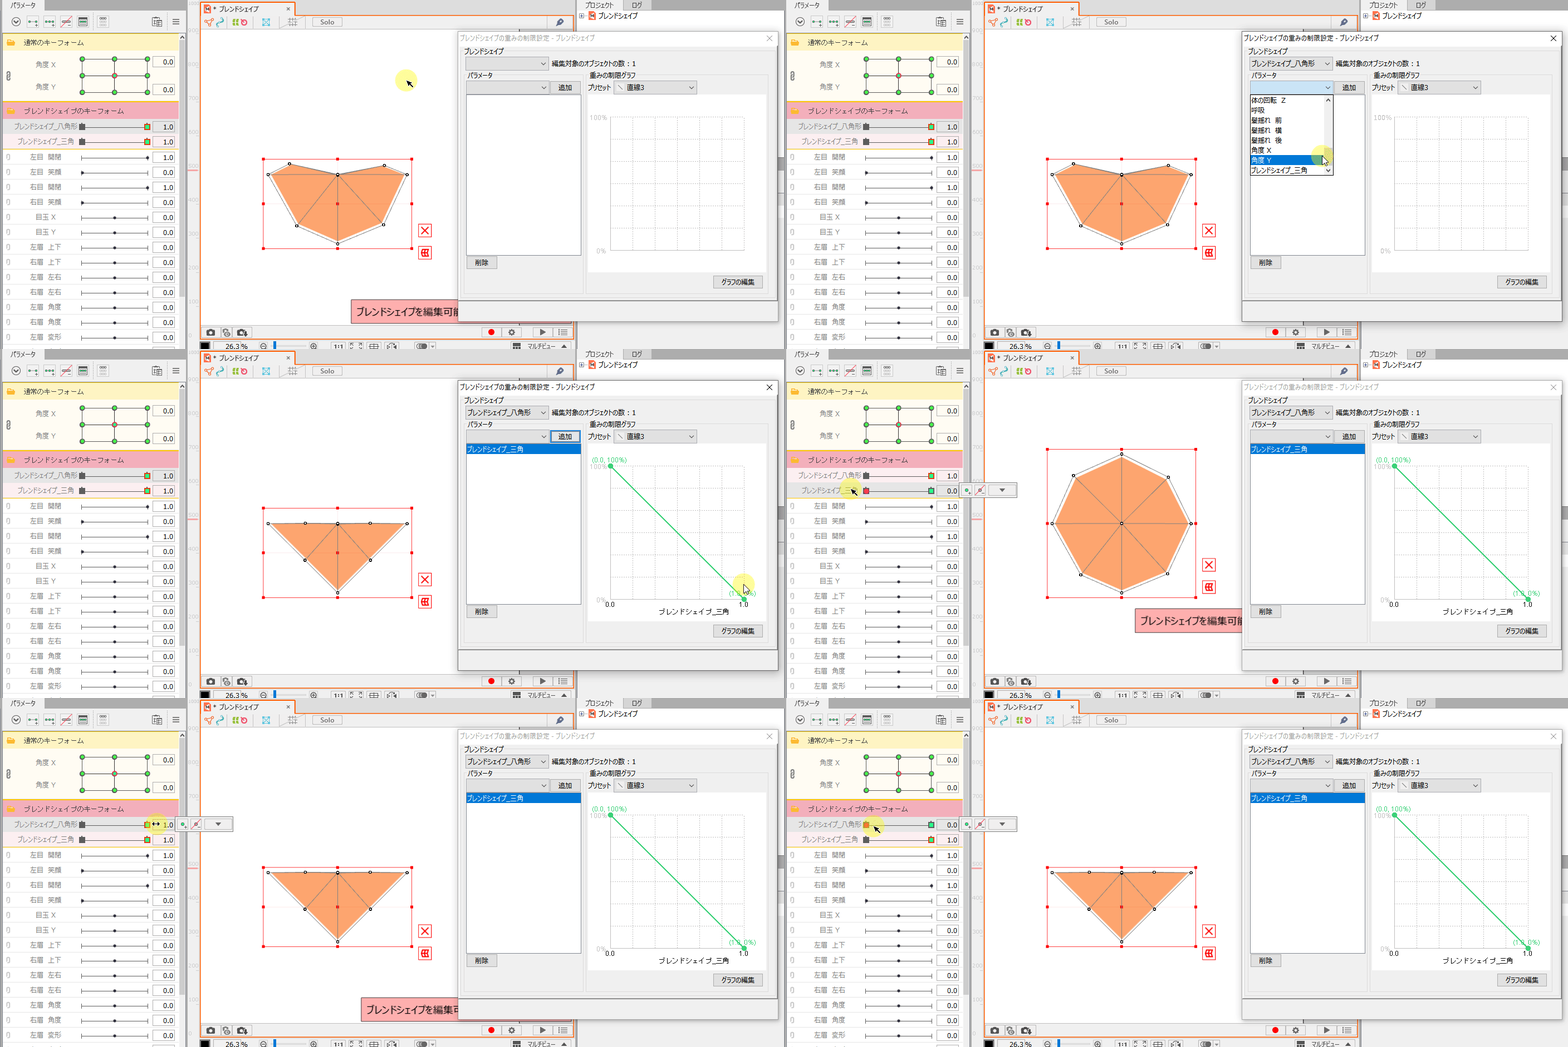
In [Limit Settings for Blend Shape Weights], select and add the parameter “Blend Shape_triangle” to add the weight limit setting to “Blend Shape_octagon.”
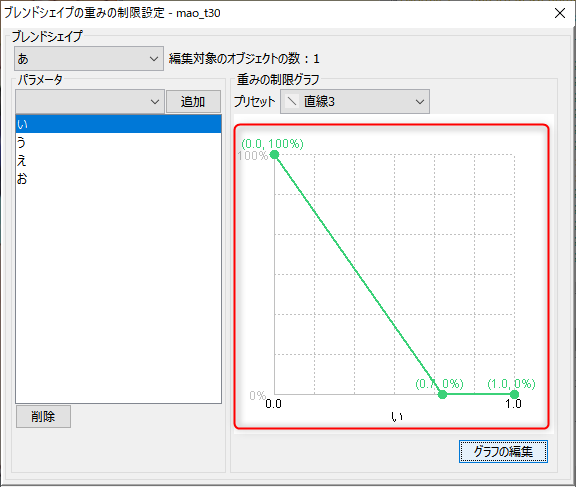
Then, a line graph of [Line 3] is added to the preset of [Weight Limit Graph].
The setting is now set to restrict “Blend Shape_octagon” when “Blend Shape_triangle” (1.0) is used.
Mouth Blend Shape
[Limit Settings for Blend Shape Weights] is a useful function when you have multiple blend shapes.
Please use this function to improve the appearance of interpolation when creating shapes such as the “a, e, i, o, u” of the mouth.
This is used in the sample model “Nijiiro Mao,” so let’s check it out.
Note: “Nijiiro Mao” will be distributed after the official version 4.2.

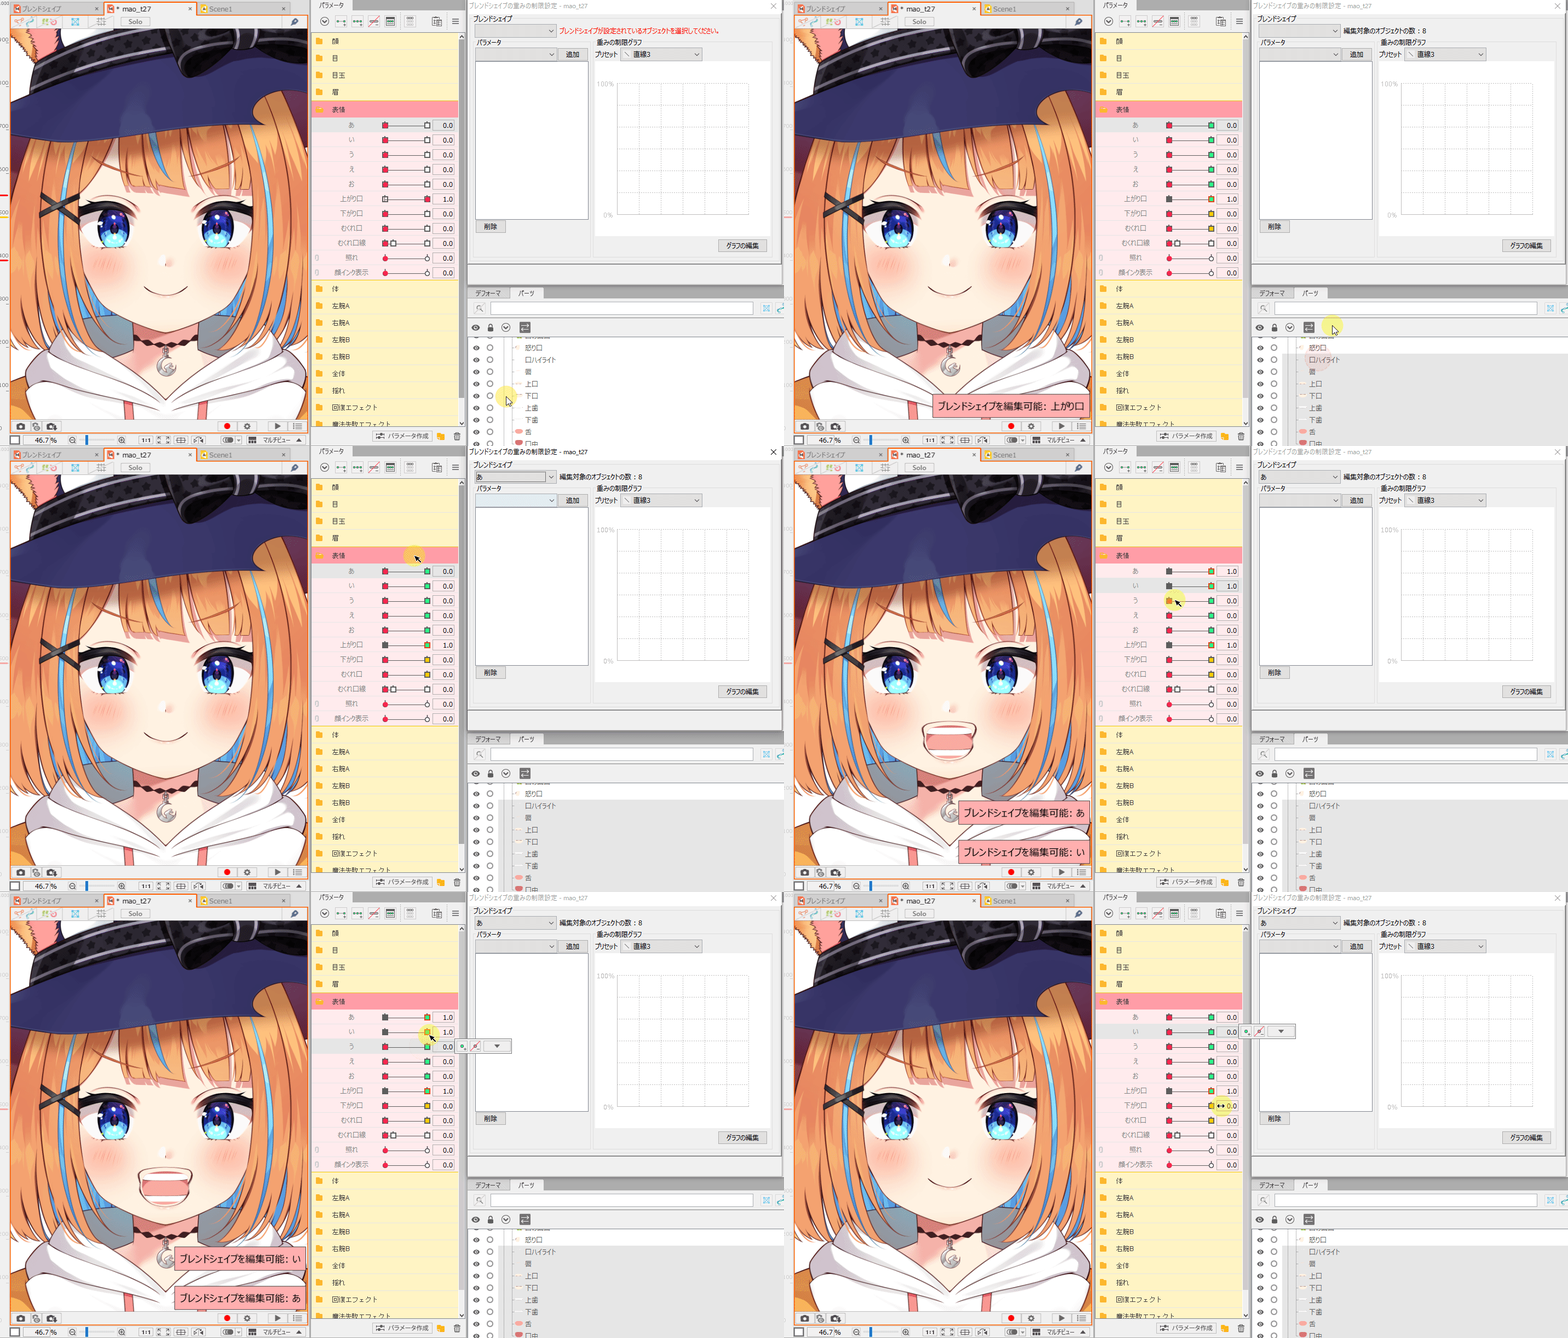
Before the addition of [Limit Settings for Blend Shape Weights]:
After creating “a,” “e,” “i,” “o,” and “u” with the Blend Shape keys, the shape is broken when the other parameters are displayed at the same time.
To suppress this breakage, apply a limit to each blend shape in the [Limit Settings for Blend Shape Weights].
After adding the weight limit setting to the Blend Shape “a”:
First, let’s look at the Blend Shape “a.”
In the Blend Shape “a,” the parameters “e,” “i,” “o,” and “u” are added that you want to restrict. [Preset] is set to [Line 3].
In this state, if you check the expressions in the Parameter palette, “A” and “I” are displayed nicely, but “U,” “E,” and “O” are still corrupted.
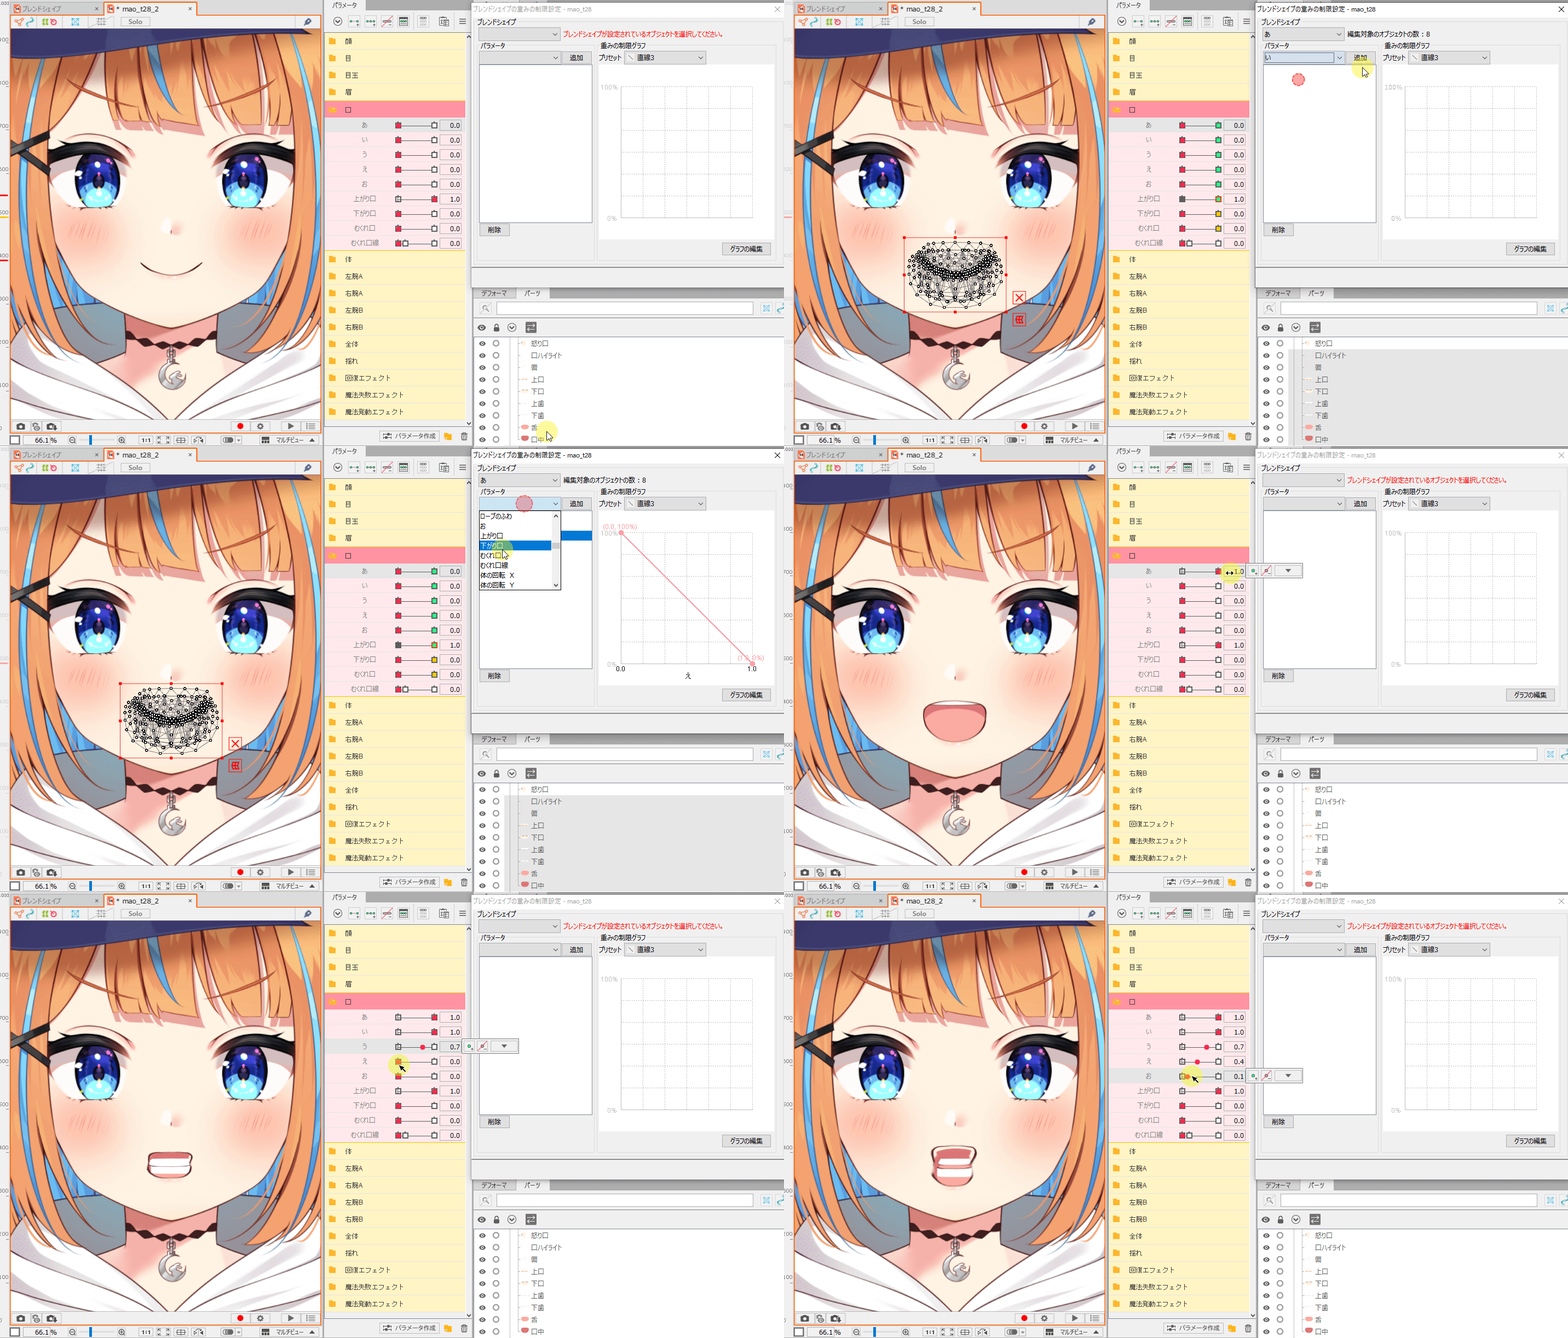
After adding the weight limit setting to the Blend Shape “i”:
Next, in the Blend Shape “i,” the parameters “u,” “e,” and “o” will be added.
Checking the expressions in the Parameter palette with the addition, “a,” “i,” and “u” appear nicely, but “e” and “o” are still corrupted.
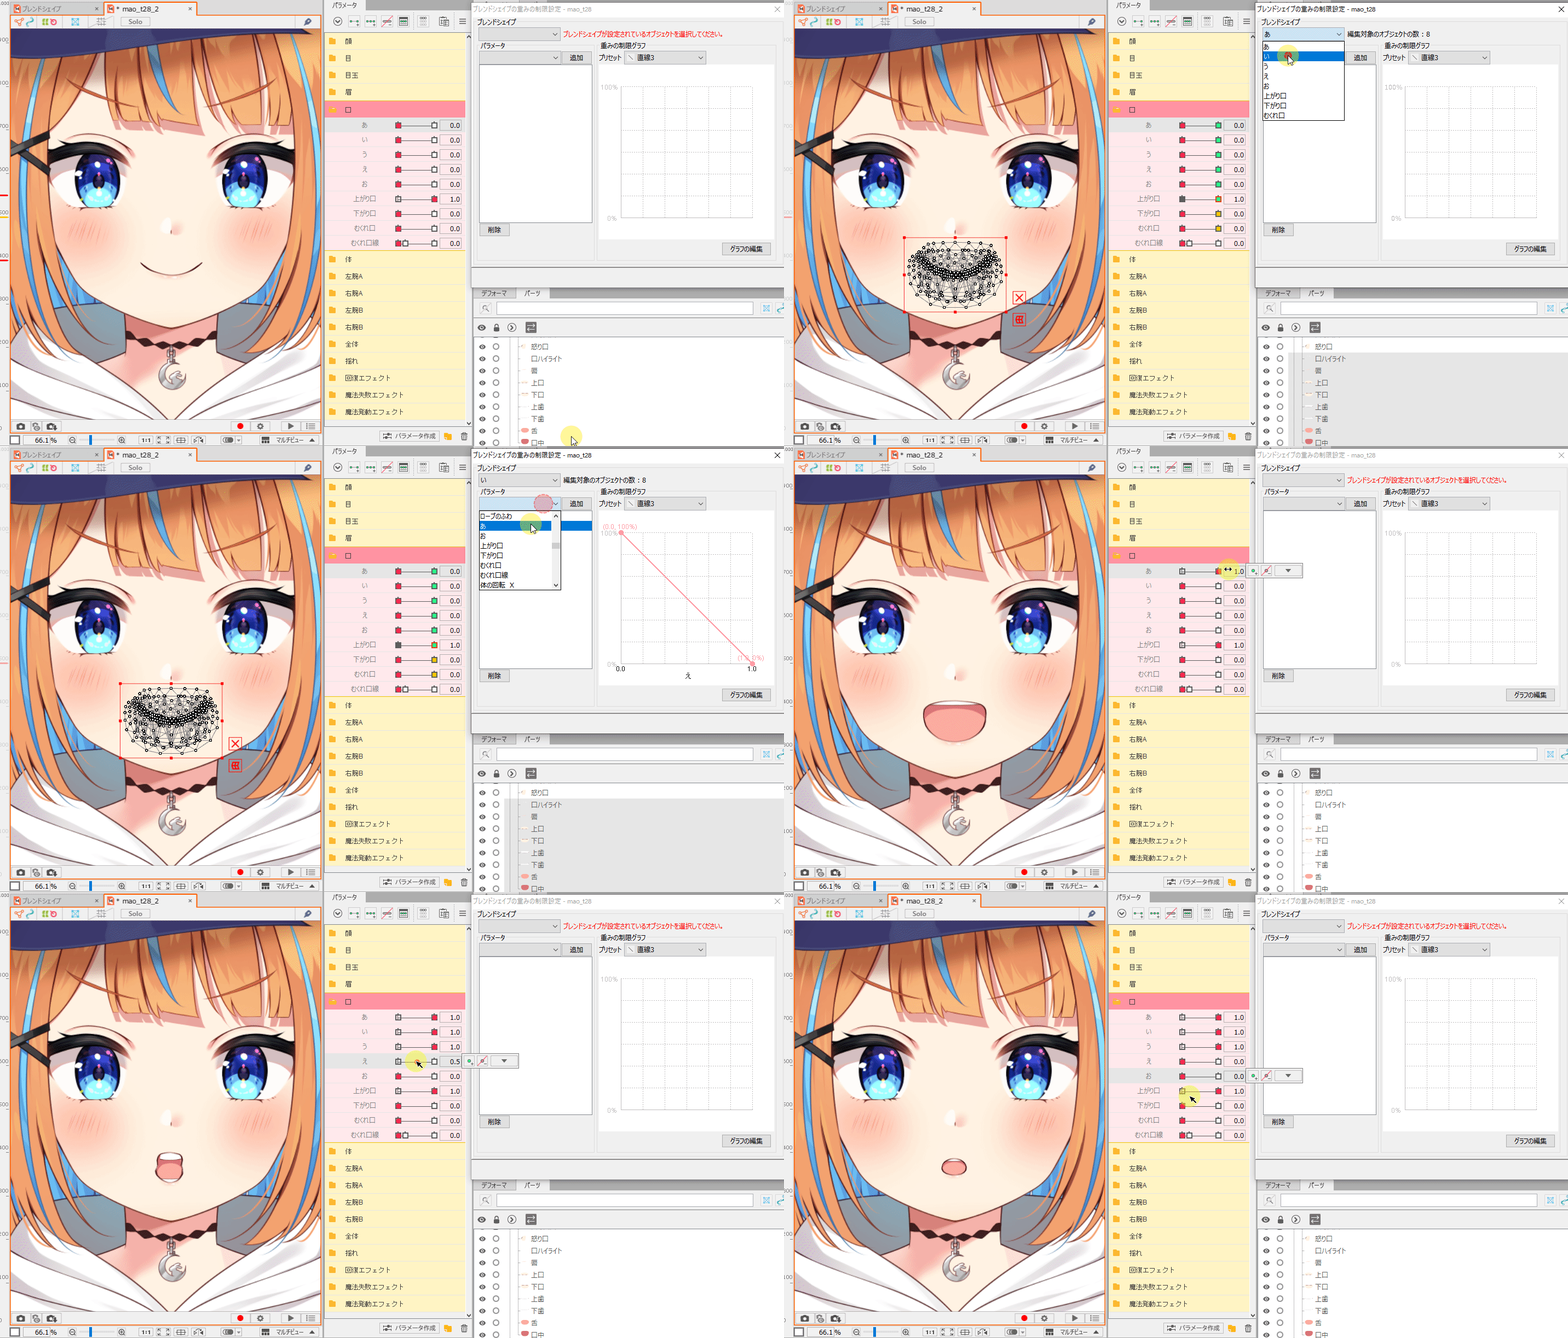
Thus, if you have multiple settings and the shapes are out of shape, you can suppress the deformation by applying restrictions to the Blend Shape.
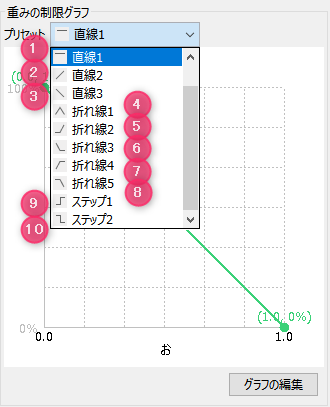
Preset list:
List of presets for the Weight Limit Graph.
| Preset list | Number | Type | Description |
|
|
(1) | Straight line 1 | Always 100% horizontal |
| (2) | Straight line 2 | Linear with 0% at minimum, 100% at maximum | |
| (3) | Straight line 3 | Linear with 100% at minimum, 0% at maximum | |
| (4) | Fold line 1 | Fold line with 0% at minimum, 100% at median, 0% at maximum | |
| (5) | Fold line 2 | Fold line with 0% from minimum to median, 100% at maximum | |
| (6) | Fold line 3 | Fold line with 100% at minimum, 0% at median, 0% at maximum | |
| (7) | Fold line 4 | Fold line with 0% at minimum, 100% at median, 100% at maximum | |
| (8) | Fold line 5 | Fold line with 100% at minimum, 100% at median, 0% at maximum | |
| (9) | Step 1 | Step-style fold line with 0% at minimum, 100% at maximum | |
| (10) | Step 2 | Step-style fold line with 100% at minimum, 0% at maximum |
Edit Graphs
In the weight limit settings, in addition to the preset settings, there is an [Edit Graph] function that allows for more advanced settings.
Under [Edit Graph], you can edit the weight limit graph in more detail.
Graph editing operations
To edit the graph, click the [Edit Graph] button at the bottom right of the blend shape’s weight limit settings.
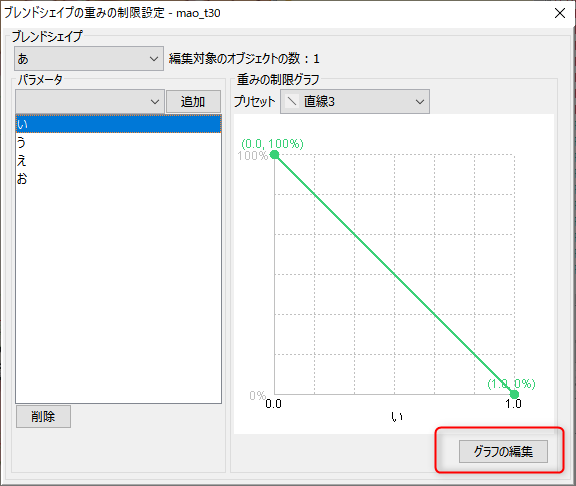
In the [Edit Graph] dialog box, adding a row displays the value you want to edit.
| Edit Graphs | Number | Type | Description |
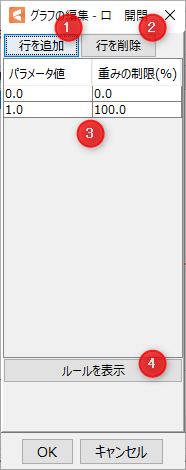 |
(1) | Add a line | Add one row to the end of the table. A maximum of five lines can be added. |
| (2) | Delete line | Delete the selected rows in the table. If no rows are selected, delete one row at the end of the table. |
|
| (3) | Table | Table showing weight limit settings. The table consists of two columns: [Parameter Value] and [Weight limit (%)]. |
|
| (4) | Show Rules | Displays the rules for editing the graph. |
Precautions
Under [Show Rules] in Edit Graph, the following dialog box appears.
The table must satisfy all of the following rules.
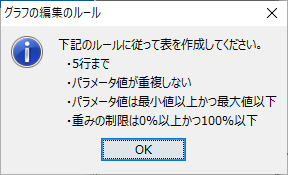
Once set up, you can edit the graph settings as follows.
Use this function when you want to change settings other than those provided in the preset graphs.
