Level edit
Updated: 04/27/2021
About Level Edit
The Cubism Editor has edit levels, and you can switch between Level edit [1], [2], and [3].
The default is set to Level edit [2].
Level edit 1
Shortcut key [1]
Level edit 2
Shortcut key [2]
Level edit 3
Shortcut key [3]
Valid Level Edits in Modeling View and Form Animation (FA) View
Warp deformer
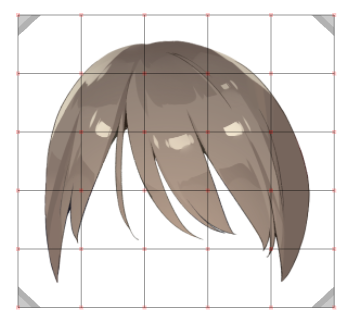
The warp deformer allows you to switch the display state of control points.
| Level edit 1 | Level edit 2 | Level edit 3 |
 |
 |
 |
|
This mode allows editing only of the [Division points], which is the intersection of the division number in the conversion. |
This mode allows editing of all [Control point] and division points at the intersection of the division number of the set Bezier. |
This mode allows you to edit all of the [Control point] and division points at the intersection of the division number of a 1 x 1 (outer frame only) Bezier. Use when you want to edit in a large frame. |
Deform Paths
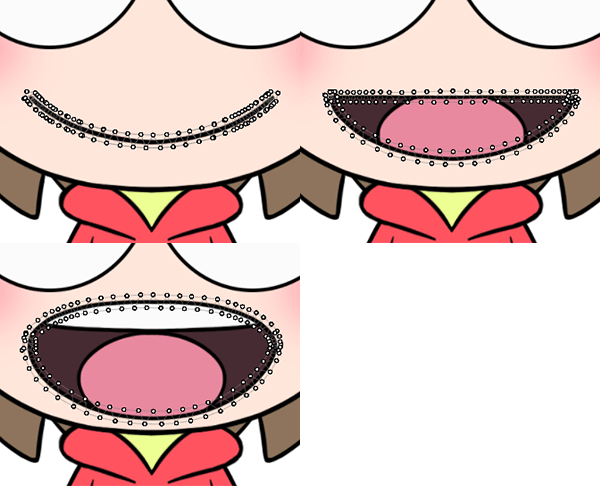
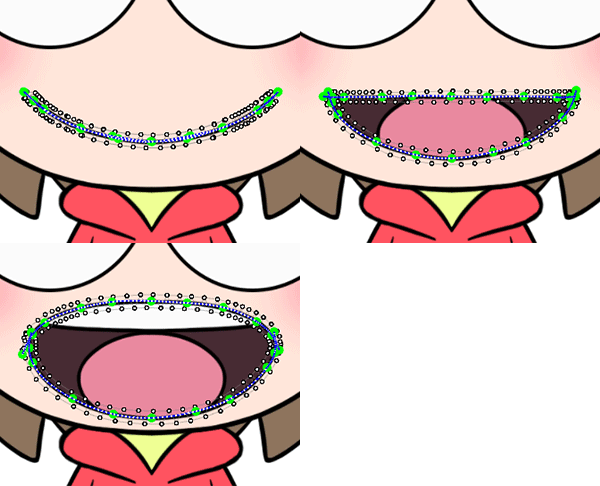
Deform Paths allows you to create separate deform paths for the same ArtMesh at Level edit [2] and [3].
The function to have a deform path per level for the same ArtMesh can be used in the following ways.
• The deformation level [2] is used to create an open mouth by setting a separate deform path for the top and bottom parts of the mouth, respectively.
• The deformation level [3] is used to create a deformation of a closed mouth by setting the top and bottom parts of the mouth together as one deform path.
| Level edit 1 | Level edit 2 | Level edit 3 |
 |
 |
 |
|
The ArtMesh deform path is hidden. |
This mode is for displaying and editing deform paths created at Level edit [2]. In the example above, a deform path to open the mouth is created and displayed. |
This mode is for displaying and editing deform paths created at Level edit [3].
In the example above, a deform path to deform the closed mouth is created and displayed. |
Deform paths generated from ArtPath
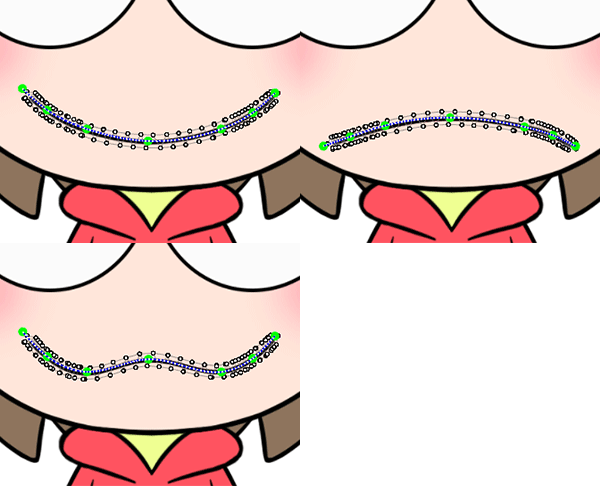
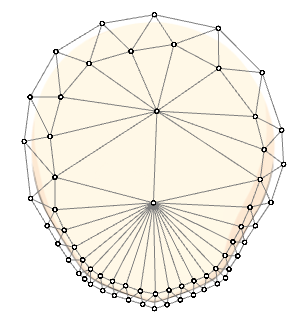
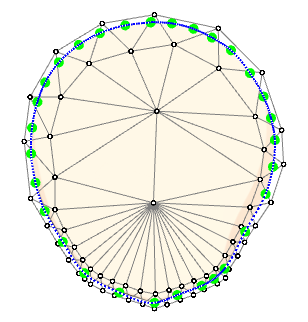
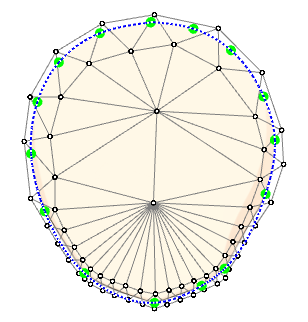
Deform paths generated from ArtPath can switch the number of control points.
| Level edit 1 | Level edit 2 | Level edit 3 |
 |
 |
 |
|
Deform paths are hidden.
|
This mode is for displaying and editing deform paths generated at Level edit 2. The number of control points for the deform path is equal to the number of control points for the ArtPath. |
This mode is for displaying and editing deform paths generated at Level edit 3. Half the number of control points of the ArtPath will be generated for the deform path. |
Valid Level Edits in Animation View
Toggling display of editing tools
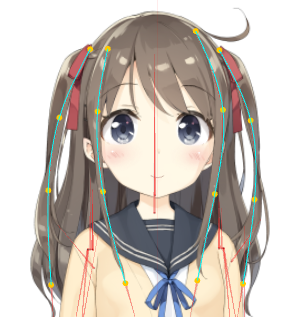
In the Animation View, you can toggle the display of rotation deformers, skinning, etc. that have already been created on the model.
| Level edit 1 | Level edit 2 | Level edit 3 |
 |
 |
 |
|
All rotation deformers are displayed on the Animation View. Note: If the part is locked on the model, the rotation deformer will not be displayed. |
The deform path of the skinning is displayed on the Animation View. Dragging a control point on the deform path deforms the ArtMesh and inserts a keyframe. Note: The number of control points for the deform path is half of the skinning rotation deformer. |
Only bounding boxes for the entire model are displayed. |
