Clipping Mask
Updated: 07/30/2020
Clipping masks are often used for blinking movements, etc.
This section describes the clipping mask procedure.
Clipping Mask Procedure
By specifying the ID of the ArtMesh to be masked, a clipping mask can be used.
The following steps will apply a clipping mask to the ArtMesh in the black eye area with the white eye ArtMesh.
First, select and copy the ArtMesh to be used as a mask (the white part of the eyes).
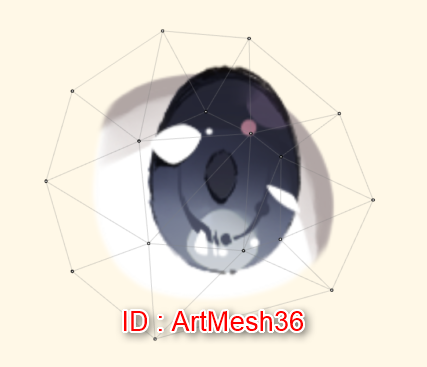
Select the ArtMesh to be clipped (the black eye area) and paste it into the [Clipping ID] field of the [Inspector] palette.
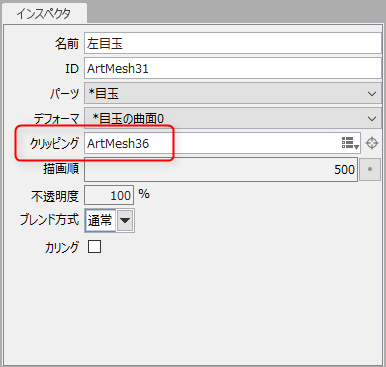
The ID of the ArtMesh to be used as a mask (ArtMesh36) is pasted into [Clipping ID], and the black eye area is clipped.
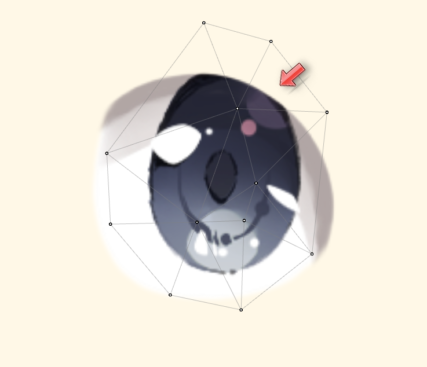
The following procedure can also be used to apply a clipping mask.
- Select the ArtMesh to be masked and copy the [ID] text in the [Inspector] palette.
- Select the ArtMesh to be clipped and paste it into the [Clipping ID] in the [Inspector] palette.
TIPS
Multiple ArtMeshes can be specified by separating them with a comma. (Example: ArtMesh1, ArtMesh2…)
POINT
When used in video productions other than SDKs, clipping masks can be used extensively.
Add and delete objects from the parts tree
You can also apply a clipping mask using the buttons in the red frame in the figure below.
- Click the button in the red frame in the figure below.
- Add a check to the ArtMesh to be masked.
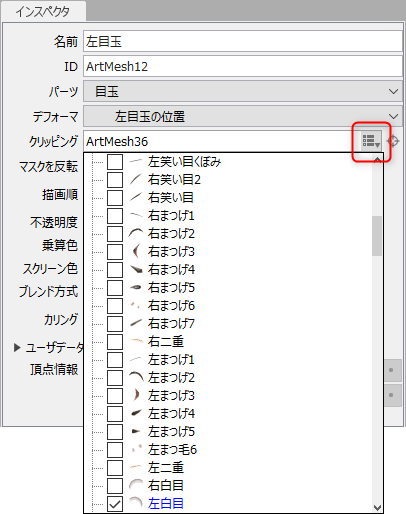
Select Objects from a Clipping Relationship
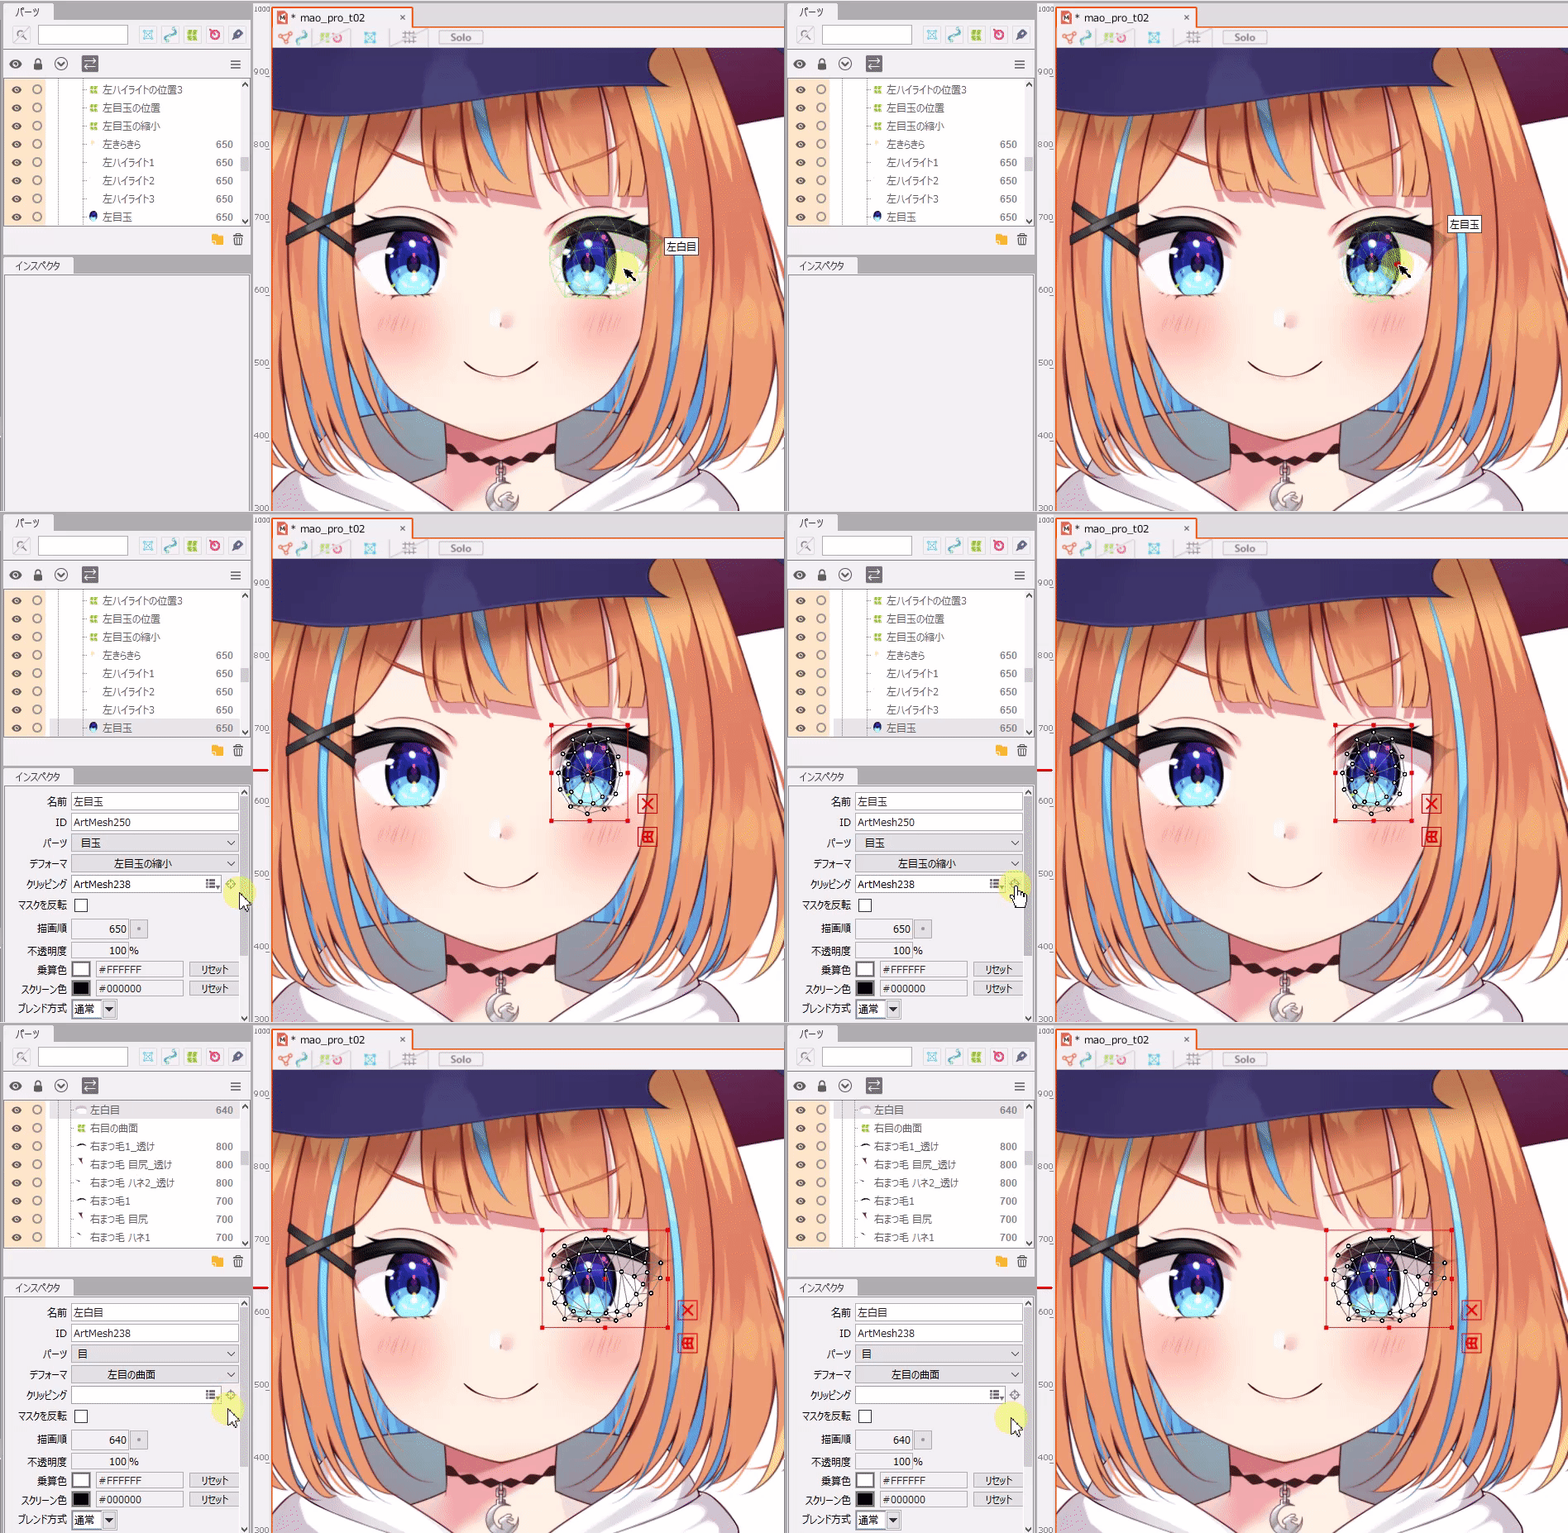
Selecting a clipping mask
Select the target object and click the target mark button on the right side of [Clipping ID] to select the object to use for the clipping mask.
This can also be done from the [Modeling] menu -> [Clipping ID] -> [Select Clipping Mask].
Reverse clipping
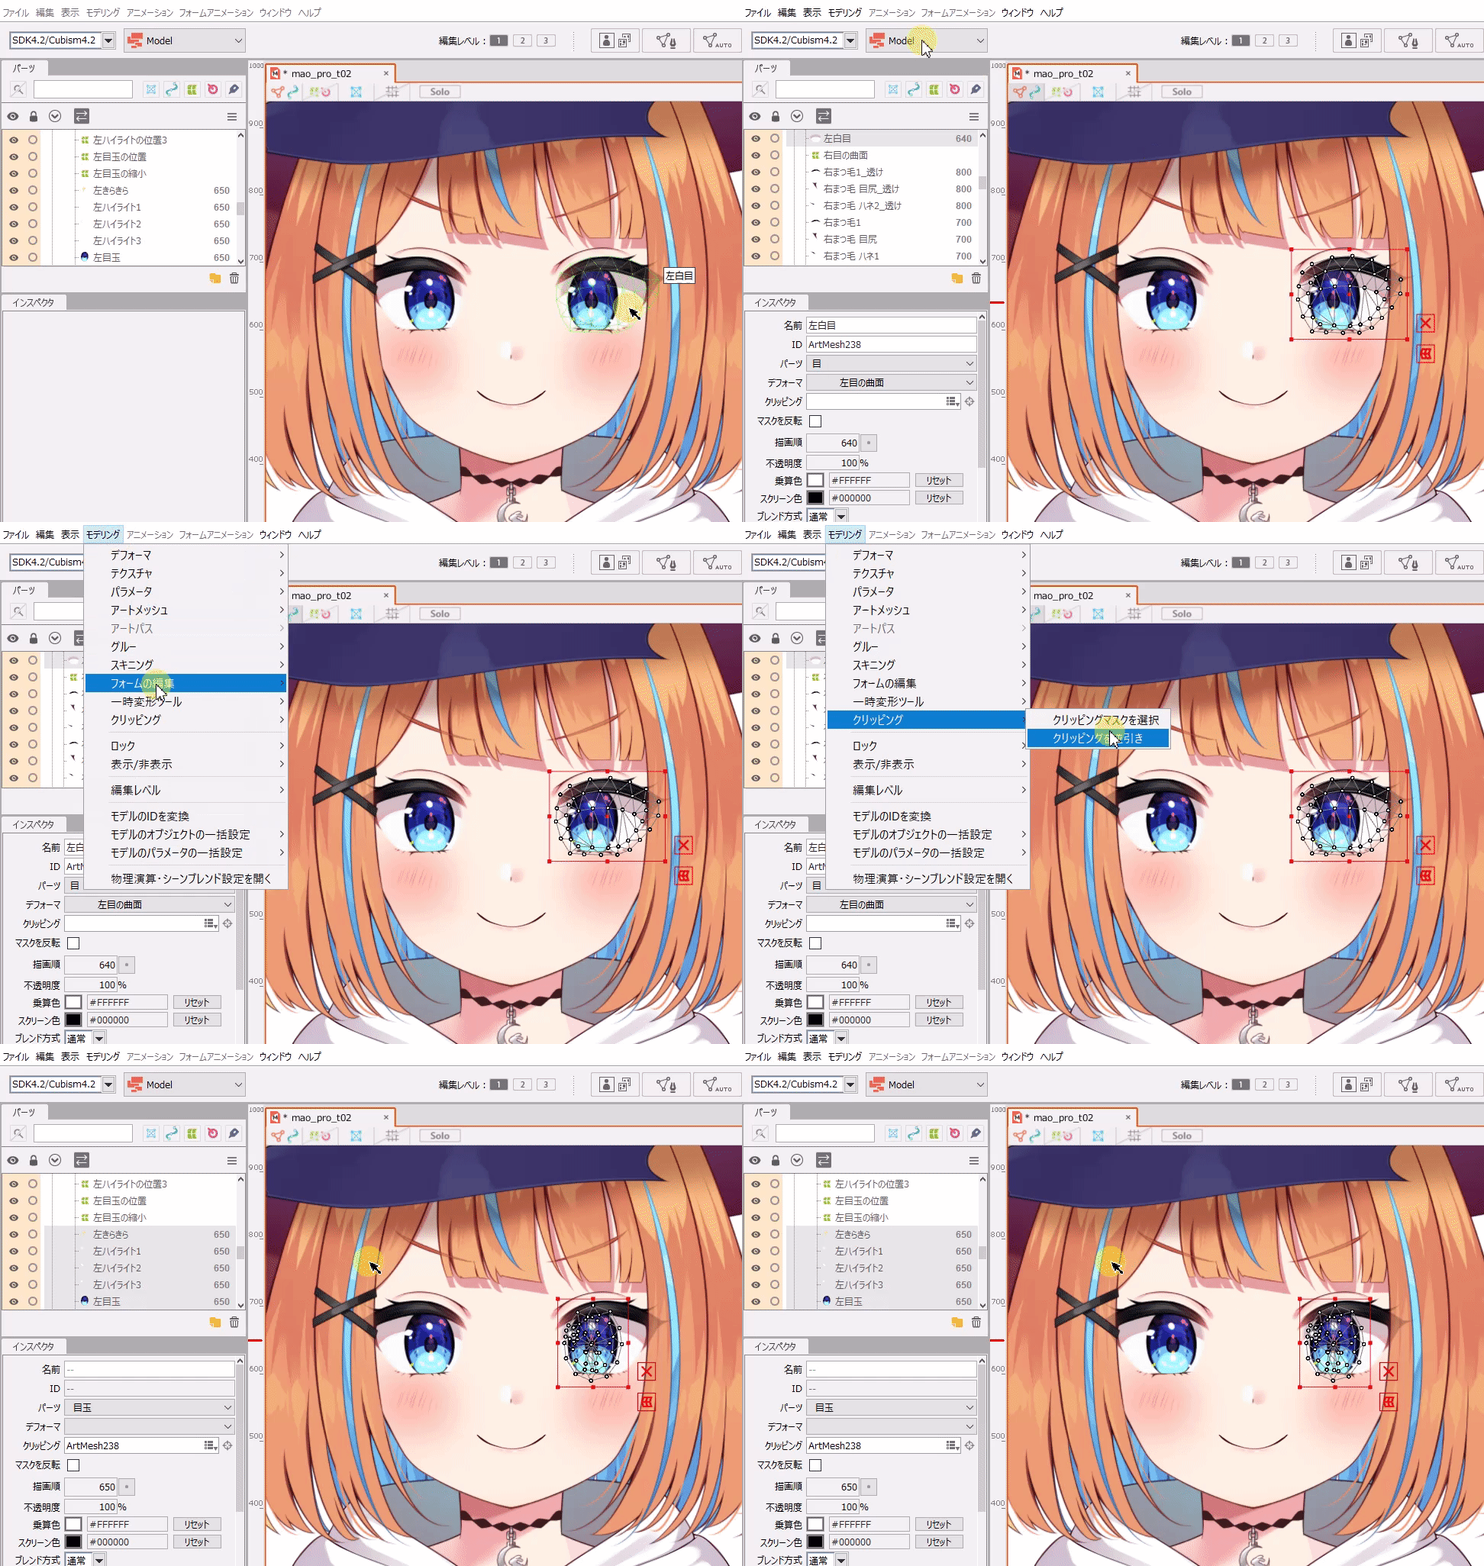
From the [Modeling] menu, navigate to [Clipping ID] -> [Reverse Clipping] to select an object that uses the selected object as a clipping mask in reverse.
As an example, in the sample model “Nijiiro Mao,” selecting the left white eye and clicking [Reverse Clipping] will select the following object that uses the left white eye as a clipping mask.
• Left eye flashing
• Left highlight (1, 2, 3)
• Left eyeball
Notes on Clipping When Using SDK
If you intend to incorporate the software into an SDK for the purpose of game development, etc., please be sure to read the following notes.
- Clipping limit
-
In the clipping drawing method of Cubism 3 SDK or later, if the number of ID permutation types specified for clipping exceeds a certain number, the display may become distorted or other problems may occur.
Since the actual characteristics depend on the program implementation, please confirm the display on the actual device.For more detailed information, please refer to “Mask Preprocessing Methods” in the SDK manual.
- Load and performance degradation
- In some environments, the load caused by clipping can be significant.
It is recommended that use be kept to the minimum necessary. - Difference in expression
- The expression and appearance may differ depending on the environment, display size, and other factors.
If strict representation is required, please check with the actual device beforehand.
TIPS
The standard mask characteristics for each platform SDK are as follows:
| Platform name | Maximum number of masks | Range of masks to be provided | Size of masks to be provided |
|---|---|---|---|
| Cubism SDK for Native | 36/model*1 | Rectangle containing all ArtMeshes to be clipped | Variable according to number |
| Cubism SDK for Web | 36/model | Rectangle containing all ArtMeshes to be clipped | Variable according to number |
| Cubism SDK for Unity | 64/Scene | Rectangle containing all ArtMeshes to be masked*2 | Fixed |
*1
In Cubism SDK for Native, CubismRenderer::_useHighPrecisionMask can be changed to “true” to generate a mask for each drawing.
This removes the upper limit on the number of masks and ensures that the masks are always drawn with maximum quality.
*2
Cubism SDK for Unity differs from Cubism SDK for Native and for Web in the scope of mask preparation.
For more information on the mask characteristics, see “Comparison of each SDK.”
White Edge of the Mask
When viewing a model with a clipping mask set in the Cubism Editor or Cubism SDK, the outline may appear to have a rim.
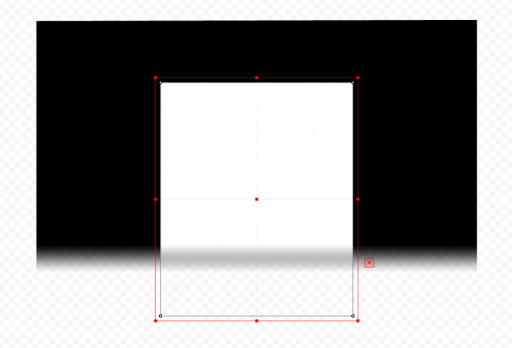
This is caused by the translucent areas in the mask outline that allow the colors of the underlying ArtMesh to show through.
Cubism’s clipping masks are represented by the following two ArtMeshes, each existing as a separate ArtMesh.
- ArtMesh for mask
- ArtMesh for clipping cut by mask
Any translucent areas in the mask outline will have their opacity applied to the ArtMesh being cut out.
If the ArtMesh for the mask is visible, the color of the translucent area of the ArtMesh for the mask will be visible through the translucent area of the cut-out outline.
If the mask shape is not complex, it can be avoided by modifying the model using the following procedure.
- Duplicate ArtMesh for mask.
- Change the ArtMesh for the specified mask from the original ArtMesh to the duplicated ArtMesh.
- Enlarge the duplicated ArtMesh so that the outline of the original is hidden.
- Set the opacity of this ArtMesh to 0%.
- Transform the duplicated ArtMesh in the same way as the original.
Check the Number of Masks
Check the number of masks in the Editor
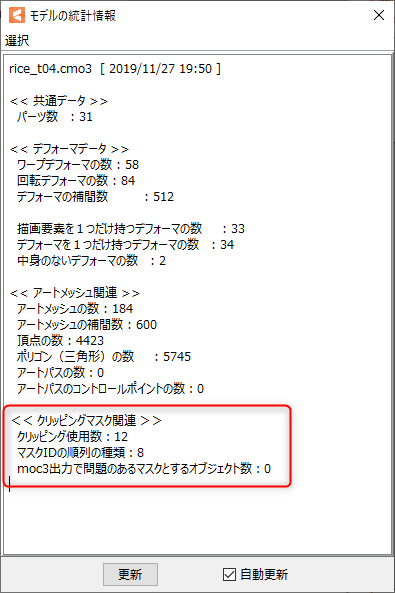
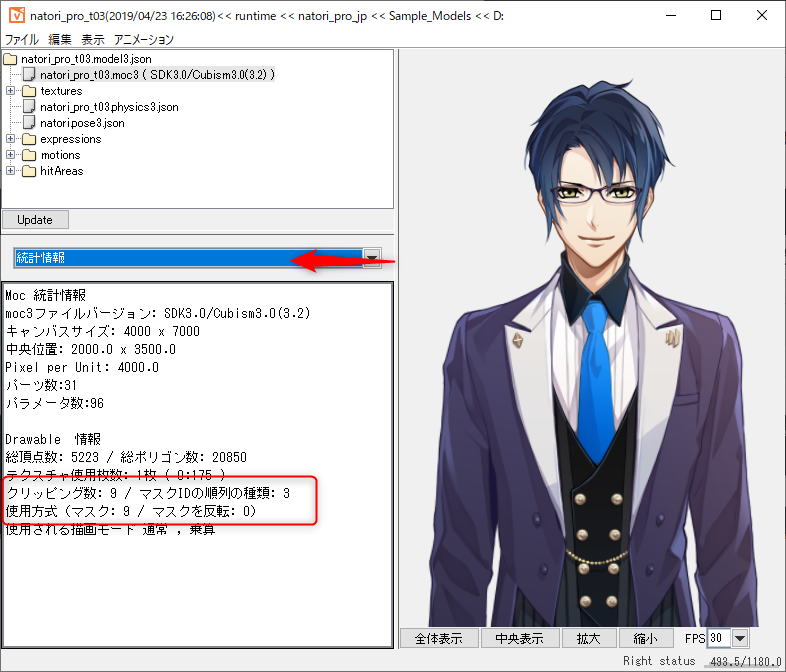
In Cubism Editor, the number of clippings in the model and the mask permutation types can be checked with statistics.
Counting masks recognized by the SDK
The number of masks recognized by the SDK is identified by a sequence of IDs.
Here are some examples of counting below.
| Mask ID display | Number of sheets to be recognized |
|---|---|
| ArtMesh1 ArtMesh1 ArtMesh2 | 2 |
| ArtMesh1 , ArtMesh2 ArtMesh1 ArtMesh1 , ArtMesh2 ArtMesh2 | 3 |
| ArtMesh1 , ArtMesh2, ArtMesh3 ArtMesh1 , ArtMesh2, ArtMesh3 ArtMesh1 , ArtMesh2, ArtMesh3 ArtMesh1 , ArtMesh2, ArtMesh3 | 1 |
If the combination is the same but in a different order, it is recognized as the same mask in Native and Web, but in Unity, they are recognized as a different mask.
| Mask ID display | Number of recognitions in Native and Web | Number of recognitions in Unity |
|---|---|---|
| ArtMesh1,ArtMesh2 ArtMesh2,ArtMesh1 ArtMesh1,ArtMesh2 ArtMesh2,ArtMesh1 | 1 | 2 |
Confirmation with Cubism Viewer (for OW)
You can also check the number of mask ID permutations in Statistics in Cubism Viewer (for OW).
Mask Warnings
A warning is issued if the mask used for the clipping mask is in an incorrect state.

Notes when warnings occur
If an embedded file is output with a “mask warning” and then loaded into an application using the SDK, the following problems may occur.
Problems:
- Forced exiting of application.
- Unable to load files for embedding.
- The display on the SDK and the Editor are different.
To avoid the above problems, warnings are issued for conditions that are “temporarily acceptable for editing but undesirable at output.”
Although it appears to be fine in Animator, we recommend fixing the problem because future updates may change what is displayed.
Situation when the warning occurs
There are two main types of situations in which a “mask warning” may occur.
- Key Lost:
- The ArtMesh that will become the mask is invisible because it exists outside the keyform of the parameter.
The display may differ significantly depending on the implementation of the application. - ArtMesh set to hidden and underdraw:
- ArtMeshes that are set to hidden or underdraw will not be output with the standard settings when outputting files for incorporation.
Therefore, if the mask ArtMesh is loaded in the SDK as it is, the mask ArtMesh will indicate incorrect values,
which may cause problems such as the application being forced to exit. - Masks have been removed:
- The ArtMesh that will be the mask has already been deleted and the clipping column in the inspector of the clipping ArtMesh is “null.”
Case-specific model modification methods
- 1. If you want to refer to a transparent ArtMesh as a mask
- Please set the opacity of the ArtMesh set for the mask to 0%.
If the ArtMesh is already keyformed and opacity is difficult to manipulate, use “Multiple Keys Editing” or set the deformer as the ArtMesh’s parent and manipulate as a batch just the opacity values.
TIPS
The behavior of the clipping mask depends on the implementation status.
Details should be discussed with the development staff before creating the model.
- 2. If you want to refer to an ArtMesh that exists in a hidden part as a mask
- In Cubism Editor 3.2.05 and later, the clipping mask itself is now released when all masks are hidden.
If an ArtMesh in a hidden part is set as a mask, the clipping mask will look unmasked.
If it is difficult to edit, temporarily move the ArtMesh set in the mask to the display part to accommodate the change.
TIPS
If there are masks that are hidden, the aforementioned warnings and errors will be displayed at the time of moc3 export.
When using for embedded applications a model that uses a mask, exporting moc3 in its non-displayed state may result in an unintended display. Be careful not to forget to put the part in the display state.
- 3. If you want to refer to a disappearing ArtMesh as a mask without interpolation, such as when switching arms
-
This is a case where you want to use the effect of the ArtMesh display disappearing when the key moves outside the range of the keyform without changing the effect.
In Cubism Editor 3.2.05 or later, if all masks are hidden, or if the object set as a mask is hidden outside the range of the keyform, the clipping mask itself will be released.
As a workaround, create an empty ArtMesh and use it as a mask that is always visible.
For the empty ArtMesh, use “ArtMesh for collision detection.”Preparation for Setting Up ArtMesh for Collision Detection
By setting the empty ArtMesh you created as a mask along with the “mask you want to turn off,” there will always be a mask in the visible state.
This will not release the clipping mask itself, but will allow the use of the effect of erasing the display outside the range of the keyform.Note: In this case, there is no need to set keys in an empty ArtMesh. Position and size are not affected, so feel free to set them as you wish.
Note: If there are masks that are hidden, the aforementioned warnings and errors will be displayed at the time of moc3 export.
When using for embedded applications a model that uses a mask, it is recommended to consult with the developer before creating the model, as it may result in unintended displays depending on the implementation status.
Hide warnings
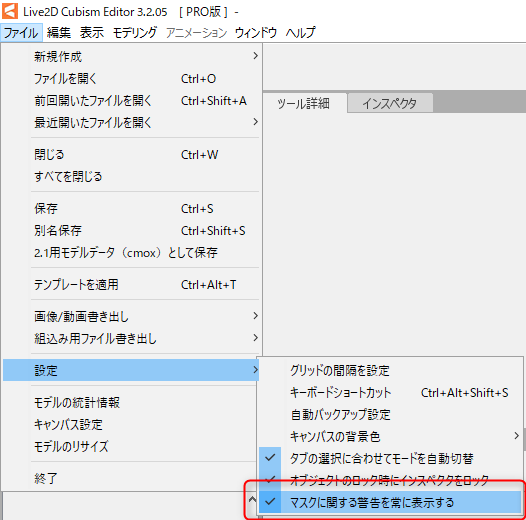
The warning can be hidden by unchecking the “Always show file/settings/mask settings” checkbox.
When ignoring warnings, create masks while checking the display on the actual device.
