








Integrate the SDK into a project
Updated: 09/29/2026
This tutorial shows you how to integrate a model file for embedded use—a file that is exported from the Cubism Editor—into an Unreal Engine project and display the model in the viewport.
Prerequisites
To use the Cubism SDK for Unreal Engine, Unreal Engine 5.3 and the Cubism SDK for Unreal Engine must be installed on the PC.
Click here for more information on installing Unreal Engine.
You can download the Cubism SDK for Unreal Engine here.
The Cubism SDK for Unreal Engine is distributed as a plugin for Unreal Engine.
See the official Unreal Engine documentation for information on how plugins work.
When working with Live2D models in the SDK, you need to export them as built-in models, not as .cmo3 or .can3 for editing.
See “Data for Embedded Use” for information on how to export models for embedded use.
The data to be exported are the .moc3 file, the .model3.json file, and the folder containing the textures.
Please keep these in one folder.
Adding the plugin to the project file
In the following section, we will assume that you have created a UE project named CubismSDKForUE.
When creating a project, we recommend that you select C++ in the project creation settings.
The directory structure of the project you created will generally appear as shown below, so create a Plugins folder in the root directory and place the plugin in it.
CubismSDKForUE
├── Binaries
├── Config
├── Content
│   └── ...
├── Plugins <- ディレクトリを追加
│   └── CubismUnrealEngineComponents <- プラグインをここに配置する
│       └── ...
├── Source
└── CubismSDKForUE.uproject
Open the CubismSDKForUE.uproject file in a text editor or a similar program, add Live2DCubismSDK to the Plugins property, and set Enabled to true.
After you add the plugin, save the file.
{
	"FileVersion": 3,
	"EngineAssociation": "5.2",
	"Category": "",
	"Description": "",
	"Modules": [
		{
			"Name": "CubismSDKForUE",
			"Type": "Runtime",
			"LoadingPhase": "Default"
		}
	],
	"Plugins": [
		{
			"Name": "ModelingToolsEditorMode",
			"Enabled": true,
			"TargetAllowList": [
				"Editor"
			]
		},
		{
			"Name": "Live2DCubismSDK",
			"Enabled": true
		}
	]
}
Then, double-click the saved .uproject file to start the project. Once the build is complete, the SDK installation is finished.
Importing a model into a project
Drag the folder containing the entire set of model data for embedded use that has been exported from the Cubism Editor into the Content Browser in the Unreal Editor.
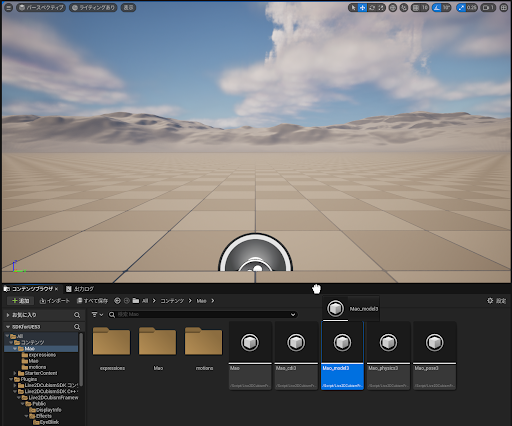
When the importing of the data finishes successfully, all model files for embedded use will have been converted to uasset asset files for Unreal Engine.
You can view the contents of the assets in the Unreal Editor by double-clicking each asset.
From the converted assets, if you drag the CubismModelJson asset corresponding to model3.json onto the Unreal Editor viewport, a CubismModel actor will be spawned.
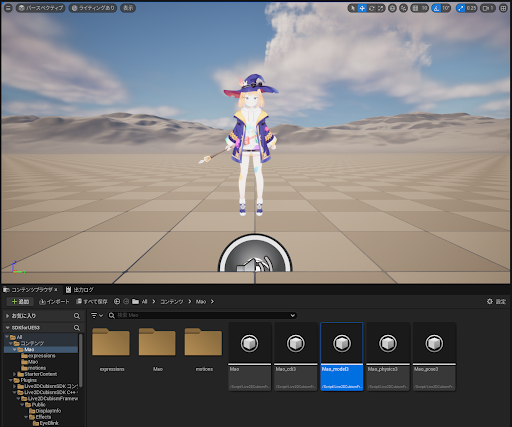
TIPS
Reimporting “model3.uasset” checks for updates to files such as images and JSON files linked to “model3.json,” and updates all related uassets, PNG files, WAV files, and other files.