Instructions for Running the Android Sample Application
Updated: 10/06/2022
This page describes how to run the Android sample application project included in the Live2D Cubism SDK for Java on an Android device using Android Studio.
Note: The content of this article is based on the Cubism 4 SDK for Java R1 beta1.
The method and procedure may differ depending on the Cubism SDK version.
What You Need
- Live2D Cubism SDK for Java
- The main body of the SDK. Download from the dedicated Live2D Community page.
- Android Studio
- This is the development environment that will be used here. Please use Android Studio Chipmunk or later.
Additional items that need to be installed from the “SDK Manager” of Android Studio are described in the next section.
Setup Procedure
Android Studio
Install the integrated development environment. The default settings are acceptable.
After installation, select SDK Manager from the “Tools” tab to install additional required tools.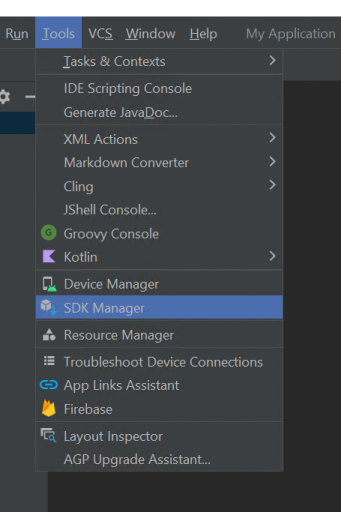
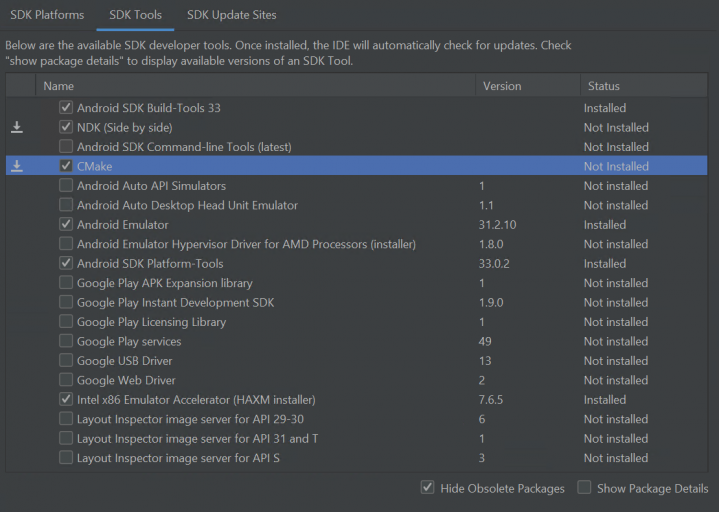
- Go to [SDK Platforms] and check the [Android 12.0(S)] checkbox.
- Install the “SDK Tools” tool as shown in the following image.
Note: Android Emulator has the ability to improve performance by using the hardware acceleration feature.
Intel processors: Intel x86 Emulator Accelerator (HAXM installer)
AMD processors: Android Emulator Hypervisor Driver for AMD Processors (installer)
However, if Hyper-V is enabled, “Windows Hypervisor Platform” must be enabled.
See the Android Studio User Guide for more information.
Build
The Android project uses Gradle as its build tool. After starting the sample application,
press “Build” -> “Rebuild Project” and execute Gradle Build.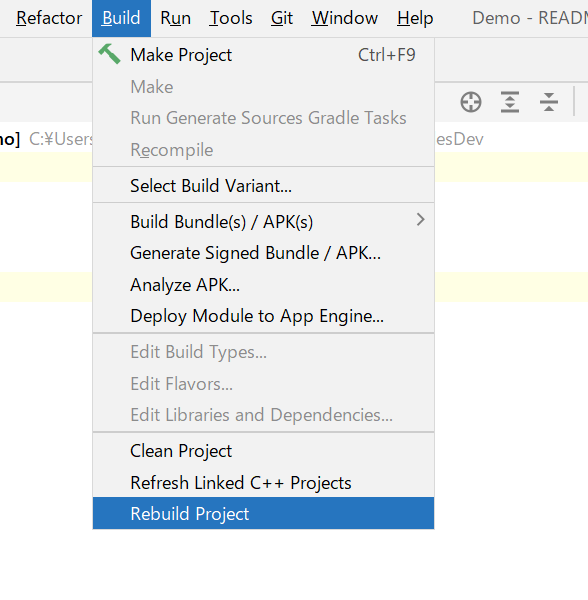
Execute
If the build is successful, you are ready to execute the application. If you have an Android device, you can connect the actual device and run it on the device. If you do not have one, please run it on an emulator.
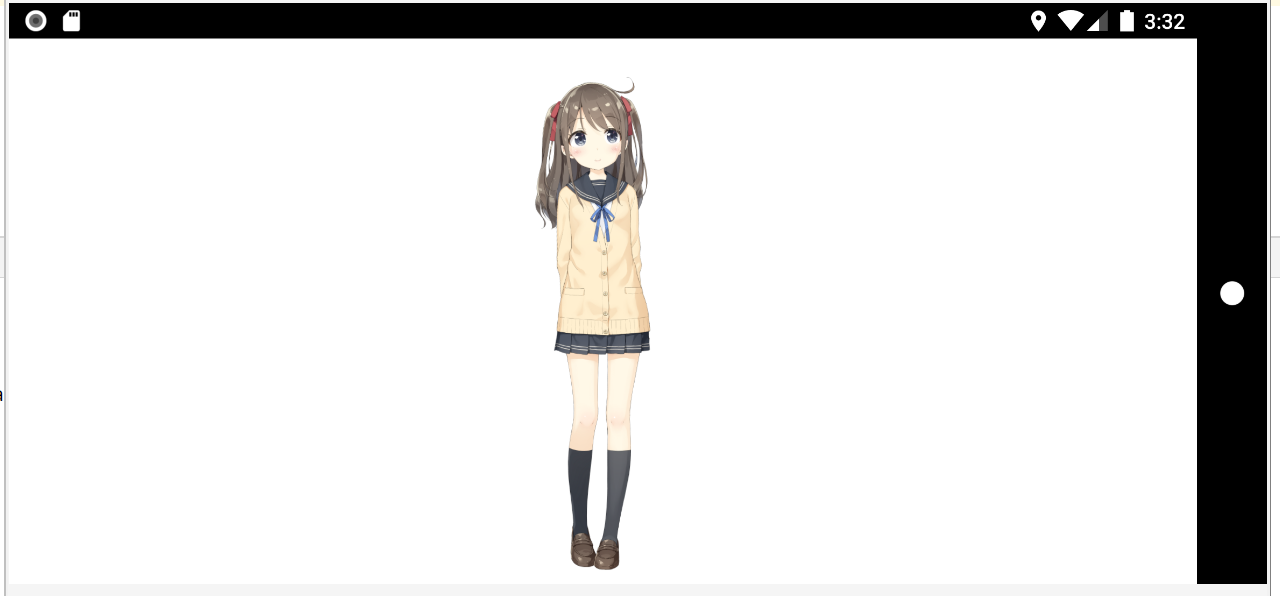
If the execution is successful, the application and execution log will be displayed as shown below.
Note: In the Minimum Demo, UI such as the background and the gear icon for switching models are not displayed.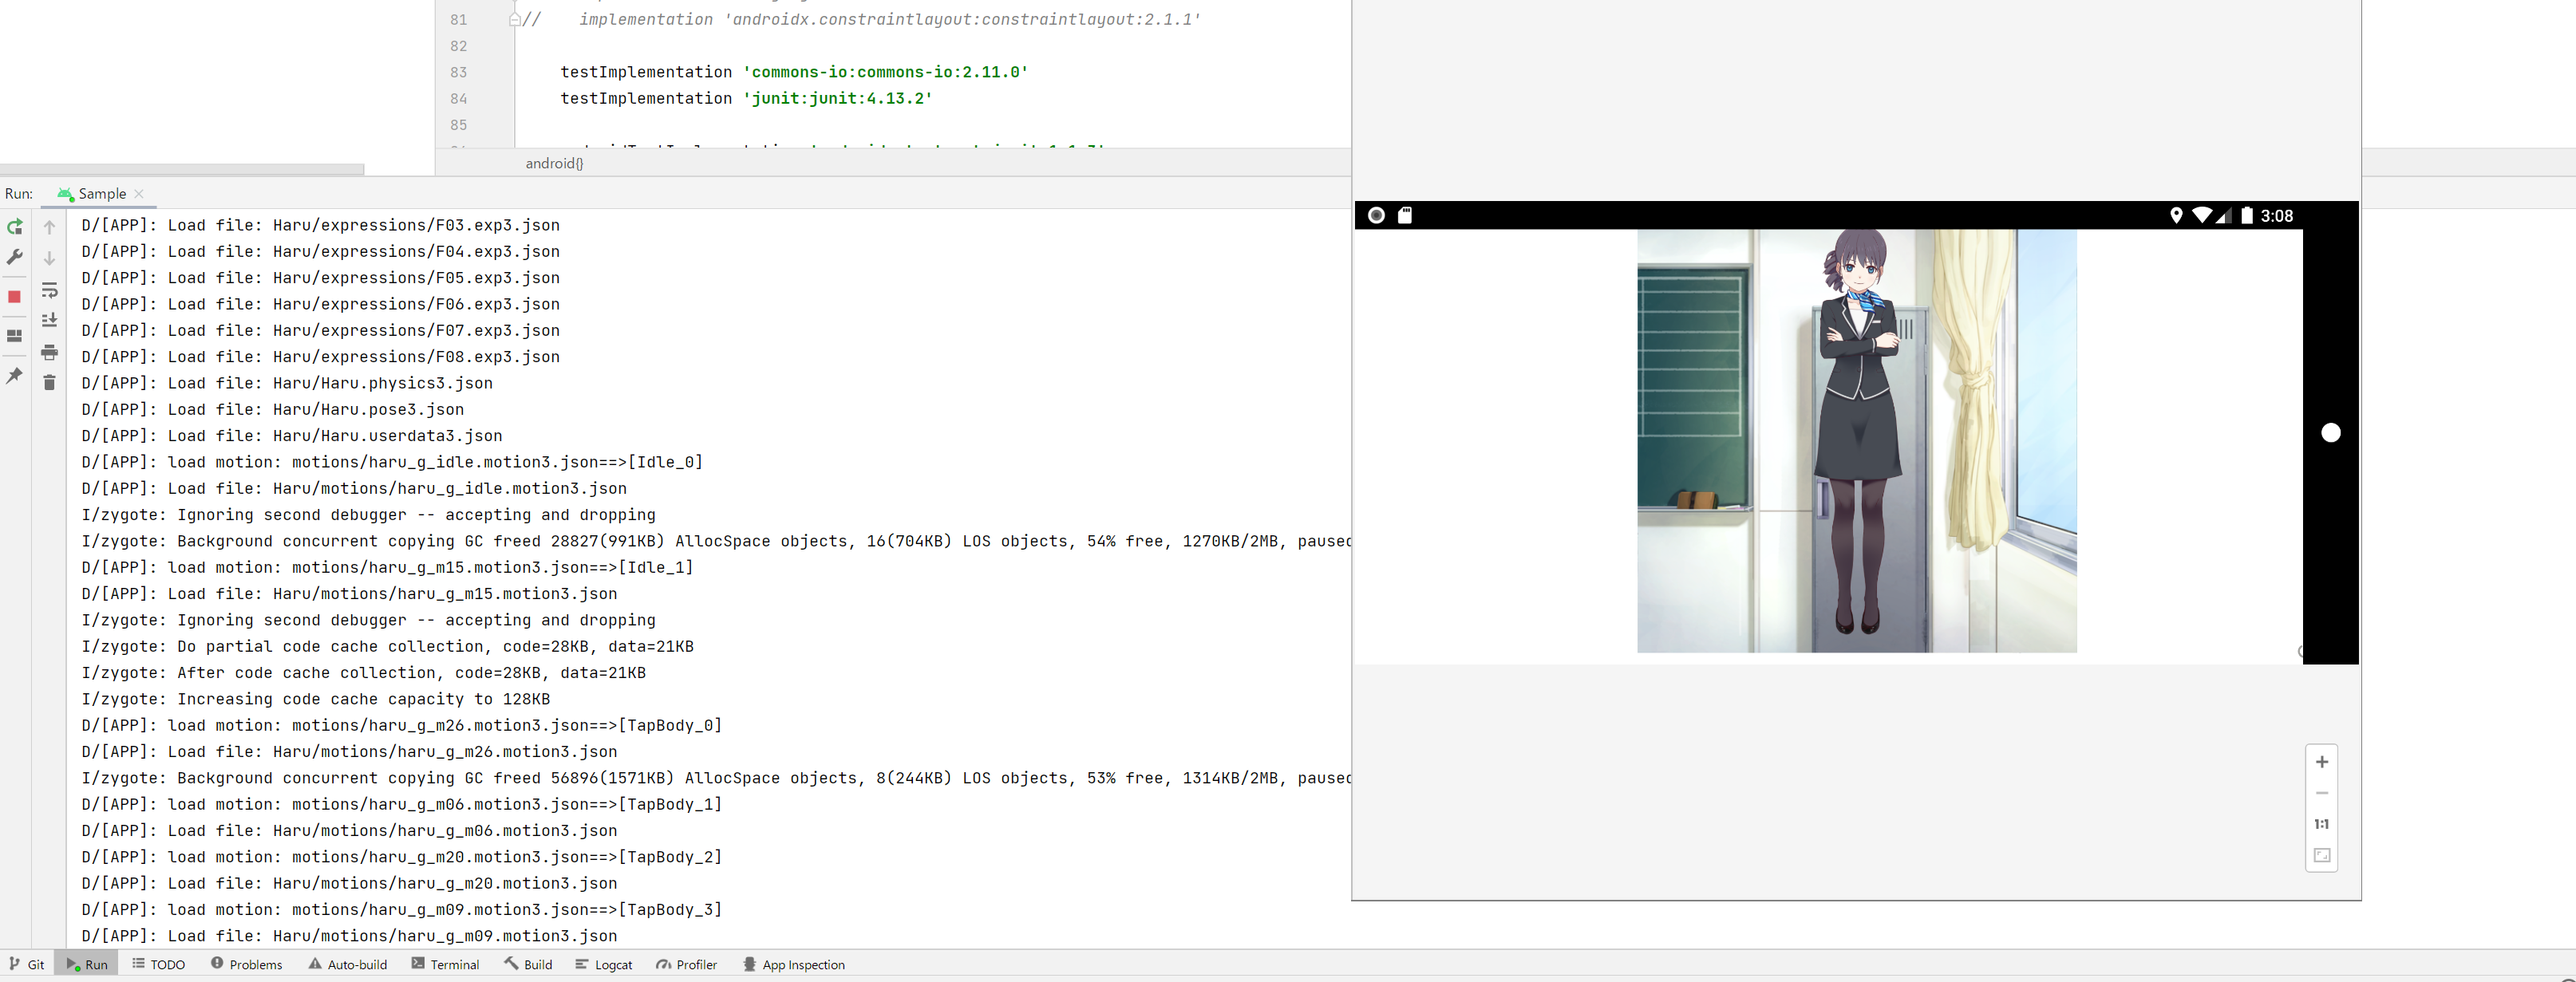
Execution of Minimum Demo
In addition to the normal samples, this application provides a “Minimum Demo” with only the minimum functions.
It is possible to change the application to run by switching the “build variant.”
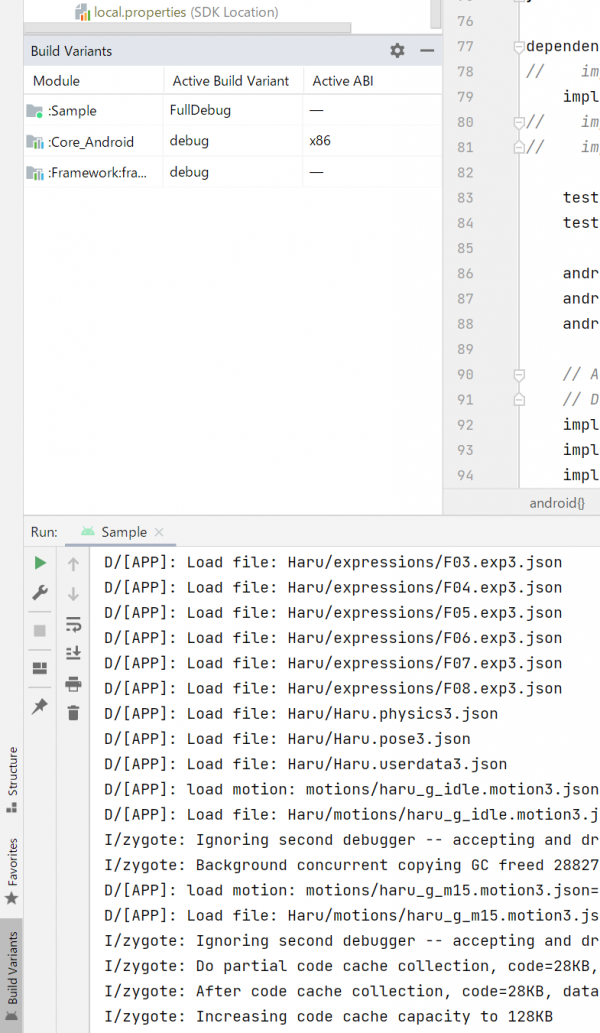
- Click the “Build Variants” in the left corner.
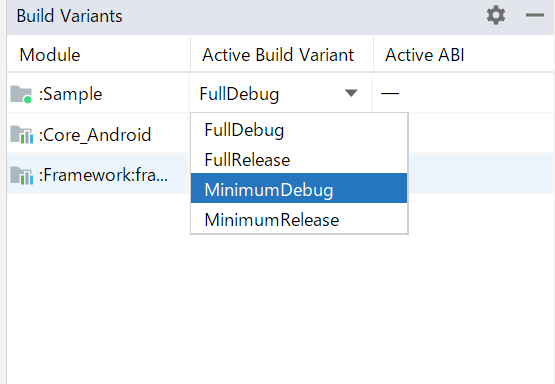
2. Click on Active Build Variants and select “ModelSpawner”.
3. Executes the Minimum Demo