Create Cubism DIY Viewer
Updated: 08/09/2017
by Traitam
There is a Cubism DIY Viewer on Live2D’s GitHub that you can customize.
This section describes how to create that Cubism DIY Viewer.
The flow is to create a project in Unity, build and customize it, and finally output it as an application.
Create a Unity Project for Cubism DIY Viewer
First, create a new Unity project and add the unitypackage SDK to the project.
See the “Import the SDK into a Project” section in “Import SDK” for more information.
The latest version of SDK components are also required to work with this Cubism DIY Viewer.
Download the latest SDK components from the links below.
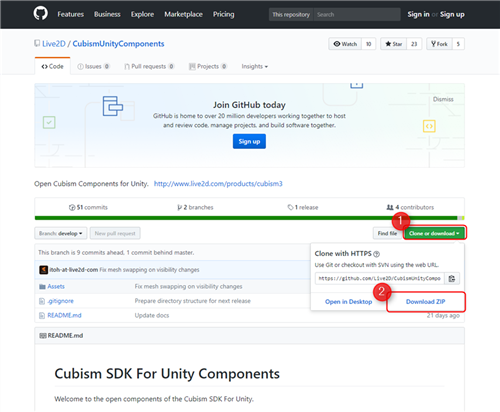
https://github.com/Live2D/CubismUnityComponents/tree/develop
On the linked page, press “Clone or download” in the red frame, then press “Download ZIP” to download the ZIP data.
Download and unzip the latest version of CubismUnityComponents.
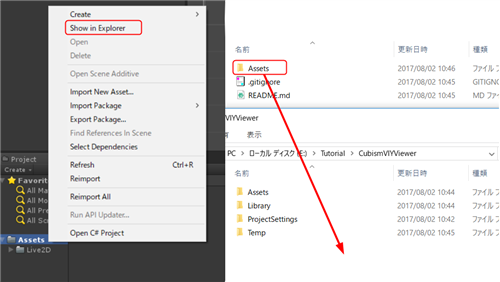
From Explorer, overwrite the Assets folder of the Unity project created above with the Assets folder contained in the newly extracted folder.
If you overwrite from Unity, the folder name will be renamed, so please overwrite from Explorer.
After overwriting, download DIY Viewer from the link below.
https://github.com/Live2D/CubismViewer
As with the latest SDK download, click the green button “Clone or download” and then click “Download ZIP” to start the download.
After downloading, unzip the file and add it to Unity.
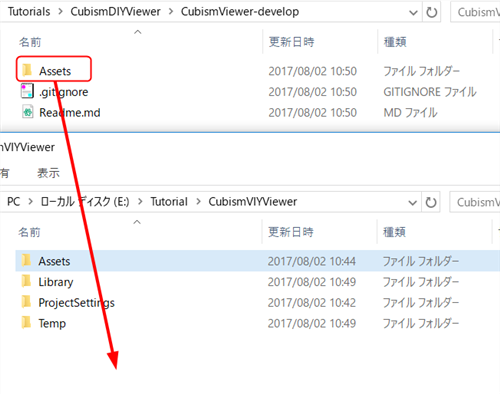
Add the Assets folder in the newly extracted folder to the same location as the Assets folder in Unity.
This is done from Explorer in the same way as the previous step of overwriting with the latest version of the SDK.
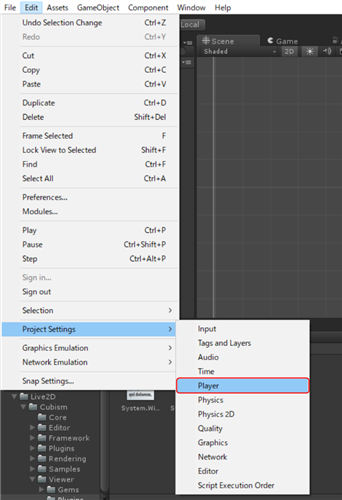
The next step is to set up the Unity Editor. There is only one setting for the Unity Editor.
In Unity, press “Edit” -> “Project Settings” -> “Player” to open the Player Settings.
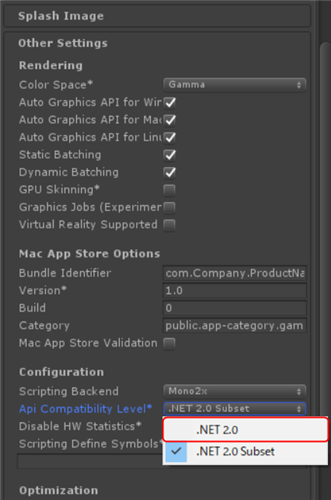
Next, open “Other Settings” and change “.NET 2.0 Subset” of Api Compatibility Level under Configuration to “.NET 2.0.”
This completes the configuration of the Unity Editor.
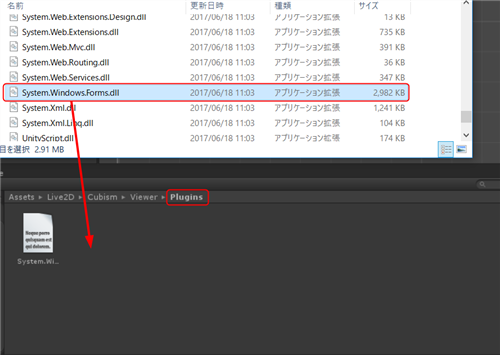
Add Required DLL
When the Viewer is added, there will be an error in Unity. Copy and add the file System.Windows.Forms.dll to resolve this error.
The standard Unity installation location is in “C:¥ProgramFiles¥Unity¥Editor¥Data¥Mono¥lib¥mono¥2.0¥System.Windows.Forms.dll.”
The location to paste into Unity is “Assets/Live2D/Cubism/Viewer/Plugins/.”
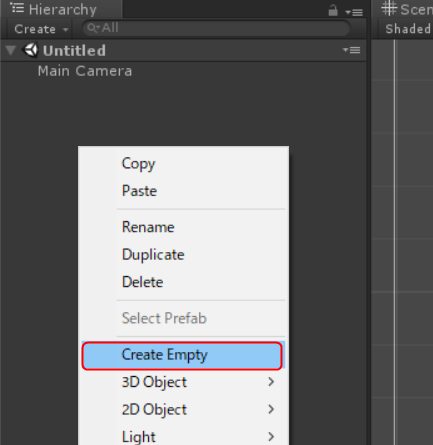
Create a Scene for the Viewer
Create a scene for the Viewer in the current project.
Right-click on the Hierarchy window to open the context menu.
Click “Create Empty” in the menu to create an empty GameObject.
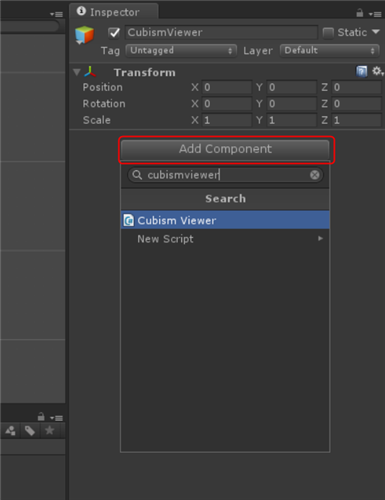
Rename the created empty GameObject “CubismViewer.”
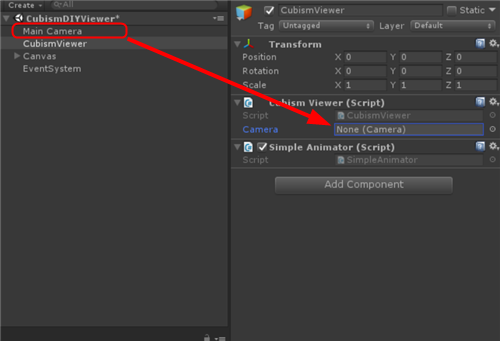
Select ‘CubismViewer’ and click “Inspector” > “Add Component” > “Cubism Viewer.cs.” Then, set the Camera object used as the main object to the Camera of the added Cubism Viewer component.
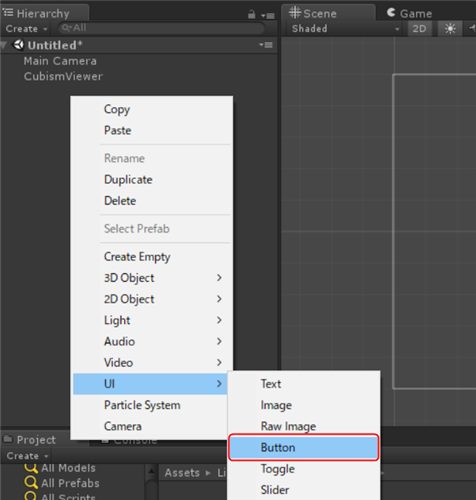
Once the GameObject is set up, the next step is to create and set up buttons to invoke the process in the scene.
Right-click on the Hierarchy window and select “UI” -> “Button” to create a button.
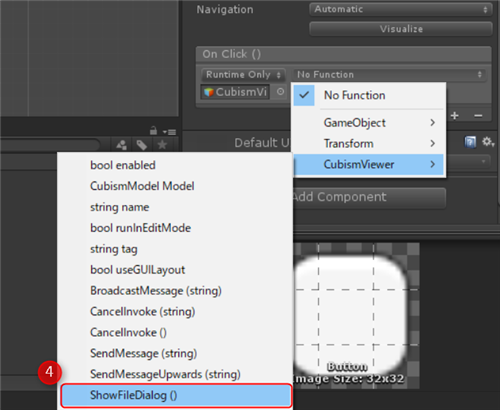
Select the created button and set “OnClick().”
After pressing “+” in OnClick(), add a CubismViewer object.
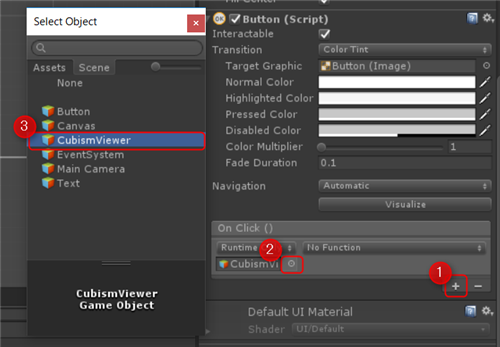
Select CubismViewer.ShowFileDialog.
This completes the creation of the Cubism DIY Viewer project.
To display the model, please follow the steps below.
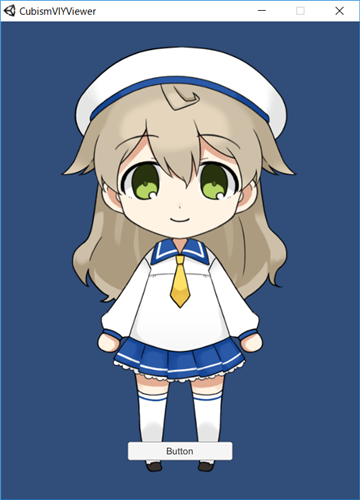
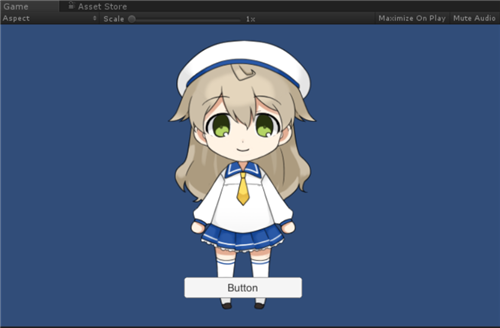
Run the scene and press the button to display the file browse window.
Then specify .model3.json.
Customize with Gems
To work with model3.json motion, add Gems/Animation/SimpleAnimator.cs to the CubismViewer object.
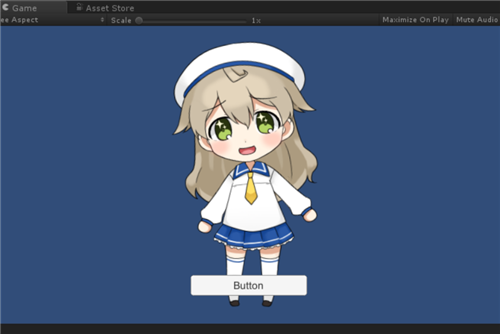
After loading .model3.json, load .motion3.json in the same way, and the motion will be applied to the model being displayed.
In addition to this, Gems includes optional features that allow you to customize the Cubism DIY Viewer.
There are also Gems created by other users.
See the Built-in Gems and User Gems link on GitHub.
https://github.com/Live2D/CubismViewer#built-in-gems
Export to exe File
Finally, export this project as a standalone application.
Before exporting, save the scene created above.
Press “File” -> “Build Settings” to configure build settings.
Press “Add Open Scenes” to add the scene you just saved to Scenes In Build.
Finally, press ‘Build’ or “Build And Run” and enter any exe name to build.
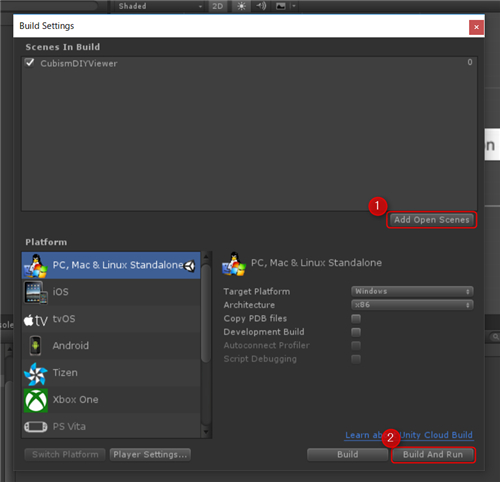
If you click ‘Build And Run,’ the exe will automatically start after the build is complete.
If the settings are correct, the model can be loaded and displayed as in Unity.