Switch Facial Expressions and Poses
Updated: 01/30/2020
This page explains how to use Unity’s Mecanim to perform facial expressions and clothing changes.
Summary
In Cubism 2.1, expression.json and Pose.json were used to change the expression, but they are obsolete in Cubism 3.
Cubism 3 and later versions of the Cubism SDK for Unity use Mecanim, a Unity feature, to provide an alternative implementation.
Both facial expressions and clothing are represented by manipulating BlendTree values created in Animator from scripts.
Details
Cubism 2.1 had expression.json and Pose.json, but they are obsolete in Cubism 3.
Therefore, changes in facial expressions and clothing are made using Mecanim, a Unity function.
In this example, we will switch facial expressions from the state in which animation is applied to the model.
Until the model is animated, see “Animation Playback”.
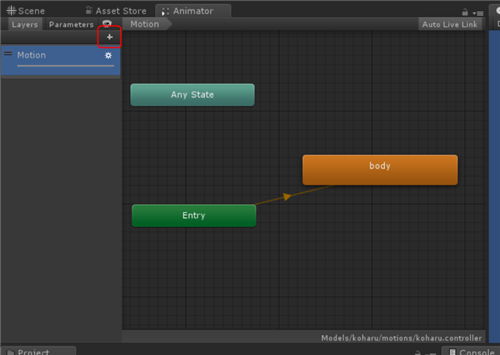
Here, the AnimatorController layer is renamed “Motion.”
In this state, create a new layer in Layers in the Animator window.
Press the + button in the red frame to create a new layer and name it “Expression.”
Then, with the Expression layer selected, select “right-click” -> “Create State” -> “From New Blend Tree” to add a new BlendTree.
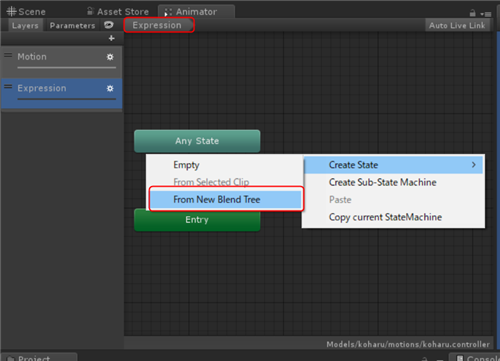
After adding, double-click on the BlendTree to go to the BlendTree edit screen.

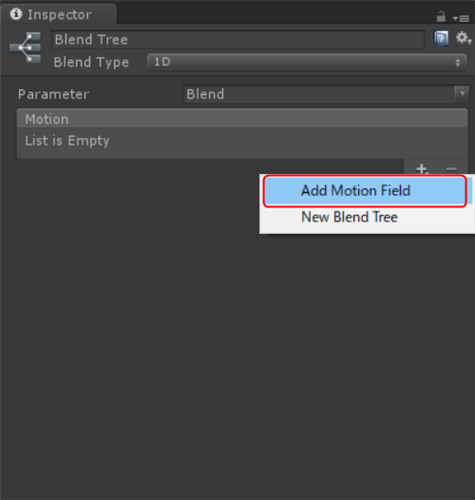
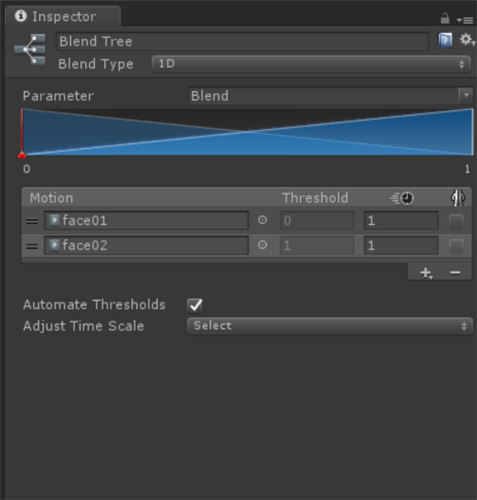
After clicking on BlendTree, press the + button for Motion in the Inspector window and press “Add Motion Field.”
Then the item to add motion for blending appears.
In this example, the two expressions will be blended, so press “Add Motion Field” again to add more motion items.
Then apply the two expressions as follows.
Change the Weight and internal Blend of this Expression layer from the script.
Create a new C# script and name it “BlendExpression.cs.”
using UnityEngine;

public class BlendExpression : MonoBehaviour
{
    private Animator _blendTree;
    private int _expressionIndex;

    [SerializeField, Range(0f, 1f)]
    public float Blending = 0f;

    [SerializeField, Range(0f, 1f)]
    public float ExpressionWeight = 1f;

    void Start()
    {
        _blendTree = GetComponent<Animator>();

        _expressionIndex = _blendTree.GetLayerIndex("Expression");
    }

    void Update()
    {
        //Fail getting animator.
        if (_blendTree == null)
        {
            return;
        }


        //Setting Blend Param and Weights.
        _blendTree.SetFloat("Blend", Blending);

        if (_expressionIndex != -1)
            _blendTree.SetLayerWeight(_expressionIndex, ExpressionWeight);

    }
}
After writing the code, select koharu, search for “BlendExpression” in “Add Component,” and add the script.
Now you can switch facial expressions from within the script.
“ExpressionWeight” is applied to the Weight of the layer created in Layers in Animator.
Similarly, you can get the Weight of the BlendTree and change the value from the script to change the clothing.