Parameter Settings
Updated: 06/18/2025
You can adjust camera tracking items and Live2D parameters in nizima LIVE.
nizima LIVE allows for the adjustment of detailed aspects such as timing and links of parameter transitions that have previously only been manipulated in Live2D Cubism.

Upper Tab Menu
| Feature | Operation |
|---|---|
| Setting Motions | Fine-tune the mapping between tracking items and Live2D parameters and how the parameters are reflected in the Live2D model. |
| Physics | Adjust the motion scale for Live2D parameters for which physics operations are set. |
| Auto Playback | Set Live2D parameters for automatic and repetitive playback, such as breathing. |
| Other Settings | Configure the setting to synchronize the left eye blinking and eyebrow with the right eye blinking and eyebrow, and lip-sync settings. |
| … | Loads and saves parameter settings configured in nizima LIVE. |
- General
- Default tracking items are displayed.
- Hand tracking
- Tracking items for hand tracking are displayed.
Please refer to Hand Tracking Specifications for information on auto-associated IDs. - Perfect synch
- Tracking items for perfect sync using iPhone are displayed.
If the tracking item name prefixed with “Param” and the parameter ID of the Live2D model match, the tracking item and parameter are automatically linked.
Example
The tracking item “EyeBlinkLeft” is automatically associated with the parameter of the Cubism parameter ID “ParamEyeBlinkLeft.” Cubism parameter IDs are case-insensitive when linked. - mocopi
- Tracking items for mocopi are displayed.
Please refer to Specifications of mocopi-compatible Parameters for information on auto-associated IDs. - User defined
- Tracking items specified in the plugin or script are displayed.
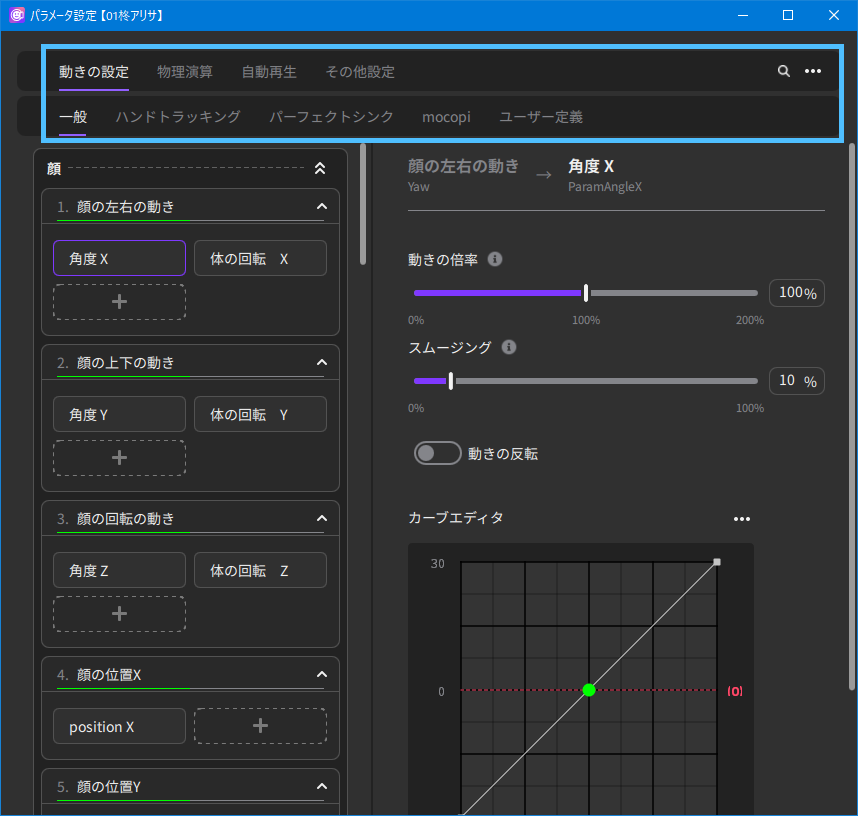
Setting Motions
Parameter selection panel (left side)
The following is a list of parameters that can be tracked in nizima LIVE and the Live2D parameters associated with them.
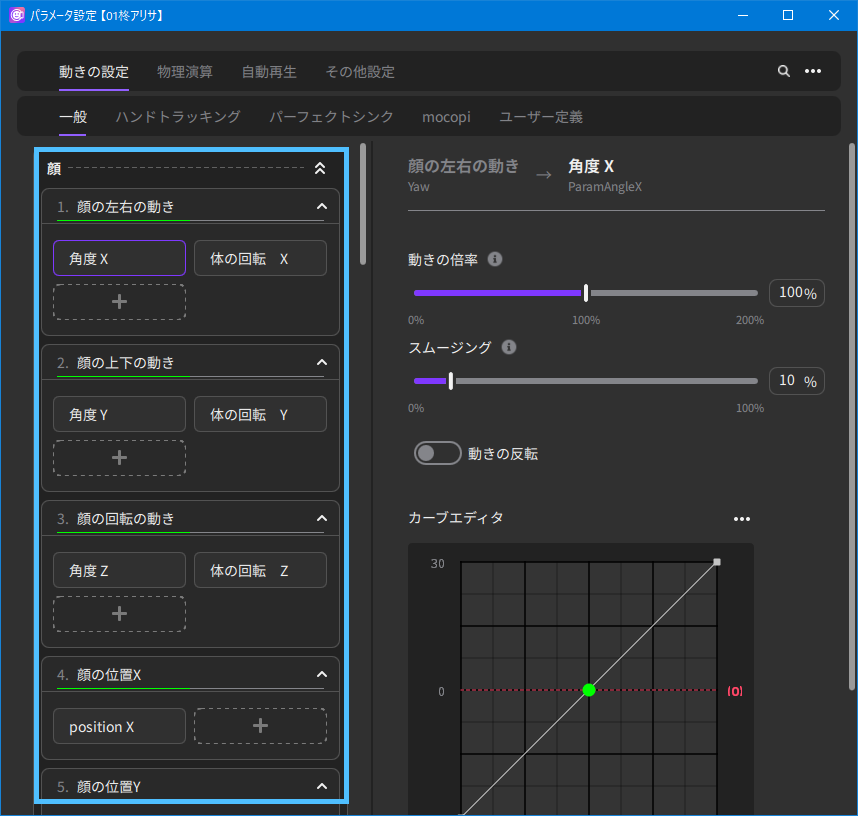
Selecting a tracking item switches the advanced settings panel on the right.

The current value of tracking is displayed in the tracking item.
It can be toggled with “Hide/Show Input Values” from the “…” menu in the upper right corner.
Press the ▲ to the right of the tracking item to close or open the associated UIs.
nizima LIVE automatically associates Live2D parameters with tracking items.
Each parameter that is associated is displayed by default under the tracking item.
Each parameter is indicated by the set name if the model data contains cdi.json, otherwise by ID.
The + button allows you to add new Live2D parameters to be associated with the tracking item.
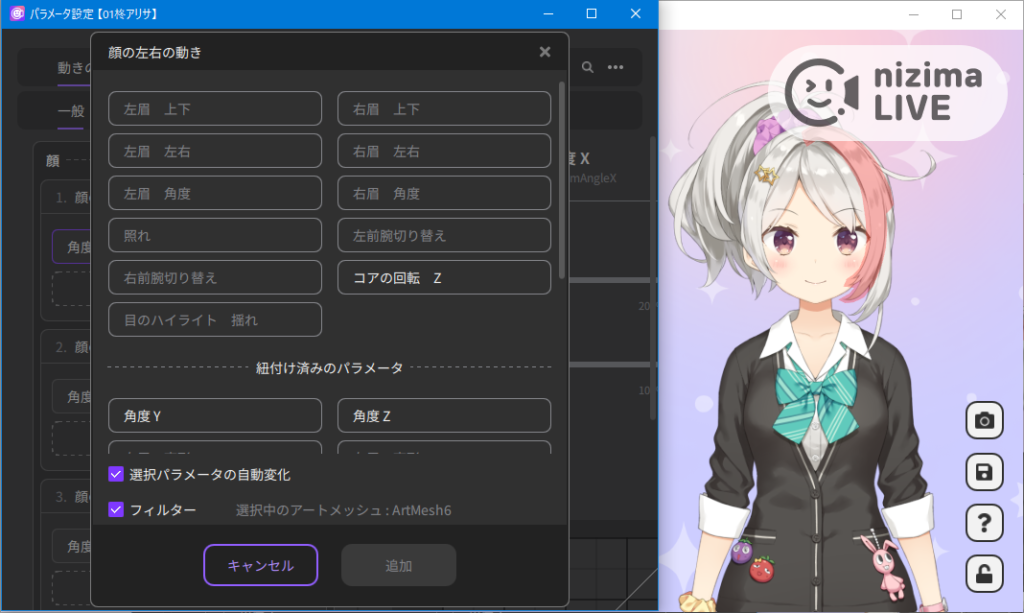
If you check the checkbox for automatic change of selected parameters (e.g., angle Y), the parameter will move automatically when you select it, allowing you to easily check it.
When the filter is checked, you can intuitively select parts by hovering the cursor over the model, and the parameters associated with the selected part will be displayed.
With the × button, you can unassociate the tracking item from the Live2D parameters.
Tracking items dedicated to iOS are also displayed, with or without the connection of a mobile version.
Advanced settings panel (right side)
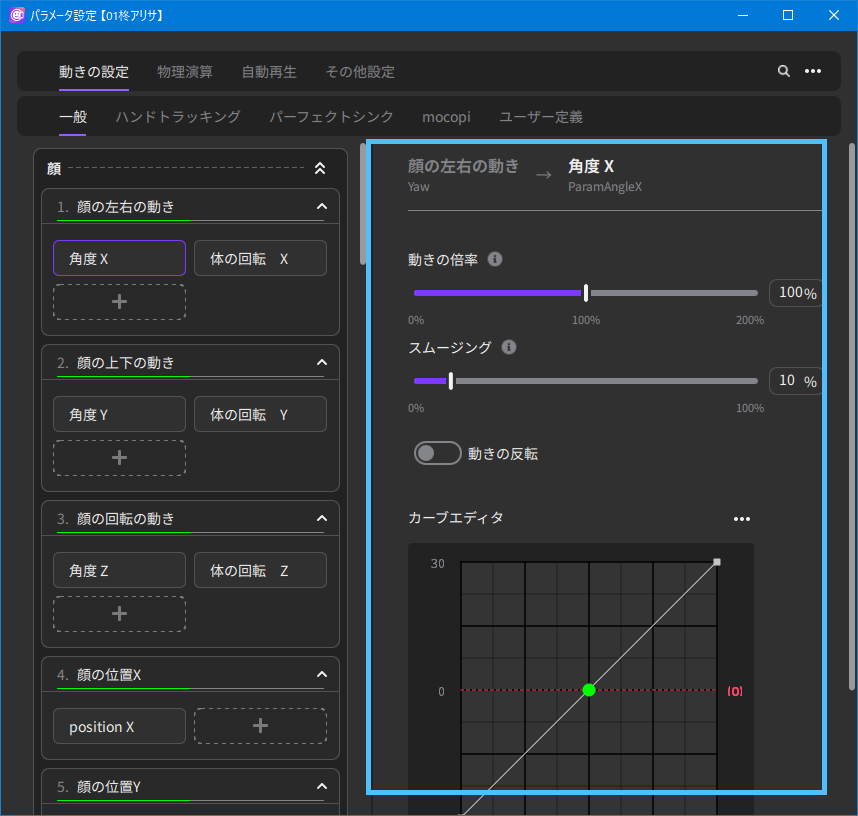
- Parameter ID
- The IDs of the parameters that the Live2D model has are displayed.
- Motion scale
- You can set the scale for body movements to be reflected in the movements of the Live2D model in the range of 0 to 200%.
- Smoothing
-
You can integrate and correct minor body shaking, etc., and set the smoothness of the Live2D model’s movement in the range of 0 to 100%.
- Motion inversion
- Inverts the movement of the Live2D model relative to the body’s movement.
- Curve editor
-
You can edit the waveforms to see how the Live2D model’s movement changes in response to the body’s movements.
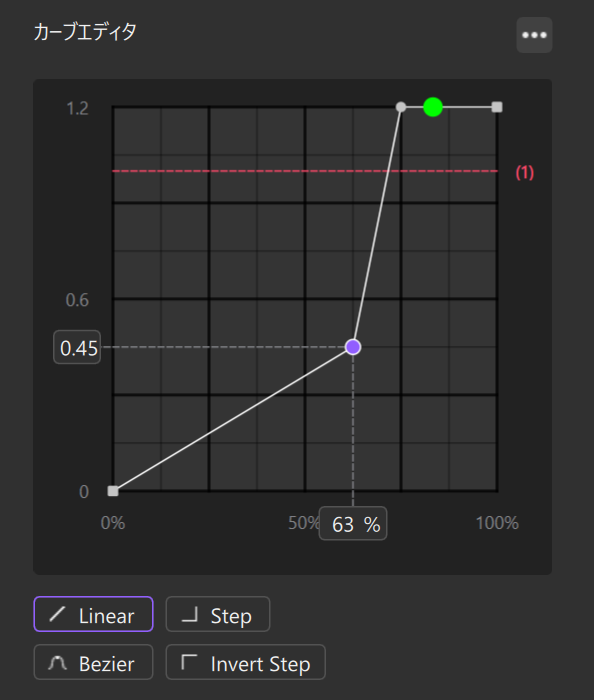
The point in the selected state is purple. The green dot on the waveform is the current value.
Click “…” in the upper right corner of the Curve editor to display the various operation buttons.
Operation Contents Left-click Marks with a dot (point). Right-click Deletes the point. Copy entire curve
or Ctrl + CCopies the shape of the entire curve. Paste entire curve
or Ctrl + VPastes the entire curve shape that you copied. Undo
or Ctrl + ZUndoes the operation. Redo
or Ctrl + Y or Ctrl + Shift + ZRedoes the undone operation. Show/hide default values Shows/hides the default values of the parameters that the Live2D model has. Enable/disable snapping Enables or disables the point to snap (stick) to the grid, edge of the screen, etc. Reset Initializes the edited contents and returns the curve shape to its initial value. Arrow keys Use the up, down, left, and right arrows to move points. Point
You can choose the type of the line that connects the selected point to the next point on the right from Linear, Step, Invert Step, and Bezier at the bottom of the screen.
Linear: A straight line connects the selected point to the next point on the right. Animation is constant and variable, with linear motion.
Step: The selected point and the next point on the right are connected by a horizontal straight line that matches the numerical value of the selected point. The animation moves so that the previous and next pictures change in an instant.
Invert Step: The selected point and the next point on the right are connected by a horizontal straight line that matches the value of the next point on the right. The animation moves so that the previous and next pictures change in an instant.
Bezier: When selected, a purple [Bezier Handle] will appear. By grabbing the rounded edge, you can move it up, down, left, or right, and freely edit the shape of the curve.
Physics
On the left side, the parameters set for physics operations are displayed.
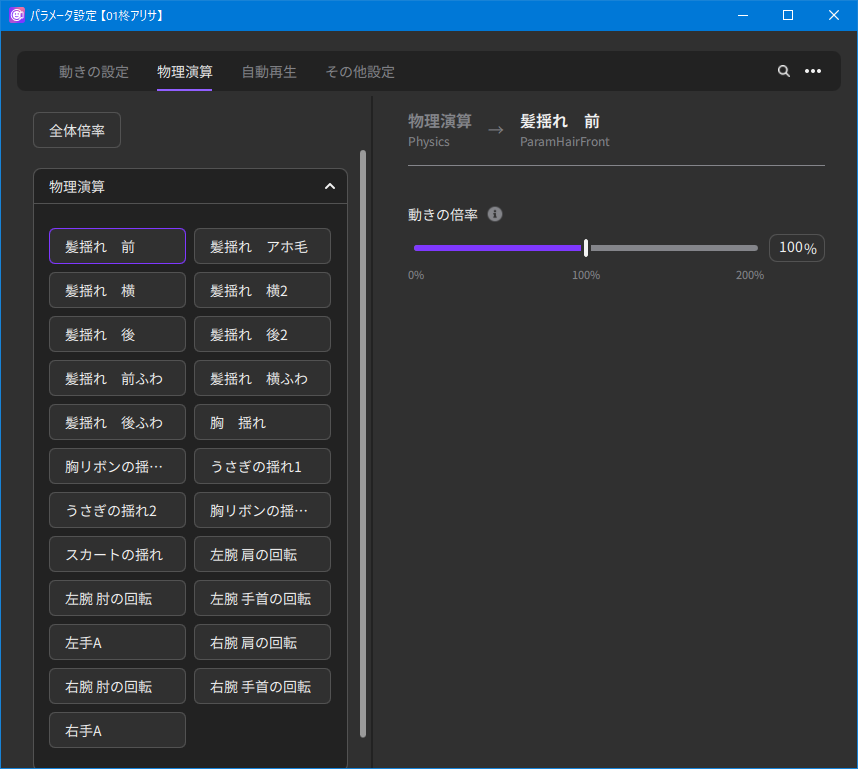
- Parameter ID
- The IDs of the parameters that the Live2D model has are displayed.
- Motion scale
- You can set the scale for body movements to be reflected in the movements of the Live2D model in the range of 0 to 200%.
The closer to 200%, the greater the movement of the Live2D model relative to the body’s movements.
Auto Playback

Parameter selection panel (left side)
- + button
- You can add new Live2D parameters for which you want to set up auto playback.
Advanced settings panel (right side)
- Parameter ID
- The IDs of the parameters that the Live2D model has are displayed.
Repeat type
- Loop playback
- Note: This is the recommended way to add breathing to a model.
The movement goes back and forth repeatedly between the maximum and minimum. - Repeat playback
- If the maximum is exceeded, the movement starts from the minimum and repeats.
- Playback speed
- The speed from the minimum to maximum can be specified in ms.
…
[…] in the upper right corner > [Save] or [Save as]
You can save your settings in .live.json format.
Other Settings
The setting to synchronize the left eye blinking and eyebrow with the right eye blinking and eyebrow and lip-sync settings are configured.
Eye parts
-
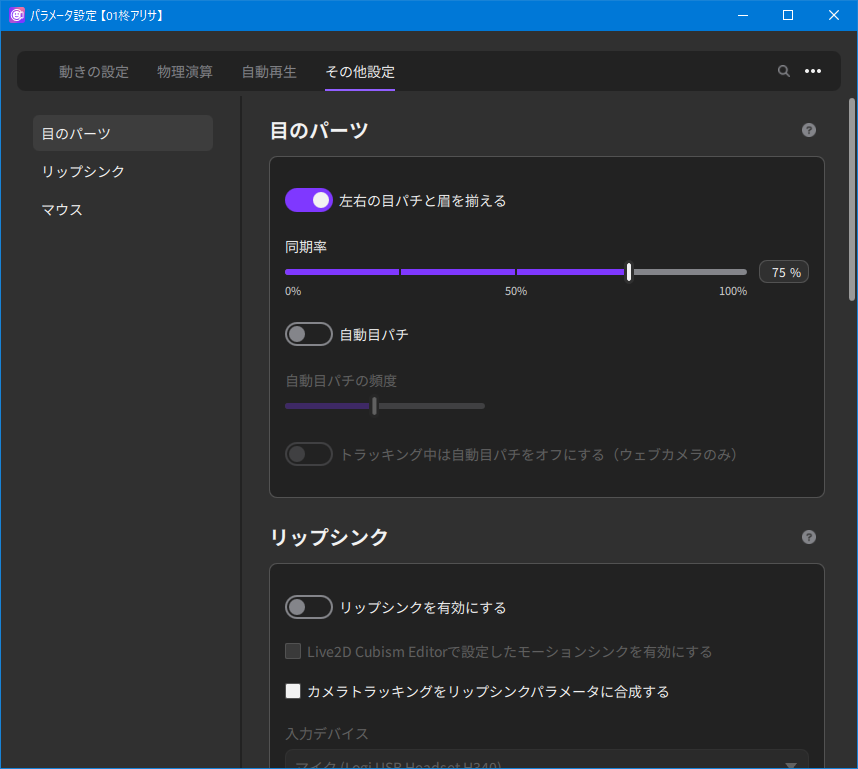
- Synchronize the left eye blinking and eyebrow with the right eye blinking and eyebrow
- Enable or disable the synchronization function.
- Synchronization ratio
- Set the criteria for winking and other out-of-sync situations.
- Automatic eye-blinking
- When turned on, the eyes will blink automatically while ignoring tracking.
- Automatic eye-blinking frequency
- Moving the slider further to the right sets a higher frequency of eye blinking.
- Turn off automatic eye-blinking while tracking (webcam only)
- When tracking with the camera on, the tracking eye motion will be prioritized.
Lip-sync
This function allows Live2D models to move in response to audio input from a microphone.
It is mainly used for mouth movements in Live2D models.
Notes
Only Cubism motion-sync is available for the Mac version.
Even if you enable this function, motion-sync is not available for models that do not support motion-sync.
-
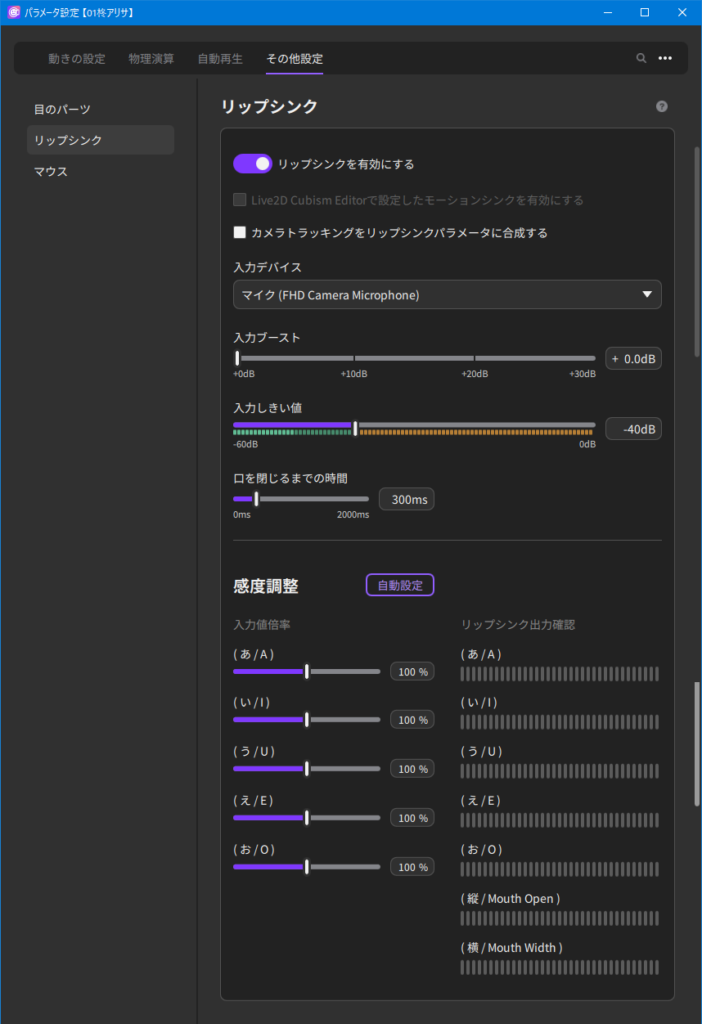
- Enable lip-sync
- Enables/disables the function.
When disabled, all of the following UIs are also disabled. - Enable motion-sync set in Live2D Cubism Editor
- The motion-sync settings configured in Live2D Cubism Editor during model creation are used to move the model. This feature is only available on models with a motion-sync setting.
Apply lip-sync to “Mouth open/close” and “Mouth spread,” Time until mouth closes, and Sensitivity adjustment, explained below, are not supported for motion-sync.
Click here for details on motion-sync settings in Live2D Cubism Editor. - Composite camera tracking with lip-sync parameters
- Microphone and camera values are blended. This allows for expressions such as surprised mouths and yawning mouths.
- Input device
- Switch the microphone.
- Input boost
- Amplifies the microphone input.
- Input threshold
- Set noise removal. Sounds less than or equal to the threshold are not reflected in lip-sync.
0dB: All sound is eliminated. - Time until mouth closes
- Set the time from the end of speaking until the mouth closes.
- Sensitivity adjustment automatic setting
- Set the scale for the corresponding vowel.
Follow the guidance and it will be set automatically. - Input value scale
- Manually set the scale of the corresponding vowel.
- Lip-sync output confirmation
-
Output results can be checked for (A), (I), (U), (E), (O), (Vertical), and (Horizontal).
Mouse
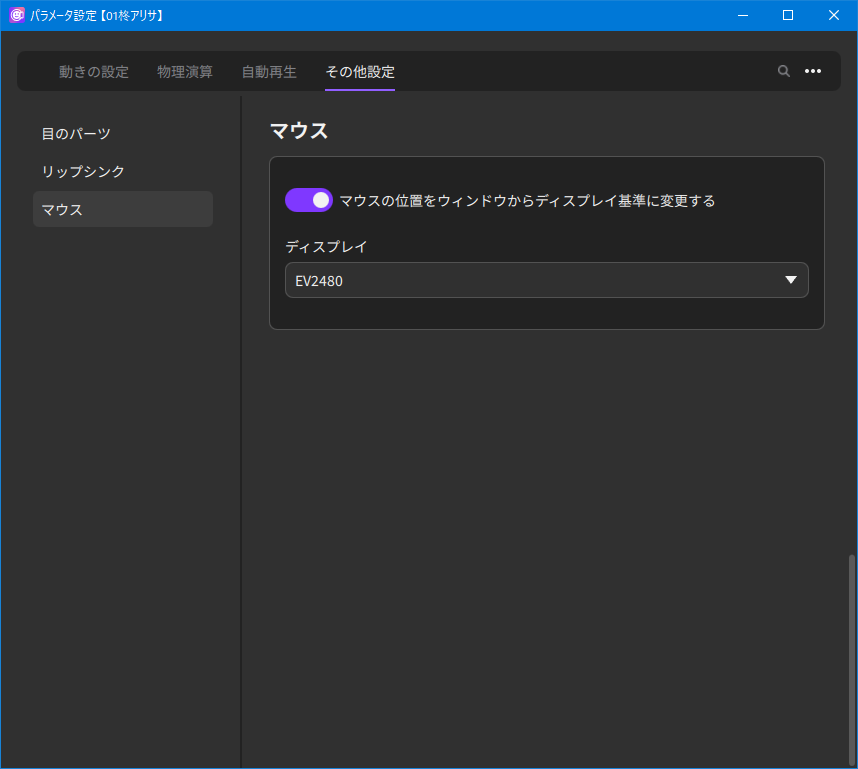
Change mouse position from window to display reference
The mouse position of the Desktop input is changed to the selected display reference when ON.
It is ON by default.