How to Set Parameters for Live2D Models
Updated: 11/06/2024
Setting Motion Scale and Smoothing (for Beginners)
Beginners should set these parameters first! Movements of Live2D models will be smoother.
- 1. Click on “Parameter settings” from the main window menu.
-
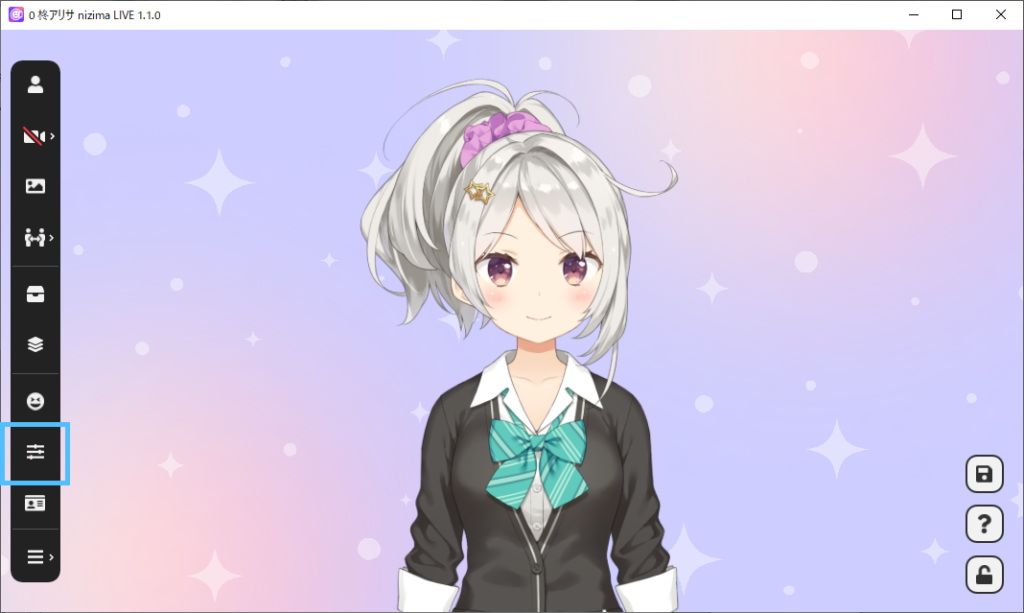
- 2. The parameter setting screen appears.
-
The parameters in boxes on the left side of the screen can be tracked in nizima LIVE. Below that, you can link the parameters of the Live2D model corresponding to that movement. (Automatically linked by default)
For example, in the screen above, “Angle X” and “Body rotation X” are linked with the “Face motion: left/right,” so turning the face left or right will move “Angle X” and “Body rotation X” of the Live2D model.
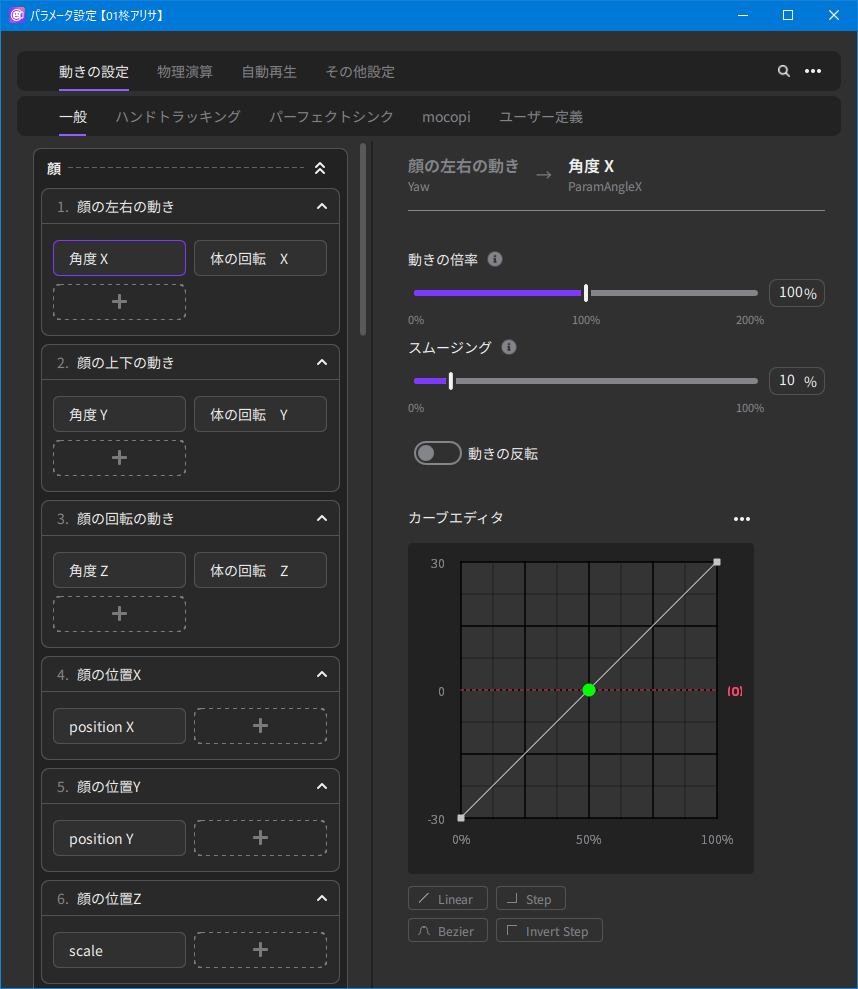
- 3. Select the parameter you wish to adjust.
-
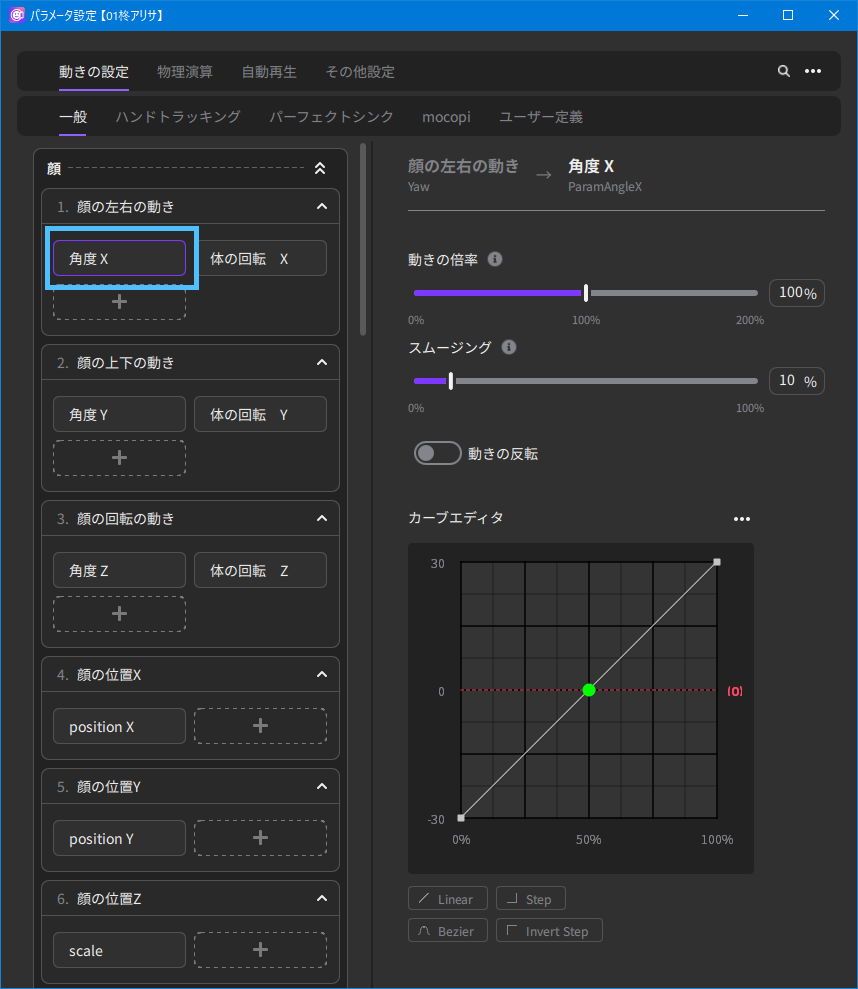
- 4. Adjust “Motion scale” while moving in front of the camera to move the Live2D model.
-
The closer to 0%, the less the Live2D model moves in response to the body’s movements. The closer to 200%, the greater the movement of the Live2D model relative to the body’s movements.
- 5. Similarly, adjust “Smoothing” while moving the Live2D model.
-
The closer to 0, the more the body movement is reflected in the model’s movement without correction.
The closer to 100, the slower the response, but it integrates and corrects minor body shaking, etc. and makes the model move smoothly.Point
If the Live2D model twitches, increasing this “Smoothing” may improve the situation.

Curve editor settings (for Intermediate and Advanced Users)
- 1. Perform steps 1 through 3 of “Setting Motion Scale and Smoothing (For Beginners).”
- 2. Edit the curve to see how the output changes in relation to the input. Edit the point you placed as desired by dragging.
-
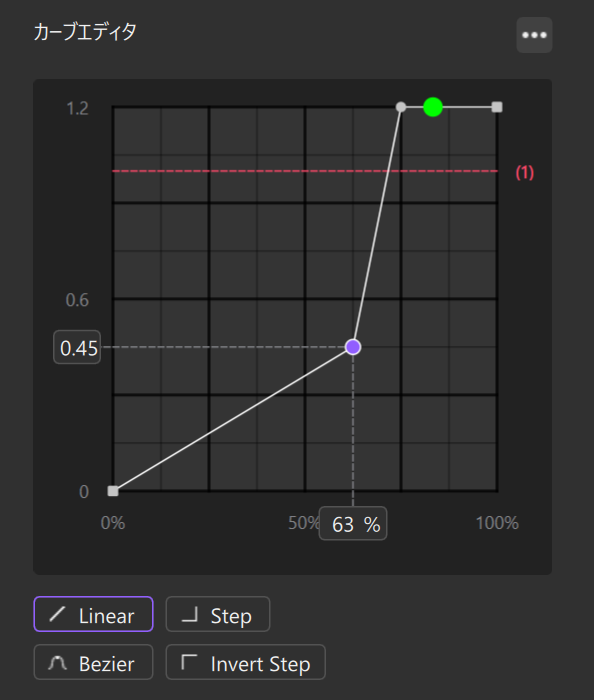
The point in the selected state is purple. The green dot on the waveform is the current value.
Click “…” in the upper right corner of the Curve editor to display the various operation buttons.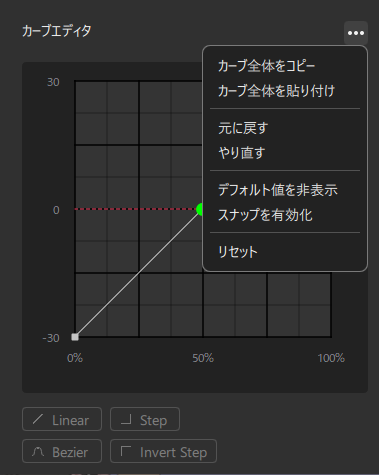
| Operation | Contents |
|---|---|
| Left-click | Marks with a dot (point). |
| Right-click | Deletes the point. |
| Copy entire curve or Ctrl + C | Copies the shape of the entire curve. |
| Paste entire curve or Ctrl + V | Pastes the entire curve shape that you copied. |
| Undo or Ctrl + Z | Undoes the operation. |
| Redo or Ctrl + Y or Ctrl + Shift + Z | Redoes the undone operation. |
| Show/hide default values | Shows/hides the default values of the parameters that the Live2D model has. |
| Enable/disable snapping | Enables or disables the point to snap (stick) to the grid, edge of the screen, etc. |
| Reset | Initializes the edited contents and returns the curve shape to its initial value. |
| Arrow keys | Use the up, down, left, and right arrows to move points. |
You can choose the type of the line that connects the selected point to the next point on the right from Linear, Step, Invert Step, and Bezier at the bottom of the screen.
Linear: A straight line connects the selected point to the next point on the right. Animation is constant and variable, with linear motion.
Step: The selected point and the next point on the right are connected by a horizontal straight line that matches the numerical value of the selected point. The animation moves so that the previous and next pictures change in an instant.
Invert Step: The selected point and the next point on the right are connected by a horizontal straight line that matches the value of the next point on the right. The animation moves so that the previous and next pictures change in an instant.
Bezier: When selected, a purple [Bezier Handle] will appear. By grabbing the rounded edge, you can move it up, down, left, or right, and freely edit the shape of the curve.
Curve Editor Application Examples
Aligning the Curves of the Right and Left Eyes
- 1. Select “EyeL Open/Close” from the tracking items on the left side of the panel.
-
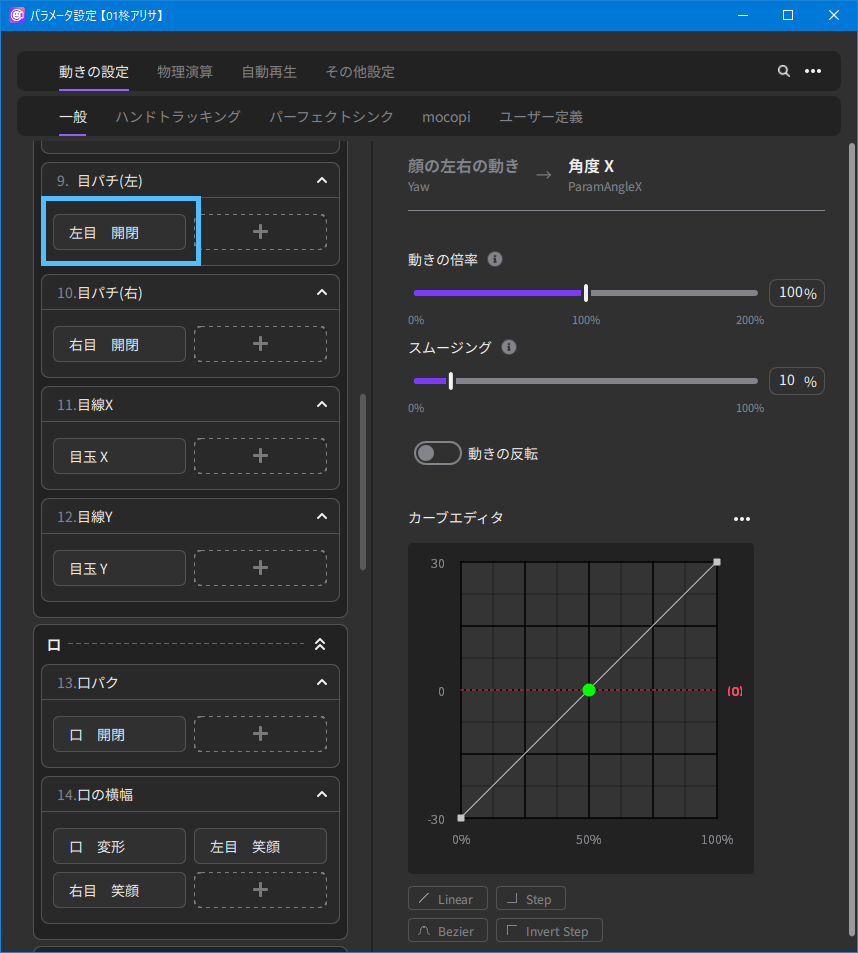
- 2. While actually moving the model, adjust the left eye opening with the Curve editor.
- 3. When adjustment is complete, click on “…” in the upper right corner of the Curve editor and click on “Copy entire curve.” The shape of the left eye opening/closing curve has been copied.
-
- 4. Select “EyeR Open/Close” from the tracking items on the left side of the panel.
-
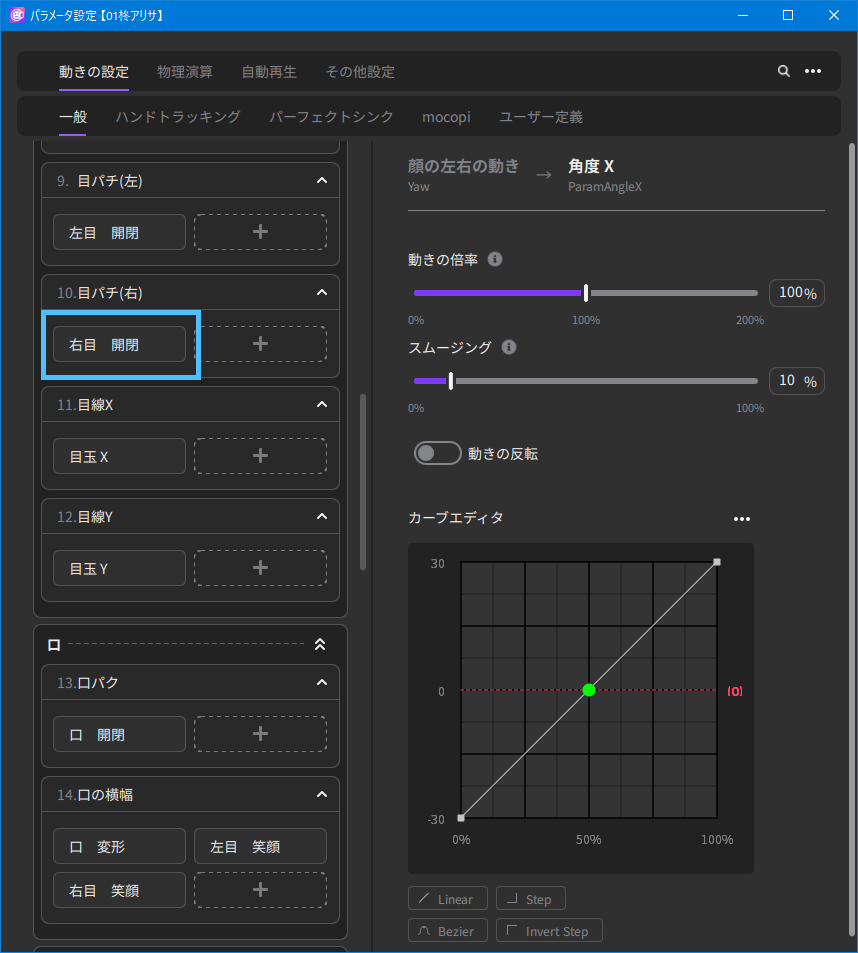
- 5. Click “Paste entire curve” from “…” in the upper right corner of the Curve editor. The shape of the left eye opening/closing curve has been pasted, and the open/close adjustment of the right eye and left eye is now the same.
-
Improving the Model’s Repetitive Mouth Opening
If the model opens and closes its mouth repeatedly when the mouth is supposed to be completely closed or when the model shakes her head while the mouth is closed, the following procedure may help.
- 1. Select “Mouth Open/Close” under “13. Mouth open/close motion” from the tracking items on the left side of the panel.
-

- 2. In the Curve editor, adjust the curve so that it looks like the following.
-
Left-click to place a single point and move it so that it is at the lowest value on the vertical axis and 25% on the horizontal axis.

- 3. Actually move the model to see if the mouth motion has been improved. Adjust curves as necessary.