How to use collaboration functions
Updated: 01/08/2025
To send and receive tracking data and Live2D model data with other users using the collaboration function, the host creates a room and the participants enter that room.
Point
- If you are using the nizima LIVE free plan, the collaboration functions have a 5-minute time limit. Please see Pricing Plans for more information, including a comparison of features with paid plans and a price list.
- You cannot collaborate between users with versions prior to 1.1.0 and version 1.1.0 or later.
Please use compatible versions for all collaboration participants.
Latest nizima LIVE version download page - The maximum number of room participants is 8.
- Voice requires the use of a separate calling application or other means.
- If there is more than one paying user in the room, re-entry and time spent in the room will no longer be limited. Note: The 40-minute tracking time limit of the free version is also removed.
- If a paid user leaves the room and the collaboration room becomes only used by free users, the free users will be subject to the existing time limits.
How to Create a Room
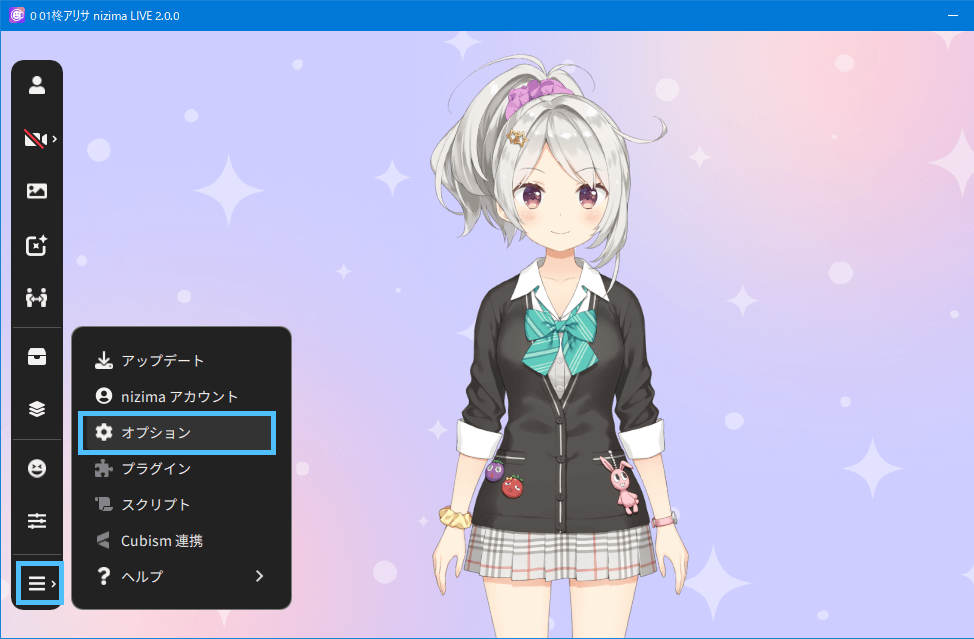
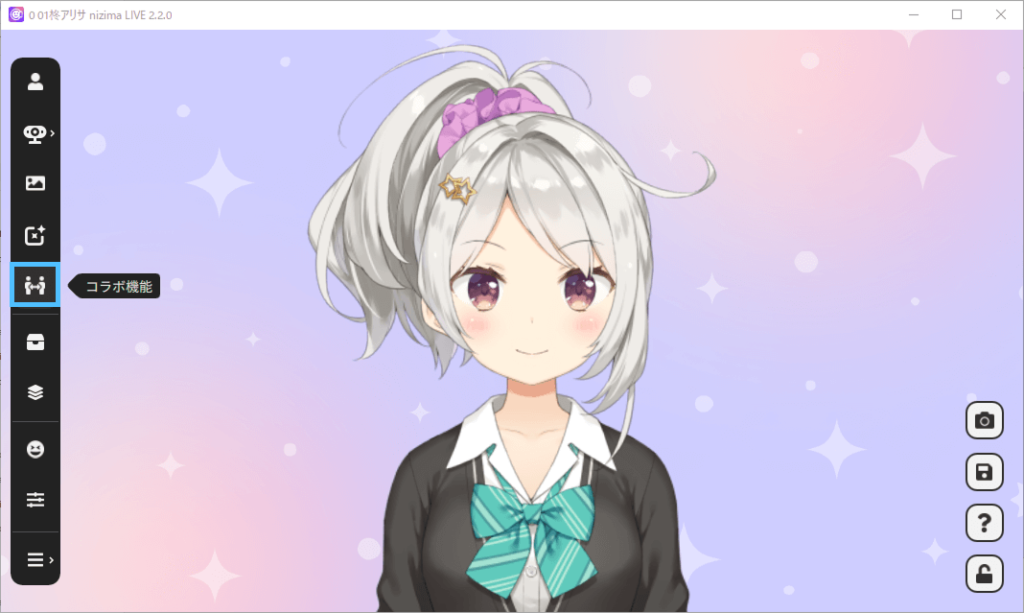
- 1. Click on “Collaboration function” > “Create room” from the menu on the left side of the main window.
-
- 2. The following screen will appear.
-
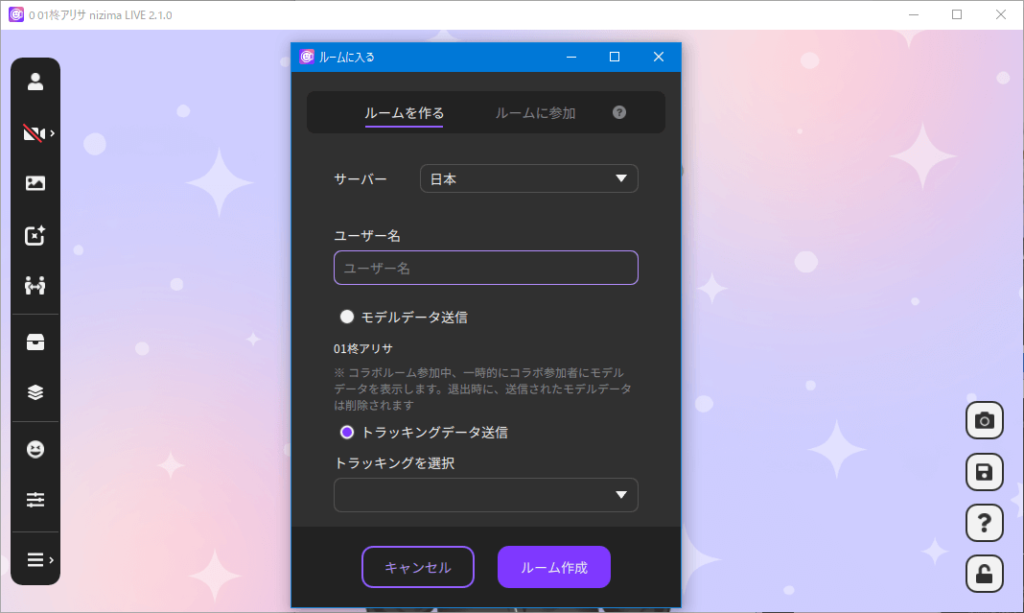
If necessary, change the “User name” displayed to the collaboration room participants.
Set the server. The default is Japan.
If necessary, check the “Send model data” checkbox.
When “Send model data” is used (recommended)
If you check the “Send model data” checkbox, the data of the Live2D model currently being displayed will be sent to the participants, who will then be able to display your Live2D model.
The parameters of the currently displayed Live2D model are sent, so there is no need to select a camera in “Select tracking.”
When “Send model data” is not used
If “Send model data” is not checked, only tracking data will be sent to participants (no model data will be sent).
Under “Select tracking,” select the camera you wish to use to send tracking data.Participants can receive tracking data by opening a new model window and selecting any “user name” from “Collaboration camera.”
If you have already given the Live2D model data to the participants in advance, or if they do not need to view your Live2D model, proceed without checking the box. - 3. When all entries are complete, click the “Create a room” button.
- 4. When the following screen appears, the collaboration room has been successfully created.
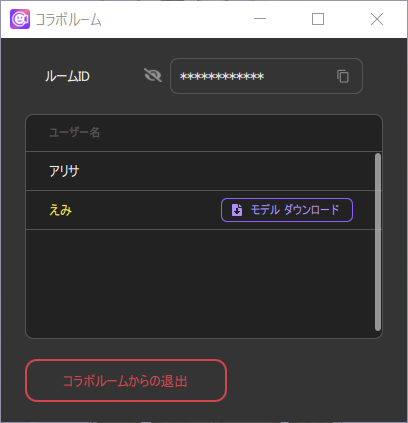
- 5. Copy the “Room ID” and send it to each participant and tell them to enter the collaboration room.
-
How to Enter the Room
- 1. From the main window menu, click on “Collaboration function” > “Enter room.”
-
- 2. The following screen will appear.
- 3. Enter the room ID received from the room creator in the “Room ID” field.
-
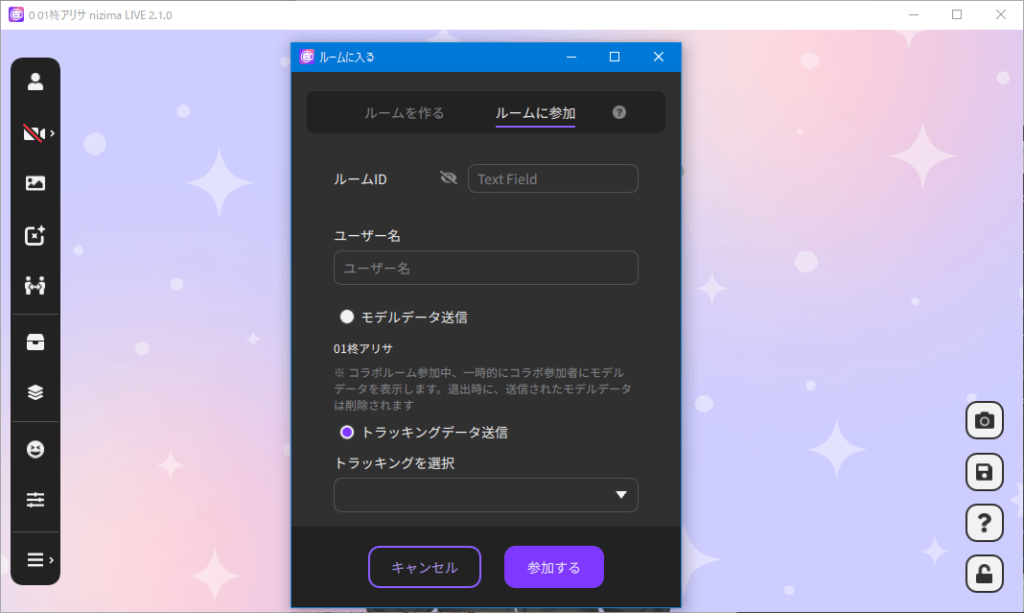
If necessary, change the “User name” displayed to the collaboration room participants.
If necessary, check the “Send model data” checkbox and select the Live2D model to be sent.
When “Send model data” is used (recommended)
If you check the “Send model data” checkbox, the data of the Live2D model currently being displayed will be sent to the participants, who will then be able to display your Live2D model.
The parameters of the currently displayed Live2D model are sent, so there is no need to select a camera in “Select tracking.”
When “Send model data” is not used
If “Send model data” is not checked, only tracking data will be sent to participants (no model data will be sent).
Under “Select tracking,” select the camera you wish to use to send tracking data.Participants can receive tracking data by opening a new model window and selecting any collaboration camera from “Face tracking.”
If you have already given the Live2D model data to the participants in advance, or if they do not need to view your Live2D model, proceed without checking the box. - 4. When all entries are complete, click “Join.”
- 5. When the following room screen is displayed, you have successfully entered the collaboration room.
-
How to Display a Live2D Model of a Participant
Notes
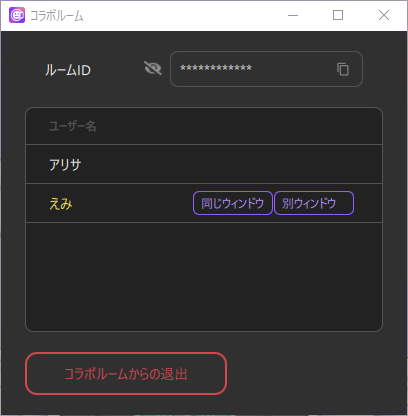
This can only be selected if the participant checked the “Send model data” checkbox when joining the room.
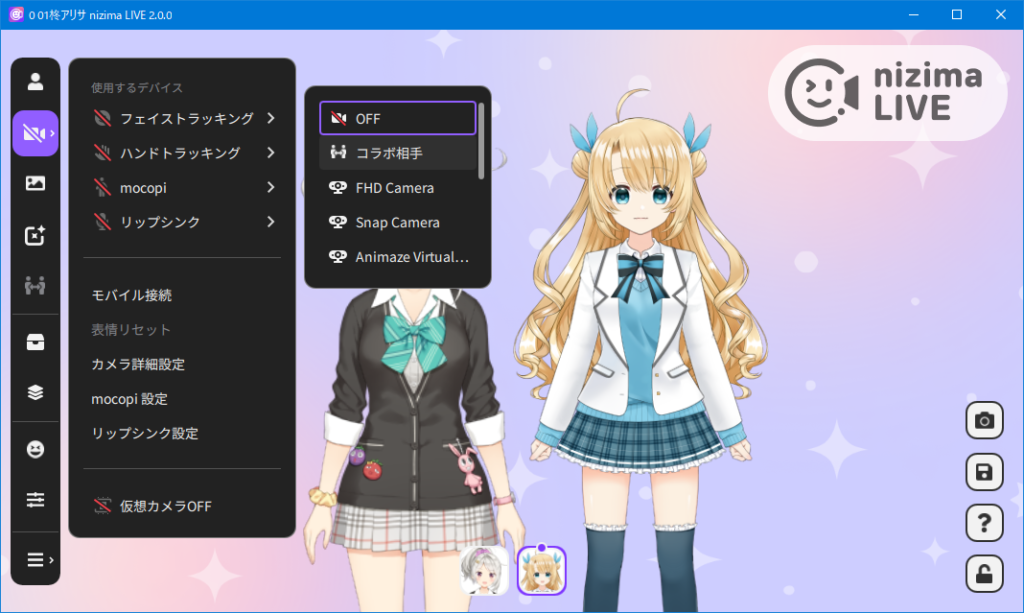
In the collaboration room window, press “Same window” to the right of the user name to display the Live2D model of the collaboration partner in the current window. Pressing “New window” opens a new window to display the Live2D model of the collaboration partner.
How to Assign Participant Movements to the Live2D Model in the App
Notes
If you have received Live2D model data from the participants in advance, you can use this method to move their Live2D models.
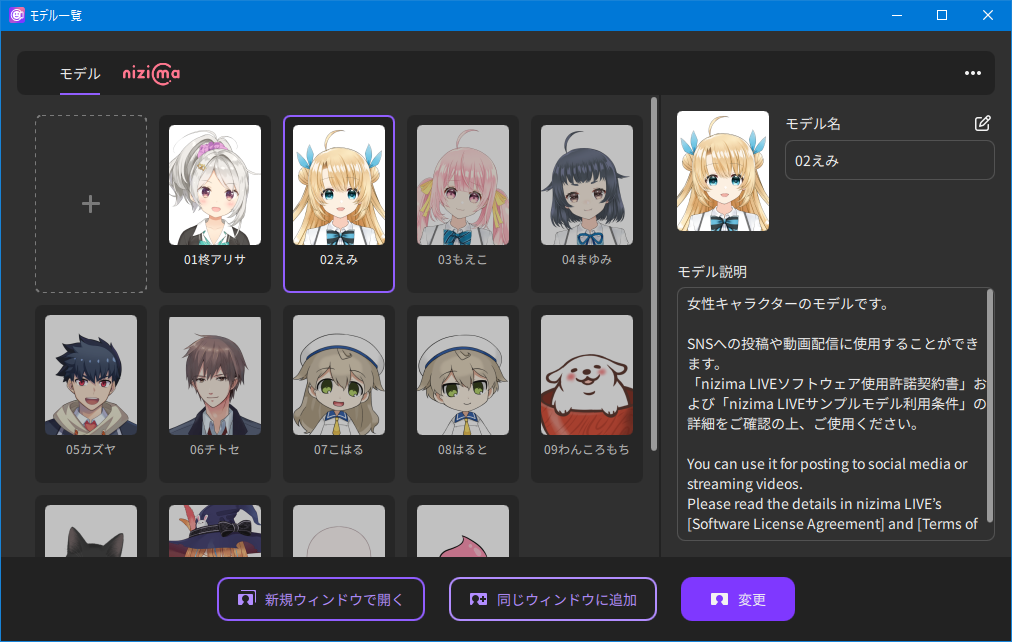
- 1. Click on “Model list” from the main window menu.
-
- 2. From the list of Live2D models, select the Live2D model to which you want to assign the participant’s movement and click “Add to same window” or “Open in new window.”
-
- 3. With the collaborator’s model selected, click “Face tracking” from the main window menu and select the participant’s camera.
-
Exiting from the Collaboration Room
To exit the collaboration function, follow the steps below to leave the collaboration room.
If you are sending model data to another participant, your Live2D model window displayed on the participant’s side will be closed when you leave the collaboration room.
- 1. In the collaboration room window, click on “Leave collaboration room.”
-
- 2. Click “Exit” when the exit confirmation window appears.
Point
- If a room has at least one participant, you may re-enter that room.
- Room IDs become invalid when all room participants leave the room.
- When a participant re-enters the room without checking the “Send model data” checkbox, the participant must re-set the model display.
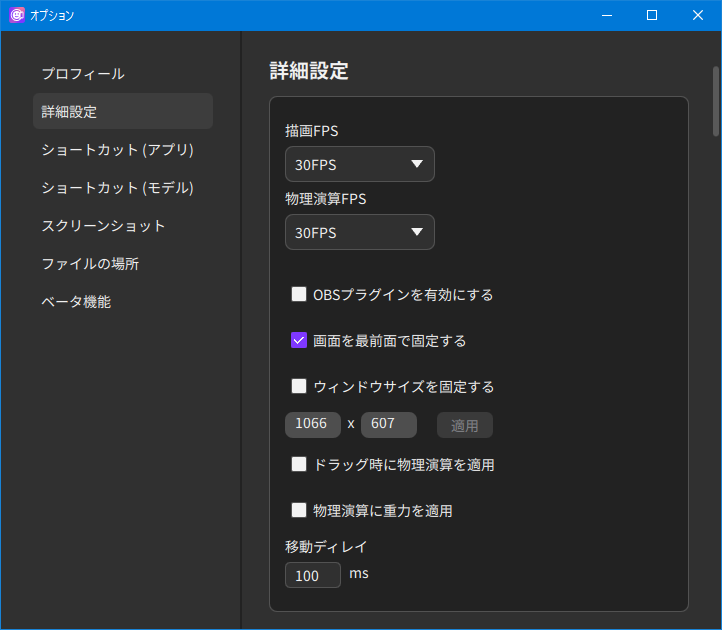
Let’s Stream Easily by Fixing the Window to the Very Front!
If you fix the window in the foreground using the optional setting, nizima LIVE will be displayed in front of other applications.
Instead of creating layers in OBS, create a simple layer structure on the desktop and make the background transparent for easy streaming.
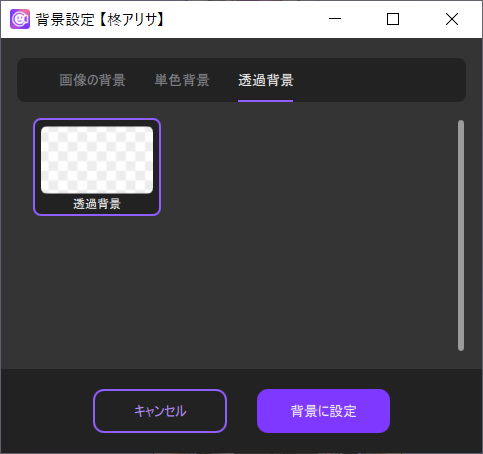
- 1. Select Transparent background from Background settings.
-
- 2. Select “Fix the window in the forefront” from the optional advanced settings.
-