How to Set Lip-sync
Updated: 11/06/2024
It is now possible to set mouth movements to be reflected in response to voice rather than camera.
Lip-sync is a feature that allows Live2D models to move in response to audio input from a microphone.
It is mainly used for mouth movements in Live2D models.
Even when the camera cannot pick up mouth movements well, the lip-sync function can be used to achieve more precise movements.
Notes
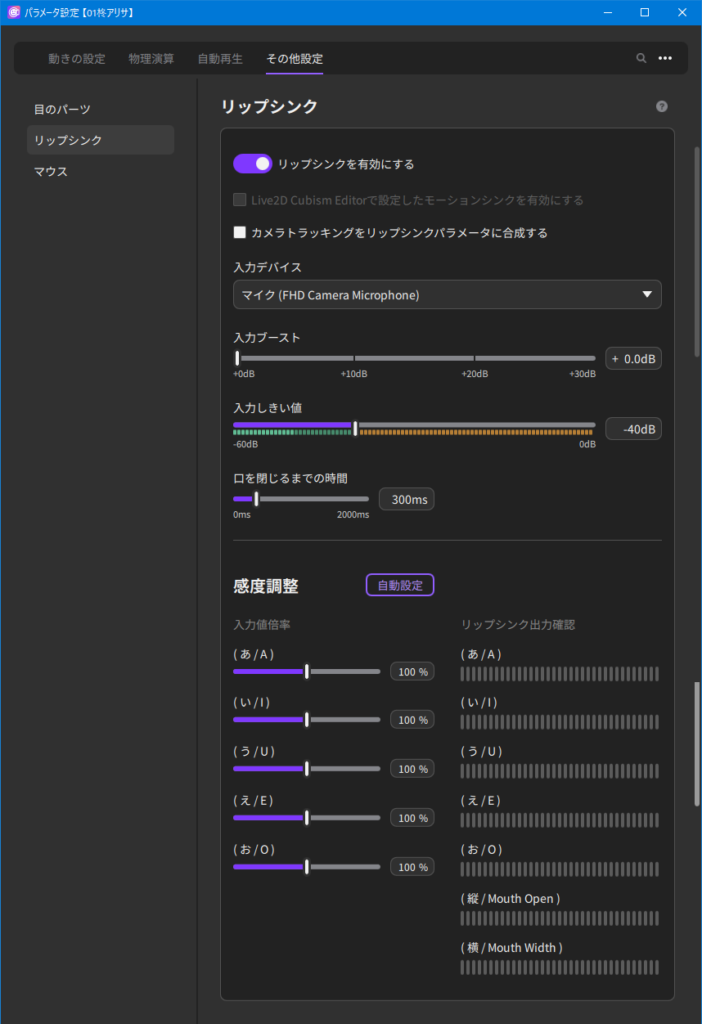
How to Use (Easy)
- 1. Turn on “Support lip-sync.”
- The parameters linked to “13. Mouth open/close motion” and “14. Mouth spread” in “Setting Motions” can be moved by voice.
- 2. Under “Input device,” select the microphone to be used.
- 3. While speaking, check the volume meter for the input threshold, and if it is low, adjust it with “Input boost.”
- 4. From the “Sensitivity adjustment” auto-setup button, make settings according to the display.
Note: If you want to cut noise such as environmental noise, adjust “Input threshold.” Audio volume less than or equal to the threshold will be ignored.
Note: Turn on “Composite camera tracking with lip-sync parameters” if you want the parameters linked to lip-sync to move the mouth with facial expressions when no sound is present, such as yawning or reaction without voice.
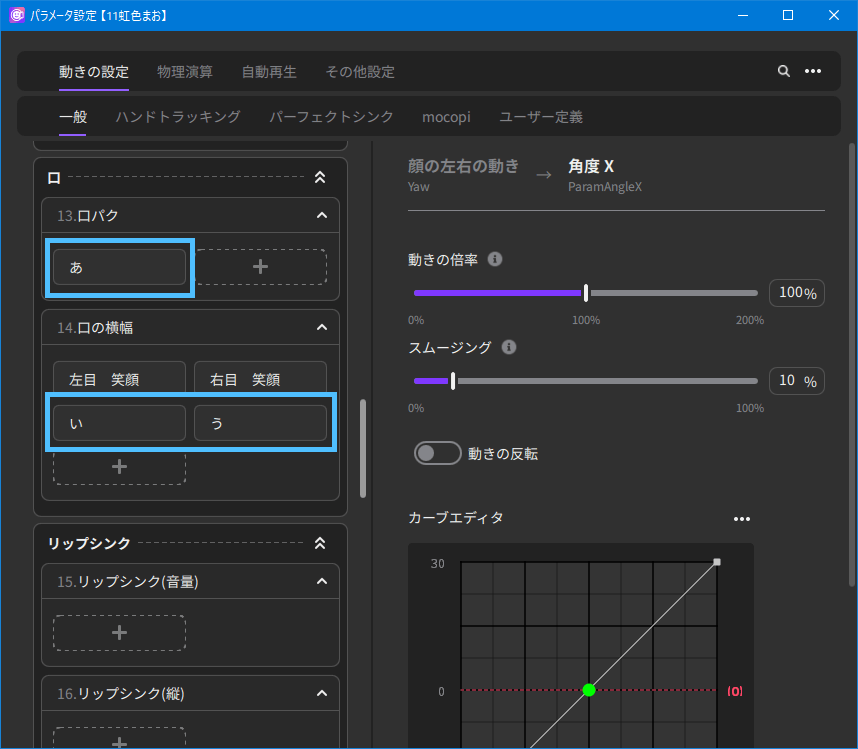
How to Use (Application)
If you want to make advanced settings, such as moving mouths of A, I, U, E, O created with Blend Shape to match vowels or controlling parameters by volume, you can manually adjust parameter links.
Here is an example of animating mouths of A, I, U, E, and O created with Blend Shape.
- 1. In the “Setting Motions” tab, unassociate the parameter you want to move for lip-sync from the tracking item currently associated with it by clicking the × button.
-
Example: Use the × button to unassociate the “A,” “I,” “U,” “E,” and “O” parameters associated with “13. Mouth open/close motion” and “14. Mouth spread.”
- 2. In the same “Setting Motions” tab, select the lip-sync item you wish to use, and then select the parameter you wish to link from the + button.
-
Example: Select the parameter “A” from the + button of “18. Lip-sync (A)” and press the Add button. This links the “A” movement of the Live2D model with the “18. Lip-sync (A)” movement. Set “19. Lip-sync (I)” and thereafter in the same manner.
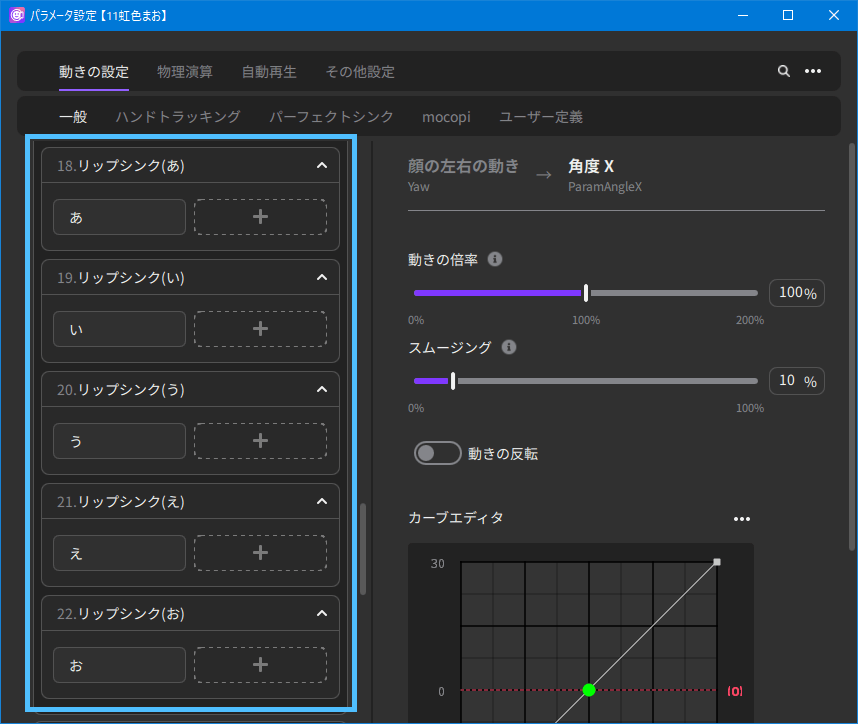
Configure the settings in the same way as in the procedure from step 2 of [How to Use (Easy)].