Link nizima LIVE with Your Streaming Software
Updated: 06/14/2024
To become a VTuber on YouTube or other video streaming sites using nizima LIVE, import the nizima LIVE screen into streaming software such as OBS Studio and stream the video. Here we will show you how to display nizima LIVE Live2D models on the streaming software OBS Studio.
Point
- The screenshots used on this page are taken from the OBS Studio software.
- The screens used on this page may differ from the latest version of the screen.
nizima LIVE offers a free plug-in for OBS. This plug-in enables the following operations.
- Output of multiple windows with transparency to OBS (Eliminates the need for the chroma key.)
- Output of nizima LIVE in minimized state to OBS
- Output of only the model, background, and FREE version logo to OBS (Eliminates the need to hide the menu bar. Also prevents the UI from being shown even when the model is changed during output to OBS.)
How to Install OBS Plug-in (First Time Only)
- 1. Download OBS Studio from the official OBS Studio website.
- 2. Get the nizima LIVE OBS plug-in installer using the “Download OBS plugin” button on the nizima LIVE download page.
- 3. Execute downloaded “nizimalive-obsplugin-●.●.●-Windows-Installer.exe” (●. ●. ● is the version name) to start the installer.
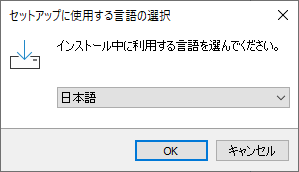
- 4. Select the language used for setup and press [OK].
-
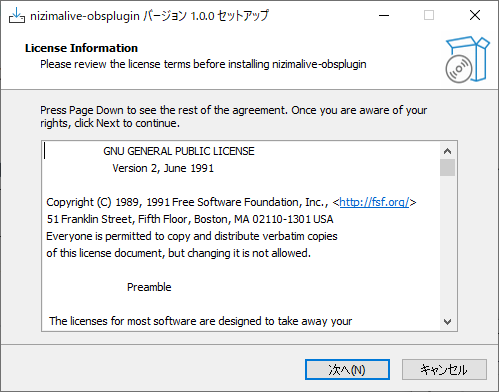
- 5. The Terms of Use will be displayed. After confirming the contents, click [Next].
-
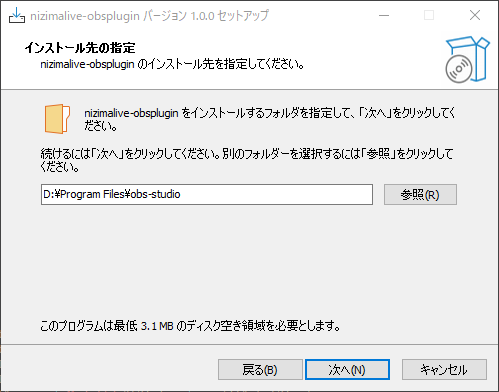
- 6. Specify the installation destination folder. If you have no particular preference, please click [Next] without making any change.
Notes
Be sure to specify the folder where OBS Studio is installed. If you select any other folder, this installation will not be reflected in OBS Studio.
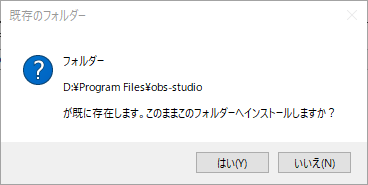
- 7. A window confirming installation into an existing folder will appear. Press [Yes] without making any change.
-
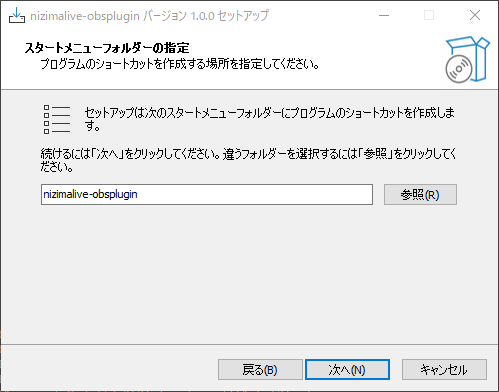
- 8. Specify the start menu folder. If you have no particular preference, please click [Next] without making any change.
-
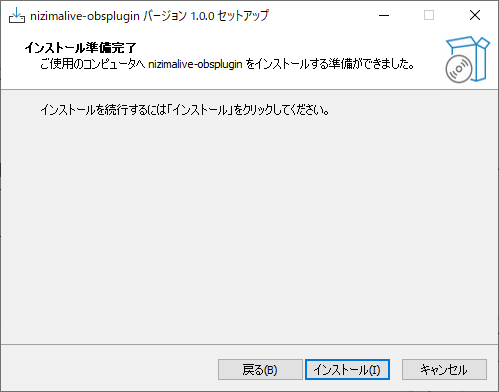
- 9. Press [Install].
-
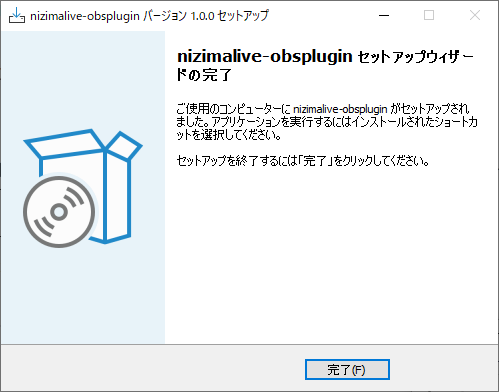
- 10. Press [Done].
-
- 11. Start nizima LIVE and press [Settings/Other] > [Option].
-
- 12. Check the [Enable OBS plugin] checkbox.
-
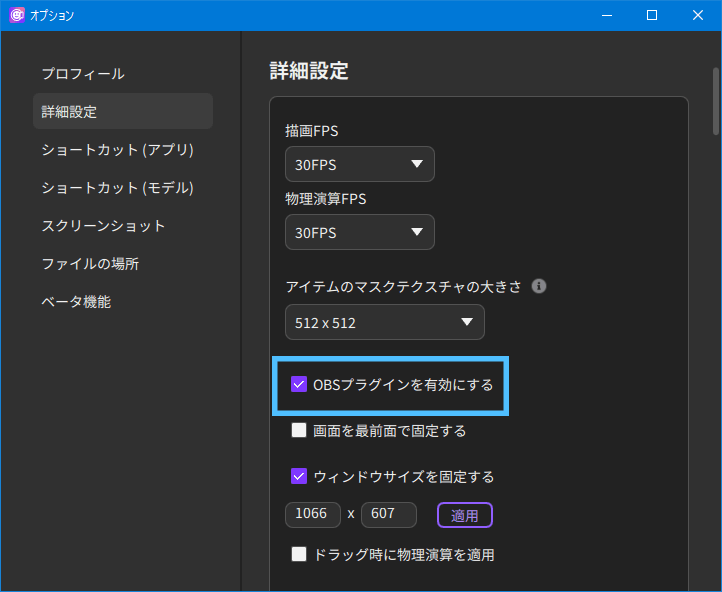
- 13. Restart nizima LIVE or reopen it in a new window.
How to Display a Live2D Model with Transparent Background Using the OBS Plug-in
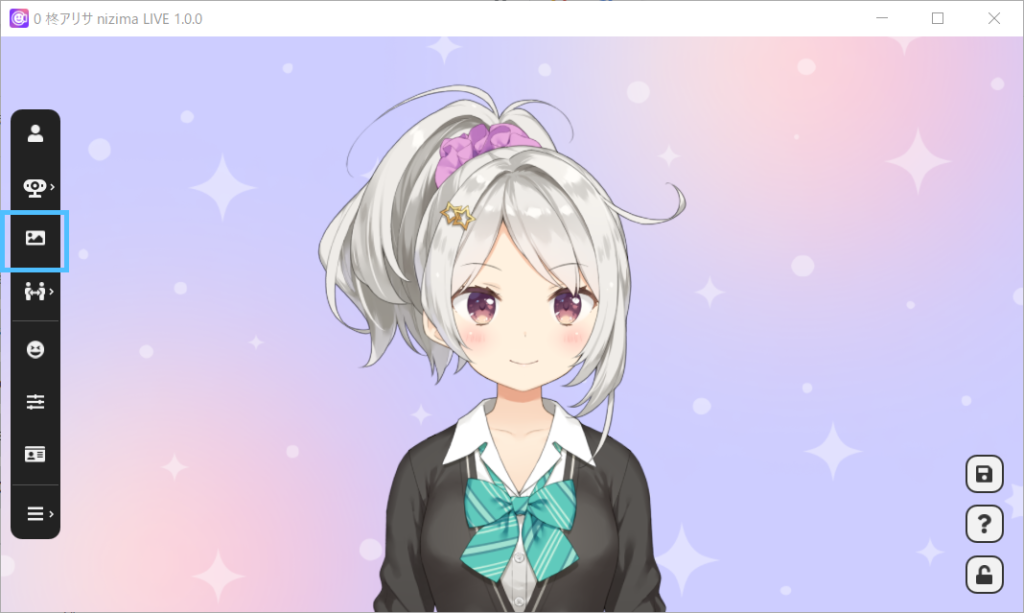
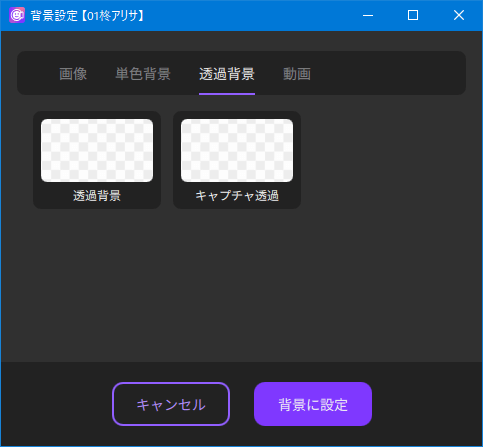
- 1. Open nizima LIVE and display the Live2D model you wish to use for streaming from “Model list.”
- 2. Set the background to transparent by selecting “Background settings” > “Transparent background” > “Set as background.”
-
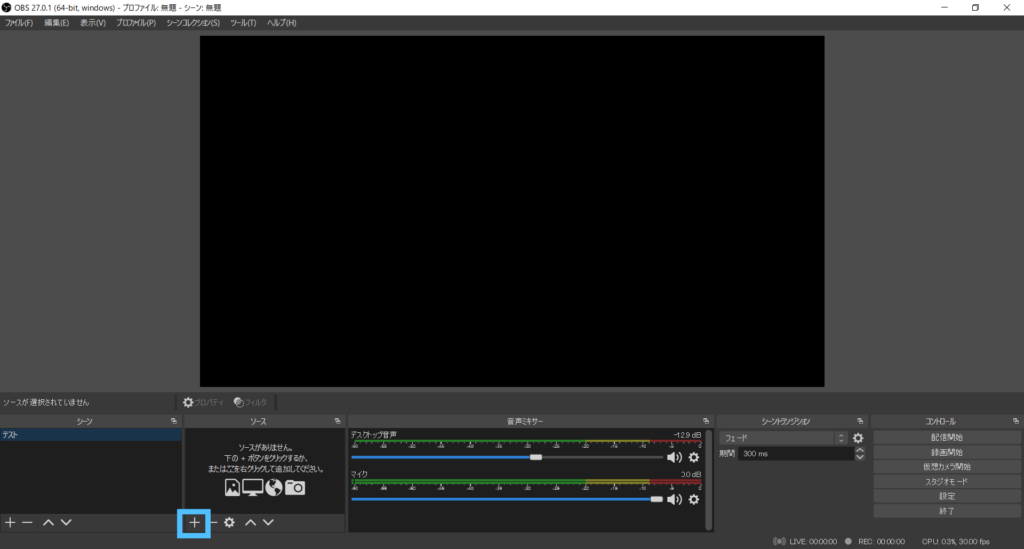
- 3. In OBS Studio, click “+” > “nizima_LIVE” under “Source.”
-
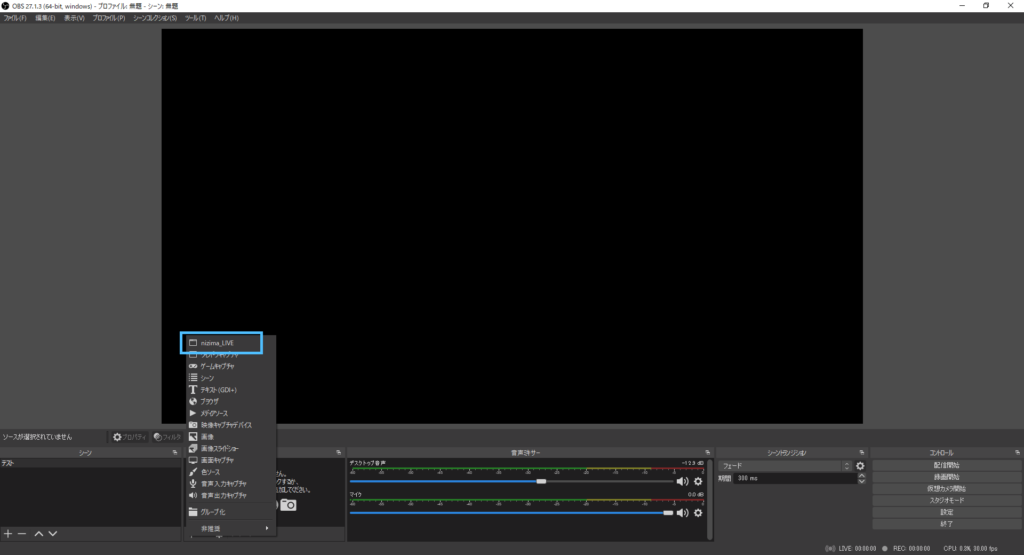
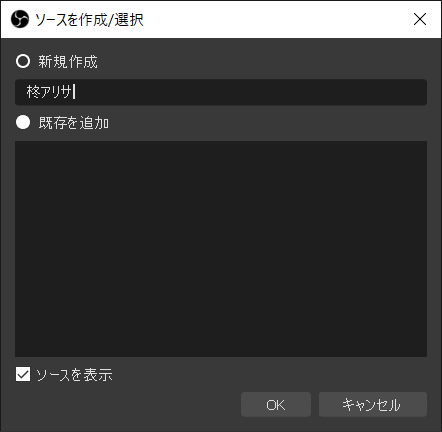
- 4. The “Create/select source” window will appear. If you want to display multiple models, change the names to the model names, etc. for easy identification, and click OK.
-
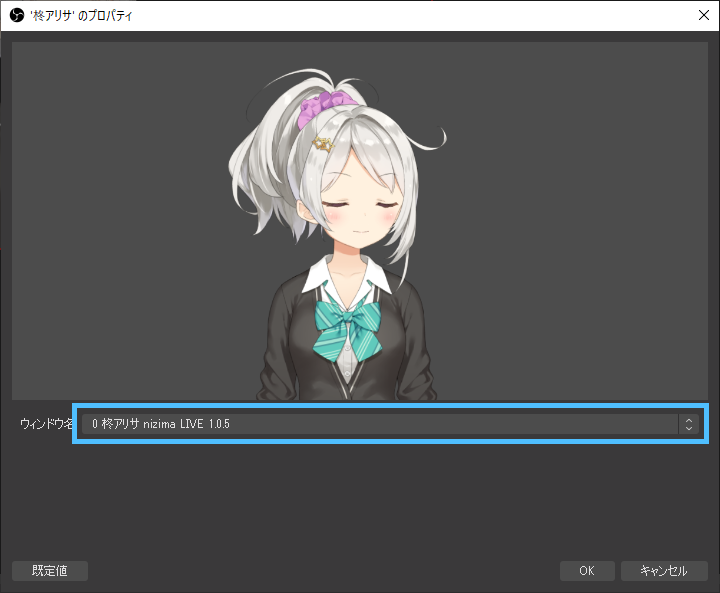
- 6. The Property screen appears. Under “Window name,” select the window of the Live2D model you wish to display and click OK.
-
- 8. A new source has been added.
-
When you want to display multiple models for collaborative streaming, etc., repeat the same operation from step 1.
To resize the window: Drag the red ■ to zoom in or out.
To cut unnecessary areas: alt key + drag the red ■ to adjust.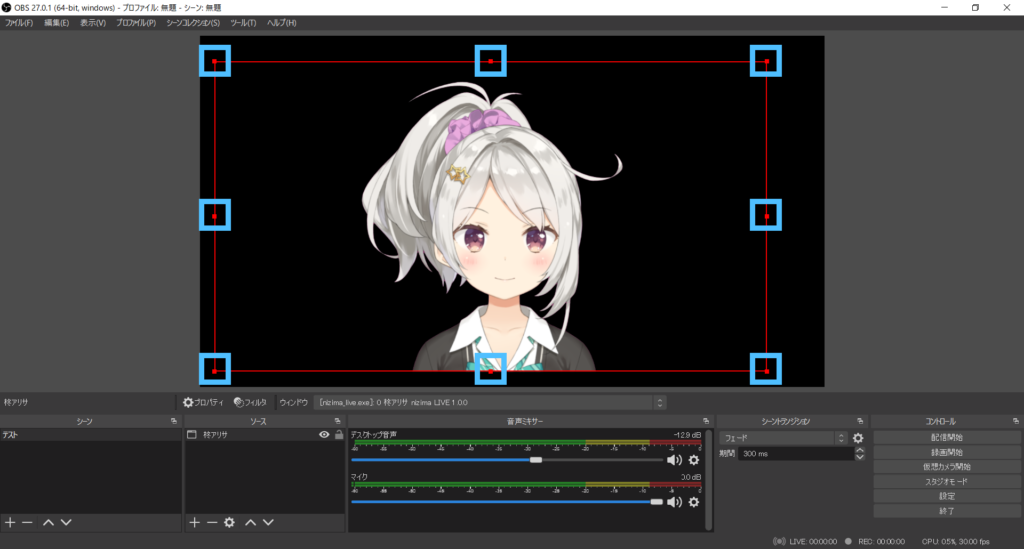
This is how to display nizima LIVE models on OBS. For other information on how to stream on various video streaming sites and for use with conference tools, please refer to each service’s website.
Manual Uninstallation of OBS Plug-in
If you have uninstalled the OBS plugin but can still select nizima LIVE in OBS, please remove the following.
- nizimalive-obsplugin folder in C:\Program Files\obs-studio\data\obs-plugins
- nizimalive-obsplugin.dll file in C:\Program Files\obs-studio\obs-plugins\64bit
If the installation location of OBS Studio is different, please replace C:\Program Files\obs-studio with the installation location.