Connecting with nizima LIVE (PC)
Updated: 07/11/2023
- 1. Connect the PC and iPhone to the same Wi-Fi.
- 2. Open nizima LIVE (PC).
- 3. From the menu on the left of the main window, open [Camera settings] and click [Mobile settings].
-
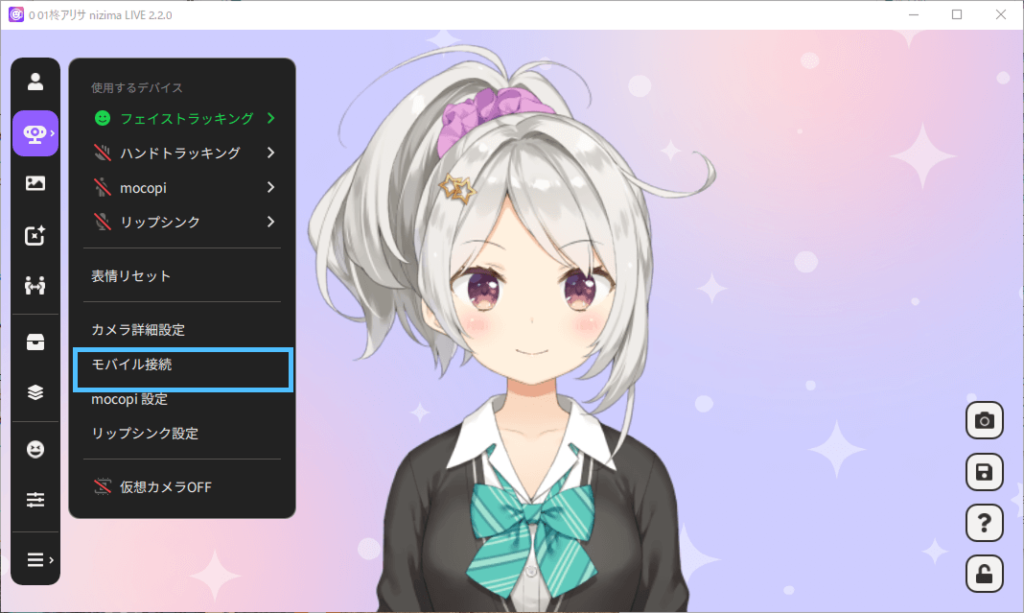
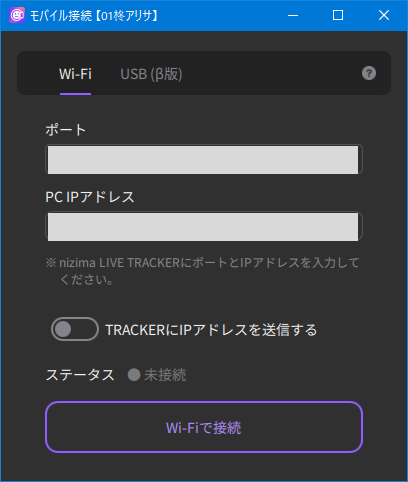
The following window appears in nizima LIVE (PC).
- 4. Leave the above window displayed in nizima LIVE (PC) and open nizima LIVE TRACKER (iPhone).
- 5. Tap the menu button in the lower-right corner.
-

The menu is displayed.
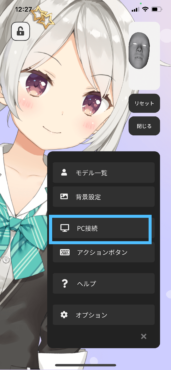
- 6. Tap [PC Connection].
-
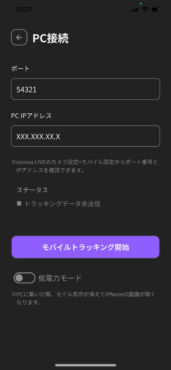
The PC connection settings screen is displayed.
The following explanations involve both this screen and the nizima LIVE (PC) screen prepared in step 3.
- 7. Enter the “Port” and “PC IP Address” displayed on the nizima LIVE (PC) side into the nizima LIVE TRACKER (iPhone) app.
- 8. Tap [Start mobile tracking] in nizima LIVE TRACKER (iPhone).
- The [Status] changes to [Sending tracking data].
- 9. Click [Connect] in nizima LIVE (PC).
-
When [Status] changes to [Connected], the connection is complete.
The following four statuses are possible.
- Not connected (gray): Connection has not been initiated.
- Waiting for connection (yellow)—Still trying to connect *Changed to a connection error if it continues for 30 seconds.
- Connected (green): Successfully connected
- Connection error (yellow): Waiting for connection continues for more than 30 seconds.
Common Causes of Connection Errors
- PC and iPhone are not connected to the same Wi-Fi
- Network settings are set to public (may be improved by changing to private).
- Security software is blocking the connection between the PC and the iPhone (may be improved by reviewing the security software settings).
- Firewall is blocking the connection between PC and iPhone (may be improved by reviewing firewall settings)
- Unable to obtain IP address
- There is a problem with the line. The line speed is slow.
Was this article helpful?
YesNo