How to use the plug-in function
Updated: 10/07/2025
Click here for information for developers.
Plug-in download procedure
Plug-ins provided by the nizima LIVE official can be downloaded in the application.
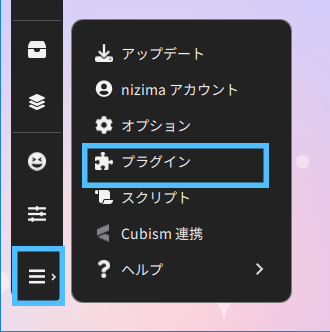
1. Click Settings/Other -> Plug-ins.
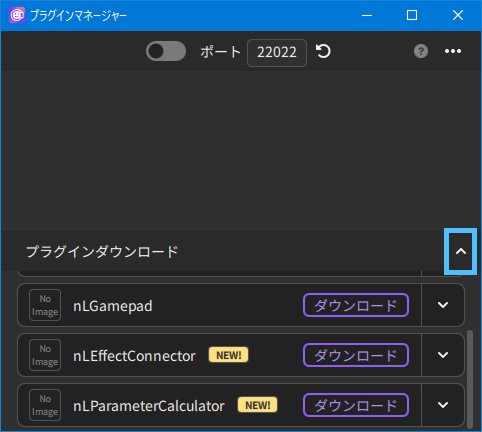
2. After the Plug-in Manager starts, click the v button to the right of the plug-in download in the lower part of the screen to download a plug-in.
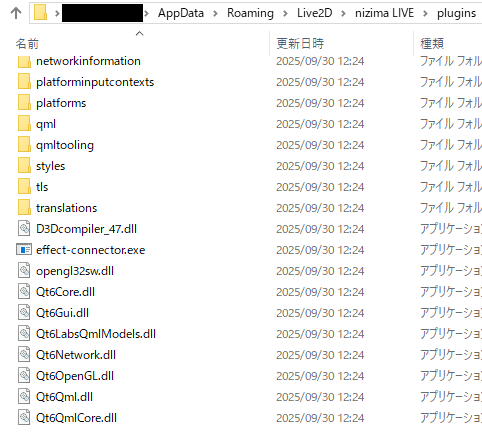
3. When the download is complete, the folder will automatically open. Open the exe file to start the plug-in.
If the download is an installer, install and run the plug-in.
Procedure for downloading plug-ins from Github
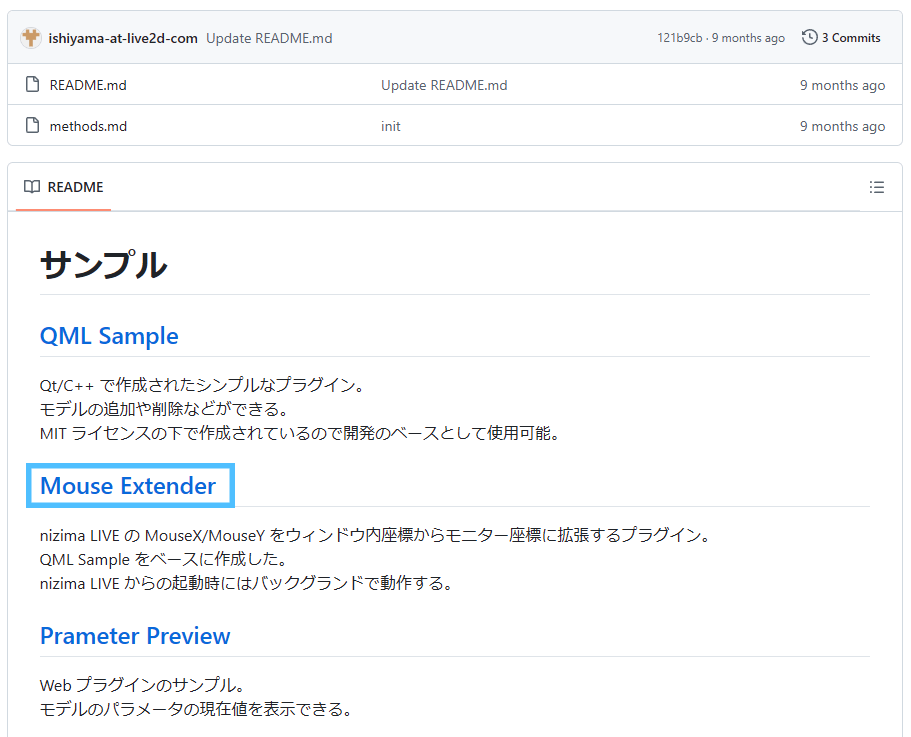
1. Download the sample plug-in from GitHub.
Select “Mouse Extender.”
2. Select “Mouse Extender 1.0.0” in Releases on the right side of the screen.
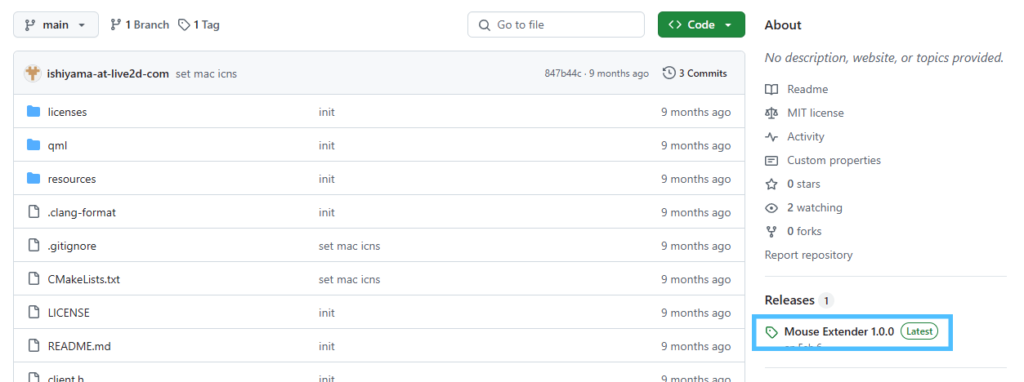
3. Download mouse-extender-X.X.X.zip, or mouse-extender-X.X.X-macOS-Apple.dmg for mac.

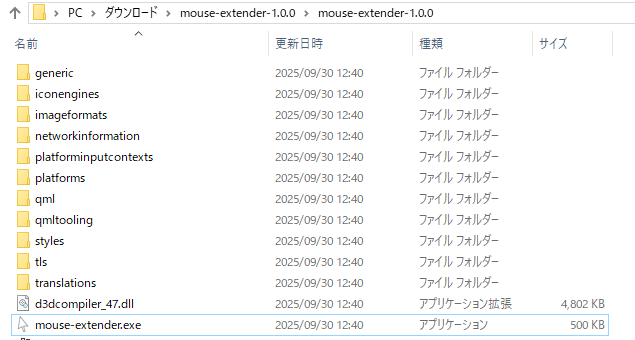
4. Unzip the downloaded folder and open the exe file to start the plug-in.
How to connect plug-ins
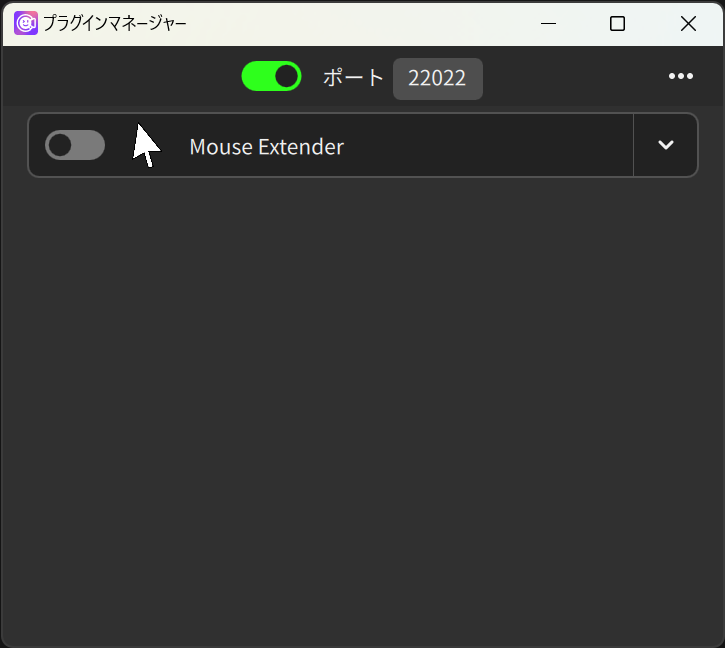
1. Click Settings/Other -> Plug-ins.
2. After the Plug-in Manager starts, use the toggle at the top of the screen to enable the plug-in function.
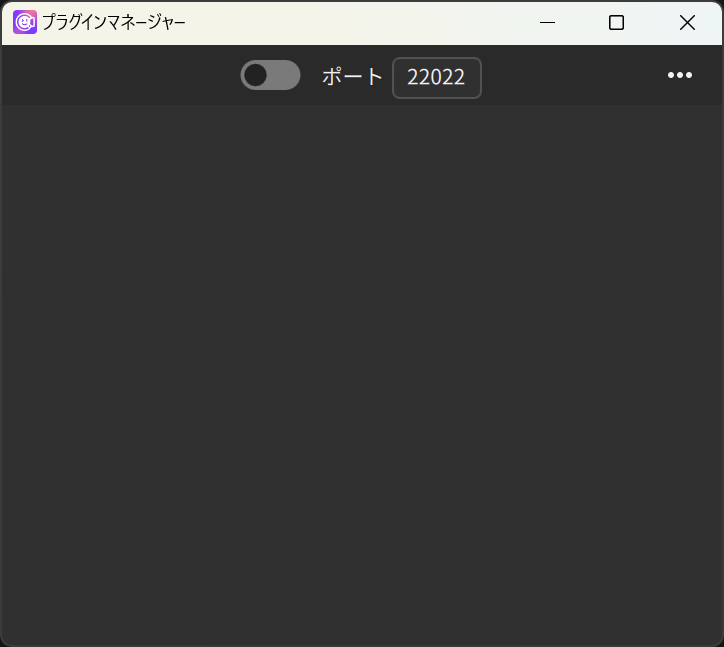
To enable communication, the port number must be the same for nizima LIVE and the plug-in.
If the configured port number is not available, the port is automatically changed to one that is available.
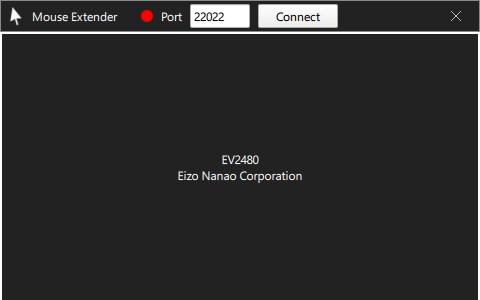
3. Start the plug-in and connect with Connect.
4. The plug-in will be added to the Plug-in Manager on the nizima LIVE side.
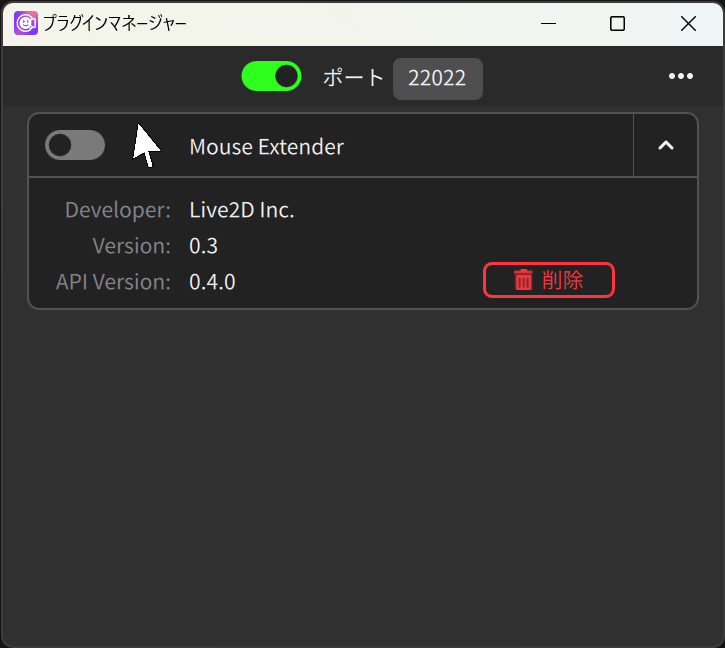
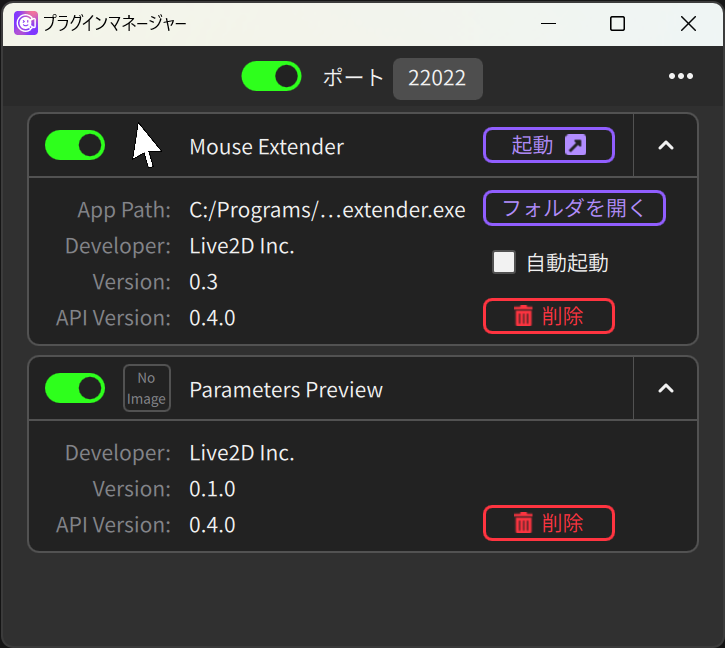
Clicking ∨ on the right side of the screen opens a panel that displays the details of the plug-in.
If you wish to remove a plug-in, you can delete its registration by clicking the Delete button.
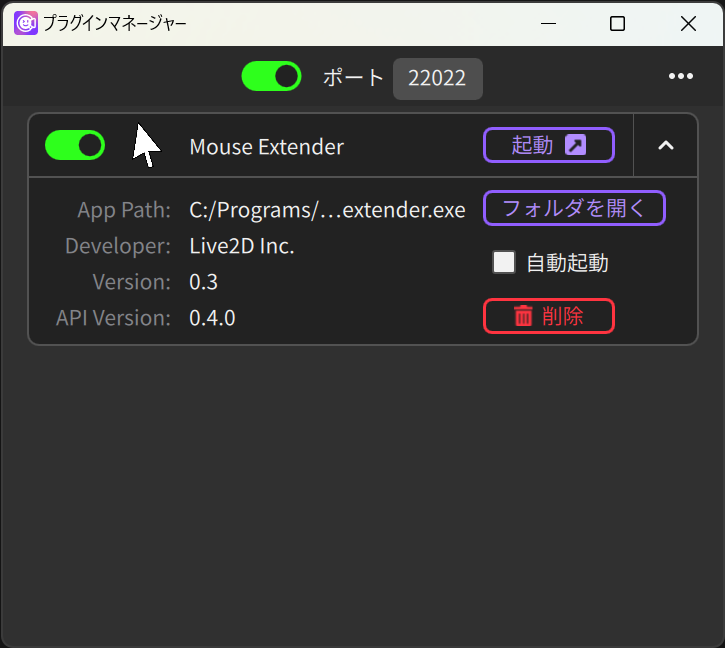
5. Activate the plug-in with the toggle on the left side of the screen.
The first time you perform this operation, you will see a pop-up window as shown in the figure. Confirm that the plug-in is the one you intended to use, and then activate it.

When the plug-in is activated, the toggle turns green and the plug-in function is available.
For plug-ins that can be started from nizima LIVE, the display is added as shown in the figure.
Notes
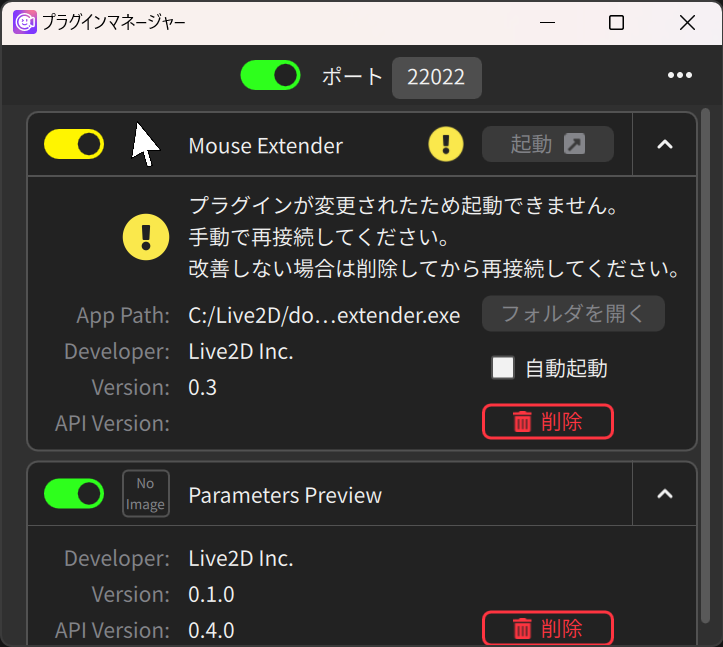
- When the plug-in is closed, the toggle turns yellow.
- When the plug-in is connected again, the toggle will return to green and the plug-in will be available immediately.
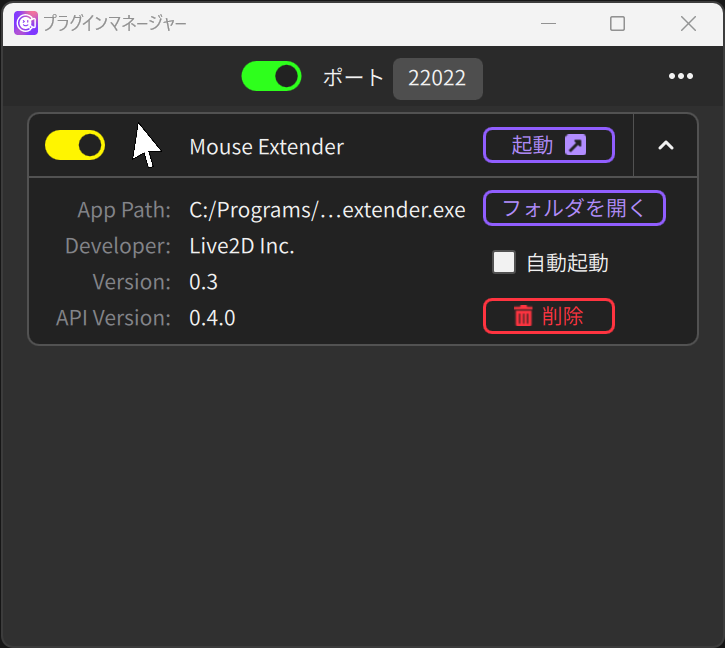
If the toggle is turned off, the plug-in will be disabled and the function will not be available.
Starting the plug-in from nizima LIVE
The display is different for plug-ins that can be started from this software (top) and those that cannot (bottom).
For plug-ins that can be started from this software, the left side shows the path to the plug-in, and the right side shows some additional functions.
1. With the plug-in disconnected, press Start to activate the plug-in.
Click Open folder to open the parent folder of the plug-in.
If you select the Auto start checkbox, the plug-in will start automatically when nizima LIVE starts or when the plug-in function is enabled.
Notes
If a plug-in is changed, such as by being moved or updated, the Start button will be disabled. In this situation, the plug-in will not be able to start and will not start automatically.
Reconnect the plug-in manually to enable it to once more be started from nizima LIVE.
If you still cannot use the plug-in, delete the registration with the Delete button and try connecting the plug-in again.
How to download and use the color change plug-in
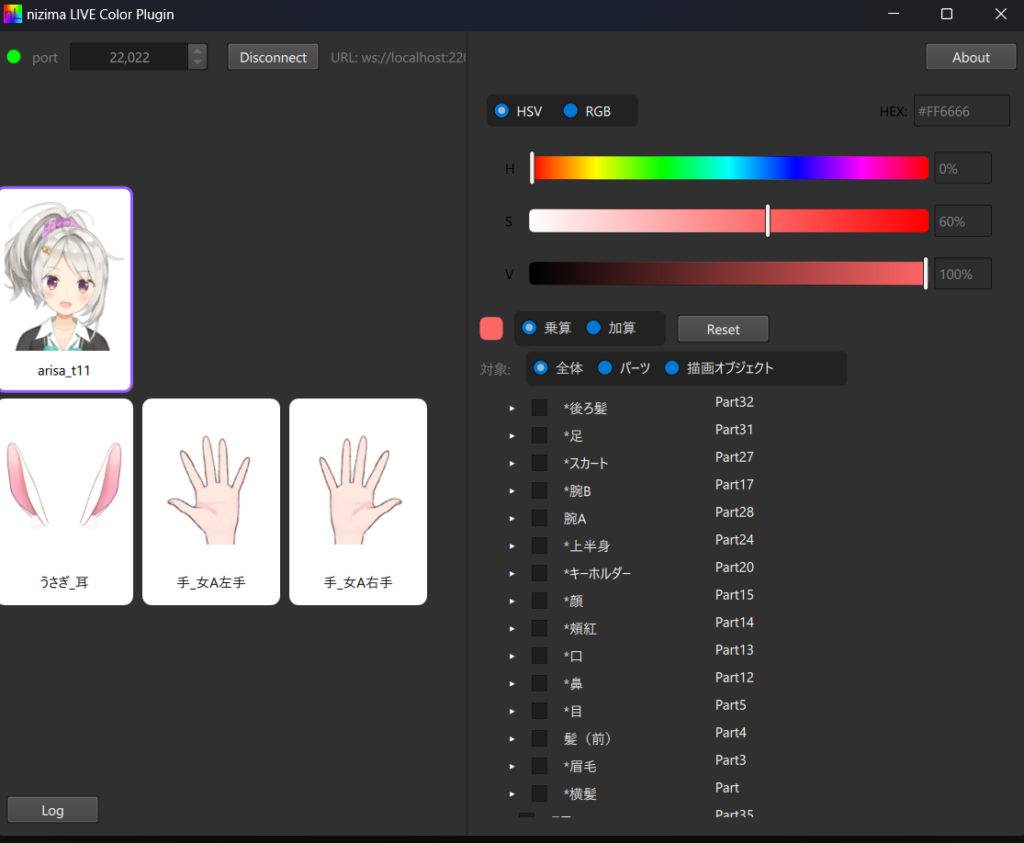
| Port | Changes the port number. |
| Connect button | Connects to nizima LIVE. If a connection has already been established, it is disconnected. This button turns green when a connection is possible. |
| Model and item list | Lists the currently displayed model and items. |
| Log button | This button is mainly for developer use. Click it to see the communication of the plug-in. |
| Color designation sliders | You can specify the color with these sliders or a hexadecimal value. |
| Multiply/Add | Changes the method of combining the specified colors. |
| Reset button | Initializes the color of the model. |
| Target | Select All, Part(s), or Drawable Object. For Part(s) and Drawable Object, only those items in the tree below whose check boxes are selected are enabled. |
| About button | Displays the version and other information. |
How to download and use the gamepad plug-in
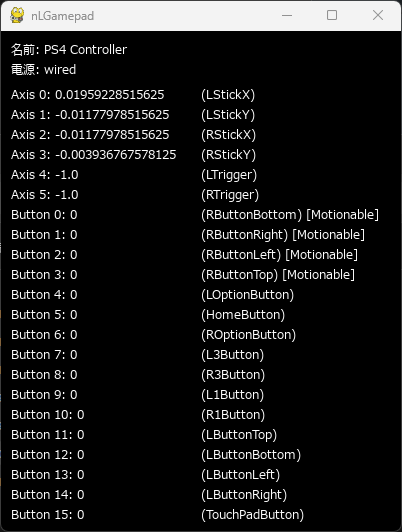
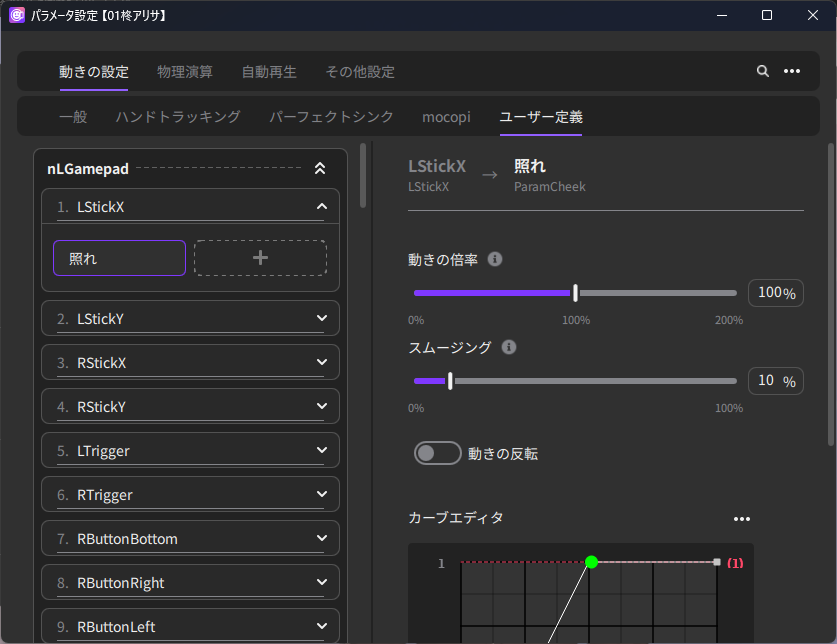
| Name | Displays the name of the connected controller. |
| Power | Displays the controller connection status. |
| Various parameters (Axis 0, LStickY, etc.) | Displays the names of user-defined parameters that are automatically added to nizima LIVE. Once the model parameters are associated with the automatically added parameters, the model will move according to the controller’s input. Since the number of Axis 0, Button 1, etc. varies depending on the controller hardware, we recommend using generic parameter names such as LStickX and RButtonRight in parentheses. Generic parameters marked with [Motionable] can perform the motion of the same name. If you set the “Display name” of a motion to “RButtonBottom” in the Expression/Motion window of nizima LIVE, that motion will automatically start when the button is pressed. After setting the display name, the plug-in needs to be reconnected, so either turn the plug-in on or off from the nizima LIVE plug-in window, or restart the plug-in. |
Tracking value blend plug-in
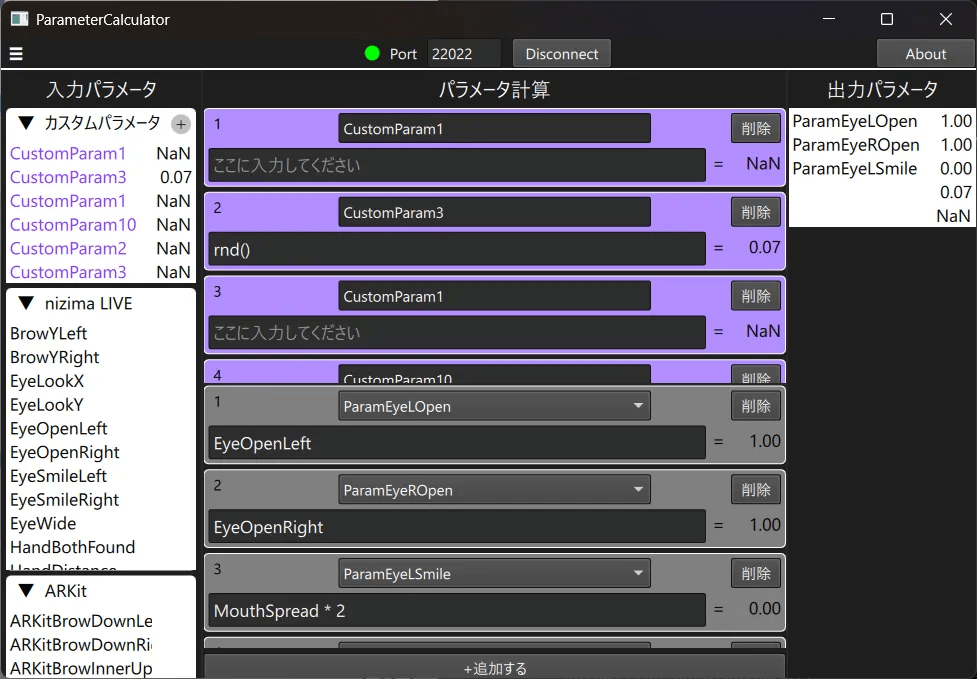
Multiple pieces of tracking data can be entered into the calculation field and the results can be linked to model parameters.
The results of a calculation can be left as new input values (custom parameters) and used as input values for another calculation.
The created settings can be exported and loaded as a json file.
| Connect/Disconnect | Turns ON/OFF the connection with nizimaLIVE. |
| Input parameter column | The parameter IDs that can be used for input values are displayed in a toggle list for each source. Press the + button next to “Custom parameter” to add custom parameters. |
| Parameter calculation column | The parameter link settings are listed. The purple background settings are for custom parameters and the gray background settings are for output parameters (parameters of the model). |
| Combo box | Specify output parameters. This is the list of Cubism parameters for the first model found upon connection. |
| Text input area | Set the input value. The parameter IDs in the input parameter column will appear as autocomplete options. Multiple IDs can be used. In addition to IDs, four arithmetic operations and some functions, such as max(x, y) and sqrt(x), can be used. |
| Add | Adds a row for parameter linking. If you added a row by mistake, you can remove it by clicking the Delete button on the row you added. |
| Delete | This button deletes the parameter link for the row in which the button appears. Parameter link deletion cannot be undone. |
| Output parameter column | Displays output parameters on the basis of the links created in the parameter calculation column. |
Top left menu
- Save as
- Exports the parameter settings you have created.
- Import from file
- Imports the parameter settings you have created.
- How to use
- Displays instructions on how to use this plug-in.
Effect linking plug-in
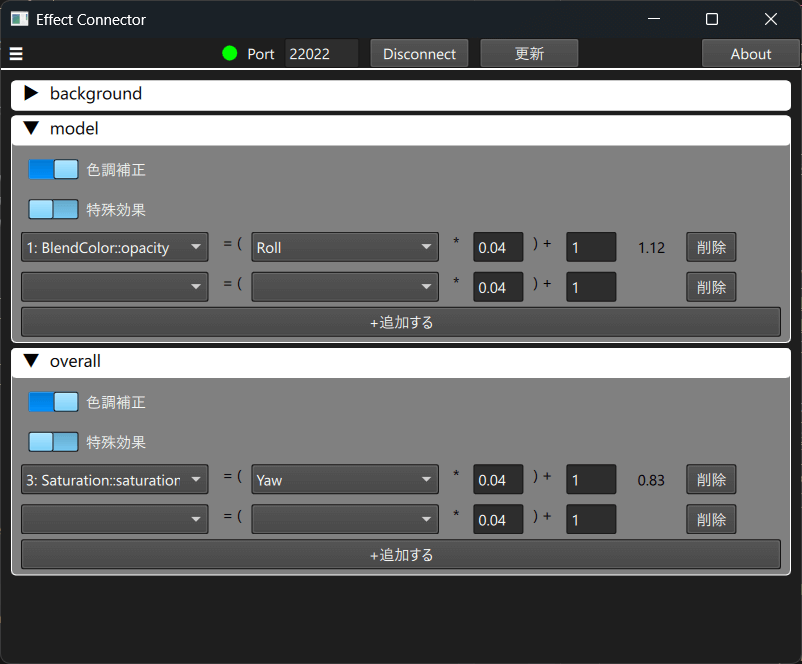
You can link a single piece of tracking data to an effect parameter to change the appearance of the effect when the tracking changes.
Effects can be turned on and off from the plug-in side. The adding and deleting of effects are not supported.
The created settings can be exported and loaded as a json file.
| Connect/Disconnect | Switches the connection to nizima LIVE. |
| Update | When an effect is added on the nizima LIVE side, the plug-in does not yet recognize the parameters of the added effect. Click this button to synchronize the plug-in with the current nizima LIVE effect parameters. |
| Add | Adds a row for parameter linking. If you added a row by mistake, you can remove it by clicking the Delete button on the row you added. |
| Delete | This button deletes the parameter link for the row in which the button appears. Parameter link deletion cannot be undone. |
Top left menu
- Save as
- Exports the parameter settings you have created.
- Import from file
- Imports the parameter settings you have created.