How to install/start the software
Updated: 11/06/2024
How to Install nizima LIVE
First, please obtain the nizima LIVE installer from the download page.
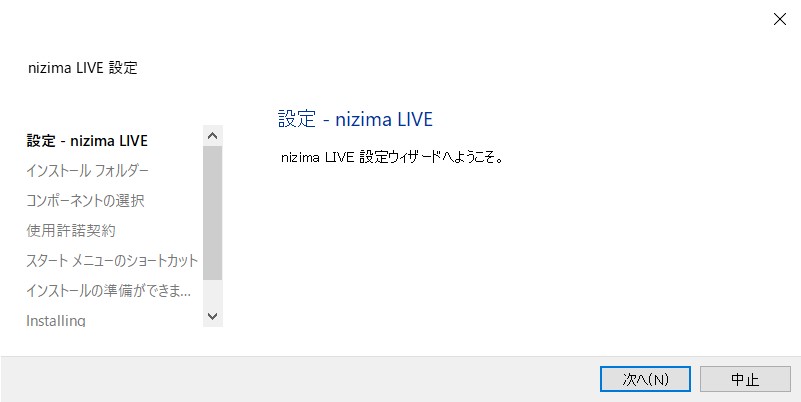
- 1. Execute the downloaded nizimaLiveSetup.exe to launch the installer.
- 2. Follow the prompts and press [Next].
-
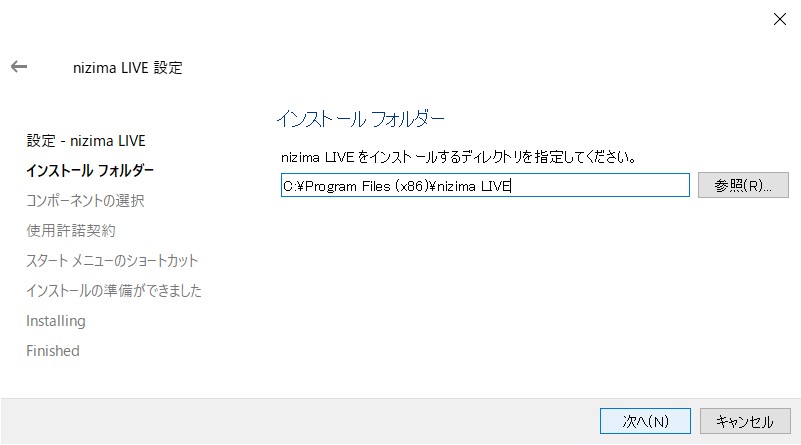
- 3. Specify the installation folder and click [Next].
-
Notes
- It is not possible to install in an existing folder, so please create a new folder by entering the name of the folder you wish to install in. If you have no particular preference, click [Next] without making any change (a new folder named “nizima LIVE” will be created).
- If the path to the installation folder contains Japanese characters, the program will not start properly. If your Windows user name is Japanese, please specify a location where the path does not contain your user name.
- All the contents of the newly created folder will be deleted when nizima LIVE is uninstalled, so do not put other files in the newly created folder afterwards.
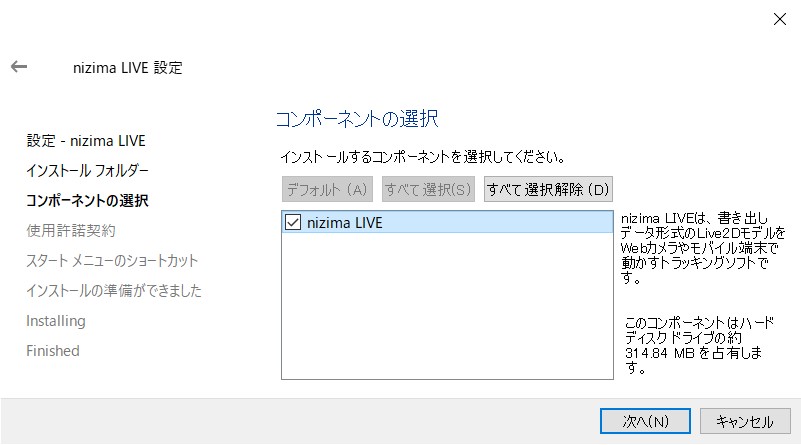
- 4. Press [Next].
-
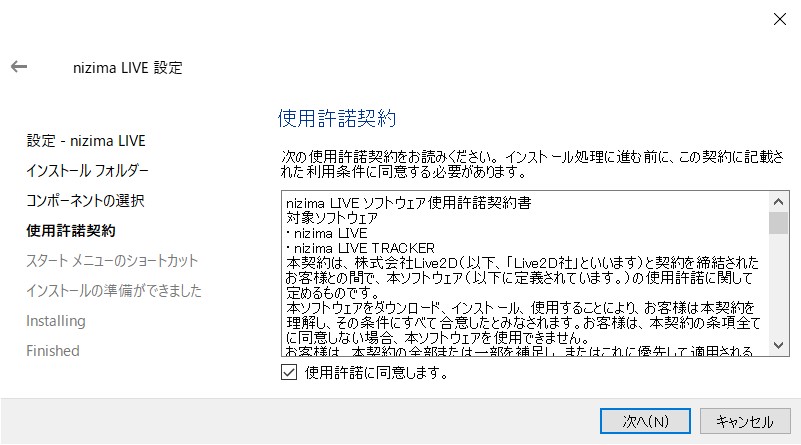
- 5. Please read the software license agreement carefully. Select “I agree to the software license agreement.” and press [Next].
-
- 6. Press [Next].
-
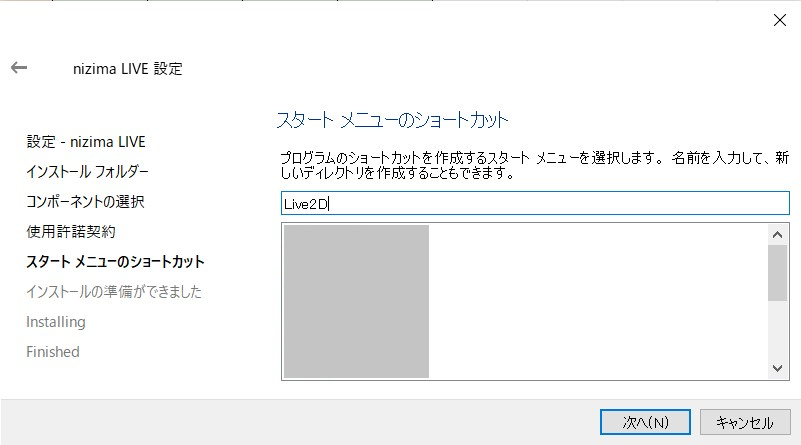
- 7. Press [Install].
-

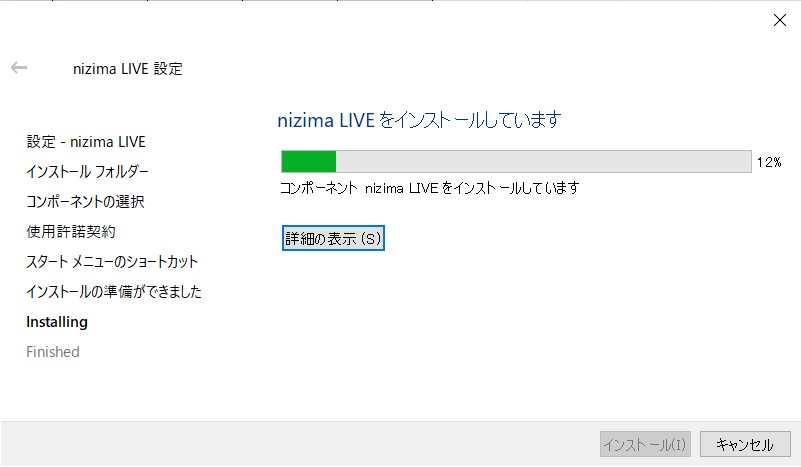
- 8. The installation will begin. Please wait.
-
- 9. Press [Done].
How to Start nizima LIVE
From the “Start Menu,” click on the icon with the name you specified during installation.
If you cannot find the shortcut, execute “nizima_live.exe” in the “installation folder.”
Notes
At startup, if you receive the error saying that “The code execution cannot continue because VCRUNTIME140_1.dll is missing.” downloading and installing “Visual C++ Redistributable Package for Visual Studio 2015, 2017, and 2019” may solve the problem.
After startup
After startup, a login screen to your nizima account will appear.
To use nizima LIVE, you need to register for a nizima account even if you are on a free plan.
If you do not have an account, create it by referring to [nizima account] Let’s sign up!
Explanation of Screens
See the page below for an explanation of each screen and feature.
Tutorials
Please see the following page for instructions on how to add Live2D models, how to connect to an iPhone, and how to use the system for different purposes.