Let’s make a model introduction video
Updated: 11/11/2025
There are model introduction videos posted on social networking and video posting platforms using tags such as #Live2DShowcase.
In this article, we will explain how to create such a video using the Cubism AE plug-in.
The Cubism AE plug-in allows you to display Cubism models and handle motion directly in Adobe® After Effects® software.
For more information, see “About AE plug-in” in the Editor manual.
Tips
Why don’t you use nizima ACTION!! for your model introduction video?
nizima ACTION!! is Live2D’s official online video editor that allows you to directly import Live2D models for video production.
In addition to the ability to move models in real time and fine-tune parameters through nizima LIVE linkage, this online video editor offers a full range of templates and illustration materials for Live2D Showcase, making it easy to create high-quality model introduction videos.
Be sure to use this editor, which we are currently offering free of charge.
Try nizima ACTION!! now (free of charge) ➭ Official website
Click here for more information on how to create Live2D Showcase videos using nizima ACTION!! ➭ [Easy with Templates] How to create a Live2D Showcase
Advance preparation
Exporting data for embedded use
Export the necessary data for embedding from Cubism Editor.
For information on how to export, see “Data for embedded use” in the Editor manual.
Live2D models can also be obtained from the following sites.
- Purchase at markets such as nizima.
- Download a model from the Live2D sample data collection.
TIPS
Align the frame rates of motion files and compositions.
Download the Plug-in
Download and install the Cubism AE plug-in from the following site.
AE (After Effects) plug-in download
Project preparation
Create an empty Adobe After Effects project.
In this example, the version is 24.3.
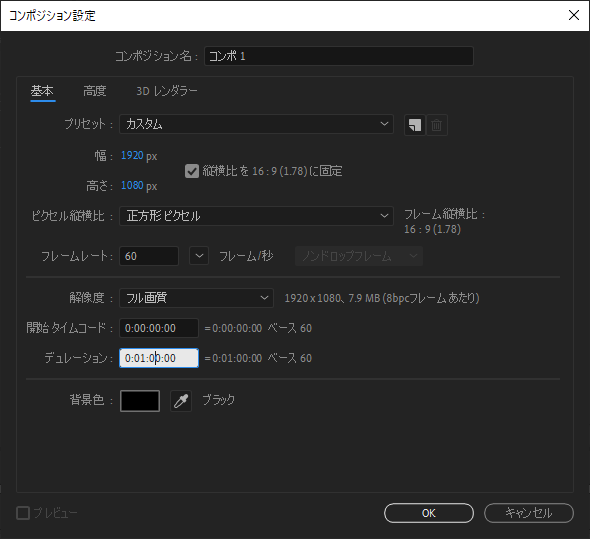
Next, create a new composition.
- Size: 1920 x 1080 px
- Frame rate: 60 fps
- Duration: 1 minute
Importing and displaying models
Once composition creation is complete, continue with importing the model for embedded use.
For detailed instructions, see “Model Display” in the Editor manual.
Editing model parameters in After Effects
Create the following movement in After Effects.

Keyframes can be edited from any of the following.
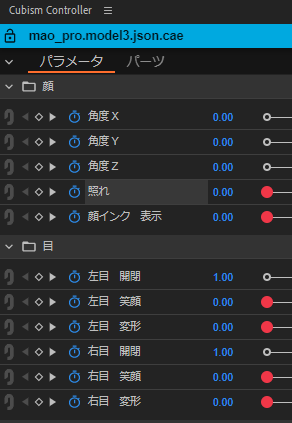
Cubism Controller panel:
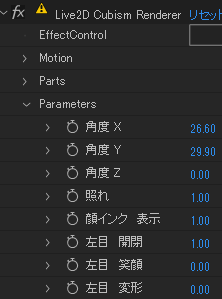
Effects control panel:
Timeline panel:

TIPS
For more information about the Cubism Controller panel, see “About the Cubism Controller” in the Editor manual.
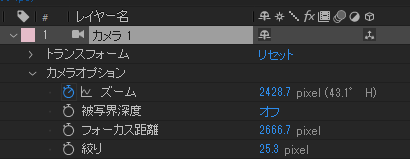
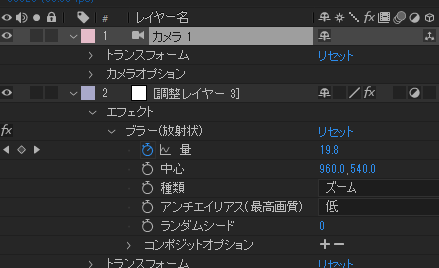
The “Zoom” parameter of the camera layer is used for the areas where the camera gradually approaches.
The last blur is expressed by applying a “blur (radial)” effect using an adjustment layer.
Applying expressions to model parameters
Be careful when using expressions with the Cubism AE plug-in.
For more information, see “About expression” in the Editor manual.
Model parameters can use expression as well as “Rotation” and other parameters in transforms.
The rhythmic movement at the beginning of the video is controlled by the “Body rotation Y” parameter and the “Breath” parameter using expressions.

For movement, the “Transform/Position” parameters are controlled by keyframes.
Applying motion
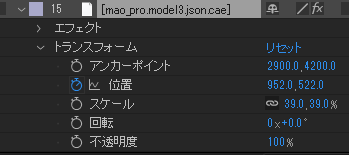
By reading the .motion3.json file, motion data can be applied to keyframes in the model.
For more information, see “Import and Export Motion” in the Editor manual.
Motion data is imported as keyframes, which can be edited in After Effects by overwriting values or adding new keyframes.

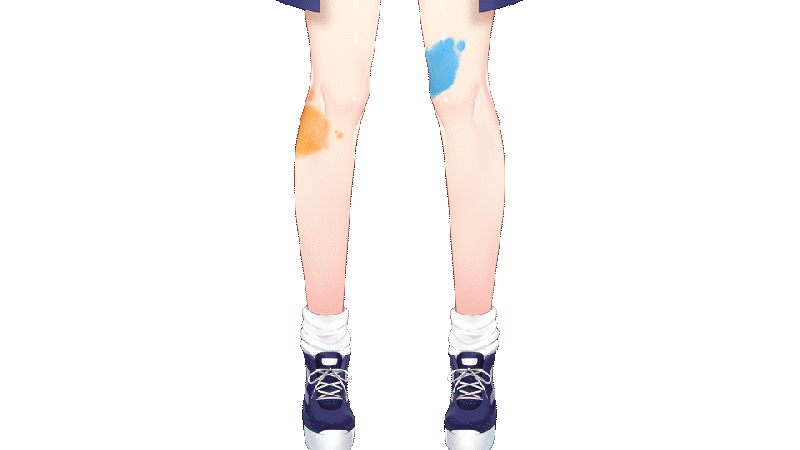
This scene uses the “mtn_02” motion of the sample model “Nijiiro Mao.”
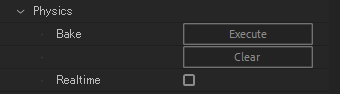
Physics baking
When you have finished applying motion, click [Live2DCubismRenderer / Physics] in the Effects Control Panel and then the [Execute] button under [Bake].
This allows the results of the model’s physics calculations to be baked in as keyframes.
Without physics baking

With physics baking

For more information, see “Physics” in the Editor manual.