Camera Settings
Updated: 06/18/2025
Click the Camera settings icon to display the following screen.
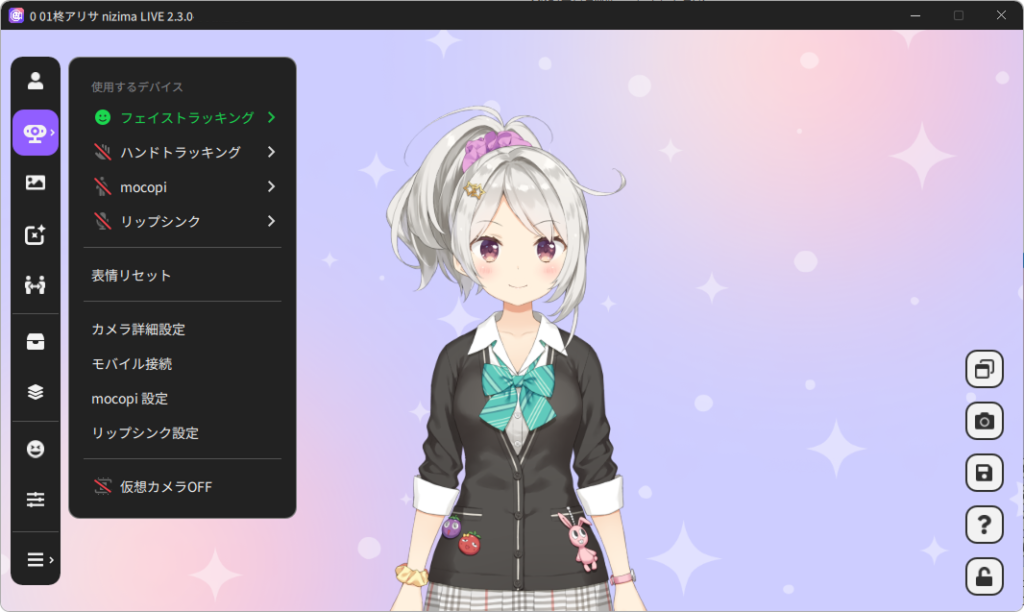
- Face tracking
- Select the webcam to be used to animate the Live2D model.
Once a webcam is selected, the selected camera will be selected by default the next time.
Select here also the connected TRACKER camera, the collaborator’s camera, and the mobile camera to which you want to assign movements to the Live2D model. - Hand tracking
-
Select the webcam to be assigned to hand tracking.
- mocopi
- Select the device to be used in the mocopi linkage.
The device to be selected needs to be connected in the mocopi settings. - Lip-sync
- Select the microphone to be used when the lip-sync is turned on.
- Mobile connection
-
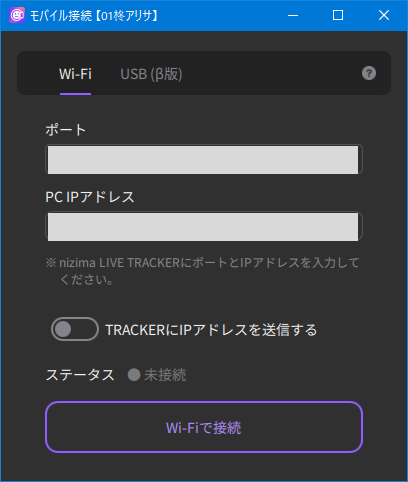
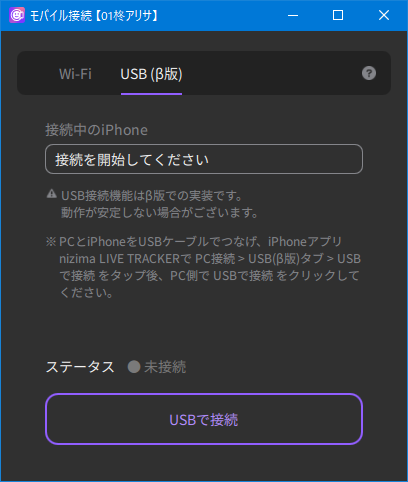
The following screen will appear when clicked. Used to connect to the “nizima LIVE TRACKER” mobile application.
You can select whether to connect via Wi-Fi or USB using the tabs. - Connect via Wi-Fi
-
- Connect via USB
-
- Reset expression
- Sets the state of the face shown by the camera to the front of the Live2D model.
Using this function may improve the movement when a Live2D model does not work well. - Advanced camera settings
-
On the basis of live images read by the webcam, this item displays tracking landmarks, switches between webcams and between hand tracking cameras, and displays advanced settings such as resetting expressions and resetting hands.
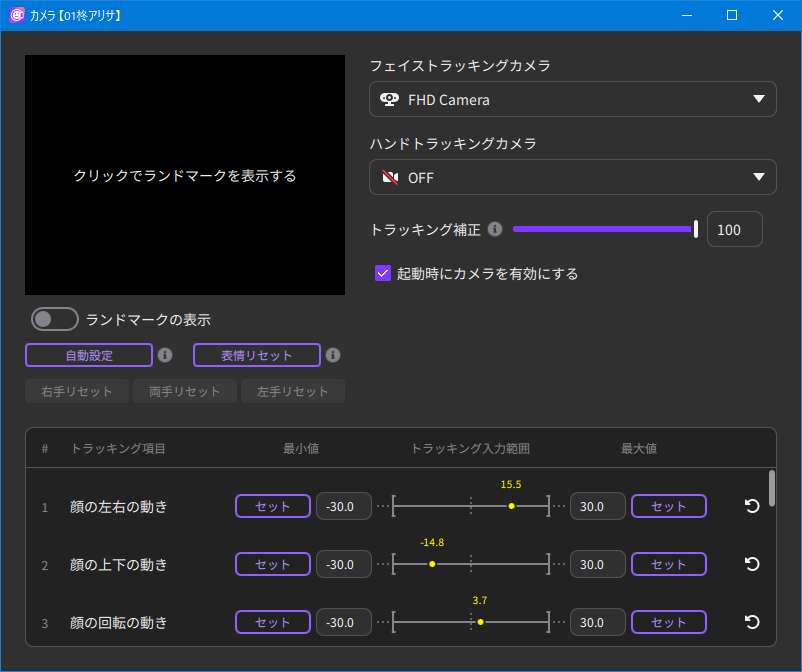
You can configure camera settings for the webcam, mobile camera, and collaboration camera.
Face tracking camera
Set the camera used for face tracking.
Hand tracking camera
Specify the webcam used for hand tracking.
Automatic setting
Automatically adjusts tracking to suit the user.
The model will move briskly when set.Reset expression
Reset the state of the facial expression as seen by the camera.
Reset right hand, Reset both hands, Reset left hand
Reset the status of each hand as seen by the camera.
The position where the hand is shown to the camera and stopped for 1 second is used as the reference. While in standby mode, these buttons change to a cancel button.
Hand tracking
When turned on, the hand tracking camera is enabled.
Tracking correction
You can set the strength of the tracking correction. Increasing the value strengthens the correction and suppresses vibration. A smaller value results in weaker correction and less input delay.
Notes
Live-action images are not displayed.
- Virtual camera ON/OFF
-
When turned on, nizima LIVE video can be output as a virtual camera for videoconferencing tools, etc.
Point
By using a virtual camera, nizima LIVE video can be displayed directly as an avatar without having to go through streaming software such as OBS Studio.
Virtual camera name nizima LIVE Virtual Camera Resolution 1920×1080 Frame Rate 30fps Items displayed as virtual camera images • Live2D model
• Item
• Background (image, single color)
• Logo (in the free version, displayed in the same state as the application side)Items not displayed as virtual camera images • Model list
• Main menu
• Bottom right control icons (help, lock, etc.)
• Icons for switching between multiple models (when multiple models are displayed)
• All UIs other than model display launched in a new windowBehavior with transparent background Background is not transparent and is displayed in black. Notes
- If appearance correction or low light correction is applied on the meeting tool side, the color of the Live2D model may be blown out.
Please turn off the correction setting in the conference tool. - The Mac version does not support a virtual camera.
- If appearance correction or low light correction is applied on the meeting tool side, the color of the Live2D model may be blown out.
mocopi settings
Information required for mocopi connection is displayed.
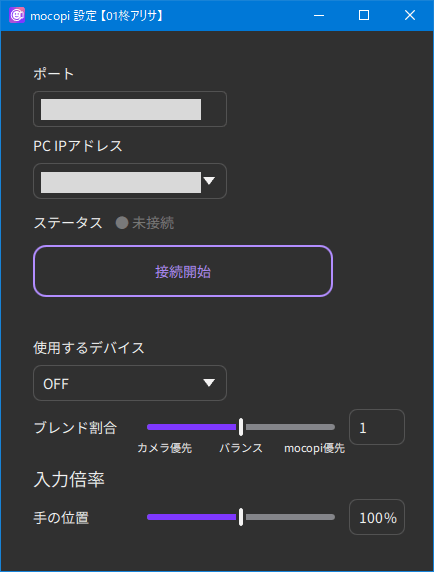
- Port
- Displays where the mocopi application is connected.
Cannot be changed while the connection is active. - IP address
- Displays where the mocopi application is connected.
- Status
- Displays the connection status.
- Devices to be used
- You can select which mocopi to use for the current model.
- Blending ratio
- You can adjust the ratio of priority between the camera and mocopi.
- Input scale
- You can set the scale for each input.
Please refer to Connecting to mocopi for how to connect to mocopi.
Lip-sync setting
Open the lip-sync setting dialog box.
For more information on lip-sync, please refer to the lip-sync section of the parameter settings.
